상품 상세보기 만들기!
01. product에 views.py 추가!
from django.shortcuts import render
from django.views.generic import ListView, DetailView
from django.views.generic.edit import FormView
from .models import Product
from .forms import RegisterForm

# Create your views here.


class ProductList(ListView):
    model = Product
    template_name = 'product.html'
    # object_list로 사용하기 싫으면 context_object_name으로 변경 가능
    context_object_name = 'product_list'


class ProductCreate(FormView):
    template_name = 'register_product.html'
    form_class = RegisterForm
    success_url = '/product/'


class ProductDetail(DetailView):
    template_name = 'product_detail.html'
    # 어떤 모델이 아닌 쿼리셋을 지정
    # 필터를 통해서 보여질지 말지도 결정할 수 있다
    queryset = Product.objects.all()
    # template에서 사용할 변수명 지정
    context_object_name = 'product'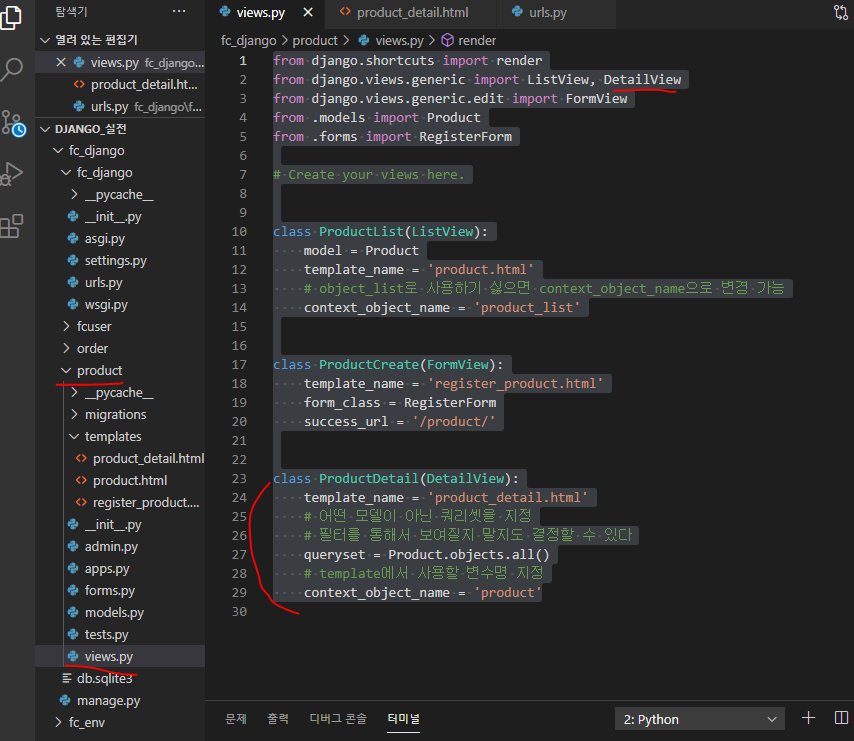
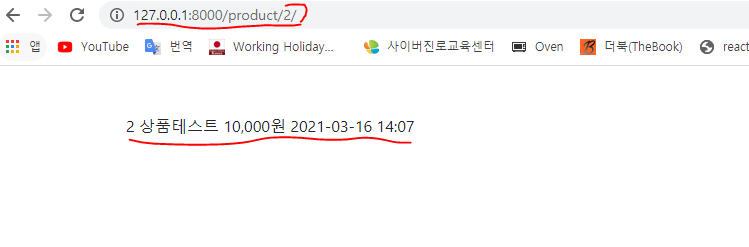
02. product에 product_detaile.html 생성!
{% extends "base.html" %}

{% load humanize%}
{% block contents %}
<div class="row mt-5">
    <div class="col-12">
        {{product.id}}
        {{product.name}}
        {{product.price|intcomma}}원
        {{product.register_date|date:'Y-m-d H:i'}}
    </div>
</div>
{% endblock %}
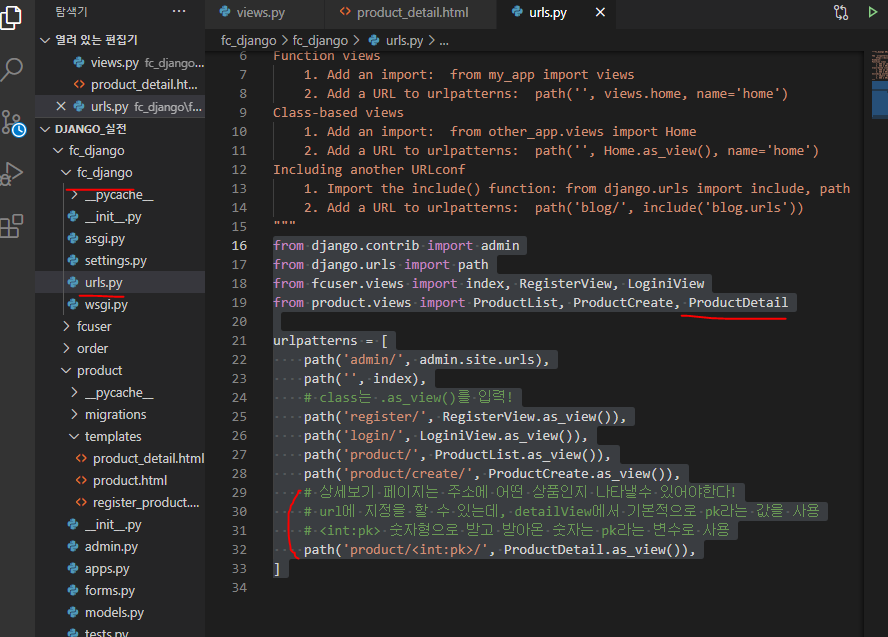
03. root 폴더에 url에 product_detail.html 연결!
from django.contrib import admin
from django.urls import path
from fcuser.views import index, RegisterView, LoginiView
from product.views import ProductList, ProductCreate, ProductDetail

urlpatterns = [
    path('admin/', admin.site.urls),
    path('', index),
    # class는 .as_view()를 입력!
    path('register/', RegisterView.as_view()),
    path('login/', LoginiView.as_view()),
    path('product/', ProductList.as_view()),
    path('product/create/', ProductCreate.as_view()),
    # 상세보기 페이지는 주소에 어떤 상품인지 나타낼수 있어야한다!
    # url에 지정을 할 수 있는데, detailView에서 기본적으로 pk라는 값을 사용
    # <int:pk> 숫자형으로 받고 받아온 숫자는 pk라는 변수로 사용
    path('product/<int:pk>/', ProductDetail.as_view()),
]
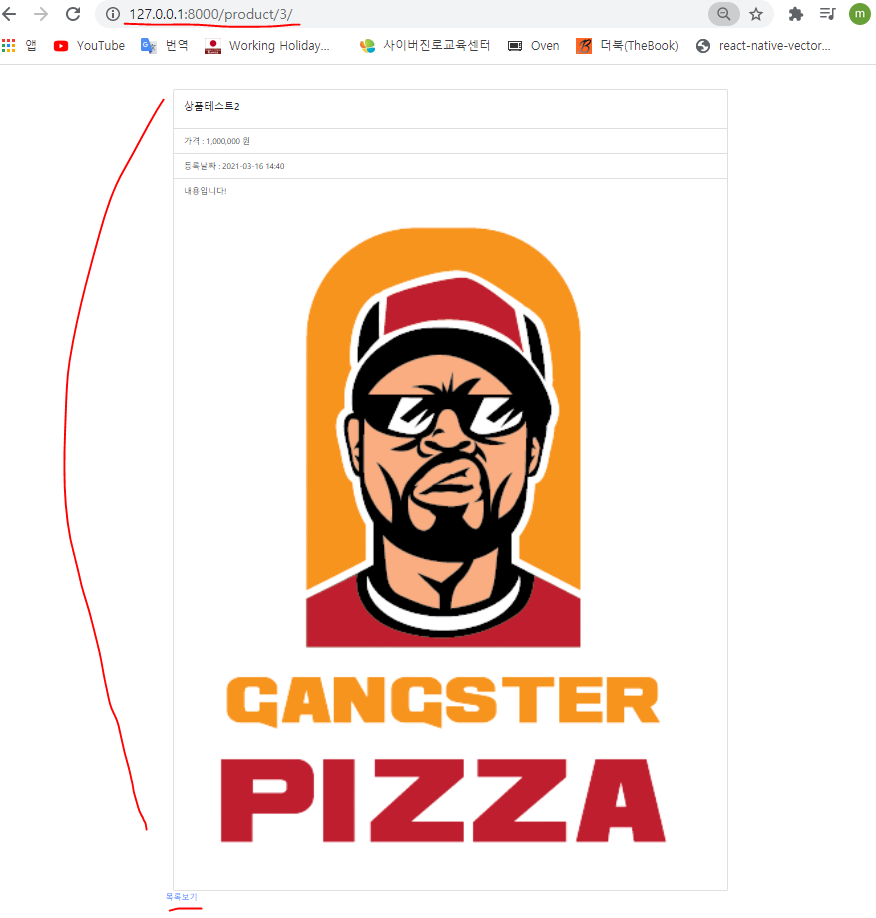
04. product_detail.html 수정하기!
{% extends "base.html" %}

{% load humanize%}
{% block contents %}
<div class="row mt-5">
    <div class="col-12">
        <div class="card" style="width: 100%;">
            <div class="card-body">
                <h5 class="card-title">{{ product.name }}</h5>
            </div>
            <ul class="list-group list-group-flush">
                <li class="list-group-item">가격 : {{ product.price|intcomma }} 원</li>
                <li class="list-group-item">등록날짜 : {{ product.register_date|date:'Y-m-d H:i' }}</li>
                <!-- description은 태그이기 때문에 필터로 |safe를 해주면 html 태그로 만들어준다! -->
                <li class="list-group-item">{{ product.description|safe }}</li>
            </ul>
        </div>
    </div>
    <div class="row">
        <div class="col-12">
            <a href="/product/">목록보기</a>
        </div>
    </div>
</div>
{% endblock %}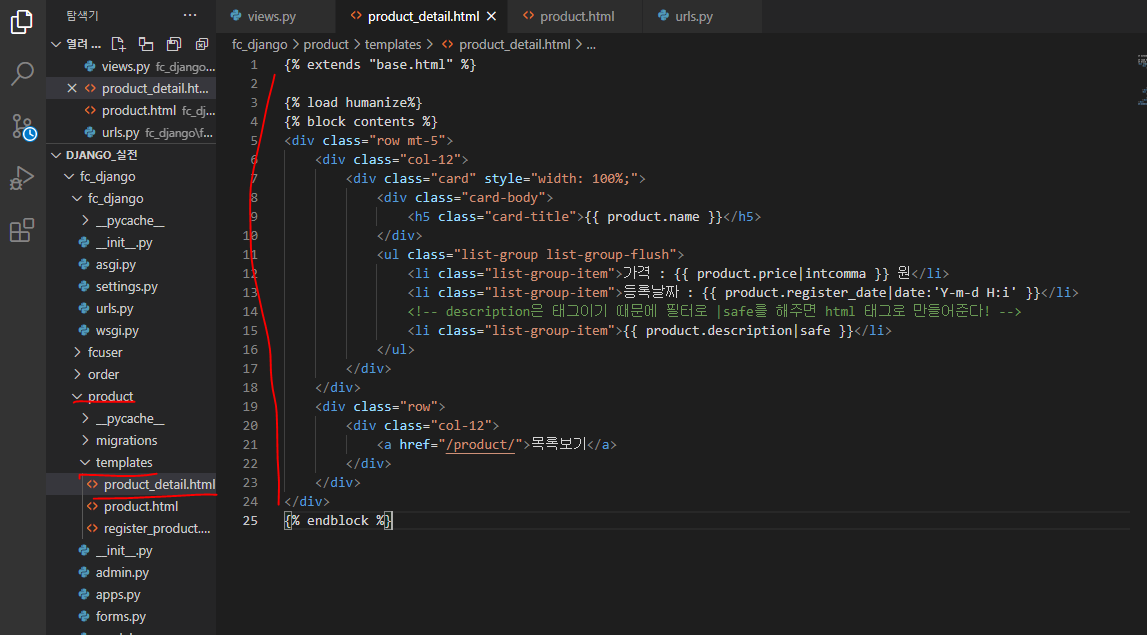
05. product.html에 product_detail.html 링크 걸기!
{% extends "base.html" %}
<!-- 필터를 사용할 수 있게 해준다 -->
{% load humanize%}
{% block contents %}
<div class="row mt-5">
    <div class="col-12">
        <table class="table table-light">
            <thead class="thead-light">
                <tr>
                    <th scope="col">#</th>
                    <th scope="col">상품명</th>
                    <th scope="col">가격</th>
                    <th scope="col">등록날짜</th>
                </tr>
            </thead>
            <tbody class="text-dark">
                {% for product in product_list %}
                <tr>
                    <th scope="row">{{product.id}}</th>
                    <th><a href="/product/{{ product.id }}">{{product.name}}</a></th>
                    <th>{{product.price|intcomma}}원</th>
                    <th>{{product.register_date|date:'Y-m-d H:i'}}</th>
                </tr>
                {% endfor %}
            </tbody>
        </table>
    </div>
</div>
{% endblock %}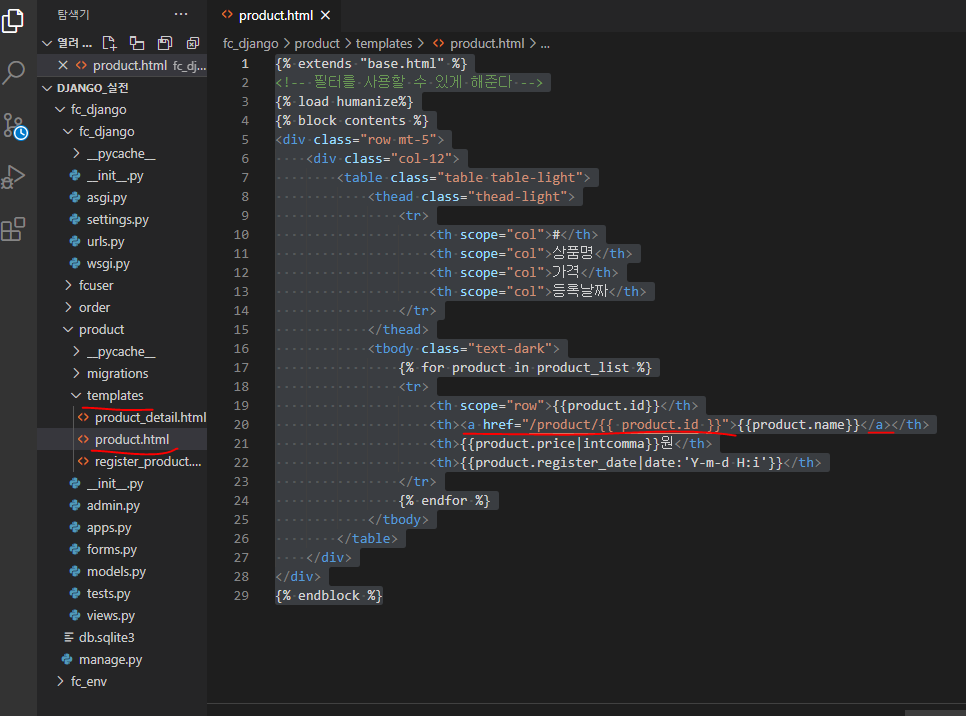

아직까지는 코린이!