
5주차에는 Javascript를 시작해보고 맛보는 시간이었다. 동작 환경인 Node.js부터 Javascript의 데이터 타입, 조건문,반복문, 자바스크립트 함수들을 건드려보는 경험! 뭔가 점점 javascript랑 친해질수있을 것 같은 느낌..
JavaScript Essentials_Node.js

Node.js : Chrome V8 JavaScript 엔진으로 빌드된 JavaScript 런타임(언어가 동작하는 환경)
- 컴퓨터 환경을 동작하는 js / ex) node.js ..
- 웹브라우저에서 웹페이지를 동작하는 js
컴퓨터에 모듈을 node.js 환경에 받아서 javascript로 변환해서 동작
nvm - 노드 버전 관리
// nvm 설치 되어있는 상태에서

// 설치된 노드 확인
nvm ls

// 원하는 노드 버전 설치
nvm install [원하는 버전] -> ex) nvm install 12.14.1

// 원하는 버전 사용하기
nvm use 12.14.1    <- 주의, 관리자 권한에서만 변경 가능

// 현재 사용하는 node 버전 확인
node --version

// node 버전 바꾸기
nvm use 12.21.0

// node 버전 지우기
nvm uninstall 12.21.0

// nvm 명령들 확인
nvm --help
npm 개요

- npm 생태계에 업로드 되어있는 패키지(모듈, 기능) 받아서 사용
npm 프로젝트 생성해보기
- project 시작
// 프로젝트 폴더에서
npm init -y // package.json 이 생긴다- 패키지 설치
npm install parcel-bundler -D //node_modules폴더(이 패키지가 들어가게 되는 폴더) & package-lock.json 생성 - package.json 안에 설치된 모듈 기록이 남으며, 노드모듈이 지워지더라도 package.json만 남아있으면 다시 설치할 수 있다.
npm install 또는 npm -i 로 재 설치 가능-
패키지를 설치하면 원하는 프로그램 외에도 여러 모듈이 묶여서 설치되는데 이 정보가package-lock 안에 기록된다.
-
-D 유무에 따라 개발용의존성(실제 동작때는 사용X), 일반 의존성(실제 동작할 때 필요)

-
프로젝트 폴더에 index.html / main.js 생성 -> 프로젝트 진행
유의적 버전
유의적 버전 (Semantic Versioning, Semver)
Major.Minor.Patch ex) 12.14.1
- Major : 기존 버전과 호환되지 않는 새로운 버전
- Minor : 기존 버전과 호환되는(동일 Major끼리) 새로운 기능이 추가된 버전
- Patch : 기존 버전과 호환되는 버그 및 오타 등이 수정된 버전
- ^Major.Minor.Patch : 캐럿 기호는 Major 버전 안에서 가장 최신 버전으로 업데이트 가능하다고 명명해놓는 것
npm 프로젝트의 버전 관리
- 프로젝트를 깃에서 관리하게 될때
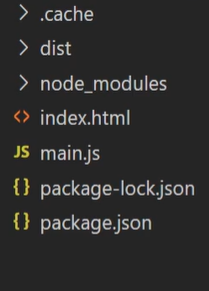
버전 관리 하지 않아돌 될 .cache / dist / node_modules 는 깃에 굳이 올릴 필요가 없다.
- 무시시킬 것들을 선언해 주는 것이
.gitignore
.cache/
dist/
node_modules/
JavaScript Essentials_JS 시작하기
ECMA스크립트
- 에크마 스크립트 : ES -> Ecma International : 표준 규격
ㄴES6,ES2015등등 보게 될 것 - 2015 -> ES6 == ES2015 크게 바뀌었고 전성기 일어났다.
ㄴ ES5 와 ES6 의 차이점 : 구 브라우저에선 5만 지원, 6는 최신 브라우저 대부분 지원함.
ㄴ BABEL을 통해 -> 5버전으로 변환할 수도 있다.
그 이후에도 1년에 한번쯤 변화 되고 있다.

JAVA <-> JavaScripts
- 자바와 자바 스크립트는 관계가 없으며, 별개의 프로그래밍 언어이므로 주의하자!
프로젝트 초기화
npm init -y: package.json 생성npm i parcel-bundler -D: devDependencies 에 parcel 설치npm run dev / npm run build: dev, build 실행 만들어주기
"scripts": {
  "dev": "parcel index.html",
  "build": "parcel build index.html"
}- index.html 만들기
vscode -> ! + tab : 기본 파일 생성
<!DOCTYPE html>
<html lang="ko">
<head>
    <meta charset="UTF-8">
    <meta http-equiv="X-UA-Compatible" content="IE=edge">
    <meta name="viewport" content="width=device-width, initial-scale=1.0">
    <title>Document</title>
    <script src="./main.js"></script>
</head>
<body>
  <h1>Hello world!</h1>
</body>
</html>- main.js 만들기
npm run dev-> localhost:1234 등으로 할당된 포트에 개발 서버 열리며, 프로젝트 확인 가능
JS 찍먹
IN main.js
// 개발자 도구 콘솔창에 출력해주는 용도!
console.log('Hello world!'); console.log(123); // 명령이 끝났다는 뜻 `;`
// 한줄로 표현 가능하나 코드는 사람이 보는 것이므로 구분해서 적도록 하자
-
퍼포먼스 향상을 위해 최대한 한줄에 한 명령어만 적고, ; 도 잘 붙이지 않는다(정석은 아니지만 편함. 문제가 있을 수도 있음.)
-
형식 확인
console.log(typeof 'Hello world!')  // string
console.log(typeof 123)  // number
console.log(typeof true) // boolean
console.log(typeof undefined) // undefined
console.log(typeof null) // object
console.log(typeof {}) // object
console.log(typeof []) // object  <- 타입이 뭉뚱그려지기도 함

// 따라서 함수를 만들어서 형식 확인 해보자.
function getType(data) {
  return Object.prototype.toString.call(data)
}

console.log(getType(123)) // [object Number]
console.log(getType(false)) // [object Boolean]

// 앞에 [object --] 부분 없는 것이 좋으므로 코드 수정
function getType(data) {
  return Object.prototype.toString.call(data).slice(8, -1)
}

console.log(getType(123)) // Number
console.log(getType(false)) // Boolean
console.log(getType(null)) // Null
console.log(getType({})) // Object
console.log(getType([])) // Array
1. JS를 내보내고 가져와 사용하기
- 위에서 만든
getType()동작 가능하게 관리
getType.js 란 파일 만들기
export default function getType(data) {
  return Object.prototype.toString.call(data).slice(8, -1)
}
main.js 에 가져와서 사용하기
import getType from './getType' // js란 확장자 생략 가능
// 이후로 부터
getType() // 사용 가능!!
2. 산술, 할당 연산자
// 산술 연산자(arithmetic operator)
console.log(1 + 2) // 3
console.log(5 - 7) // -2
console.log(3 * 4) // 12
console.log(10 / 2) // 5

// 추가로 나머지 연산자
console.log(7 % 5) // 2

// 할당 연산자(assignment operator)
const a = 2 // [ = ]이 '할당 연산자' 이다!!!

let b = 2
// b = b + 1 : 아래와 동일한 뜻
b += 1 // 지금 코드의 [+=] : 원값에 더해서 할당하는 '할당연산자'
console.log(b) // 3

// 할당연산자 -= , *=, /=, %= 도 가능하다
3. 비교, 논리 연산자
// 비교 연산자(comparisom operator)
const a = 1
const b = 1

cosole.log(a === b) // [===] : 일치 연산자 // true 가 출력된다.
// ---------
const a = 1
const b = 3

cosole.log(a === b) // false

// 일치연산자 함수에 넣어보기
function isEqual(x, y) {
  return x === y
}
console.log(isEqual(1,1)) // true
console.log(isEqual(2,'2')) // false 하나는 숫자고 하나는 문자이므로 형식부터 달라 무조건 false

// ---------
const a = 1
const b = 3
console.log(a !== b) // true // [!==] : 불일치 연산자 =/= 같은 느낌

// ---------
const a = 1
const b = 1
console.log(a < b) // false [<] , [>] : 큰지 작은지, 대소 구분
console.log(a >= b) // true [>=] , [<=] : 크거나 같다, 작거나 같다
// '=' 은 꺽쇠괄호보다 뒤에 적혀야 한다. 문법임
// 논리 연산자(logical operator)
const a = 1 === 1 // 숫자 비교
const b = 'AB' === 'AB' // 문자 비교
const c = true // 불린 선언
console.log(a) // true
console.log(b) // true
console.log(c) // true
console.log('&&: ', a && b && c ) // && : and 연산자 '그리고'
// a, b, c 전부 true 여야 true , 하나라도 false 생기면 false 출력
console.log('||: ', a || b || c ) // || : or 연산자 '또는'
// a, b, c 하나라도 true이면 true , 전부 false 여야 false 출력
console.log('!: ', !a) // ! : not 연산자 : 특정 데이터의 반대 출력
4. 삼항 연산자
// 삼항 연산자(ternary operator)

const a = 1 < 2 // a는 true 인 상태!
// if 와 유사한 기능 간편하게!!

if (a) {
  console.log('참')
} else {
  cosole.log('거짓')
}                       // 콘솔 값 -> 참 , 첫블럭이 실행된 것

// 위보다 단순하게 만들 수 있다!!! '삼항연산자'로!!!!

console.log(a ? '참' : '거짓') // 참, 위의 if문과 동일한 기능이다!
// ? 를 기준으로 앞이 true 이면 : 앞 내용 출력, false면 : 뒷부분 출력!
5. 조건문 If Else
getRandom.js 만들기
export default function random() {
  return Math.floor(Math.random() * 10) // 랜덤한 정수 반환 로직
}       // floor : 버림 method , random() : 0 ~ 1 사이의 소숫값 나옴.
// 조건문 (If statement)
import random from './getRandom'
const a = random()
if (a === 0) {
console.log('a is 0')
} else {
console.log('rest...')
} // 랜덤 값 나오다가 0나오면 'a is 0' 출력
if (a === 0) {
console.log('a is 0')
} else if (a === 2) {
console.log('a is 2')
} else {
console.log('rest...')
} // 조건 두가지 사용 가능한 if 문
if (a === 0) {
console.log('a is 0')
} else if (a === 2) {
console.log('a is 2')
} else if (a === 4) {
console.log('a is 4')
} else {
console.log('rest...')
} // 다중 중간 조건 가능!!!! 6. 조건문 switch
- if 조건문 외에 switch 조건문도 있다. 위와 같은 동작을 switch조건문으로 !
switch (a) { // if와 다르게 변수만 넣는다. 변수의 내용이 무엇인지
  case 0 :   // case를 나누어 가를 수 있도록 되어있다.
    console.log('a is 0')
    break // 이걸 해주지 않으면 다른 케이스까지 실행되버린다.
  case 2 :
    console.log('a is 2')
    break
  case 4 :
    console.log('a is 4')
    break
  default:  // 나머지 경우인 else와 동일한 효과
    console.log('rest...') // 마지막 이기 때문에 break도 필요없다.
}
7. 반복문 for
// 반복문 (For statement)
// for (시작조건; 종료조건; 변화조건) {}

for (let i = 0 ; i<3; i+=1) {
  // 해석, i=0부터 i<3까지, i를 1씩 증가하면서 할당 및 반복
  console.log(i)
}   // 출력값 0
    //       1
    //       2
8. 변수 유효범위
// 변수 유효범위(Variable Scope)
// var, let, const <- 최신의 js에선 왠만하면 var쓰지 말자.

function scope() {
  if (true) {
    const a = 123
    console.log(a)
  }
}

scope() // 콘솔창: 123 출력- const a 는 {} 안에서만 유효하다.
// 콘솔로그를 if 밖으로 빼보면,

function scope() {
  if (true) {
    const a = 123
  }
  console.log(a)
}
scope() // 콘솔창: a is not defined
// 콘솔로그를 const 위로 올려보면,
function scope() {
if (true) {
console.log(a) // 콘솔창: undefined
const a = 123
}
}
scope()let도 동일하며, let과 const를 블록레벨에서 유효한 범위를 가진다고 한다.
- var는 함수 안에서는 정상 동작 한다.
함수레벨에서 유효범위를 가진다고 한다
function scope() {
  if (true) {
    const a = 123
    console.log(a)
  }
}

scope()  // 콘솔창: 123 출력
// let이나 const는 안되던 {} 밖에서도 정상 동작한다.
function scope() {
if (true) {
const a = 123
}
console.log(a)
}
scope() // 콘솔창: 123선언되지 전에 콘솔에 호출하면 undefined 나오는 것은 동일하다.
- 사용필요한 경우가 있지만 메모리 누수가 있기 때문에 사용하지 않도록 하자.
9. 형변환
// 형변환(Type conversion)
const a = 1
const b = '1'

console.log(a === b) // 콘솔창: false(두 값은 다르다)===: 일치연산자==: 동등 연산자 (자동으로형변환이 되어버린다)
의도치 않은 형변환이 되어 원하지 않은 결과가 나올 수 있기 때문에
==의 사용은 피하자
Truthy ( 참 같은 값 )
- true, { } object , [ ] 배열 , 1(0,1에서의 1), 2(양수), 'false'(문자데이터), -12(음수), '3.14'(pi) ...
Falsy ( 거짓 같은 값 )
- false, '', null(의도한 빈값), undefined(의도하지않은 빈값), 0, -0, NaN(Not a Number 숫자데이터긴 하다)
Truthy는 너무 많고 대부분이기 때문에 외우지 않고, 적은 Falsy들을 이해해보도록 하고 나머지는 Truthy 로 생각해보자.
JS 함수
1. 함수 복습
function sum(x, y) { // x,y대신 다른 이름 사용해도 됨.
  console.log(x + y) // 콘솔에 출력할 뿐 사용 불가
}

sum(1, 3) // 1, 3을 매개변수라 하자 // 출력창: 4
sum(4. 12)// 재활용 가능 // 출력창: 16
function sum(x, y) { // x,y대신 다른 이름 사용해도 됨.
return x + y // 얘는 내보내는 용도!!
}
const a = sum(1, 3) // 반환값을 변수에 담아 사용 가능
const b = sum(4. 12) // 당연히 재활용 용도 가능
console.log(a) // 출력창: 4
console.log(b) // 출력창: 16
console.log(a + b) // 출력창: 20
console.log(sum(1,3)) // 출력창: 4
console.log(sum(4,12)) // 출력창: 16
console.log( sum(1,3) + sum(4,12) ) // 출력창: 20
// 위 아래는 동일한 결과를 보여주나, 변수로 사용해야 재사용 시 용이!
// 또한 함수가 실행되야 하므로 여러번 함수가 실행되는 셈이 되며, 자원 낭비가 된다.
// 변수는 1번 실행되고 값만 담겨서 사용되는 것!- 함수 표현(익명함수) 복습
function sum(x, y) { // 이름 있는 '기명함수'
  return x + y
}
sum(1, 3) // 함수 사용

const sum = function (x, y) { // 이름 없는 '익명함수' // 변수가 담아 사용
  return x + y
}
// 이런 경우는 '함수표현'이라 한다.-
return의 주의사항
return은 뒤에 붙인 값이 함수 밖으로 반환되는 역할도 있지만, 그 줄에서 함수가 종료된다는 것도 뜻한다.
return 줄 밑의 코드들은 모두 사장(실행되지 않는다) -
arguments
// 함수안에서 사용되게 만들어진 argument가 있다.
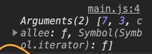
function sum() { // 매개변수 지정 없이 들어온 요소를 사용할 수 있다
console.log(arguments) // 아래 콘솔 image 참고
return arguments[0] + arguments[1]
}
console.log(sum(7, 3)) // 여기서 7, 3을 넣어주었기 때문에
// arguments에서 순서대로 사용가능 하다.콘솔창
- 매개 변수가 너무 많아 이름을 일일이 지정하기 어려운 경우 일괄적으로
관리가 가능하다.BUT값 사용에 불편함이 있으니 가능하다면 이름을 지정해주는 것이 좋다
2. 화살표 함수
// 화살표 함수
// () => {} vs function () {}
const double = function (x) {
  return x * 2
}
console.log('double: ', double(7)) // 콘솔창: double: 14

const doubleArrow = (x) => {
  return x * 2
}
console.log('doubleArrow: ', doubleArrow(7)) // 콘솔: doubleArrow: 14
화살표 함수는 일부 내용을 축약시킬 수 있다
{ return }부분을 축약시킬 수 있다.
const doubleArrow = (x) => x*2  // 중괄호와 return을 지우고, 반환 원하는 값 적기
console.log('doubleArrow: ', doubleArrow(7)) // 콘솔: doubleArrow: 14- 화살표 함수도 매개변수 여러개 사용 할 수 있다
(x, y) => x+y처럼 사용 가능하며,
위와 동일하게 매개변수가 하나일 경우x => x*2처럼 ( )생략조차 가능하다.
const doubleArrow = (x) => { x*2 } // 화살표함수 일지라도 중괄호가 있으면
                                   // return 없이는 반환 불가하다...
// { } 있으면 return 도 넣어줘야 반환 가능- 객체는 { }로 표현하는 데, 화살표 함수에선 블럭으로 인식해버리기 때문에, 객체를 반환하고 싶을 경우 ( )로 묶고 표현하면 반환 가능하다
const a = (x) => null
console.log('a: ', a(7)) // 콘솔창->  a: null

const a = (x) => 1234
console.log('a: ', a(7)) // 콘솔창->  a: 1234

const a = (x) => undefined
console.log('a: ', a(7)) // 콘솔창->  a: undefined

const a = (x) => [1,2,3,4]
console.log('a: ', a(7)) // 콘솔창->  a: [1,2,3,4]

// 주의
const a = (x) => {1,2,3,4} // 의도: object {1,2,3,4}를 출력하고 싶었음
console.log('a: ', a(7)) // 실제 출력창 a: undefined
// 위는 사실
const a = (x) => {
  1,2,3,4            // 이와같이 블럭표현이 되어버리고, return지정없으므로
}                    // undefined가 출력될 수 밖에 없다.

// 원하는 대로 출력하려면
const a = (x) => ({1,2,3,4}) // 소괄호로 감싸면 가능하다.
console.log('a: ', a(7)) // 콘솔창->  a: {1,2,3,4}
3. 즉시실행함수 IIFE
// IIFE, Immediately-Invoked Function Expression
const a = 7
function double() {
  console.log(a*2)
}
double(); // 함수 실행하면 콘솔: 14 로 잘 출력됨- 혹 한번만 사용한다면 이름을 만들어서 따로 실행시킬 필요가 없다
// 즉시실행함수
( function () { console.log(a*2) } )() //이와 같이 중괄호안에 익명함수 넣으면 됨

// 들여쓰기 정리를 해주면
(function () {
  console.log(a*2)
})();                  // 이렇게 표현된다. 맨뒤 소괄호 ()는 실행명령

// 맨뒤 소괄호를 안으로 넣어도 가능하다.
(function () {
  console.log(a*2)
}());                  // 둘중 아래 것을 권장함
4. 호이스팅
// 호이스팅(Hoisting)
// 함수 선언부가 유효범위 최상단으로 끌어올려지는 현상
const a = 7

const double = function () {
  console.log(a * 2)
}

double() // 코드는 위에서 아래로 해석되므로 '함수 표현'은 선언 후에 가능하다.

// ------------------------------------------------------------------
const a = 7

double()

function double() { // 이런 형태는 '함수 선언'이며, 함수선언은 최상단에 생긴다.
  console.log(a * 2)
}
// 콘솔창 14 로 정상 출력되며, 함수선언이 최상단으로 올라가기 때문에 가능한 현상
// 이러한 현상을 '호이스팅' 이라고 한다.- 호이스팅의 장점
함수의 정상실행을 위해 함수를 모두 최상단으로 올릴 경우 코드 해석에 난항을 겪을 수 있다( 실행한 코드의 내용을 최상단을 봐야 확인 가능하기 때문 )
따라서 이런 경우호이스팅으로 해석 가능한 위치에 함수 선언을 하더라도 문제 없이 함수 실행이 될 수 있으며, 이 점이 장점으로 작용한다.
5. 타이머 함수
setTimeout(함수, 시간): 일정 시간 후 함수 실행clearTimeout(): 설정된 Timeout 함수를 종료setInterval(함수, 시간): 일정 시간 간격마다 함수를 실행clearInterval(): 설정된 Interval 함수를 종료
setTimeout(function () {}, 3000) // 시간은 ms : 밀리세컨이다.
// 사용하는 함수는 setTimeout 함수 안에서 작동하므로 별도 이름은 필요없다.

// 상세히 만들어보자면
setTimeout(function () {
  console.log('Heropy!')
}, 3000)  // 선언하면 3초후에 콘솔창에 Heropy! 가 출력된다.


// 화살표 함수로도 가능하다
setTimeout(() => {
  console.log('Heropy!')
}, 3000)  // 위와 동일 출력값, Heropy!
- 위에서 만든 setTimeout 함수를 종료시켜보자
// h1 태그의 내용을 클릭하면 만들어 놓은 setTimeout 함수가 종료되도록 계획.
const timer = setTimeout(() => {
  console.log('Heropy!')
}, 3000)

const h1El = document.querySelector('h1') // h1요소를 찾아 변수에 저장
h1El.addEventListener('click', () => {
  clearTimeout(timer) // 선언해놨던 setTimeout 함수를 매개변수로 주면
})
// 실제 3초가 되면 콘솔창에 Heropy! 가 출력되어야하나,
// 그전에 h1 태그 안 텍스트를 클릭하게 되면 Heropy! 출력이 안되게 된다.
setInterval
// setTimeout 부분을 setInterval로 바꿀 시 3초당 한번씩 출력되는 함수로 바뀐다.
const timer = setInterval(() => {
  console.log('Heropy!')
}, 3000)

const h1El = document.querySelector('h1')
h1El.addEventListener('click', () => {
  clearInterval(timer)
})
// 실제 3초마다 콘솔창에 Heropy! 가 출력되고 계속 이어지나,
// h1 태그 안 텍스트를 클릭하게 되면 Heropy! 출력이 멈추게 된다.
6. 콜백
// 콜백(Callback)
// 함수의 인수로 사용되는 함수

//ex) setTimeout(함수(콜백), 시간)
function timeout() {
  setTimeout(() => {
    console.log('Heropy!')
  }, 3000)
}
timeout()
console.log('Done!') // 계획은 timeout함수 내용이 실행되고 끝내는 의미로
                     // 'Done' 이란 표시가 출력되길 원했으나, timeout이
                     //  3초후 실행이라 Done! 이 뜨고, 경과 후 Heropy가
                     //  뜨는 상황이 발생해버렸다.
- 원하는 목표대로 실행시키게 하기 위해 콜백함수를 사용해보자
// timeout 함수의 로직은 건들지 않고
function timeout(callback) {         // callback 이란 변수이름은 변경 가능
  setTimeout(() => {
    console.log('Heropy!')
    callback()       // 함수 호출시 기입한 콜백함수를 원하는 위치(순서)에 넣기
  }, 3000)
}
timeout(() => {console.log('Done')}) // timeout 실행시 인수로 콜백함수 기입
콜백함수는 나오는 순서를 보장해주는 역할을 많이 한다!
JS 클래스
1. 생성자 함수(prototype)
const byeol = {
  firstName: 'Byeol',
  lastName: 'Jang',
  getFullName: function () {
    return `${this.firstName} ${this.lastName}`
  }
}
console.log(byeol)   // 콘솔창 : {firstName: 'Byeol',
                     //          lastName: 'Jang',
// getFullName:f }- Member ->
속성,메서드(object 안 함수형태) - this : 함수가 소속되는 객체를 뜻함 -> 현재는 byeol.firstName과 동일
const amy = {
  firstName: 'Amy',
  lastName: 'Clarke',
  getFullName: function () {
    return `${this.firstName} ${this.lastName}`
  }
}
console.log(amy.getFullName) // Amy Clarke 출력

// 동일로직이라면 함수 각각 메모리에 할당되므로 비효율적
// 클래스로 묶게 될 것
생성자 함수로 만들어보자
function User(first, last) {  // 파스칼케이스 형태로 만든다
  this.firstName = first
  this.lastName = last
}

const byeol = new User('Byeol', 'Jang')
const amy = new User('Amy', 'Clarke')

              // 이때 new 뒤의 함수를 '생성자 함수'라 한다
console.log(byeol) // user {fisrtName: "Byeol", lastName: "Jang"} 객체 생성
위와 같은 로직은 간단하게 { }를 넣어주는 것과 동일하다.
const byeol = { }- 리터럴 -> " " : 문자형태 생성, { }: object 생성, [ ]: array 생성
function User(first, last) {
  this.firstName = first
  this.lastName = last
}
user.prototype.getFullName = function () {
  return `${this.firstName} ${this.lastName}`
} // 숨겨져 있는 prototype 안에 getFullName을 넣어 한번만 선언하여 반복사용 가능
위와 같은 함수도 클래스라 볼 수 있다.
2. this
// 일반(Normal)함수는 '호출 위치'에서 따라 this 정의!
// 화살표(Arrow)함수는 자신이 선언된 '함수 범위'에서 this 정의!
const byeol = {
  name: 'Byeol',
  normal: function () {
    console.log(this.name)
  },
  arrow: () => {
    console.log(this.name)
  }
}
byeol.normal()   // 출력창 : Byeol
byeol.arrow() // 출력창 : undefined- byeol.normal( ) : 이 호출 위치에서 byeol이기 때문에 this가 byeol이다.
- byeol.arrow( ) : 함수가 정의되는 시점에 this가 결정되기 때문에
arrow: () =>{}만들어지는 위치에 this에 맞는 값이 없어 undefined 출력
const amy = {
  name: 'Amy',
  normal: byeol.normal,
  arrow: byeol.arrow
  }
}
amy.normal()   // 출력창 : Amy
amy.arrow() // 출력창 : undefined- 로직 이해해보자
const timer = {
  name: 'Amy!!',
  timeout: function () {
    setTimeout(function () {
      console.log(this.name)
    },2000)
  }
}
timer.timeout()  // 출력창: undefined
왜 undefined일까?
this가 선언된 함수는 일반함수 형태이며, 일반함수는 호출 위치에서 this가 선언된다. this가 호출된 위치의 함수는 setTimeout이며, setTimeout 내에는 name으로 찾을 수 있는 값이 없으므로 undefined로 출력된다.
- 목표대로 출력원하면 화살표 함수로 작성했어야 한다
const timer = {
  name: 'Amy!!',
  timeout: function () {
    setTimeout(() => {
      console.log(this.name)
    },2000)
  }
}
timer.timeout()  // 출력창: Amy!!
정상 출력된 이유
화살표 함수는 this가 함수가 정의된 범위에서 선언되며, 현재 화살표 함수를 감싸고 있는 범위{}는 timeout을 만드는 메서드에서 선언된 { }범위이다. timeout이라는 일반 함수에서는 timer가 지칭부분이기 때문에 timer의 name이 불려와 정상 출력가능하다.
3. ES6 Classes
// 일반(Normal)함수 선언시 : function 부분까지 축약 가능
//
const byeol = {
  name: 'Byeol',
  normal() {   // 얘만 남겨도 정상 동작 한다.
    console.log(this.name)
  },
  arrow: () => {
    console.log(this.name)
  }
}
byeol.normal()   // 출력창 : Byeol
byeol.arrow()    // 출력창 : undefined
// 이전에 사용한 prototype 형태
function User(first, last) {
this.firstName = first
this.lastName = last
}
user.prototype.getFullName = function () {
return `${this.firstName} ${this.lastName}`
}
const byeol = new User('Byeol','Jang')
const amy = new User('Amy','Clarke')
const neo = new User('Neo','Smith')
console.log(byeol) // User {firstName:"Byeol",lastName:"Jang"}
console.log(amy.getFullName()) // Amy Clarke
console.log(neo.getFullName()) // Neo Smith- javascript는 prototype 형태의 언어이나, 타 언어에서 Class를 받아들였다
// ES6 Classes

class User {
  constructor(first, last) {    // constructor: function(first,last)축약
    this.firstName = first
  	this.lastName = last
  }
  getFullName() {         // prototype 명령 넣지 않아도 동일하게 사용가능하다
    return `${this.firstName} ${this.lastName}`
  }
}

const byeol = new User('Byeol','Jang')
const amy = new User('Amy','Clarke')
const neo = new User('Neo','Smith')

console.log(byeol) //User {firstName:"Byeol",lastName:"Jang"}, __proto__있음
console.log(amy.getFullName()) // Amy Clarke
console.log(neo.getFullName()) // Neo Smith
4. 상속 확장
class Vehicle {
  constructor(name, wheel) {
    this.name = name
    this.wheel = wheel
  }
}
// 이전까지 활용한다면 생성자함수로
const myVehicle = new Vehicle('운송수단', 2)
console.log(myVehicle)
// 출력창 : Vehicle {name: "운송수단", wheel: 2} & __proto__

// 만들어진 클래스에서 상속(속성사용, 확장)
class Bicycle extends Vehicle {
  constructor(name, wheel) {
    super(name, wheel)  // super는 Vehicle값 불러 사용가능
  }
}
// 이미 정의가 되어진 정보를 손쉽게 만들 수 있고, 확장도 가능하다.
// 리액트에서 많이 사용- 확장해보자면
class Car extends Vehicle {
  constructor(name, wheel, license) {  // 상속받은 속성2개와 추가속성1개
    super(name, wheel)  // super는 Vehicle에서의 속성을 의미
    this.license = license
  }
}- 사용
class Bicycle extends Vehicle {
  constructor(name, wheel) {
    super(name, wheel)
  }
}

const myBicycle = new Bicycle('삼천리', 2)
const daughtersBicycle = new Bicycle('세발', 3)

console.log(myBicycle)
console.log(daughtersBicycle)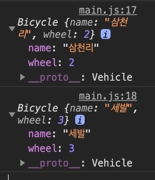
class Car extends Vehicle {
  constructor(name, wheel, license) {
    super(name, wheel)
    this.license = license
  }
}
const myCar = new Car('벤츠', 4, true)
const daughtersCar = new Car('포르쉐', 4, false)

console.log(myCar)
console.log(daughtersCar)
JS 데이터
- String : " ", ' ', ``
- Number
- Boolean : true, false
- undefined
- null
- Array : [ ]
- Object : { }
1. 문자
String mdn - 검색
- 전역 객체 , 문자열(문자의 나열)의 생성자
- new String() 로 생성 가능
- " "등으로 리터럴 방식으로도 생성가능
- Properties
- String length
- Methods
- 많은 메서드들 있음
const result = 'Hello world!'.indexOf('world')
 console.log(result) // 출력값 6  // 찾지 못하면 -1 반환
const str = '0123' console.log(str.length) // 출력값 4const str = 'Hello world!' console.log(str.indexOf('BYEOL') !== -1) // 출력값 falseconst str = 'Hello world!' console.log(str.slice(0, 3)) // Hel .slice(시작, 종료(직전값))const str = 'Hello world!' console.log(str.replace('world','BYEOL')) // Hello BYEOL// 지우는 용도로도 사용 가능하다 const str = 'Hello world!' console.log(str.replace(' world!','')) // Hello// 아이디만 뽑아내기 - 정규표현식 이해 필요 const str = 'starggoggo@hanmail.net' console.log(str.match(/.+(?=@)/)[0]) // starggoggo// 앞뒤 공백 없애기 const str = ' Hello world ' console.log(str.trim()) // 출력값 Hello world
- 많은 메서드들 있음
2. 숫자와 수학
Number
const pi = 3.14159265358979
console.log(pi) // 3.14159265358979

const str = pi.toFixed(2) // 소숫점 2번째까지만 사용
                         // 문자로 변환되버림
console.log(str) // 3.14
console.log(typeof str) // string

const integer = parseInt(str) // 문자를 정수로 변환
const float = parseFloat(str) // 문자를 실수로 변환
console.log(interger) // 3
console.log(float) // 3.14
console.log(typeof interger, typeof float) // number number- 전역함수
parseInt(): 분석 -> 정수 반환parseFloat(): 분석 -> 실수 반환
Math
- 수학적인 상수와 함수를 위한 속성과 메서드를 가진 내장 객체
- Methods
console.log('abs: ',Math.abs(-12))  // 출력값 12
console.log('min: ',Math.min(2, 8))  // 출력값 2
console.log('max: ',Math.min(2, 8))  // 출력값 8
console.log('ceil: ',Math.ceil(3.14))  // 출력값 4 //올림처리(정수단위)
console.log('floor: ' ,Math.floor(3.14))  // 출력값 3 // 내림 처리
console.log('round: ',Math.round(3.14))  // 출력값 3 // 반올림 처리
console.log('random: ',Math.random())  // 출력값 0.5997386294302
                                       // random() 은 0~1사이 난수 생성
3. Array's Api
const numbers = [1,2,3,4]
const fruits = ['Apple','Banana','Cherry']

console.log(numbers[1])  // 2
console.log(fruits[2])   // Cherry
// 1,2 같은 것을 순서값 'index'라 한다- 배열에 들어있는 것들을
item,element라 한다
Array mdn
// .length() : 배열의 길이 - items 갯수
const numbers = [1,2,3,4]
const fruits = ['Apple','Banana','Cherry']

console.log(numbers.length) // 4
console.log(fruits.length)  // 3
console.log([1, 2].length)  // 2 //리터럴에도 속성 사용가능

console.log([].length) // 0 <- 비었다는 뜻(채움 확인용)

//.concat() : 두개의 배열 병합, 원본손상 x
const numbers = [1,2,3,4]
const fruits = ['Apple','Banana','Cherry']

console.log(numbers.concat(fruits)) // [1,2,3,4,'Apple','Banana','Cherry']
console.log(numbers)    // [1,2,3,4]
console.log(fruits)     // ['Apple','Banana','Cherry']

//.forEach() : 배열 item 만큼 콜백함수가 반복 실행됨
const numbers = [1,2,3,4]
const fruits = ['Apple','Banana','Cherry']

fruits.forEach(function (element, index, array) {
  console.log(element, index, array) // 요소, 위치, 원본배열 출력
})
// 출력값 Apple 0 { ... }
//       Banana 1 { ... }
//       Cherry 2 { ... }

//.map() :
const numbers = [1,2,3,4]
const fruits = ['Apple','Banana','Cherry']

const a = fruits.forEach(function (fruit, index) {
  console.log(`${fruit}-${index}`)  // 출력: Apple-0 Banana-1 Cherry-2
})
console.log(a)  // 출력값 : undefined <- forEach는 반환값 없다.

const b = fruits.map(function (fruit, index) {
  return `${fruit}-${index}` //출력값은 없다
})
console.log(b) // b출력하면 반환값을 배열화해서 반환
// [Apple-0, Banana-1, Cherry-2]- .map( ) : 콜백함수에서 반환된 반복된 값들이 새로운 배열 만들어 반환해준다.
출력값 ㄱ//새로운 객체 데이터를 만들어 활용가능하다 (많이 사용) const b = fruits.map(function (fruit, index) { return { id : index, name : fruit } }) console.log(b)
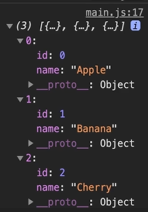
[ {id: 0 , name:"Apple"},{id: 1 , name:"Banana"},{id: 2 , name:"Cherry"} ]
// 화살표함수로 표현해보자면 (this 없으므로 일반함수와 차이도 없다.)
const a = fruits.forEach((fruit, index) => {
  console.log(`${fruit}-${index}`)
})
console.log(a)

const b = fruits.map((fruit, index) => ({id: index, name: fruit}))
console.log(b)
Array mdn 이어서
//.filter()

const numbers = [1,2,3,4]

const a = numbers.map(number => {
  return number < 3   // 반환은 true 또는 false 로 된다.
})                    // map은 함수 반환값 자체로 배열을 만든다

console.log(a) // 따라서 출력되는 값은 [true,true,false,false]

const b = numbers.filter(number => {
  return number < 3   // 필터는 조건에 맞는 요소 자체가 반환된다.
})
console.log(b)  // 출력값 : [ 1, 2 ]
.filter( ): 반환되는 값이 true가 되는 경우에만 item 자체를 새 배열에 넣어 반환이 된다.- map과 filter는 원본을 훼손하지 않는다.
// 화살표함수로 표현해보자면 (this 없으므로 일반함수와 차이도 없다.)
const numbers = [1,2,3,4]

const a = numbers.map(number => number < 3)
console.log(a)

const b = numbers.filter(number => number < 3)
console.log(b)
//.find(), .findIndex()
const fruits = ['Apple','Banana','Cherry']
//find : 찾은 요소 자체 출력
const a = fruits.find(fruit => {
return /^B/.test(fruit) //맨앞이 B 인 요소 1개 찾기(찾으면 반복 종료)
})
console.log(a) // 출력값 Banana
//findIndex : 찾은 요소의 인덱스값 출력
const b = fruits.findIndex(fruit => {
return /^B/.test(fruit)
})
console.log(b) // 출력값 1
// 화살표 함수로 바꿔 보면 매우 간결해진다.
const a = fruits.find(fruit => /^B/.test(fruit))
const b = fruits.findIndex(fruit => /^B/.test(fruit))
//.includes() : 찾는값이 배열에 포함되어져 있는지 확인
const numbers = [1,2,3,4]
const fruits = ['Apple','Banana','Cherry']
const a = numbers.includes(3)
console.log(a) // 출력값 : true
const b = fruits.includes("BYEOL")
console.log(b) // 출력값 : false
// .push() . unshift()
// 원본 수정됨 주의!
const numbers = [1,2,3,4]
const fruits = ['Apple','Banana','Cherry']
numbers.push(5) // 원본이 바뀌어 버린다.
console.log(numbers) //출력값 [1,2,3,4,5] <- 5가 맨뒤에 추가되었다
numbers.unshift(0) // 원본이 바뀐다.
console.log(numbers) //출력값 [0,1,2,3,4,5] <- 맨 앞에 0 추가됨
// .reverse()
// 원본 수정됨
const numbers = [1,2,3,4]
const fruits = ['Apple','Banana','Cherry']
numbers.reverse()
fruits.reverse()
console.log(numbers) // [4,3,2,1]
console.log(fruits) // ['Cherry','Banana','Apple']
//.splice() : .splice(시작index, 지울 갯수)
// 원본 수정됨
const numbers = [1,2,3,4]
numbers.splice(2,1)
console.log(numbers) // [1,2,4] // 3이 사라져 있음을 알 수 있다.
//.splice(시작index, 지울 갯수, 끼워넣을 값)
numbers.splice(2,0, 999)
console.log(numbers) // [1,2,999,3,4] //2번에서 0개지우고 그자리에 999 집어넣기4. Object's Api
Object mdn - 검색
// Object.assign() - 출처 객체로부터 대상 객체로 속성을 복사할 때 사용
// 대상 객체를 덮어서 반환함. 동일 키가 있으면 덮는 값으로 바뀜.
const target = { a: 1, b: 2 };
const source = { b: 4, c: 5 };

const returnedTarget = Object.assign(target, source);

console.log(target);  // 출력값: Object { a: 1, b: 4, c: 5 }
console.log(returnedTarget); // 출력값: Object { a: 1, b: 4, c: 5 }

// 객체끼리는 참조형 데이터로 메모리 할당이 같아야만 === 이 된다.
// 새로운 객체로 만들고 싶으면, 빈객체로 반환시키면 된다.
const returnedTarget1 = Object.assign({}, target, source)
console.log(target)  // 출력값: Object { a: 1, b: 2}
console.log(returnedTarget1) // 출력값: Object { a: 1, b: 4, c: 5 }

//Object.keys() - 객체의 key들만 뽑아 배열로 반환
const object1 = {
  a: 'somestring',
  b: 42,
  c: false
}

const obj_keys = Object.keys(object1)
console.log(obj_keys) // 출력값: Array ["a", "b", "c"]
// 인덱스 값과 key값으로 value를 꺼낼 수 있다.
console.log(obj_keys[1]) // 출력값: 42
console.log(obj_keys['c']) // 출력값: false
5. 구조 분해 할당
// 구조 분해 할당(Destructuring assignment)
// 비구조화 할당

const user = {
  name: 'Byeol',
  age: 33,
  email: 'starggoggo@hanmail.net'
}
// 객체의 key를 원하는 것만 분해해 놓고 필요할 떄 사용 가능
// 당연히 없는 address는 undefined 출력
const { name, age, email, address } = user
console.log(`사용자의 이름은 ${name}입니다.`)
// 출력값: 사용자의 이름은 Byeol입니다.
console.log(`${name}의 나이는 ${age}입니다.`)
// 출력값: Byeol의 나이는 33입니다.
console.log(`${name}의 이메일 주소는 ${email}입니다.`)
// 출력값: Byeol의 이메일 주소는 starggoggo@hanmail.net입니다.
console.log(address) // undefined
// 구조분해할당은 user.age, user['age'] 방식과 동일한 결과를 낸다.

// 없는 경우에 디폴트 값을 지정할 수도 있다.
// 비어있다면 지정값, 값이 생기면 그 값으로 출력해준다.
const { name, age, email, address='Korea' } = user

// key값을 변수로 사용하기 싫다면 콜론(:)뒤에 원하는 변수이름지정 가능
const { name: star, age, email, address='Korea' } = user
console.log(`사용자의 이름은 ${star}입니다.`)
// 출력값: 사용자의 이름은 Byeol입니다.
// 이 이후론 name으론 사용할 수 없으며, name 안쓰면 에러 뱉는다.

// 배열은 index순서대로 변수 지정해서 구조 분해 할당 가능
const fruits = ['Apple','Banana','Cherry']
const [a, b, c, d] = fruits
console.log(a, b, c, d) // 출력값: Apple Banana Cherry undefined

// 혹시 Banana만 사용하고 싶다면, 인덱스 자리를 생각해서 ,로 구분 후 사용
const [, b] = fruits
console.log(b) // 출력값: Banana
const [, ,c] = fruits
console.log(c) // 출력값: Cherry
#### 6. 전개 연산자
// 전개 연산자(Spread)
// 마침표 ... 사용하면 요소만 뿌려준다.

const fruits = ['Apple','Banana','Cherry']
cosole.log(fruits)     // 출력값: ['Apple','Banana','Cherry']
cosole.log(...fruits)  // 출력값: Apple Banana Cherry

// 전개연산자 활용 예)
function toObject(a, b, c) {
  return {
    a: a,
    b: b,
    c: c,
  }
}
console.log(toObject(...fruits))
// 출력값: {a:"Apple", b:"Banana", c:"Cherry"}

// 매개변수에서 사용하면 "rest parameter"로 사용된다
const numbers = [1,2,3,4]
function toObject(a, b, ...c) {
  return {
    a: a,
    b: b,
    c: c,
  }
}
console.log(toObject(...numbers))
// 출력값: {a:1, b:2, c:[3,4]} // 남은 매개변수들이 Array로 들어간다

// 속성의 이름과 변수의 이름이 같다면 한번만 써도 동일기능이 된다.
const numbers = [1,2,3,4]
function toObject(a, b, ...c) {
  return { a, b, c }
}
console.log(toObject(...numbers))
// 출력값: {a:1, b:2, c:[3,4]}

// 화살표함수로도 표현 가능
const toObject(a, b, ...c) => ({ a, b, c })
// 주의할 것은 { }는 블럭으로 인식되어버리기 때문에 출력위해선 ()안에 넣어야함
#### 7. 불변성
데이터 불변성(Immutability)
- 원시 데이터: String, Number, Boolean, undefined, null
- 자바스크립트에서 사용할 수 있는 기본 데이터 구조이다.
- 참조형 데이터: Object, Array, Function(callback등등)
- 불변성을 원시 데이터로 알아보자
- 메모리 주소라고 치자
- 메모리 주소라고 치자
let a = 1 // 1번 메모리에 할당됨
let b = 4 // 2번 메모리의 할당됨
console.log(a, b, a === b) //출력값: 1 4 false

b = a // b가 a를 바라보게 된다.(즉 1번 메모리 바라보게 됨)
console.log(a, b, a === b) //출력값: 1 1 true

a = 7  // 3번 메모리에 할당됨
console.log(a, b, a === b) //출력값: 7 1 false

let c = 1 // c는 4번으로 가는게 아닌 1번메모리의 숫자1을 바라보게 됨
console.log(b, c, a === b) //출력값: 1 1 true

// 코드 전체에서 1번메모리:1 / 2번메모리:4 / 3번메모리: 7 / 4번 empty- 참조형 데이터 : Object를 예시로 생각해보자.
let a = { k: 1 } // 1번 메모리에 할당 { k:1 }
let b = { k: 1 } // 2번 메모리에 할당 { k:1 }
console.log(a, b, a === b) // 출력: { k: 1 } { k: 1 } false

a.k = 7 // 1번 메모리의 k:1 -> k:7 로 변함
b = a   // b가 a를 바라보게 됨 // 1번 메모리 {k:7}
console.log(a, b, a === b) // 출력: { k: 7 } { k: 7 } true

a.k = 2 // 1번메모리 k:7 -> k:2로 변함
        // 그런데 b가 a를 바라보고 있기 때문에 b도 { k: 2 }를 가리킴
console.log(a, b, a === b) // 출력: { k: 2 } { k: 2 } true

let c = b // c는 b를 따라가겠다 선언, b가 1번 { k: 2 } 바라보므로 c도 그렇게됨
console.log(a, b, c, a === c) // 출력: { k: 2 } { k: 2 } { k: 2 } true

a.k = 9
console.log(a, b, c, a === c) // 출력: { k: 9 } { k: 9 } { k: 9 } true- a와 b가 따로 놀게 하고프면
복사가 필요하다(새 메모리의 할당필요)- 얕은 복사 : 겉의 참조만 복사 / 깊은 복사 : 세부 내용까지 복사
8. 얕은 복사, 깊은 복사
// 얕은 복사(Shallow copy), 깊은 복사(Deep copy)

const user = {
  name: 'Byeol',
  age: 33,
  email: ['starggoggo@hanmail.net']  // 1번에 할당되었다 치자
}
const copyUser = user  // copyUser도 user가 바라보는 곳도 1번이 됨.
console.log(copyUser === user) // true

user.age = 34  // user를 통해 1번 age: 34 로 변경
console.log('user', user)
console.log('copyUser', copyUser)  // 둘 다 age: 34로 변한 동일값 출력

console.log('------')

// 얕은 복사
const user = {
  name: 'Byeol',
  age: 33,
  email: ['starggoggo@hanmail.net']
}
// 새 메모리 주소에 할당됨.
const copyUser = Object.assign({}. user) // user를 빈object에 복사해 넣음
// 동일 기능 : const copyUser = {...user} // 복사해서 user 요소 뿌려넣기
console.log(copyUser === user) // 출력값: false

user.age = 34  // user를 통해 1번 age: 34 로 변경
console.log('user', user)   // 출력값 age: 34 변경된 object로 나옴
console.log('copyUser', copyUser)  // 변하지 않은 age:33으로 출력

console.log('------')

user.emails.push('star@zillinks.com')
console.log(user.emails === copyUser.emails) // 출력값 : true
// user.emails 자체로 변경한 적은 없기 때문에
// user가 변하면 복사했다 여긴 값도 같이 따라감 푸시되어 배열로 두 이멜 다 뜸.
// ---- 여기까지 얕은 복사 ------ 깊은 복사는 javascript 에서 표현하기 복잡하다..
cmd에서npm i lodash로 lodash 설치!import _ from 'lodash' const user = { name: 'Byeol', age: 33, email: ['starggoggo@hanmail.net'] } const copyUser = _.cloneDeep(user) // 깊은 복사 반환 // 이제 아예 구분됨 console.log(copyUser === user) // 출력값: false // 이후로는 두 객체는 아예 따로 논다!
lodash
_.cloneDeep(value) : 재귀(반복) 복사됨 -> 깊은 복사 진행
- 굉장히 많은 명령어들 있다. 많이 쓰게 될 것!
JS 데이터 실습
1. 가져오기, 내보내기
import _ from 'lodash'  // From 'node_modules' 로부터 가져옴
import getType from './getType'      // 동일 위치 안 getType.js로부터
import getRandom from './getRandom'  // 동 폴더 안 getRandom.js로부터

console.log(_.camelCase('the hello world')) // theHelloWorld
console.log(getType([1,2,3]))
console.log(getRandom(), getRandom())- In getType.js
export default function getType(data) {
  ...
} // export 로 내보내진 함수를 가져올 수 있다.
import/export 구조 설명
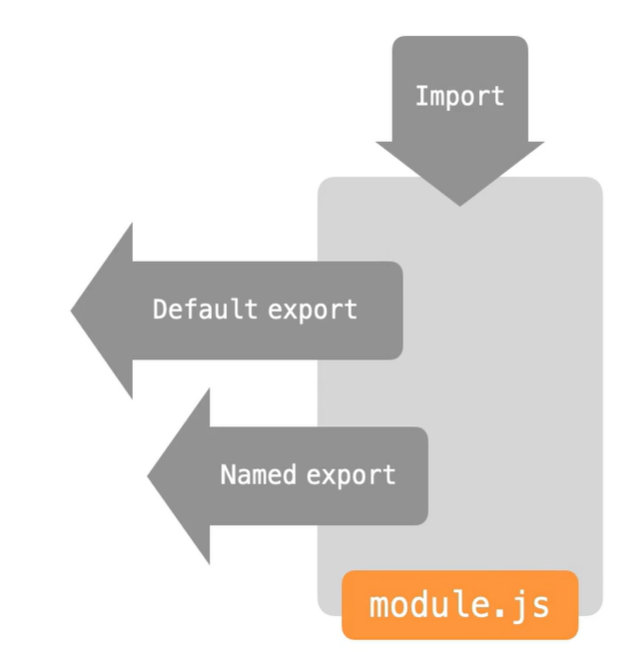
- default 붙인 export 는 따로 이름 붙일 필요 없다
- import만 하는 js / Default export만 있는 js도 있다.
이름 없는 default export 같은 경우에는 이름 바꿔서 import 해도 문제 없다
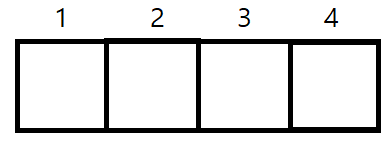
- 이름 없는 default export는 한개만 export 할 수 있다.
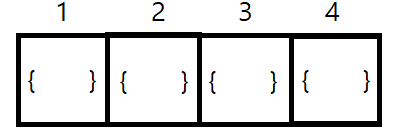
이름 지정한 export 같은 경우에는 import { random } from './getRandom'
- 이름 지정한 export는 js 안 내보내기 값 여러개 가능
import { random, user } from './getRandom'
import { random, user as byeol} from './getRandom'
ㄴ 꺼내오기는 user를 꺼내오지만 사용시 byeol로 사용하겠다는 뜻.
와일드카드( Wildcard Character , * ) : 어러 내용을 한꺼번에 지정할 목적으로 사용
2. Lodash 사용법
_.uniq([2,1,2])-> [2, 1] 고유하게 하나씩만 출력하기_.uniqBy(users, 'userId')-> 기입된 속성을 기준으로 곂치는 값은 1개만 유일하게 반환_.unionBy(usersA, usersB, 'userId')-> 아직 합치지 전이라면, 합칠 두 값 적고 기준으로 삼을 속성 적어줌._.find(users, {name: 'Byeol'})-> 뒤 조건에 해당되는 키 반환_.findIndex(users, {name: 'Byeol'}): 조건에 맞는 부분의 키를 index로 바꿔줌_.remove(users, {name: 'Byeol'}): 명명한 조건 지워주기
3. Json
JavaScript Object Notation - 객체와 유사
- 문자형은 " "만 가능
- json 은
하나의 데이터으로 사용 가능
// json에 가능한 type들
// json은 하나의 문자 데이터!!
{
"string": "BYEOL",
"number": 123,
"boolean": true,
"null": null,
"object": {},
"array": []
}
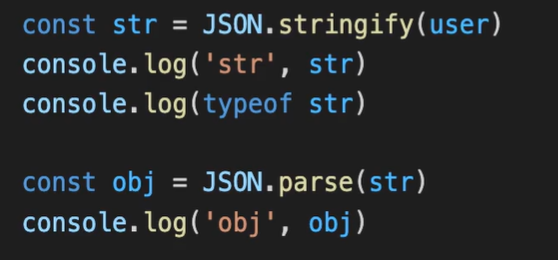
// import로 가져와지면 객체 데이터로 읽어준다.const str = Json.stringify(obj) : object를 str 형식으로!
const obj = Json.parse(str) : 문자를 obj 형태로!
4. Storage
f12 -> Application -> Local Storage / Session Storage
- LocalStorage
- 도메인 주소에 종속되어 있는 저장소 : 데이터 만료되지 않는다.
- Session Storage
- 페이지에 종속되어있어 닫으면 사라지는 저장소 : 닫으면 데이터 만료
// 'key' | 'object'
localStorage.setItem( 'key', 'value' ) '-> 문자로 최대한 넣어라'

const a = localStorage.getItem('key')
// key로 검색된 정보 삭제
localStorage.removeItem('a')

localStorage.setItem(,,10000)
Lowdb
검색해서 사용법 읽어볼 것
5. OMDb API
- 영화정보 요청 가능
- 사이트에서 인증하고, apikey
- By Search
s(필수) : 제목 통해 영화 검색
// Query String
//  주소/?속성 = 값 & 속성 = 값 & 속성 = 값

// Axios
// Promiss 기반 hTML 요청을 처리해주는 JS 기반 Client
import axios from 'axios'

function fetchMovies () {
  axios
    .get('https://www.omdbapi.com/?apikey=7035c60c&s=frozen')
    .then((res) => {       // get에서 얻어서 then에서 처리할 것
      console.log(res)
  	})
}
fetchMovies()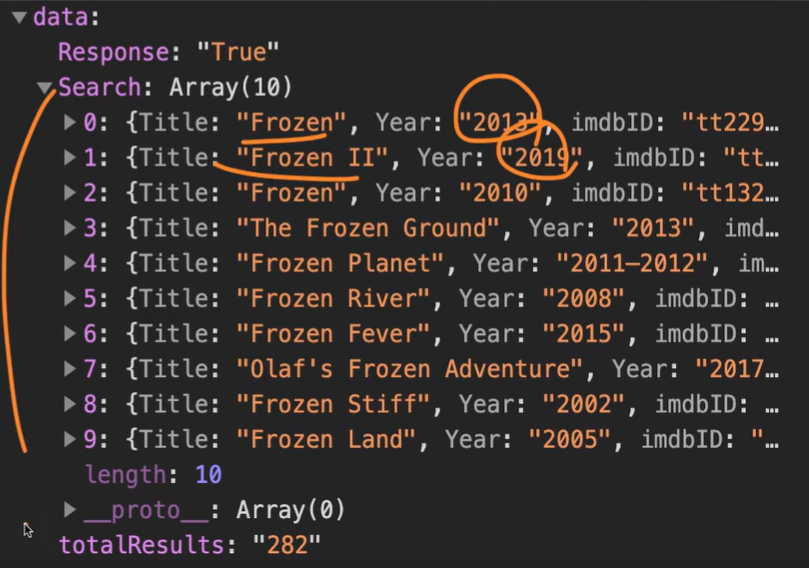
출처 : fastcampus react & redux로 시작하는 웹 프로그래밍
