
1. Tensorflow로 MNIST 데이터 학습하기
import tensorflow as tf라이브러리를 임포트 하고
(train_images, train_labels), (test_images, test_labels) = tf.keras.datasets.mnist.load_data()

train_images = train_images.reshape((60000, 28, 28, 1))
test_images = test_images.reshape((10000, 28, 28, 1))
train_images, test_images = train_images / 255.0, test_images / 255.0
Dataset에 관한 초기 설정을 한 뒤,
model = tf.keras.models.Sequential([
  tf.keras.layers.Conv2D(32, (3, 3), activation='relu', input_shape=(28, 28, 1)),
  tf.keras.layers.MaxPooling2D((2, 2)),
  tf.keras.layers.Conv2D(64, (3, 3), activation='relu'),
  tf.keras.layers.MaxPooling2D((2, 2)),
  tf.keras.layers.Flatten(input_shape=(28, 28)),
  tf.keras.layers.Dense(128, activation='relu'),
  tf.keras.layers.Dense(10, activation='softmax')
])
모델을 디자인 한다.
Tensorflow의 Keras 라이브러리를 사용했고,
- 28x28x1의 입력 이미지가 input이고
- 32개의 3x3 필터를 가지는 Convolutional layer (ReLU 사용)
- Max pooling (CNN에서 사용)을 2x2로 사용했다.
- 2x2 사이즈의 사각형을 만들어 이미지의 Max 값을 출력한다.
이렇게 해도 중요한 정보는 유지된다고 한다. - 이렇게 하면 데이터 처리가 빠르고, overfitting을 줄일 수 있다.
- 2x2 사이즈의 사각형을 만들어 이미지의 Max 값을 출력한다.
- 64개의 3x3 필터를 가지는 Convolutional layer (ReLU 사용)
- 3.과 같은 Max Pooling layer
- Flatten layer : 2D로 바꾸기 위해 사용함.
- softmax activation function을 사용하는 output layer가 마지막에 있다.
** Convolutional layer과 max pooling layer를 번갈아서 사용하는 이유는, Convolutionl layer에서는 복잡한 특징을, max pooling layer에서는 모델을 둔감(?)하게 만들고 계산 Cost를 줄여준다.
따라서 모델이 점점 더 복잡한 특징을 효율적으로 학습할 수 있게 도와준다.
model.compile(optimizer='adam',
              loss='sparse_categorical_crossentropy',
              metrics=['accuracy'])

model.fit(train_images, train_labels, epochs=30
30 epochs로 학습을 수행했다. 15 epochs부터 유의미한 변화는 없었다.
import tensorflowjs as tfjs

tfjs.converters.save_keras_model(model, 'mnist')
tensorflow를 Javascript 환경에서 사용할 수 있는 라이브러리이다.
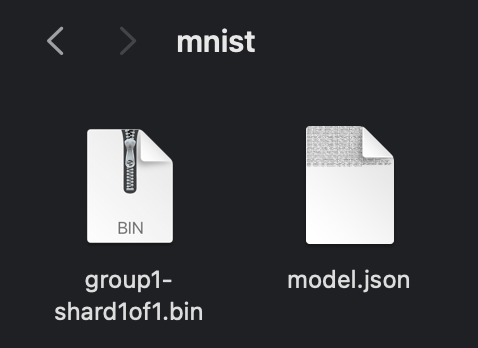
model.json은 딥러닝 모델에 관한 정보를 저장하고 있고,
group1-shard1of1.bin은 모델의 weight 값을 저장하고 있다.
이제 위 모델을 local 서버로 불러오려 한다.
2. Live Server Extension
다른 라이브 서버 확장 프로그램은 크롬 브라우저의 CORS policy 에러가 나서 vscode의 Live Server 확장 프로그램을 설치해서 로컬 서버를 운영하였다.
3. 로컬 웹 페이지 만들기
<!DOCTYPE html>
<html>
<head>
<meta charset="utf-8" />
<title>마우스로 그린 글씨 예측</title>
<!-- Import TensorFlow.js -->
<script src="https://cdn.jsdelivr.net/npm/@tensorflow/tfjs@1.0.0/dist/tf.min.js"></script>
<!-- Import tfjs-vis -->
<script src="https://cdn.jsdelivr.net/npm/@tensorflow/tfjs-vis@1.0.2/dist/tfjs-vis.umd.min.js"></script>
<!-- Import opencv -->
<script src="https://docs.opencv.org/3.4.1/opencv.js"></script>
<!-- Import the main script file -->
<script src="script.js" type="module"></script>
</head>
<style>
#canvas {
border: 3px solid grey;
background-color: black;
}
#canvas2 {
border: 1px solid red;
background-color: black;
}
#result {
font-size: 20px;
color: black;
font-family: "Nanum Gothic", sans-serif;
font-weight: 700;
}
/* predict 버튼 스타일 */
#predict {
background-color: #4caf50; /* Green */
border: none;
color: white;
padding: 15px 32px;
text-align: center;
text-decoration: none;
display: inline-block;
font-size: 16px;
margin: 4px 2px;
cursor: pointer;
}
/* clear 버튼 스타일 */
#clear {
background-color: #f44336; /* Red */
border: none;
color: white;
padding: 15px 32px;
text-align: center;
text-decoration: none;
display: inline-block;
font-size: 16px;
margin: 4px 2px;
cursor: pointer;
}
h1 {
font-family: "Nanum Gothic", sans-serif;
font-weight: 700;
font-size: 30px;
}
</style>
<body>
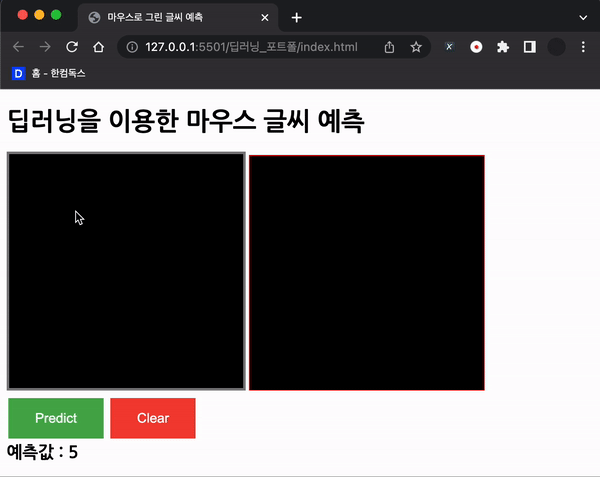
<h1>딥러닝을 이용한 마우스 글씨 예측</h1>
<div>
<canvas id="canvas" width="280" height="280"></canvas>
<canvas id="canvas2" width="280" height="280"></canvas>
</div>
<button id="predict">Predict</button>
<button id="clear">Clear</button>
<div id="result"></div>
</body>
</html>간단한 html, css 코드를 작성했다. 아직 html은 간단한 것 밖에 작성하지 못한다 ㅠㅠ
		<!-- Import TensorFlow.js -->
		<script src="https://cdn.jsdelivr.net/npm/@tensorflow/tfjs@1.0.0/dist/tf.min.js"></script>

		<!-- Import tfjs-vis -->
		<script src="https://cdn.jsdelivr.net/npm/@tensorflow/tfjs-vis@1.0.2/dist/tfjs-vis.umd.min.js"></script>

		<!-- Import opencv -->
		<script src="https://docs.opencv.org/3.4.1/opencv.js"></script>
python으로 학습한 모델을 tensorflowjs 로 내보냈고, 그 모델을 불러올때 tensorflowjs(tfjs)를 사용한다.
openCv는 Computer Vison을 목적으로 한 프로그래밍 라이브러리이다. python에서 자주 사용하는데, Javascript용 라이브러리도 있어서 사용 할 계획이다. 이미지 전처리 목적으로 사용 할 계획이다.
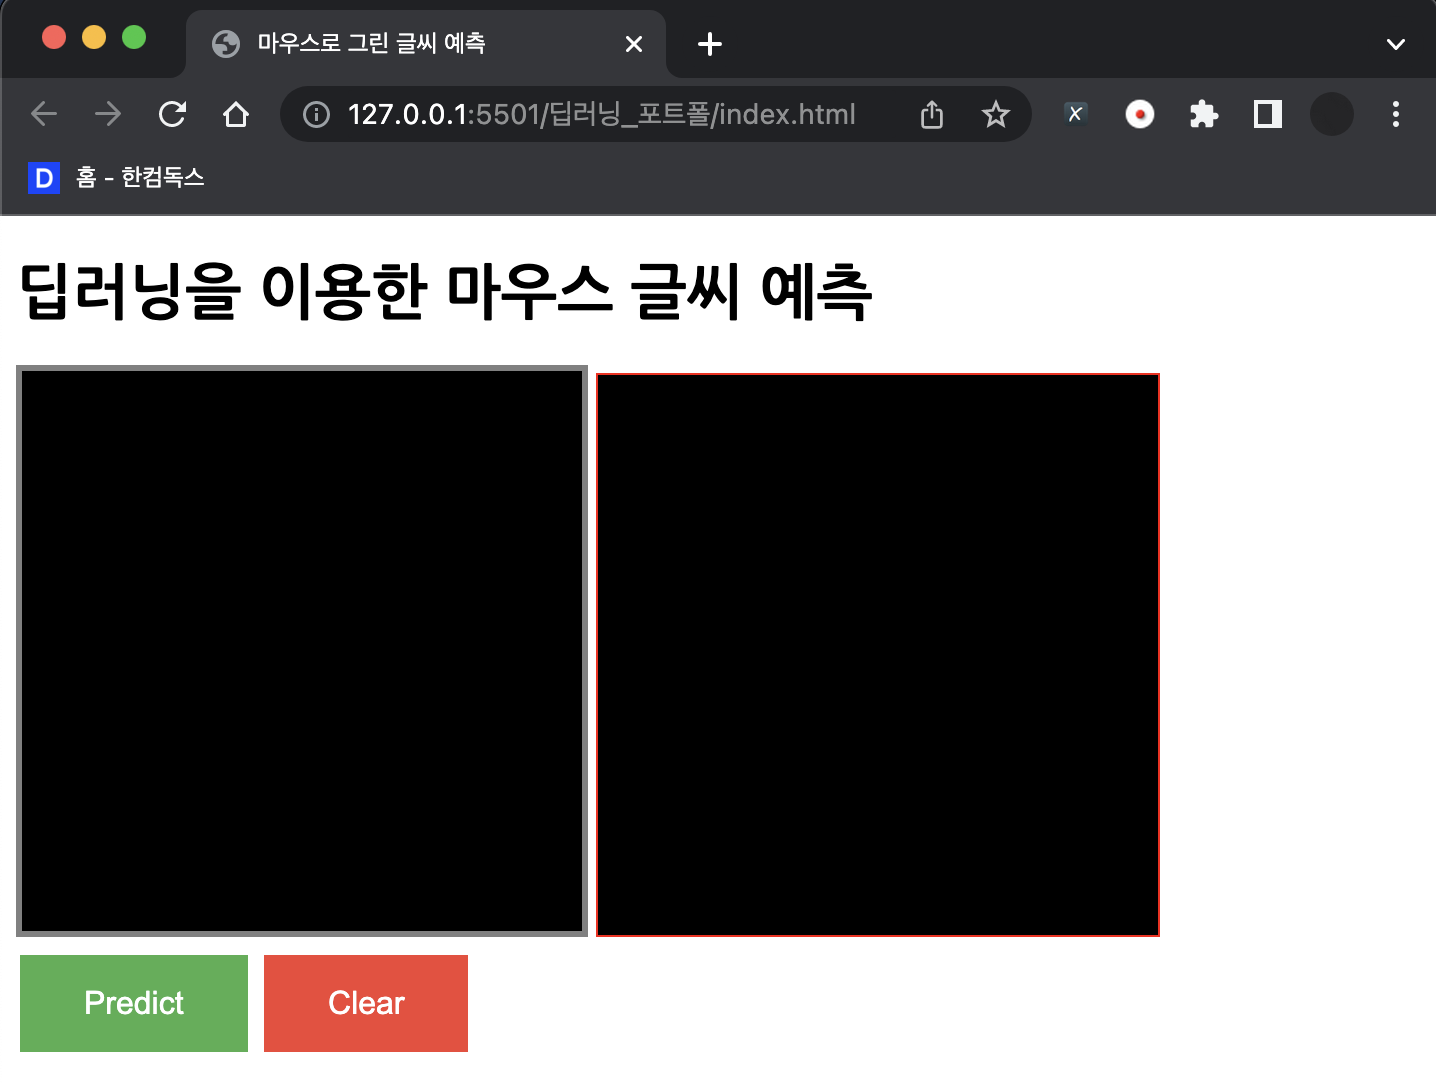
위와 같이 생겼고, 왼쪽 영역에 마우스로 숫자를 그리게 할 계획이다.
// canvas에 마우스로 그림을 그릴 수 있게 하는 함수
async function canvas() {
	var canvas = document.getElementById("canvas");
	var ctx = canvas.getContext("2d");
	var mouse = { x: 0, y: 0 };
	canvas.addEventListener(
		"mousemove",
		function (e) {
			mouse.x = e.pageX - this.offsetLeft;
			mouse.y = e.pageY - this.offsetTop;
		},
		false
	);

	ctx.lineWidth = 10;
	ctx.lineJoin = "round";
	ctx.lineCap = "round";
	ctx.strokeStyle = "white";

	canvas.addEventListener(
		"mousedown",
		function (e) {
			ctx.beginPath();
			ctx.moveTo(mouse.x, mouse.y);

			canvas.addEventListener("mousemove", onPaint, false);
		},
		false
	);

	canvas.addEventListener(
		"mouseup",
		function () {
			canvas.removeEventListener("mousemove", onPaint, false);
		},
		false
	);

	var onPaint = function () {
		ctx.lineTo(mouse.x, mouse.y);
		ctx.stroke();
	};
}
document.getElementById("canvas").addEventListener("click", () => canvas());

function clear() {
	const clear = document.getElementById("clear");
	clear.addEventListener("click", () => {
		const ctx = document.getElementById("canvas").getContext("2d");
		ctx.clearRect(0, 0, 280, 280);
	});
}
document.getElementById("clear").addEventListener("click", () => clear());
마우스로 canvas 영역 위에 그림을 그릴 수 있게 하는 함수이다. clear() 함수는 canvas의 데이터를 지운다.
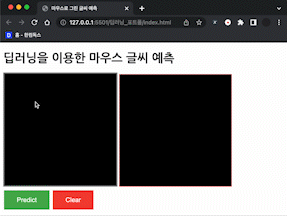
위 함수를 적용한 모습이다.
predict 메소드
// predict 버튼을 누르면 실행되는 함수
async function predict() {
	var canvas = document.getElementById("canvas");
	var canvas2 = document.getElementById("canvas2");

	const tensor2 = tf.browser
		.fromPixels(canvas, 1)
		.resizeNearestNeighbor([28, 28])
		.toFloat()
		.expandDims();

	// 모델을 불러오고, 결과를 출력한다.
	const model = await tf.loadLayersModel("http://localhost:5501/model.json");
	const output = model.predict(tensor2);

	const predictions = output.argMax(1).dataSync()[0];

	document.getElementById("result").innerHTML = "예측값 : " + predictions;
}
document.getElementById("predict").addEventListener("click", () => predict());
처음에는 위 코드를 사용하였으나, 정확도가 너무 나오지 않았다.
바보..
맨 처음 든 생각은 데이터가 처음 학습했던 MNIST 데이터와 달라서 그럴 것이라고 생각했다.
관련 자료를 구글링해보니 데이터 전처리를 하면 해결 할 수 있을 것이라고 생각했다.
내가 생각한 방법은, canvas 위에 그려진 데이터에서
(1) 그린 영역을 직사각형으로 잘라내어
(2) 리사이징하여 입력시키는 방법을 생각해냈다.
위를 구현하기 가장 쉬운 방법은 앞서 소개한 openCv 라이브러리를 사용하는 것이다.
// canvas를 이용해 그려진 흑백 숫자 이미지를 경계를 찾고 직사각형으로 자른 뒤 확대하는 함수
function processImage(canvas) {
	// OpenCV를 사용하여 이미지를 읽음
	let src = cv.imread(canvas);
	// 흑백으로 변환
	cv.cvtColor(src, src, cv.COLOR_RGBA2GRAY, 0);
	// 이진화
	cv.threshold(src, src, 0, 255, cv.THRESH_BINARY + cv.THRESH_OTSU);
	// 경계 찾기
	let contours = new cv.MatVector();
	let hierarchy = new cv.Mat();
	cv.findContours(
		src,
		contours,
		hierarchy,
		cv.RETR_LIST,
		cv.CHAIN_APPROX_SIMPLE
	);

	// 경계 중 가장 큰 직사각형 찾기
	let rect = cv.boundingRect(contours.get(0));
	for (let i = 1; i < contours.size(); i++) {
		let r = cv.boundingRect(contours.get(i));
		if (r.width * r.height > rect.width * rect.height) {
			rect = r;
		}
	}
	// canvas에 경계를 빨간색 직사각형을 더하여 그림
	let ctx = canvas.getContext("2d");
	ctx.strokeStyle = "red";
	// 선의 두께를 2로 설정
	ctx.lineWidth = 2;
	ctx.strokeRect(rect.x, rect.y, rect.width, rect.height);
	ctx.strokeStyle = "white";
	ctx.lineWidth = 10;

	// 경계 직사각형으로 이미지 자르기
	let roi = src.roi(rect);
	// 자른 이미지를 200x200으로 확대, 가로와 세로 비율을 1대1로 유지한다.
	if (roi.cols > roi.rows) {
		cv.resize(
			roi,
			roi,
			new cv.Size(200, (200 * roi.rows) / roi.cols),
			0,
			0,
			cv.INTER_AREA
		);
	} else {
		cv.resize(
			roi,
			roi,
			new cv.Size((200 * roi.cols) / roi.rows, 200),
			0,
			0,
			cv.INTER_AREA
		);
	}

	// 이미지를 canvas2의 크기에 맞게 확대해서 그림. 가로와 세로 비율을 1대1로 유지한다.
	cv.copyMakeBorder(
		roi,
		roi,
		40,
		40,
		40,
		40,
		cv.BORDER_CONSTANT,
		new cv.Scalar()
	);

	// 자른 이미지를 canvas2에 다시 그리기
	let canvas2 = document.getElementById("canvas2");

	cv.imshow(canvas2, roi);
	src.delete();
	contours.delete();
	hierarchy.delete();
}
* processImage 함수에 대한 설명
let src = cv.imread(canvas);
	// 흑백으로 변환
	cv.cvtColor(src, src, cv.COLOR_RGBA2GRAY, 0);
	// 이진화
	cv.threshold(src, src, 0, 255, cv.THRESH_BINARY + cv.THRESH_OTSU);
	// 경계 찾기
	let contours = new cv.MatVector();
	let hierarchy = new cv.Mat();
	cv.findContours(
		src,
		contours,
		hierarchy,
		cv.RETR_LIST,
		cv.CHAIN_APPROX_SIMPLE
);-
openCv image Read 메소드를 사용해서 canvas의 이미지 데이터를 읽는다.
-
grayScale, Binary화 하고, 메소드 중 경계를 찾는 메소드인 findContours를 사용하여 숫자 오브젝트의 경계를 찾는다.
- contours는 이미지에서 찾은 객체의 경계를 저장할 리스트이고,
- hierachy는 경계 사이의 관계를 저장하는 변수이다.
findContours의 인자 중
- cv.RETR_LIST는 함수가 이미지에서 모든 경계를 검색하여 contours 변수에 저장한다는 뜻이고
- cv.CHAIN_APPROX_SIMPLE는 함수가 간단한 방법으로(?) 경계를 찾는다는 말이다. 자세한 메커니즘은 모르지만 사각형의 꼭짓점 데이터만 저장한다고 알고 있다.
// 경계 중 가장 큰 직사각형 찾기
	let rect = cv.boundingRect(contours.get(0));
	for (let i = 1; i < contours.size(); i++) {
		let r = cv.boundingRect(contours.get(i));
		if (r.width * r.height > rect.width * rect.height) {
			rect = r;
		}
	}

// canvas에 경계를 빨간색 직사각형을 더하여 그림
	let ctx = canvas.getContext("2d");
	// 경계를 그릴 직사각형의 두께를 2로 설정하고, 빨간색으로 그림
	ctx.strokeStyle = "red";
	ctx.lineWidth = 2;
	ctx.strokeRect(rect.x, rect.y, rect.width, rect.height);

// 이후 원상복귀 시킨다
	ctx.strokeStyle = "white";
	ctx.lineWidth = 10;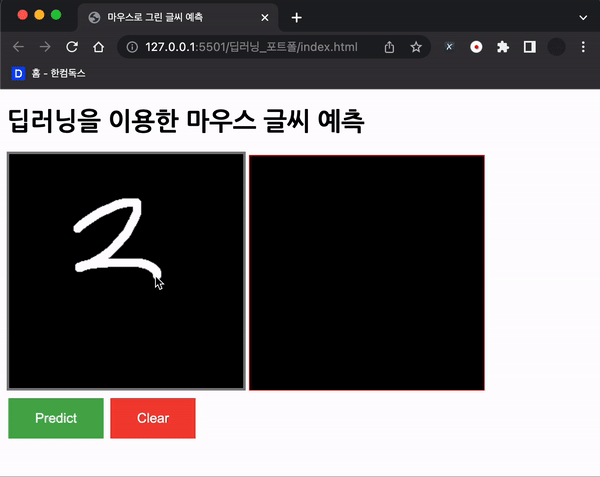
위와 같이 경계를 찾고, 경계를 그려준다! 그 외의 동작들은 이제 설명 할 계획이다.
경계를 기준으로 Crop 하기
	let roi = src.roi(rect);
	// 자른 이미지를 200x200으로 확대, 가로와 세로 비율을 1대1로 유지한다.
	if (roi.cols > roi.rows) {
		cv.resize(
			roi,
			roi,
			new cv.Size(200, (200 * roi.rows) / roi.cols),
			0,
			0,
			cv.INTER_AREA
		);
	} else {
		cv.resize(
			roi,
			roi,
			new cv.Size((200 * roi.cols) / roi.rows, 200),
			0,
			0,
			cv.INTER_AREA
		);
	}
roi 는 region of interest(흥미영역?)이라고 한다.
let roi = src.roi(rect);직사각형에서 직사각형(rect)을 기준으로 이미지(scr)의 roi를 추출해낸다.
	if (roi.cols > roi.rows) {
		cv.resize(
			roi,
			roi,
			new cv.Size(200, (200 * roi.rows) / roi.cols),
			0,
			0,
			cv.INTER_AREA
		);
	} else {
		cv.resize(
			roi,
			roi,
			new cv.Size((200 * roi.cols) / roi.rows, 200),
			0,
			0,
			cv.INTER_AREA
		);
	}
이후, 200x200 사이즈로 리사이징 하는데, 가로와 세로 비율을 유지하면서 잘라낸다.
// 이미지를 canvas2의 크기에 맞게 확대해서 그림. 가로와 세로 비율을 1대1로 유지한다.
	cv.copyMakeBorder(
		roi,
		roi,
		40,
		40,
		40,
		40,
		cv.BORDER_CONSTANT,
		new cv.Scalar()
	);

// 자른 이미지를 canvas2에 다시 그리기
	let canvas2 = document.getElementById("canvas2");

	cv.imshow(canvas2, roi);
	src.delete();
	contours.delete();
	hierarchy.delete();
이후 canvas2의 크기에 맞춰 그리면 된다. 200x200으로 리사이징 해서, 여백을 40씩 만들어 줄 수 있다.

위와 같이 확대해서 그려준다.
모델에 넣어 예측하기
// 모델을 불러오고, 결과를 출력한다.
	const model = await tf.loadLayersModel("http://localhost:5501/model.json");
	const output = model.predict(tensor2);

	const predictions = output.argMax(1).dataSync()[0];

	document.getElementById("result").innerHTML = "예측값 : " + predictions;
const model = await tf.loadLayersModel("http://localhost:5501/model.json");model.json은 딥러닝 모델에 관한 정보를 저장하고 있고,
group1-shard1of1.bin은 모델의 weight 값을 저장하고 있다고 했다.
위 메소드를 사용해 모델을 불러오고
	const output = model.predict(tensor2);

	const predictions = output.argMax(1).dataSync()[0];
모델에 텐서를 집어넣으면 된다! 집어넣기 전에 28x28로 resize해야하는데
	processImage(canvas);

	// canvas2의 이미지를 28x28 tensor로 변환한다
	const tensor2 = tf.browser
		.fromPixels(canvas2, 1)
		.resizeNearestNeighbor([28, 28])
		.toFloat()
		.expandDims();
위에서 열심히 canvas2에 처리한 이미지를 불러와서 28x28로 바꾸면 된다.
