📌Keyword
- Viewpager
- FragmentStateAdapter
- Indicator
- TabLayout
- TabLayoutMediator
- Indicator
- Bottom Navigation
- Fragment 전환
- menu
- Adapter
알고 갈 것 :
Fragment의 생성자 오버로드는 금지됨, Why?
https://kotlinworld.com/73
한것 :
-
ViewPager2
뷰페이저 이용하면 좌우로 움직이는 화면을 만들 수 있다.
     <androidx.viewpager2.widget.ViewPager2
            />
탭레이아웃과 연계하여 메뉴 항목을 뛰우는 것도 가능할 것<com.google.android.material.tabs.TabLayout
android:id="@+id/album_content_tb"
android:layout_width="match_parent"
android:layout_height="wrap_content"
android:background="@drawable/album_background_color"
app:layout_constraintEnd_toEndOf="parent"
android:layout_marginTop="10dp"
app:layout_constraintHorizontal_bias="0.0"
app:layout_constraintStart_toStartOf="parent"
app:layout_constraintTop_toBottomOf="@+id/album_mainimg_iv"
app:tabIndicatorColor="@color/light_blue2"
app:tabIndicatorFullWidth="false"
app:tabIndicatorHeight="3dp"
app:tabInlineLabel="true"
app:tabMode="fixed"
app:tabRippleColor="#00ff0000"
app:tabSelectedTextColor="@color/light_blue2"
app:tabTextAppearance="@style/tab_text"
app:tabTextColor="@color/song_gray" />보면은 이디케이터와 텍스트 설정같은게 매우 많다 나중에 커스텀할 때는 구글링해보자.
FragmentStateAdapter는 Viewpager2로 변하면서 사용
ViewPager2 정리 : https://furang-note.tistory.com/26
TabLayout과 ViewPager2를 붙일때 사용할 것
FragmentStatePagerAdapter -> FragmentStateAdapter
PagerAdapter -> RecyclerView.Adapter
addPageChangeListener -> registerOnPageChangeCallback
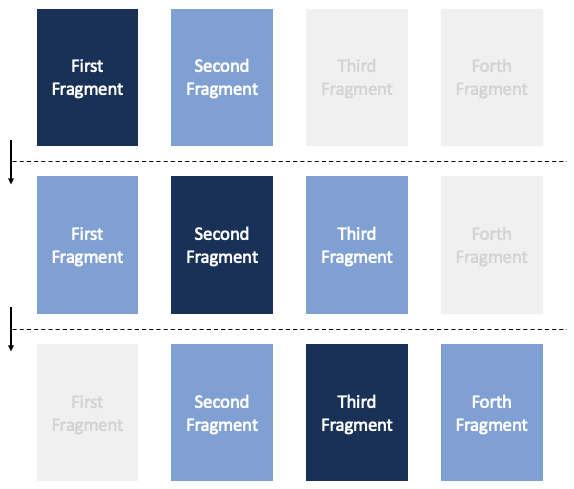
2019년에 수정된듯ViewPager는 현재 페이지를 기준으로 양 옆, 총 3개의 페이지만 관리하고
나머지 페이지는 메모리에서 삭제한다.
인자 값으로 Fragment 넘김
class AlbumViewparAdapter(fragment : Fragment,var albumid : Int) : FragmentStateAdapter(fragment){

    private var album_id : Int = albumid
    override fun getItemCount(): Int = 3

    override fun createFragment(position: Int): Fragment {
        return when(position){//when은 swich문과 동일
            0 -> SongFragment(album_id)
            1 ->  DetailFragment()
            else -> VideoFragment()
        }
    }

}
val albumAdapter = AlbumViewparAdapter(this, album.albumIdx)
binding.albumContentVp.adapter = albumAdapter
TabLayoutMediator(binding.albumContentTb, binding.albumContentVp) { tab, position ->
tab.text = information[position]
}.attach()
TabLayoutMediator란
TabLayout을 ViewPager2와 연결하기 위한 중재자.
중재자는 탭이 선택될 때 ViewPager2의 위치를 선택한 탭과 동기화
ViewPager2의 OnPageChangeCallback을 수신
https://developer.android.com/reference/com/google/android/material/tabs/TabLayoutMediator
if (position == 1) tab.setText("Test2")
if (position == 0) tab.setText("Test1")
 동일
tab, position -> tab.text = information[position]
코틀린 문법 : Lambda expression
https://tourspace.tistory.com/110
Indicator는 직접 만들수도 있지만, 구글링해보면 예쁜게 많이나옴 직접 커스텀은 해봐야할듯
Bottom Navigation
- Bottom Navigation XML
<com.google.android.material.bottomnavigation.BottomNavigationView
        android:id="@+id/main_bnv"
        android:layout_width="match_parent"
        android:layout_height="wrap_content"
        app:itemIconSize="25dp"
        app:itemIconTint="@drawable/main_btm_color_selector"
        app:itemTextColor="@drawable/main_btm_color_selector"
        app:labelVisibilityMode="labeled"
        app:layout_constraintBottom_toBottomOf="parent"
        app:layout_constraintEnd_toEndOf="parent"
        app:layout_constraintStart_toStartOf="parent"
app:menu="@menu/bottom_nav_menu" />- 메뉴 Xml
<?xml version="1.0" encoding="utf-8"?>
<menu xmlns:tools="http://schemas.android.com/tools"
    xmlns:android="http://schemas.android.com/apk/res/android"
    xmlns:app="http://schemas.android.com/apk/res-auto">
    <item
        android:id="@+id/homeFragment"
        android:icon="@drawable/main_btm_home_selector"
        app:showAsAction="always"
        android:enabled="true"
        android:title="홈"
        tools:ignore="AlwaysShowAction" />
    <item
        android:id="@+id/lookFragment"
        android:icon="@drawable/main_btm_look_selector"
        app:showAsAction="always"
        android:title="둘러보기" />
    <item
        android:id="@+id/searchFragment"
        android:icon="@drawable/main_btm_search_selector"
        app:showAsAction="always"
        android:title="검색" />
    <item
        android:id="@+id/lockerFragment"
        android:icon="@drawable/main_btm_my_selector"
        app:showAsAction="always"
        android:title="보관함" />

</menu>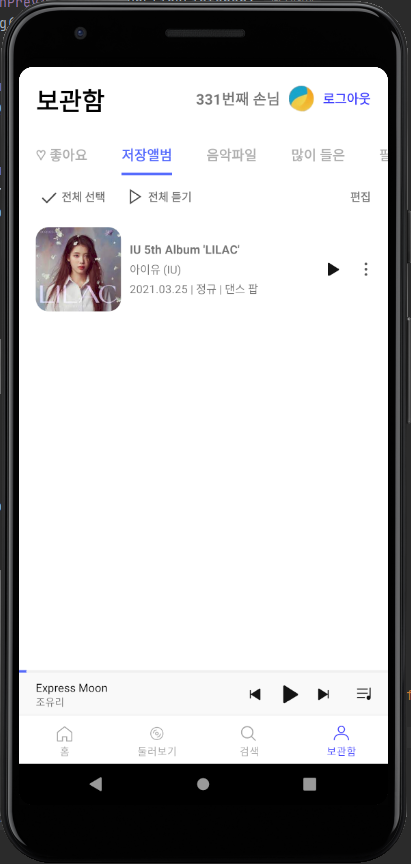
바닥에 예쁘게 깔린다.
 binding.mainBnv.setOnItemSelectedListener {
            when (it.itemId) {
                R.id.homeFragment -> {
                    supportFragmentManager.beginTransaction()
                        .replace(R.id.main_frm, HomeFragment())
                        .commitAllowingStateLoss()
                    return@setOnItemSelectedListener true
                }

                R.id.lookFragment -> {
                    supportFragmentManager.beginTransaction()
                        .replace(R.id.main_frm, LookFragment())
                        .commitAllowingStateLoss()
                    return@setOnItemSelectedListener true
                }

                R.id.searchFragment -> {
                    supportFragmentManager.beginTransaction()
                        .replace(R.id.main_frm, SearchFragment())
                        .commitAllowingStateLoss()
                    return@setOnItemSelectedListener true
                }

                R.id.lockerFragment -> {
                    supportFragmentManager.beginTransaction()
                        .replace(R.id.main_frm, LockerFragment(false))
                        .commitAllowingStateLoss()
                    return@setOnItemSelectedListener true
                }

            }
            false
        }
https://developer.android.com/guide/fragments/fragmentmanager?hl=ko
모든 FragmentActivity 및 그 서브클래스(예: AppCompatActivity)는 getSupportFragmentManager() 메서드를 통해 FragmentManager에 액세스할 수 있습니다.
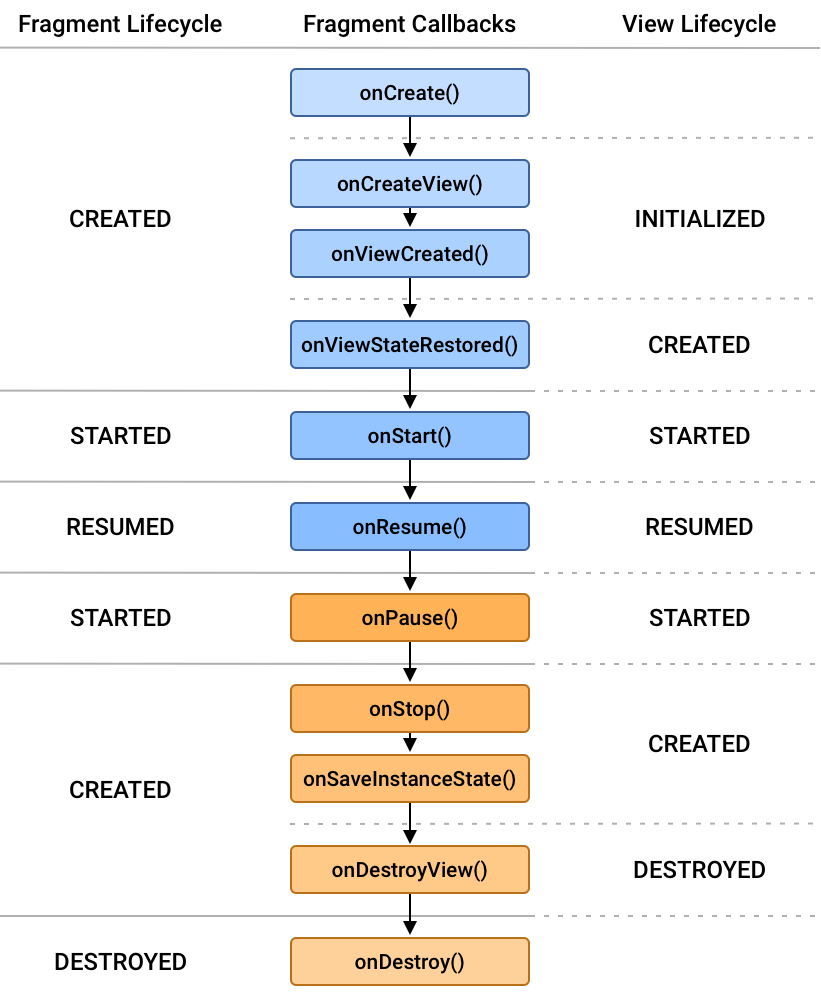
프래그먼트 State
- INITIALIZED
- CREATED
- STARTED
- RESUMED
- DESTROYED
setMaxLifecycle() 프래그먼트의 최대 상태를 설정한다.
액티비티의 생명주기와 비슷한 듯