
TodoList 예제를 통해 Mobx-State-Tree를 이해해보자
세팅
npm install -g expo-cliexpo init "파일명"- cd "파일명"
yarn add mobx mobx-react mobx-state-treeyarnornpm installyarn startornpm start
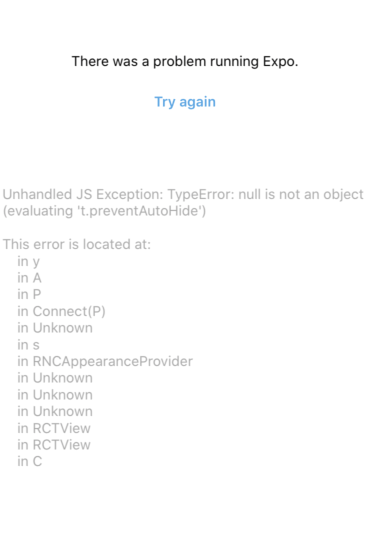
를 치면 localhost 호스트 창과 휴대폰 모양의 창이 뜰텐데 혹시 아래와 같은
error가 뜬다면 해당 창을 띄운 터미널에i를 누르고 enter
import
import { StatusBar } from "expo-status-bar";
import React, { useState } from "react";
import {
  StyleSheet,
  Text,
  View,
  TextInput,
  Button,
  SafeAreaView,
} from "react-native";
import { types } from "mobx-state-tree";
import { observer } from "mobx-react";
Mobx
우선 Mobx로 만든 toDoList를 살펴보고 Mobx-State-Tree와의 차이를 보자 , 아래 코드는 위 세팅과 import와 별개이다.
   const state = observable({
      todoList: ["Buy milk"]
    });
    const actions = {
      addTodo(todo) {
        state.todoList.push(todo);
      },
      removeTodo(todo) {
        state.todoList.remove(todo);
      }
    };
    const TodoApp = observer(() => {
      const [todo, setTodo] = useState("");
      return (
        <View style={S.container}>
          <TextInput value={todo} onChangeText={setTodo} placeholder="I have to..." />
          <Button
            title="ADD"
            onPress={() => {
              actions.addTodo(todo);
              setTodo("");
            }}
          />

          <Text>Todos:</Text>
          {state.todoList.map(todo => (
            <View style={S.row}>
              <Text>{todo}</Text>
              <Button title="X" onPress={() => actions.removeTodo(todo)} />
            </View>
          ))}
        </View>
      );
    });
Mobx 훌륭한 라이브러리이지만 앱이 더 커질 경우 관리해야하는 state이 늘어난다. 그에 따라 자연스레 우리는 여러개의
stores로 분리해서 stuff를 넣게 되며 앱의 다른영역들 간의 communication이 복잡해지기 시작해진다.
Mobx-State-Tree
이 때
Mobx-State-Tree를 쓰게된다. Mobx-State-Tree(이하 MST)는 MobX를 기반으로 한state management library이다. 이것을 씀으로써 우리는 트리모델 구조안에서state` 관리함과 동시에 우리는 트리 구조에서 자유롭게 위 아래 이동할 수 있다.
Data Validation
MST 는 Mobx 보다 훨씬 strict하다.
Mobx 에서 addTodo 부분을 보면 하나의 매개변수를 받고 그것을 todoList에 push하는 addTodo라는 action이 있다
  addTodo(todo) {
        state.todoList.push(todo);
},- 이때 우리는 언제나
string으로 매개변수를 넘겨주지만 정말 쉽게 실수로 유효하지 않는 data를addTodo에 넘겨줄 가능성이 있다. 더 큰 앱의 경우 앱의 다양한 영역을 같은 state으로 관리하는 것이 흔한 일이기에addTodo(todo)를 예를들어addTodo({ todo }같이 실수할 가능성이 크게 된다.이럴 때 Mobx의 경우 error를 던져 주지 않지만 MST의 경우 error를 바로 던져준다. 이것이 바로 MST data validation이다.
이제 MST의 todoList App을 살펴보자
const Store = types
  .model("Store", {
    todoList: types.array(types.string),
  })
  .actions((self) => {
    return {
      addTodo(todo) {
        self.todoList.push(todo);
      },
      removeTodo(todo) {
        self.todoList.remove(todo);
      },
    };
  });
MST에서 제일 첫 번째로 해야될 일은data model를 정의하는 것이다. 이것은 당신이 갖고 있는 data의 shape과 type을 결정하는 계획이라고 보면 된다. 이 방식을 통해 우리는 data와 그 데이터를 변경시키는 action을 한 location에 둘 수 있다.
위 예에서는
todos를 더하고 빼는 작업을 위한todos의 배열과 액션을 담는 Store model을 만들었다. 그리고
types.array(types.string)를 통해 기대하는todos의 type이 string이라고 define 해준다.
const store = Store.create({
  todoList: ["Buy milk"],
});
다음으로
Store.create()를 사용해 model의 instance를 생성하고 최초의 state을 첫 번째 인자로 넘겨준다.
const TodoApp = observer(() => {
  const [todo, setTodo] = useState("");
  return (
    <SafeAreaView style={styles.toDoWrapper}>
      <View style={styles.row}>
        <TextInput
          value={todo}
          onChangeText={setTodo}
          placeholder="I have to..."
        />
        <Button
          title="ADD"
          onPress={() => {
            store.addTodo(todo);
            setTodo("");
          }}
        />
      </View>
      <Text>Todos:</Text>
      {store.todoList.map((todo) => (
        <View style={styles.row}>
          <Text>{todo}</Text>
          <Button title="X" onPress={() => store.removeTodo(todo)} />
        </View>
      ))}
    </SafeAreaView>
  );
});

export default function App() {
  return (
    <View style={styles.container}>
      <TodoApp />
    </View>
  );
}

const styles = StyleSheet.create({
  container: {
    marginTop: 50,
    flex: 1,
    backgroundColor: "lightgrey",
    alignItems: "center",
    justifyContent: "center",
  },
  toDoWrapper: {
    // marginTop: 50,
    flex: 0.5,
    width: "100%",
    backgroundColor: "white",
    alignItems: "center",
    justifyContent: "center",
  },
  row: {
    flexDirection: "row",
    alignItems: "center",
  },
});
화면

스타일링을 하지 않아 조악하지만 위와 같은 화면이 구현된다!


react native + mobx
예제나 글이 많지 않아서
접근이 힘들었는데
좋은 글 감사합니다..