게시판 API 만들기
1. API 테스트 정의
설계한 API를 기반으로 테스트 코드를 만들어 나가는 과정이다.
2. Spring Data Rest
Spring Data REST is part of the umbrella Spring Data project and makes it easy to build hypermedia-driven REST web services on top of Spring Data repositories.
Spring Data REST builds on top of Spring Data repositories, analyzes your application’s domain model and exposes hypermedia-driven HTTP resources for aggregates contained in the model.
- Spring Data Rest를 이용하여 Entity 클래스들과 Repository를 이용해서 빠르게 Restful한 API를 만들 수 있다.
- 기본적인 데이터 Serving은 Spring Data Rest를 사용하고, 복잡한 데이터를 전달하고자 할 때는 별도로 만들어서 보충하여 개발할 것이다.
2.1 의존성 추가
implementation 'org.springframework.boot:spring-boot-starter-data-rest'
implementation 'org.springframework.data:spring-data-rest-hal-explorer'-
Rest Repositories - Exposing Spring Data repositories over REST via Spring Data REST.
Spring Data 프로젝트의 서브 프로젝트로 Repository의 설정만으로 REST API 서버를 구성해주는 신박한 기능입니다. 사용자는 Entity 클래스와 Repository 인터페이스만 작성하면 나머지 CRUD 작업은 모두 알아서 RESTful하게 생성됩니다. -
Spring Data REST의 주요 기능은 Data Repository로부터 Resource를 추출하는 것으로 핵심은 Repository 인터페이스입니다. 예를 들어 OrderRepository와 같은 Repository인터페이스가 있을 경우 소문자의 복수형 resource를 뽑아내어 /orders 를 만듭니다. 그리고 /orders/{id} 하위에 각 item을 관리할 수 있는 resource를 추출해 냅니다.
-
Rest Repositories HAL Explorer - Browsing Spring Data REST repositories in your browser.
Spring Data REST를 시각적으로 보기 위한 도구로 직접 페이지를 구현하지 않아도 시각적으로 볼 수 있도록 도와주는 도구이다.
2.2 옵션 설정
debug: false
management.endpoints.web.exposure.include: "*"

logging:
  level:
    com.fastcampus.projectboard: debug
    org.springframework.web.servlet: debug
    org.hibernate.type.descriptor.sql.BasicBinder: trace

spring:
  datasource:
    url: jdbc:mysql://localhost:3306/board
    username: artist
    password: thisisTESTpw!#%&
    driver-class-name: com.mysql.cj.jdbc.Driver
  jpa:
    defer-datasource-initialization: true
    hibernate.ddl-auto: create
    show-sql: true
    properties:
      hibernate.format_sql: true
      hibernate.default_batch_fetch_size: 100
  sql.init.mode: always
  ### 추가된 부분
  data.rest:
    base-path: /api
detection-strategy: annotated # annotation을 지정한 repository에 한해서 노출-
dectection-stategy 전략

-
Repository에 적용
@RepositoryRestResource 어노테이션을 통해 지정할 수 있다.
@RepositoryRestResource
public interface ArticleRepository extends JpaRepository<Article, Long> {
}
@RepositoryRestResource
public interface ArticleCommentRepository extends JpaRepository<ArticleComment, Long> {}-
옵션 지정할 때 설정한 base-path를 입력하면 아래와 같은 모습을 볼 수 있다.(localhost:8080/api)
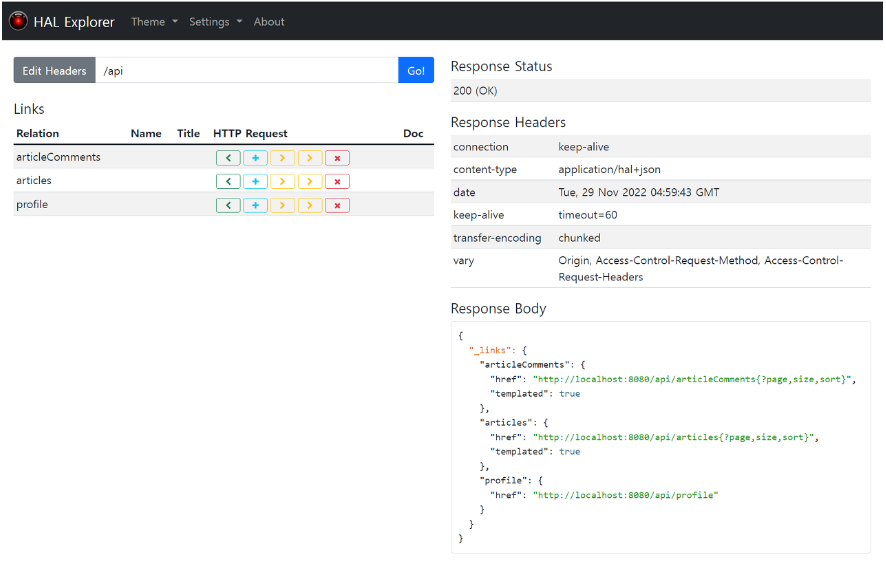
-
페이징된 기본 값인 20페이지를 API로 볼 수있다.
Data REST를 붙이기만 한 것으로 구현 코드 또는 Controller 없이 Restful API가 생성되는 것을 볼 수 있다.
3. Spring Data REST 테스트
@DisplayName("Data REST - API 테스트")
@WebMvcTest
public class DataRestTest {

    private final MockMvc mvc;

    public DataRestTest(@Autowired MockMvc mvc) {
        this.mvc = mvc;
    }

    @DisplayName("[api] 게시글 리스트 조회")
    @Test
    void givenNothing_whenRequestingArticles_thenReturnsArticlesJsonResponse() throws Exception {
        // Given

        // When & Then
        mvc.perform(get("/api/articles"))
                .andExpect(status().isOk())
                .andExpect(content().contentType(MediaType.valueOf("application/hal+json")))
                .andDo(print());
    }
}- Controller에 대한 테스트이므로 splice test는 @WebMvcTest일 것이다.
- contentType은 일반적인 application/json이 아닌 Data REST로 만든 미디어 타입은 application/hal+json이다.
3.1 404 에러 발생

-
AS-IS
localhost:8080/api/articles를 검색하면 정상적으로 동작하는데 테스트를 진행하게 되면 에러가 발생하는 것을 볼 수 있다. @WebMvcTest는 slice test이기 때문에 controller 외에 Bean들을 로드하지 않고, Controller와 연관된 최소한으로 읽어들인다. 그래서 Data REST의 AutoConfiguration을 읽어들이지 않는다. -
TO-BE
-
추가적으로 AutoConfiguration을 연결시키는 방법
→ 굉장히 번거롭고 복잡하고 힘들다. -
Integeration Test로 작성하는 방법
2.1 @WebMvcTest to @SpringBootTest 으로 전환
2.2 경량화를 위해 webEnvironment를 다른 것을 사용하고 싶지만..WebEnvironment.Mock 사용해야하므로 그대로 작성
2.3 MockMvc에 존재를 알 수 없기 때문에 @AutoConfigureMockMvc 추가
@DisplayName("Data REST - API 테스트")
@AutoConfigureMockMvc
@WebMvcTest
public class DataRestTest {

    private final MockMvc mvc;

    public DataRestTest(@Autowired MockMvc mvc) {
        this.mvc = mvc;
    }

    @DisplayName("[api] 게시글 리스트 조회")
    @Test
    void givenNothing_whenRequestingArticles_thenReturnsArticlesJsonResponse() throws Exception {
        // Given

        // When & Then
        mvc.perform(get("/api/articles"))
                .andExpect(status().isOk())
                .andExpect(content().contentType(MediaType.valueOf("application/hal+json")))
                .andDo(print());
    }
}- 실행 결과
3.2 문제 발생
-
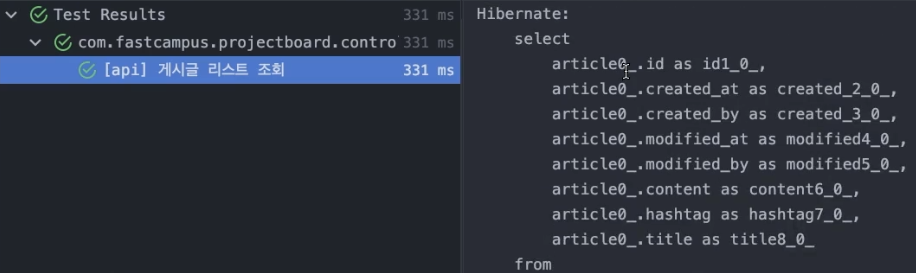
AS-IS
Integration 테스트로 API를 실행한 결과가 Repository까지 전부 실행하여 query까지 출력되는 모습을 볼 수 있다.
즉 DB에 영향을 주는 테스트가 되어버렸다. -
TO-BE
@Transactional 어노테이션을 추가하여 해결할 수 있다.
테스트 환경에서 Transactional의 기본동작은 Rollback이다. 모든 Data REST 테스트에 unit 테스트는 Rollback 상태로 묶이게 된다.
@DisplayName("Data REST - API 테스트")
@Transactional
@AutoConfigureMockMvc
@WebMvcTest
public class DataRestTest {}
3.3 완성된 테스트 코드
@Disabled("Spring Data REST 통합테스트는 불필요하므로 제외시킴")
@DisplayName("Data REST - API 테스트")
@Transactional
@AutoConfigureMockMvc
@SpringBootTest
public class DataRestTest {

    private final MockMvc mvc;

    public DataRestTest(@Autowired MockMvc mvc) {
        this.mvc = mvc;
    }

    @DisplayName("[api] 게시글 리스트 조회")
    @Test
    void givenNothing_whenRequestingArticles_thenReturnsArticlesJsonResponse() throws Exception {
        // Given

        // When & Then
        mvc.perform(get("/api/articles"))
                .andExpect(status().isOk())
                .andExpect(content().contentType(MediaType.valueOf("application/hal+json")))
                .andDo(print());
    }

    @DisplayName("[api] 게시글 단건 조회")
    @Test
    void givenNothing_whenRequestingArticle_thenReturnsArticleJsonResponse() throws Exception {
        // Given

        // When & Then
        mvc.perform(get("/api/articles/1"))
                .andExpect(status().isOk())
                .andExpect(content().contentType(MediaType.valueOf("application/hal+json")))
                .andDo(print());
    }

    @DisplayName("[api] 게시글 -> 댓글 리스트 조회")
    @Test
    void givenNothing_whenRequestingArticleCommentsFromArticle_thenReturnsArticleCommentsJsonResponse() throws Exception {
        // Given

        // When & Then
        mvc.perform(get("/api/articles/1/articleComments"))
                .andExpect(status().isOk())
                .andExpect(content().contentType(MediaType.valueOf("application/hal+json")))
                .andDo(print());
    }

    @DisplayName("[api] 댓글 리스트 조회")
    @Test
    void givenNothing_whenRequestingArticleComments_thenReturnsArticleCommentsJsonResponse() throws Exception {
        // Given

        // When & Then
        mvc.perform(get("/api/articleComments"))
                .andExpect(status().isOk())
                .andExpect(content().contentType(MediaType.valueOf("application/hal+json")))
                .andDo(print());
    }

    @DisplayName("[api] 댓글 단건 조회")
    @Test
    void givenNothing_whenRequestingArticleComment_thenReturnsArticleCommentJsonResponse() throws Exception {
        // Given

        // When & Then
        mvc.perform(get("/api/articleComments/1"))
                .andExpect(status().isOk())
                .andExpect(content().contentType(MediaType.valueOf("application/hal+json")))
                .andDo(print());
    }
}- 요약
- 꼭 필요한 테스트는 아니지만, 공부를 목적으로 Data REST의 동작을 테스트한 것이다.
- Spring Data REST가 아닌 평범한 Integration 테스트에 예상되는 Repository를 mocking해서 repository까지 흐름을 끊어 Integration Cycle을 끊을 수 있다. 하지만 Spring Data REST를 사용하기 때문헤 함부로 mocking해버리면 테스트가 정상적으로 동작하지 않을 수 있다. 그래서 mocking도 안되고 결국 Integration 테스트를 사용할 수 밖에 없다.
- DB 접근이 일어나므로 안전을 위해
@Transactional을 적용하여 테스트 안에서는 Rollback 정책으로 동작한다.- 인증 기능(로그인, 회원가입)을 제외한 모든 API는 구현됨.
4. API 구현
Spring Data REST 기능을 사용하면서 테스트와 동시에 구현되었다.
- AS-IS
직접 만들어야 하는 회원가입과 로그인을 제외하고 데이터를 단순히 Serving하는 API는 설계대로 구현 완료됨.
구체적인 검색 기능은 구현되지 않음.
- 검색 기능을 구현하면서 querydsl을 연동시키는 방법을 알아볼 것이다. => Querydsl Setup
- Spring Data REST와 querydsl에 연계 기능이 어떤 식으로 서비스가 제공되고 있는지 알아볼 것이다.
- QuerydslPredicateExecutor
- QuerydslBinderCustomizer
4.1 Querydsl Setting
4.1.1 의존성 추가
- Spring initializr ❌
- 현재 지원되지 않는다.
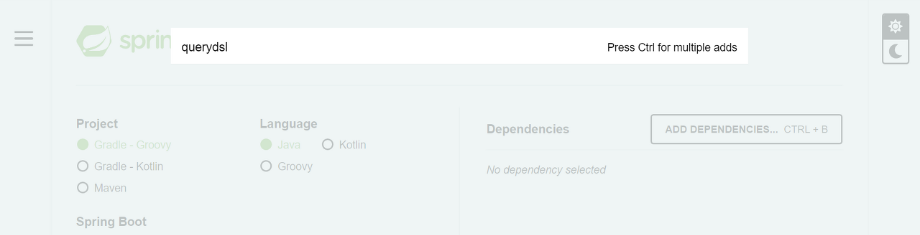
- ewerk-querydsl ❌
예제가 많이 정리되어 있고, 업데이트가 이루어지고 있지만.. Gradle쪽은 상대적으로 querydsl과 관련된 업데이트가 늦는다. 검색을 할경우 간단하게 gradle plugin을 이용해서 보다 적은 줄로 적용하는 예제가 있지만, 이 방법은 추천하지 않는다.
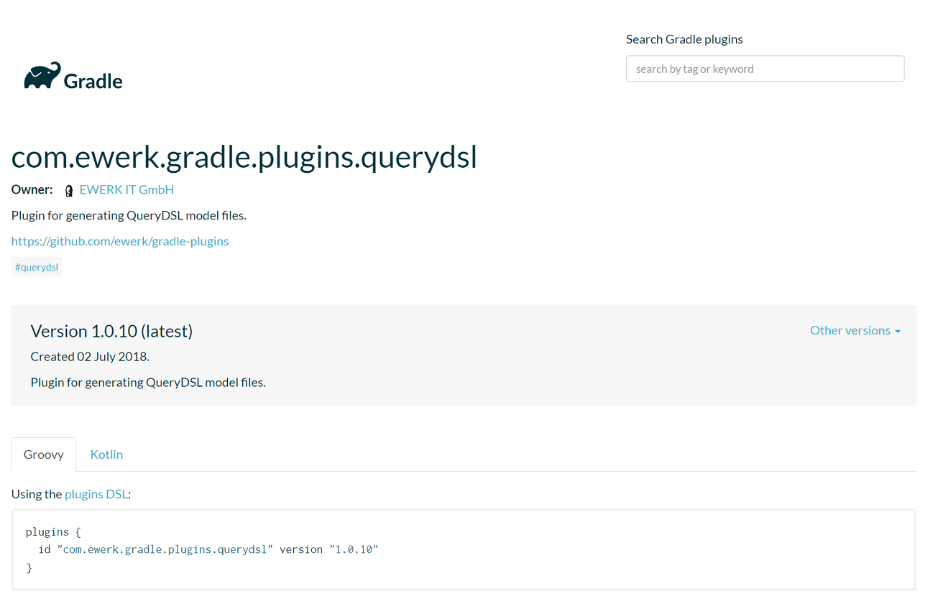
추천하지 않는 이유
1. commit 주기가 오래되었다.
2. 현재 최신버전은 5.x.x인데 반해 ewerk는 4.x.x로 플러그인이 맞지 않는 부분이 있어 정확한 동작을 보장하지 못할 수 있다.
- 직접 Dependency Setup
// queryDSL 설정
implementation "com.querydsl:querydsl-jpa"
implementation "com.querydsl:querydsl-core"
implementation "com.querydsl:querydsl-collections"
annotationProcessor "com.querydsl:querydsl-apt:${dependencyManagement.importedProperties['querydsl.version']}:jpa" // querydsl JPAAnnotationProcessor 사용 지정
annotationProcessor "jakarta.annotation:jakarta.annotation-api" // java.lang.NoClassDefFoundError (javax.annotation.Generated) 대응 코드
annotationProcessor "jakarta.persistence:jakarta.persistence-api" // java.lang.NoClassDefFoundError (javax.annotation.Entity) 대응 코드- querydsl-jpa, core, apt가 가장 중요.
- collections이 없어도 querydsl의 기본 기능을 사용하는데 문제가 없다.(querydsl의 모든 기능을 포함하기 위해 넣음)
${dependencyManagement.importedProperties['querydsl.version']}은 gradle에 groovy 문법을 이용해 버전이 자동으로 기입되도록 한 것- 다른 Dependency에 버전은 삽입하지 않은 이유는 spring dependency management가 관리해주는 대상들이기 때문 (마지막 부분에 버전을 적는 것만 생략 가능)
- jakarta.annotation-api, jakarta.persistence-api는 에러를 대응하기 위한 조치
4.1.2 Querydsl 연동 옵션 Setting
// Querydsl 설정부
def generated = 'src/main/generated'

// querydsl QClass 파일 생성 위치를 지정
tasks.withType(JavaCompile) {
	options.getGeneratedSourceOutputDirectory().set(file(generated))
}

// java source set 에 querydsl QClass 위치 추가
sourceSets {
	main.java.srcDirs += [ generated ]
}

// gradle clean 시에 QClass 디렉토리 삭제
clean {
	delete file(generated)
}
querydsl이 자동으로 QClass를 생성해주는데 기능이 있는데 그것들이 일반적으로 build 디렉토리 내부에 들어가게 되는데 그것들은 src/main으로 꺼내오기 위한 방법이다.
Why❓ - IDE(Intellij 등)를 이용하여 Build할 때 생길 수 있는 잠재적인 문제를 피하기 위한 방법이다.
Intellij에 경우 직접 경로를 설정하지 않고 기본 값을 주고 Q클래스를 생성시키면 Build 디렉토리에 생성되는데 gradle build할 때 gradle 빌드 도구가 스캔하는 영역과 IDE가 build할 때 Intellij가 스캔하는 영역이 서로 차이가 있다.
이러한 내부적인 동작 차이 때문에 Intellij가 Build를 시도할 때 Gradle Build를 시도하면서 Gradle이 스캔하는 영역과 Intellij가 스캔하고자 하는 Build 클래스 파일이 있는 영역들을 한 번더 스캔하면서 중복 스캔이 일어난다.
첫 번째 스캔때 QClass의 위치를 알았고 불러왔는데 똑같은 클래스를 또 불러오려고 하다가 충돌나서 중복 문제가 발생하는 것이다. 이 문제를 해결하기 강제로 Q클래스의 위치를 옮긴 것이다.
이를 통해 Gradle Build할때 동작과 IDE Build 할때 동작이 동일해진다.
4.2 API 검색 기능 구현