Jenkins 노드 만들어서 실습하기
| 노드 | CPU | RAM | IP | 기타 |
|---|---|---|---|---|
| master | 4 | 4 | 192.168.8.100 | jenkins(.201), registry(5000/tcp), registry-ui(8888→8080) |
| worker1 | 2 | 2 | 192.168.8.101 | |
| gitlab | 4 | 4 | 192.168.8.199 | gitlab-runner, ansible |
별도의 노드로 Jenkins 추가 예정
| jenkins | 2 | 2 | 192.168.8.200 | ansible |
|---|
- gitlab 주소 변경
vi /etc/netplan/01-network-manager-all.yamlversion: 2
ethernets:
ens32:
addresses: [192.168.8.199/24]
gateway4: 192.168.8.2
nameservers:
addresses: [8.8.8.8, 8.8.4.4]netplan apply- gitlab 설정
이미 설정되어 있으나, IP 정보를 수정해야 한다.
vi /etc/gitlab/gitlab.rb32번째 줄 external_url 'http://192.168.8.199' 로 변경
gitlab-ctl reconfigure변경된 IP 정보를 반영하여 서비스 재시작
기존 패스워드는 그대로 사용할 수 있다. (root/test1234)
- gitlab에 gitlab-runner, ansible 설치
curl -L https://packages.gitlab.com/install/repositories/runner/gitlab-runner/script.deb.sh | sudo bashapt-get install -y gitlab-runnerapt-add-repository ppa:ansible/ansible
apt-get install -y ansible
apt-get update- 1차 권한 조정
일반 사용자처럼 동작하는 agent인 gitlab-runner는 내부적으로 docker을 이용하여 이미지를 만들고 이를 push, pull 할 수 있어야 한다. 따라서 아래의 설정이 필요하다.
4-1. /var/run/docker.sock 퍼미션 조정
chmod 666 /var/run/docker.sock4-2. /etc/docker/daemon.json
{
        "insecure-registries" : [ "192.168.8.100:5000" ]
}- ansible 설정
vi /etc/ansible/hosts[master]
192.168.8.100
[worker]
192.168.8.101gitlab-runner 계정에서
ssh-keygen -q -N ""공개키 pub을 master, worker들의 authorized_keys로 등록해 두어야 한다.
master,worker에서 ~/.ssh는 없는 상태이다. 디렉토리 만들어서 퍼미션 700으로 바꾸거나 ssh-keygen -q -N “” 명령어를 통해 만들어도 된다.(.ssh는 700이어야 함)
master,worker 에서 만든 id_rsa, id_rsa.pub은 사용하지 않는다(디렉토리 만들기 위해서 만든것)
gitlab에 있는 id_rsa.pub을 master,worker의 authorized_keys 등록 퍼미션은 600
cat ~/.ssh/id_rsa.pub키 복사
master,worker에서 파일을 만들고
touch ~/.ssh/authorized_keys
vi ~/.ssh/authorized_keys
pub 키를 붙여넣는다.
chmod 600 ~/.ssh/authorized_keyspublic key를 이용하여 로그인 가능하도록 설정해주어야 한다.
master, worker에서
vi /etc/ssh/sshd_config39번째 줄 PubkeyAuthentication yes 주석 해제
이후 ssh 재시작
systemctl restart ssh- gitlab-runner 퍼미션 조정
gitlab-runner가 실행하는 명령은 향후 ansible 등에게 전달할 때 사용해야 한다.
그런데 쉘을 실행할 때 만약 패스워드를 요구한다면 CI 도중 사용자에게 패스워드를 요구하면서 멈출 것이다. 이를 위해 gitlab-runner 사용자의 명령은 패스워드 요구 없이 root 권한 호출하여 사용가능하도록 해주어야 한다.
vi /etc/sudoers27 gitlab-runner ALL=NOPASSWD: ALL
또한 해당 계정을 이용하여 ansible 명령을 전달해야 하므로 /etc/ssh/ssh_config 파일도 일부 조정한다.
- 아까 gitlab-runner에서 하지않고 root에서 했다면?
root@gitlab:~# mkdir /home/gitlab-runner/.ssh
root@gitlab:~# cp ~/.ssh/id_rsa /home/gitlab-runner/.ssh/id_rsa
root@gitlab:~# chmod 700 /home/gitlab-runner/.ssh
root@gitlab:~# chmod 600 /home/gitlab-runner/.ssh/id_rsa
root@gitlab:~# chown gitlab-runner.gitlab-runner /home/gitlab-runner/.ssh
root@gitlab:~# chown gitlab-runner.gitlab-runner /home/gitlab-runner/.ssh -R
vi /etc/ssh/ssh_configHost 192.168.8.*
IdentityFile /home/gitlab-runner/.ssh/id_rsassh-keyscan 192.168.8.100 >> ~/.ssh/known_hosts
ssh-keyscan 192.168.8.101 >> ~/.ssh/known_hosts- ansible 연결 확인
root@gitlab:~# ansible all -m ping -u root
192.168.8.100 | SUCCESS => {
    "ansible_facts": {
        "discovered_interpreter_python": "/usr/bin/python3"
    },
    "changed": false,
    "ping": "pong"
}
192.168.8.101 | SUCCESS => {
    "ansible_facts": {
        "discovered_interpreter_python": "/usr/bin/python3"
    },
    "changed": false,
    "ping": "pong"
}root@gitlab:~# ansible worker -m command -a 'hostname' -u root
192.168.8.101 | CHANGED | rc=0 >>
worker1New Project > blank >
su rootroot@gitlab:~# gitlab-runner register
Runtime platform arch=amd64 os=linux pid=15480 revision=0d4137b8 version=15.5.0
Running in system-mode.
Enter the GitLab instance URL (for example, https://gitlab.com/):
http://192.168.8.199
Enter the GitLab instance URL (for example, https://gitlab.com/):
Enter the registration token:
GR1348941Pao6GSBCebLzkUphxhCs
Enter a description for the runner:
[gitlab]: lab1_gitlab_runner
Enter tags for the runner (comma-separated):
build-server
Enter optional maintenance note for the runner:
Registering runner... succeeded runner=GR1348941Pao6GSBC
Enter an executor: virtualbox, docker+machine, docker-ssh, docker, parallels, shell, ssh, docker-ssh+machine, instance, kubernetes, custom:
shell
Runner registered successfully. Feel free to start it, but if it's running already the config should be automatically reloaded!
Configuration (with the authentication token) was saved in "/etc/gitlab-runner/config.toml"시나리오
-
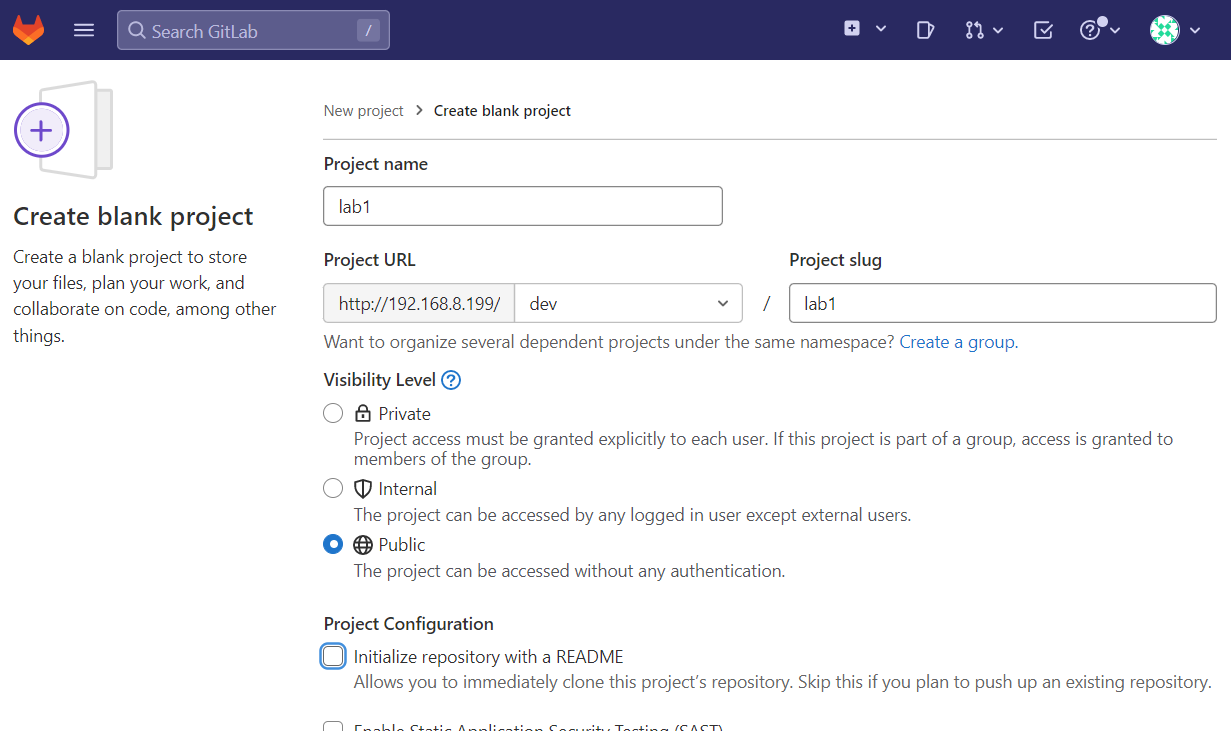
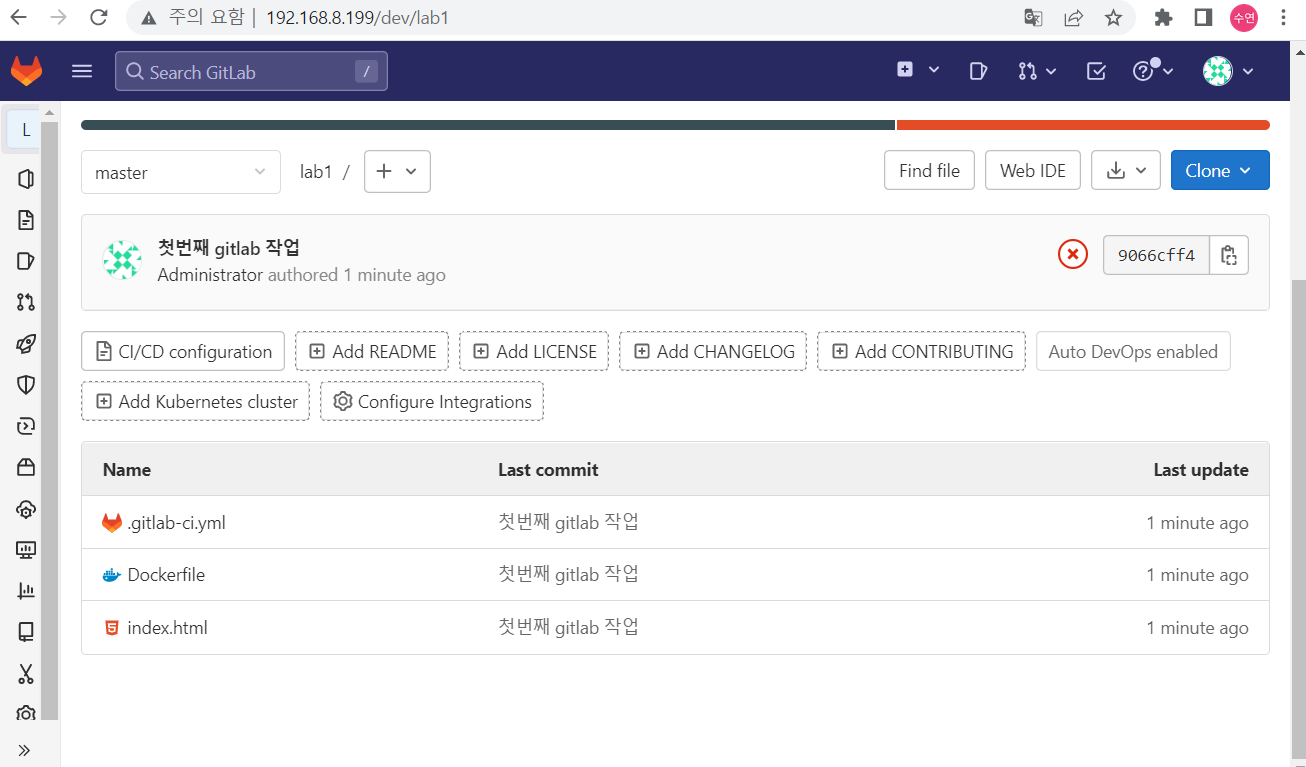
개발자는 Dockerfile, index.html 그리고 Jenkinsfile과 같은 역할을 수행하는 .gitlab-ci.yml 파일을 작성하여 http://192.168.8.199/dev/lab1.git
-
해당 프로젝트에 새로운 파일이 등록된 것을 확인한 gitlab-runner는 작업지시서 역할을 하는 .gitlab-ci.yml 파일을 읽고 ci/cd를 진행한다.
-
Dockerfile을 이용하여 이미지를 사설 저장소에 등록. ansible 이용하여 worker 노드들이 사설저장소에서 이미지를 pull 하도록 설정
위의 과정에서 중단은 없다. 코드를 push 하면 CI → CD 까지 무중단으로 진행된다.
when: manual
- 로컬에서 새폴더 생성 후 git bash
user@LAPTOP-CISI8I61 MINGW64 ~/Desktop/lab1
$ touch Dockerfile index.html .gitlab-ci.yml

user@LAPTOP-CISI8I61 MINGW64 ~/Desktop/lab1
$ echo "<h2>GITLAB CI/CD TEST</h2> > index.html
> ^C

user@LAPTOP-CISI8I61 MINGW64 ~/Desktop/lab1
$ echo "<h2>GITLAB CI/CD TEST</h2>" > index.html

user@LAPTOP-CISI8I61 MINGW64 ~/Desktop/lab1
$ vi Dockerfile
FROM nginx
ADD index.html /usr/share/nginx/html/index.html- .gitlab-ci.yml
lab1-job:
  only:
    - master
  tags:
    - build-server
  # when: manual

  script:
    - docker build -t 192.168.8.100:5000/lab1:1.0 .
    - docker push 192.168.8.100:5000/lab1:1.0
    - ansible worker -u root -m command -a 'docker pull 192.168.8.100:5000/lab1:1.0'
    - echo "작업이 완료되었습니다"
only: -master → master 브랜치에 커밋이 발생하면 반영하겠다는 뜻
tags → build-server를 불러서 사용
when → manual → 수동으로 버튼을 누르면 진행할 수 있도록 함
user@LAPTOP-CISI8I61 MINGW64 ~/Desktop/lab1
$ git init
Initialized empty Git repository in C:/Users/user/Desktop/lab1/.git/

user@LAPTOP-CISI8I61 MINGW64 ~/Desktop/lab1 (master)
$ git remote add origin http://192.168.8.199/dev/lab1.git
$ git add .
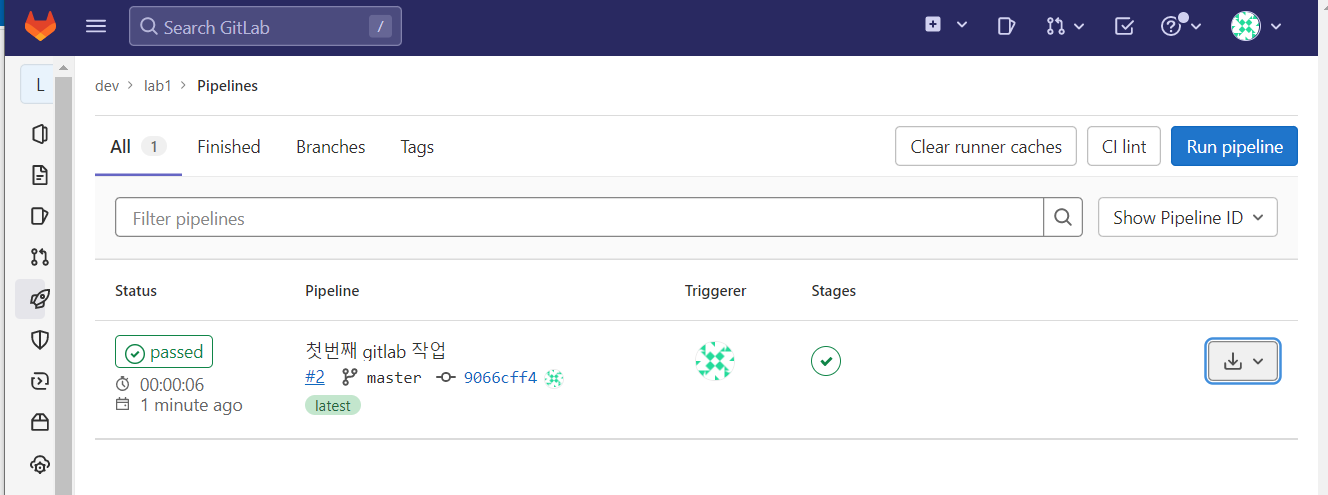
$ git commit -m "첫번째 gitlab 작업"
$ git push origin masterroot/test1234로 인증

로컬 저장소에서 index.html 내용 아무렇게나변경, .gitlab-ci.yml 파일의 내용중 이미지버전을 2.0 으로 when: manual 을 삽입한 뒤,
lab1-job:
  only:
    - master
  tags:
    - build-server
  when: manual

  script:
    - docker build -t 192.168.8.100:5000/lab1:2.0 .
    - docker push 192.168.8.100:5000/lab1:2.0
    - ansible worker -u root -m command -a 'docker pull 192.168.8.100:5000/lab1:2.0'
    - echo "작업이 완료되었습니다"
git add. > git commit -m "두번째 커밋" > git push origin master
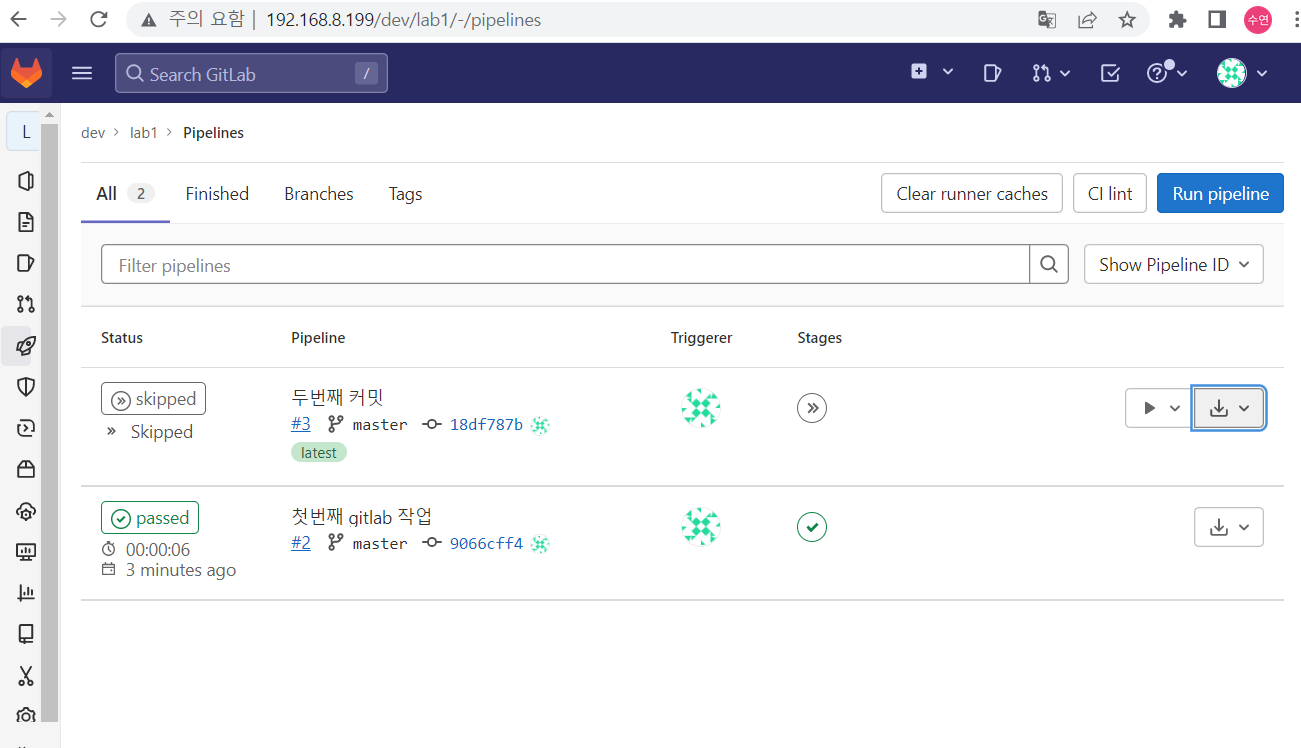
when: manual을 넣으면 플레이 버튼이 생기고, 그 버튼을 누르면 실행된다.
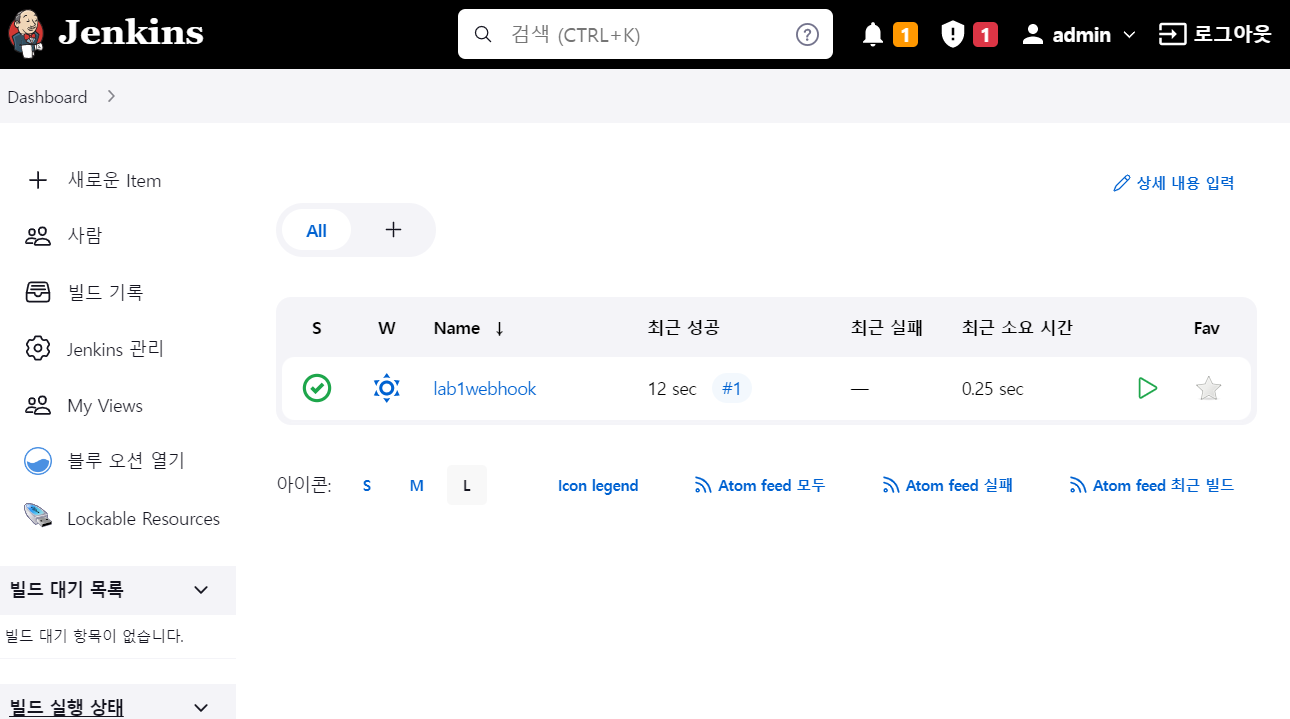
Jenkins 노드
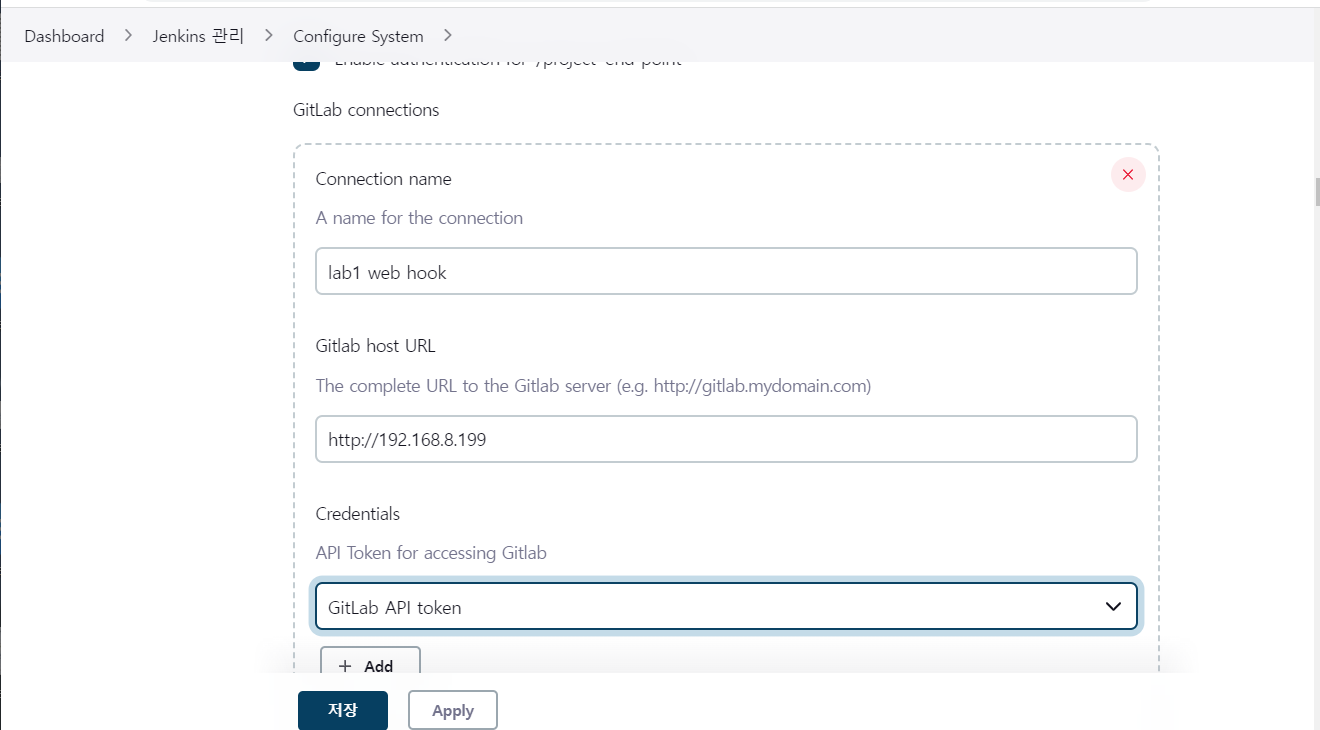
jenkins 주소 : http://192.168.8.200:8080
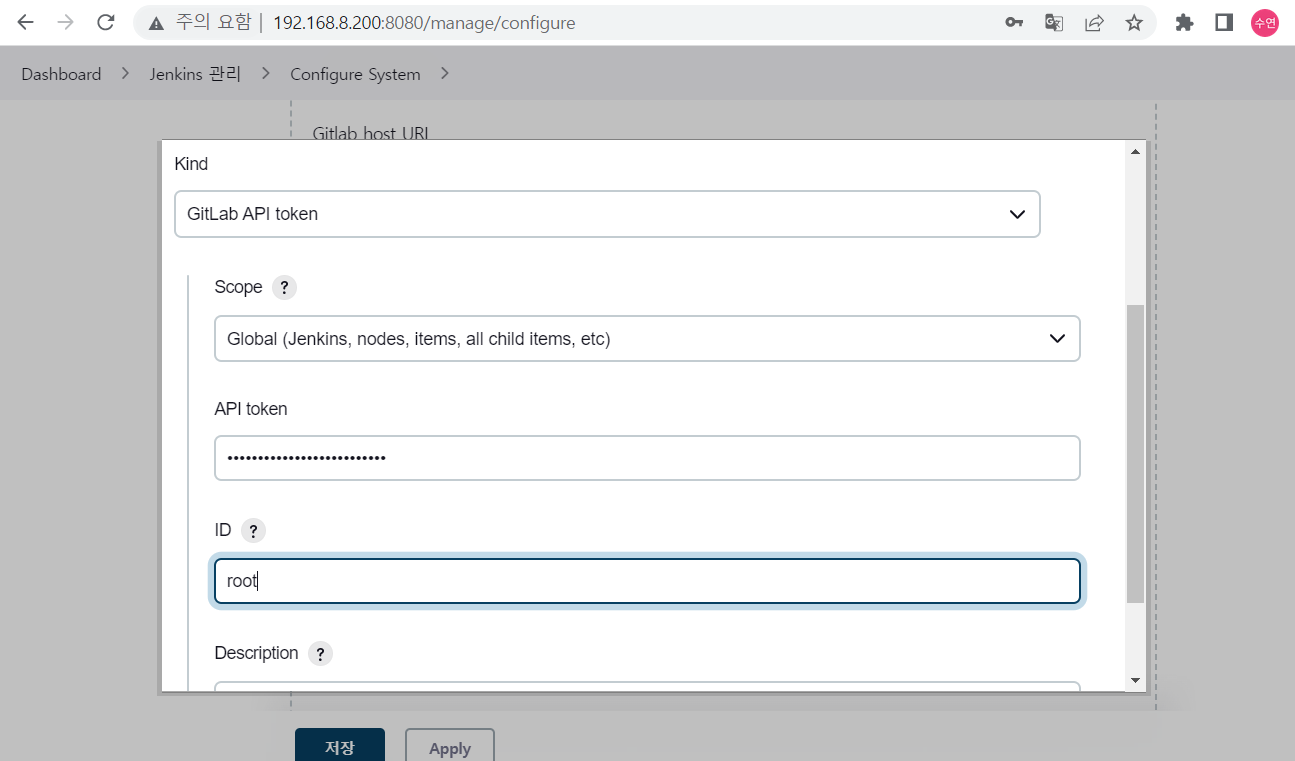
gitlab에서 발행한 토큰 → root / glpat-1tsLBP367sR5GK2Xyesz
New item > lab1webhook > freestyle
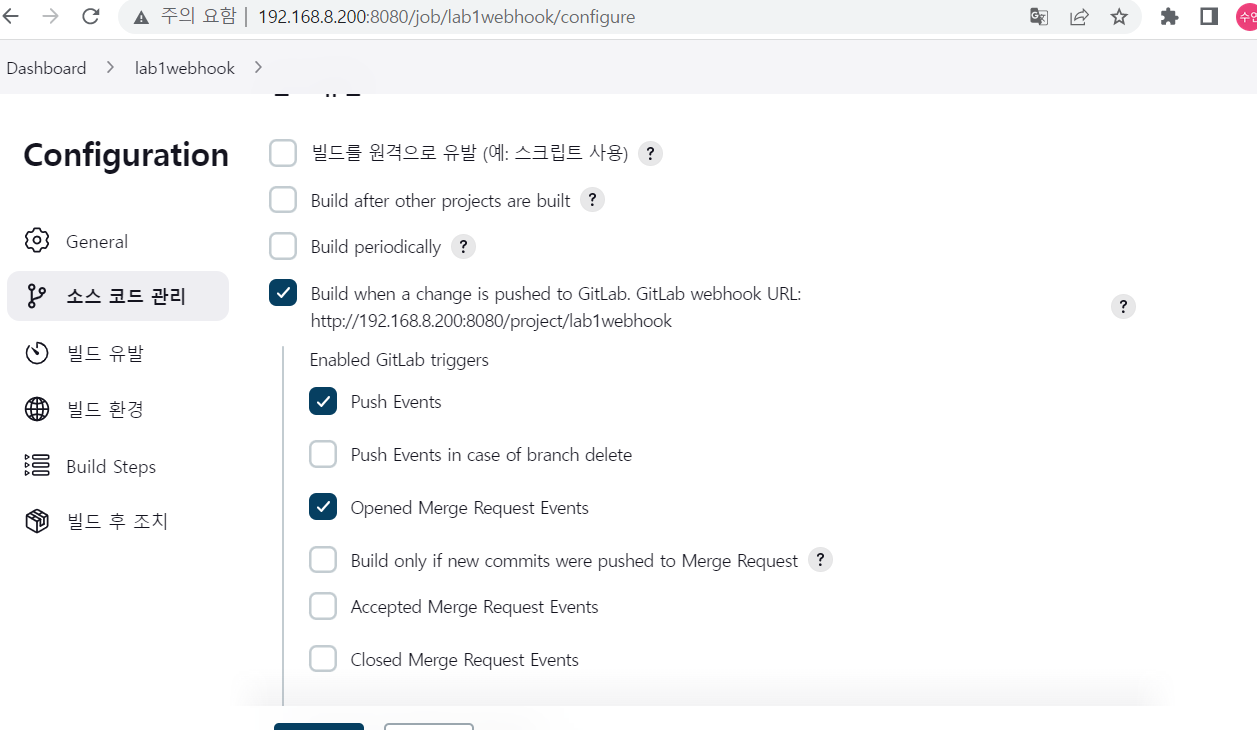
web hook 주소 : http://192.168.8.200:8080/project/lab1webhook
고급 클릭 > secret token generate
jenkins에서 발행한 토큰 : d070610b9b3c34ab9d13701663f05a8d
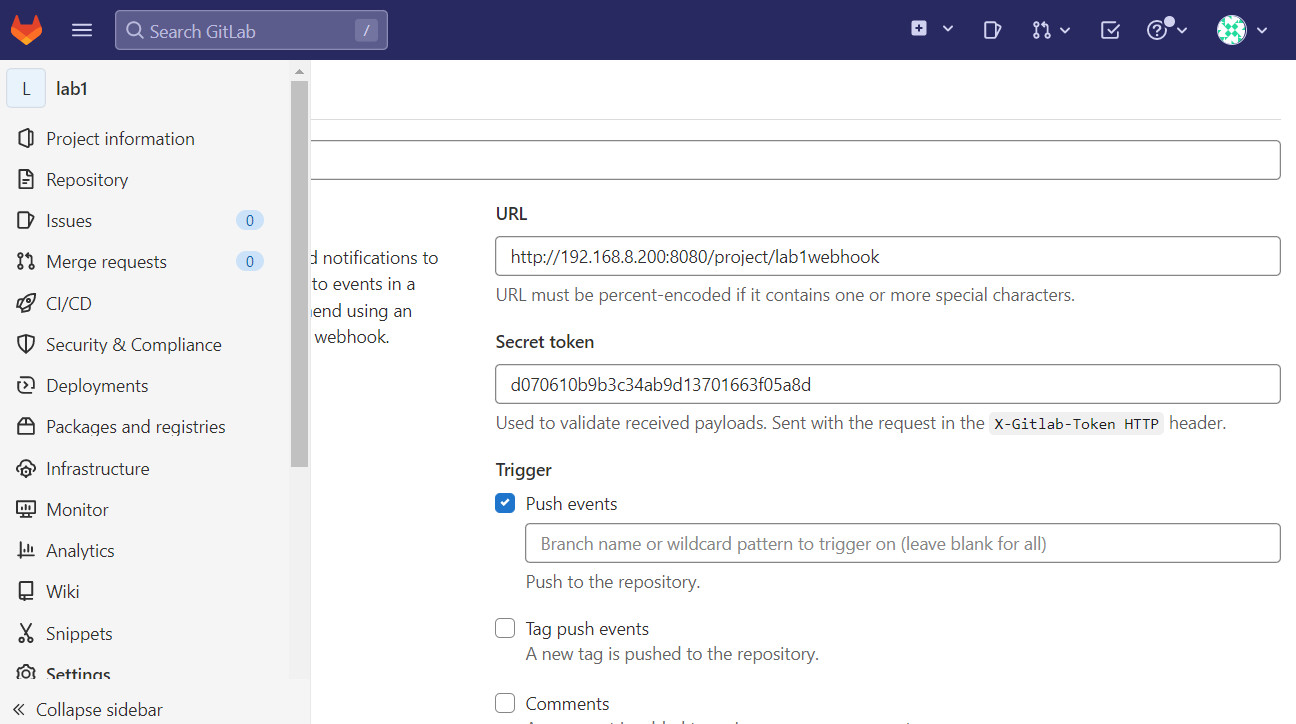
Add webhook 클릭
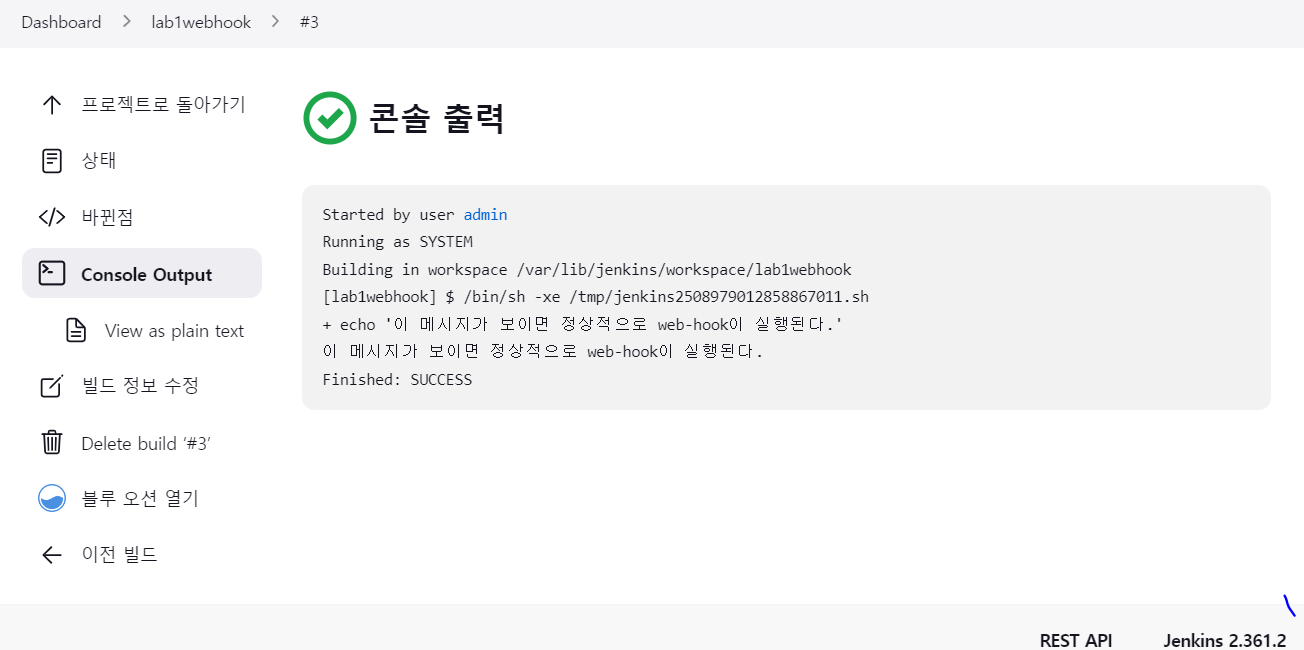
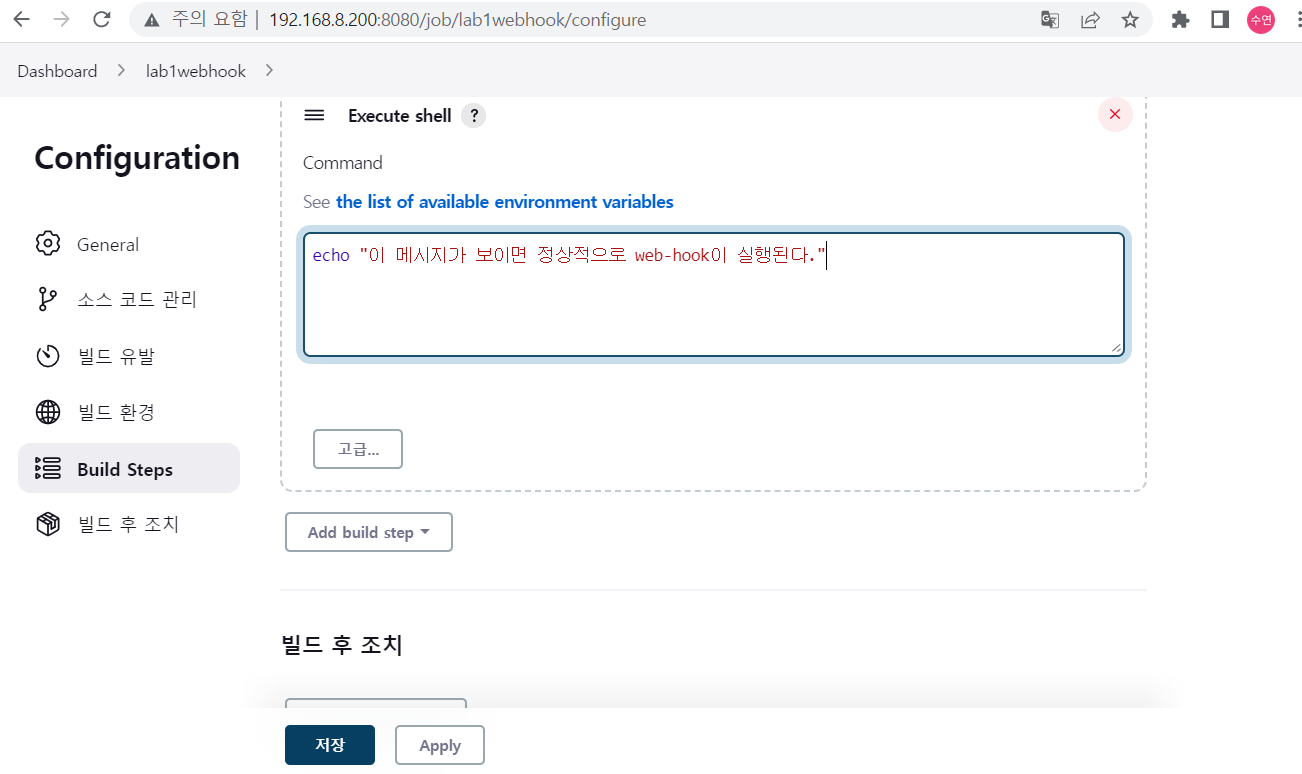
gitlab에 파일이 들어오게 되면 쉘을 실행한다.
Build steps → execute shell
왼쪽 상단 > admin > setting > network
outbound 맨위 체크
192,.168.8.0/24 입력 후 저장
webhook 들어가서 URL, secret 입력 하고 master 후 Add