
날씨 앱
도시 이름을 입력하면, 입력한 도시의 현재 날씨 정보를 화면에 표시해 주는 앱이다. 도시 이름을 잘못 입력하면 서버로부터 응답받은 에러 메시지가 Alert으로 표시된다.
알아야 할 개념들
- 웹 통신과 Protocol
- HTTP
- URL Session
1. 웹 통신과 Protocol
웹 통신은 말 그대로, 인터넷 상에서의 통신을 말한다. 많은 정보들을 주고받기엔, 인터넷에는 엄격한 규약이 존재하는데 이것을 Protocol이라고 부른다. 이번에 알아볼 Protocol은, HTTP이다. 어디 한번!! 알아볼까낭...
2. HTTP
HTTP란?!
Hyper Text Transfer Protocol의 약자로, Hyper Text를 전송하기 위한 Protocol이다. HTML 문서를 주고받는 데 쓰이는 통신 Protocol이라고 보면 된다.
HTTP 통신은 기본적으로 요청(Request)와 응답(Response)로 이루어져 있다. 클라이언트에서 서버를 요청하면 서버는 그에 맞는 응답 결과를 돌려 주고, 클라이언트는 사용자에게 서버로부터 응답받은 결과를 보여 준다. 예를 들어, 우리가 브라우저에 네이버 사이트 주소를 입력하면, 클라이언트는 웹 브라우저를 통해 네이버 서버에 네이버 시작 페이지를 보여 달라고 요청하는 것이고, 네이버 서버는 요청을 받은 후에 시작 페이지에 해당하는 HTML 파일을 클라이언트에게 돌려준다. 여기서 알 수 있는 것이 한 가지 더 있다! 바로, HTTP 통신은 서버와 클라이언트는 연결되어 있지 않다는 것이다. 연결되어 있지 않다는 말은, 서버는 클라이언트가 요청한 정보를 전송하고, 곧바로 연결을 종료시키는 것을 의미한다.
2-1. HTTP 패킷
HTTP 통신은 요청을 보내고 응답을 받을 때 그 저보를 패킷에 넣어 보낸다. 패킷은 크게 Header와 Body로 나누어져 있는데, Header에는 보내는 사람과 받는 사람의 주소, 그리고 패킷의 생명 시간 등이 담겨 있고, Body에는 우리가 전하고자 하는 실질적인 내용이 담겨 있다.
2-2. HTTP Method
클라이언트가 서버에게 HTTP 통신 요청을 하려면, URL 주소와 HTTP 메서드를 정의해 주어야 한다. 서버에서는 메서드에 따라 어떤 요청인지 파악이 가능하다.
- GET: 클라이언트가 서버에 리소스를 요청할 때 사용하는 메서드
- POST: 클라이언트가 서버의 리소스를 새로 만들 때 사용하는 메서드
- PUT: 클라이언트가 서버의 리소스를 전체 수정할 때 사용하는 메서드
- PATCH: 클라이언트가 서버의 리소스를 일부 수정할 때 사용하는 메서드
- DELETE: 클라이언트가 서버의 정상 작동 여부를 확인할 때 사용하는 메서드
- HEAD: 클라이언트가 서버의 정상 작동 여부를 확인할 때 사용하는 메서드
- OPTIONS: 클라이언트가 서버에서 해당 URL이 어떤 메서드를 지원하는지 확인할 때 사용하는 메서드
- CONNECT: 클라이언트가 프록시를 통하여 서버와 SSL 통신을 하고자 할 때 사용하는 메서드
- TRACE: 클라이언트가 서버 간 통신 관리 및 디버깅을 할 때 사용하는 메서드
2-3. HTTP Status
서버는 클라이언트 요청에 응답하면서 요청이 성공적으로 완료되었는지 알려 주는 상태 코드를 함께 보내는데, 이 코드에는 100~500번대가 있다.
- 100번대(Informational): 요청 정보를 처리 중인 상태 (현재는 거의 사용되지 않는다고 한다...)
- 200번대(Success): 요청을 정상적으로 처리한 상태
- 300번대(Redirection): 요청을 완료하기 위해 추가 동작이 필요한 상태
- 400번대(Client Error): 서버가 요청을 이해하지 못한 상태
- 500번대(Server Error): 서버가 요청 처리에 실패한 상태
3. URL Session
URL Session은 애플에서 HTTP 통신을 하기 위해 만든 세션으로, 특정 URL을 이용하여 데이터를 다운롣드하고 업로드하기 위한 API이다. 한마디로, 웹에서 서버와 통신하기 위해 제공하는 API라고 생각하면 된다.
웹은 하나 이상의 URL Session 인스턴스를 생성하고, 각 인스턴스는 관련 데이터 전송 작업 그룹을 조정한다. URL Session은 기본적으로 Request와 Response를 기본 구조로 갖고 있는데, Request는 서버로 요청을 보낼 때 "어떤 HTTP 메서드를 이용할 것인지", "캐싱 정책을 어떻게 할 것인지"에 대해 설정할 수 있고, Response는 "URL 요청에 응답을 나타내는 객체"이다.
URL Sessiondms URLSessionConfiguration을 통해 생성이 가능하다. 이렇게 생성된 URL Session을 통해 하나 이상의 URL Session Task를 생성할 수 있고, 이 Task를 통해 실제 서버와 통신할 수 있다.
3-1. URL Session의 종류와 Task
-
공유 세션 (Shared Session)
URLSession.shared()
-> 싱글톤으로 사용할 수 있고, 기본 요청을 하기 위한 세션이다. 맞춤 설정은 할 수 없지만, 쉽게 만들어 사용 가능하다. -
기본 세션 (Default Session)
URLSession(configuration: .default)
-> 공유 세션과 유사하게 작동하지만, 직접 원하는 맞춤 설정이 가능하고, 캐시와 쿠키, 사용자 인증 정보 등을 디스크에 저장한다. 순차적으로 데이터 처리하기 위해 델리게이트 지정 가능하다. -
임시 세션(Ephemeral Session)
URLSession(configuration: .ephemeral)
-> 공유 세션과 비슷하지만, 캐시, 쿠키, 사용자 인증 정보를 디스크에 저장을 하지 않는다. 메모리에 올려서 세션을 연결하고, 세션 연결 시 데이터가 사라진다. -
백그라운드세션(Background Session)
URLSession(configuration: .background)
->이 세션을 사용하면 앱이 실행되지 않는 동안 백그라운드에서 컨텐츠 업로드 및 다운로드를 수행 할 수 있다.
위와 같이 URL Session이 구성되었으면, URL Session Task를 이용하여 각 Session 내에 작업을 추가할 수 있다.
- URLSessionDataTask: 데이터 객체를 이용하여 데이터를 요청하고 응답받는다. 주로 짧고 빈번하게 요청할 때 사용된다..
- URLSessionUploadTask: 데이터 객체 또는 파일 형태의 데이터를 업로드하는 작업을 수행한다. 앱이 실행되지 않았을 때 백그라운드 업로드를 지원한다.
- URLSessionDownloadTask: 데이터를 다운로드받아서 파일 형태로 저장하는 작업을 수행한다. 이 아이도 앱이 실행되지 않았을 때 백그라운드 업로드를 지원한다.
- URLSessionStreamTask: TCP/IP 연결을 생성할 때 사용되는 태스크이다.
- URLSessionWebSocketTask: 웹 소켓 포로토콜 표준을 통해 통신하는 태스크이다.
3-2. URL Session Life Cycle
이번에는 URL Session Life Cycle에 대해 알아보자. 순서는 다음과 같다!
(1) Session Configuration을 결정하고, Session을 생성한다.
(2) 통신할 URL과 Request 객체를 설정한다.
(3) 사용할 Task를 결정하고, 그에 맞는 Completion Handler 혹은 Delegate 메서드를 작성한다.
(4) 해당 Task를 실행하고,
(5) Task가 완료된 후, Completion Handler 클로저가 호출이 된다. 클로저 아래서 작업에 대한 결과 값을 받을 수 있다.
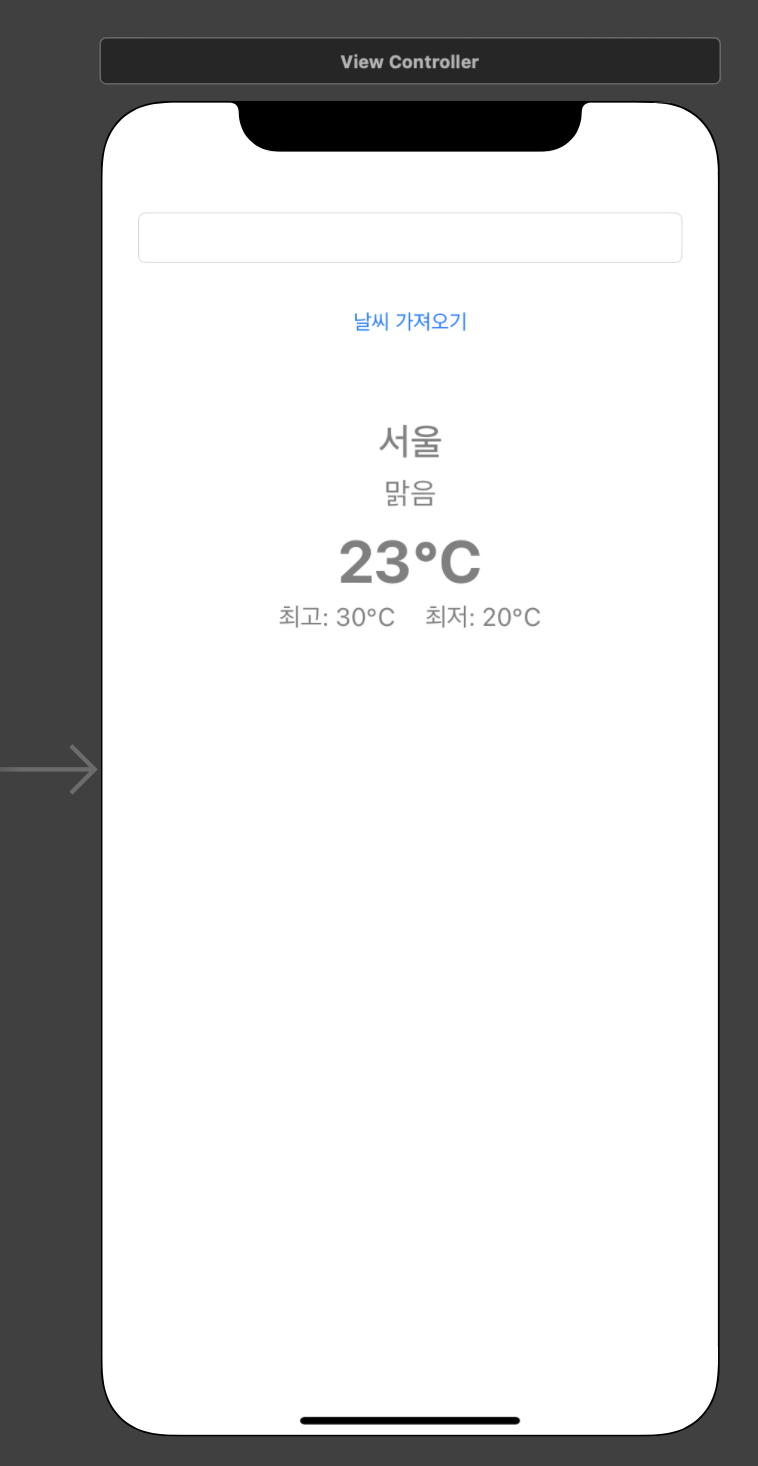
StoryBoard
Code
ViewController.swift
import UIKit

class ViewController: UIViewController {

    @IBOutlet weak var cityNameTextField: UITextField!
    @IBOutlet weak var cityNameLabel: UILabel!
    @IBOutlet weak var weatherDescriptionLabel: UILabel!
    @IBOutlet weak var tempLabel: UILabel!
    @IBOutlet weak var maxTempLabel: UILabel!
    @IBOutlet weak var minTempLabel: UILabel!

    @IBOutlet weak var weatherStackView: UIStackView!

    override func viewDidLoad() {
        super.viewDidLoad()
        // Do any additional setup after loading the view.
    }

    @IBAction func tapFetchWeatherButton(_ sender: UIButton) {
        if let cityName = self.cityNameTextField.text {
            self.getCurrentWeather(cityName: cityName)
            self.view.endEditing(true)
        }
    }

    func configureView(weatherInformation: WeatherInformation) {
        self.cityNameLabel.text = weatherInformation.name
        if let weather = weatherInformation.weather.first {
            self.weatherDescriptionLabel.text = weather.description
        }
        self.tempLabel.text = "\(Int(weatherInformation.temp.temp - 273.15))℃"
        self.minTempLabel.text = "최저: \(Int(weatherInformation.temp.minTemp - 273.15))℃"
        self.maxTempLabel.text = "최저: \(Int(weatherInformation.temp.maxTemp - 273.15))℃"
    }

    func showAlert(messgae: String) {
        let alert = UIAlertController(title: "에러", message: messgae, preferredStyle: .alert)
        alert.addAction(UIAlertAction(title: "확인", style: .default, handler: nil))
        self.present(alert, animated: true, completion: nil)
    }

    func getCurrentWeather(cityName: String) {
        guard let url = URL(string: "https://api.openweathermap.org/data/2.5/weather?q=\(cityName)&appid=bd4f07b96b68f8e5a84c55e4effdded8") else { return }
        let session = URLSession(configuration: .default)
        session.dataTask(with: url) { [weak self] data, response, error in
          let successRange = (200..<300)
          guard let data = data, error == nil else { return }
          let decoder = JSONDecoder()
          if let response = response as? HTTPURLResponse, successRange.contains(response.statusCode) {
            guard let weatherInformation = try? decoder.decode(WeatherInformation.self, from: data) else { return }
            DispatchQueue.main.async {
              self?.weatherStackView.isHidden = false
              self?.configureView(weatherInformation: weatherInformation)
            }
          } else {
            guard let errorMesaage = try? decoder.decode(ErrorMessage.self, from: data) else { return }
            DispatchQueue.main.async {
                self?.showAlert(messgae: errorMesaage.message)
            }
          }

        }.resume()
    }
}
Error.swift
import Foundation

struct ErrorMessage: Codable {
    let message: String
}
WeatherInformation.swift
import Foundation

struct WeatherInformation: Codable {  // Codable 프로토콜은 자신을 변환하거나 외부 표현으로 변환할 수 타입을 의미. 외부 표현이란 JSON과 같은 타입을 의미함. json 인코딩, 디코딩 다 가능. 한마디로, 웨더인포메이션 객체를 json형태로, json 형태를 웨더인포메이션 객체로 만들 수 있는 것.

    let weather: [Weather]
    let temp: Temp
    let name: String  // 도시 이름

    enum CodingKeys: String, CodingKey {
        case weather
        case temp = "main"
        case name
    }
}

struct Weather: Codable {
    let id: Int
    let main: String
    let description: String
    let icon: String
}

struct Temp: Codable {
    let temp: Double
    let feelsLike: Double
    let minTemp: Double
    let maxTemp: Double

    enum CodingKeys: String, CodingKey {
        case temp
        case feelsLike = "feels_like"
        case minTemp = "temp_min"
        case maxTemp = "temp_max"
    }
}
실행 결과
나중에 업로드 할게요....