❇️8_fetch.js
const http = require("http"); //Node.js 내장 모듈인 http를 불러온다. 이 모듈을 통해 웹 서버를 만들 수 있다.
const skills = [
{ name: "HTML" },
{ name: "CSS" },
{ name: "JavaScript" },
{ name: "Python" },
{ name: "AI" },
{ name: "Node.js" },
{ name: "MySQL" },
{ name: "mongoDB" },
];
const server = http.createServer((req, res) => {
res.setHeader("Access-Control-Allow-Origin", "*"); // 접속하는 모든 곳을 허용해줘
res.setHeader("Access-Control-Allow-Methods", "GET, POST, OPTIONS");
res.setHeader("Access-Control-Allow-Headers", "Content-Type");
// *은 모든 출처(origin)에서 접근 가능하다는 의미.
// 이 설정 덕분에 브라우저에서 fetch()를 통해 이 서버에 접근할 수 있다.
const url = req.url;
const method = req.method;
// 요청 URL과 요청 방식(GET, POST 등)을 변수로 저장한다.
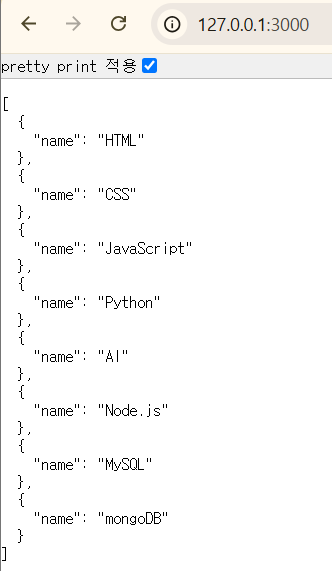
if (method == "GET") {
res.writeHead(200, { "Content-Type": "application/json" });
res.end(JSON.stringify(skills));
}
});
// GET 요청이 들어오면 응답 코드를 200으로 설정하고,
// skills 데이터를 JSON 형식으로 응답한다.
server.listen(3000, () => {
console.log("서버 실행 중");
## });
// 서버를 3000번 포트에서 실행한다.
// 터미널에 "서버 실행 중" 메시지가 표시된다.http.createServer()함수는요청(req)을 받고응답(res)을 처리할 수 있는 서버를 만든다.
✨fetch.html
<!DOCTYPE html>
<html lang="en">
  <head>
    <meta charset="UTF-8" />
    <meta name="viewport" content="width=device-width, initial-scale=1.0" />
    <title>기술 고르기</title>
  </head>
  <body>
    <h2>기술 고르기</h2>
    <select name="skills" id="skills">
      <option value="">기술 고르기</option>
    </select>

    <script>
      fetch("http://127.0.0.1:3000/")
        .then((response) => {
          if (!response.ok) {
            throw new Error("API 호출 실패!");
          }
          return response.json();
        })
        .then((data) => {
          const skills = document.getElementById("skills");
          data.forEach((skill) => {
            // <option></option>
            const option = document.createElement("option");
            // <option value='HTML'></option>
            option.value = skill.name;
            // <option value='HTML'>HTML</option>
            option.textContent = skill.name;
            skills.appendChild(option);
          });
        })
        .catch((error) => {
          console.error("fetch 실패!");
        });
    </script>
  </body>
</html>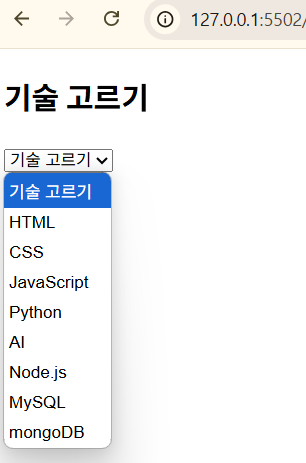
-
fetch()함수는 API를 호출하여 데이터를 가져온다.
여기서는 로컬 서버(127.0.0.1:3000)로부터 데이터를 요청한다. -
서버 응답이 정상이 아니면 에러를 던진다.
정상이면 JSON 데이터를 추출한다. -
받아온 데이터를 하나씩 순회하면서
<option>요소를 만들어<select>에 추가한다.
ex) skill.name이 "HTML"이면<option value="HTML">HTML</option>이 생성된다.
-
fetch 요청이나 데이터 처리에 실패하면 콘솔에 에러 메시지를 출력한다.
➿연동 흐름➿
[HTML 페이지 열림]
↓
[JavaScript가 fetch()로 API 호출]
↓
[Node.js 서버가 JSON 응답 제공]
↓
[응답 받은 기술 목록으로 드롭다운 생성]
❇️9_express.mjs
import express from "express";

const app = express();

app.use((req, res, next) => {
  res.setHeader("node-msg", "Hi! node.js!");
  // 모든 요청에 대해 node-msg라는 커스텀 헤더를 추가.
  next();
});

app.get("/", (req, res, next) => {
  res.send("<h2>익스프레스 서버로 만든 첫번째 페이지</h2>");
  next();
});

app.get("/hello", (req, res, next) => {
  res.setHeader("Content-Type", "application/json");
  res.status(200).json({ userid: "apple", name: "김사과", age: 20 });
  next();
});

app.listen(3000, () => {
  console.log("서버 실행 중");
});-
최신 ES6 문법으로 express 모듈을 불러온다.
-
만약 이 코드가 동작하지 않으면,
type: "module"설정이package.json에 있거나, 확장자명이.mjs여야 한다. -
GET 방식으로
루트(/)에 접속 시, HTML 문장을 반환한다.
/hello 경로에서는 JSON 데이터를 반환한다.
🏷️ node-msg란?
"node-msg"는 이름 그대로 "내가 임의로 만든 커스텀 헤더 이름"
📌 헤더란?
클라이언트(브라우저)와 서버 간 요청/응답 시 추가 정보를 담는 부분
ex) Content-Type, Authorization, User-Agent 등은 표준 헤더.
✅ node-msg는?
표준 헤더는 아니고, 개발자가 임의로 만든 커스텀 헤더(Custom Header)
서버가 응답 시 이 헤더를 클라이언트에게 전달할 수 있다.
개발 중 상태 확인, 디버깅, 특정 정보 전달 등에 사용할 수 있다.
🧪 확인 방법
크롬에서 개발자 도구(F12) → "Network 탭" → 응답(Response) 헤더를 보면
node-msg: Hi! node.js!가 있는 걸 확인할 수 있다.
❇️10_get.mjs
import express from "express";
import fs from "fs";

const app = express();

app.get("/", (req, res) => {
  fs.readFile("login.html", (err, data) => {
    if (err) {
      res.status(500);
      return res.send("파일 읽기 오류");
    }
    res.status(200).set({ "Content-Type": "text/html" });
    res.send(data);
  });
});

//http://127.0.0.1:3000/login?userid=apple&userpw=1234
app.get("/login", (req, res) => {
  console.log("login 호출!(GET)");
  console.log(req.query);
  console.log("아이디: ", req.query.userid);
  console.log("비밀번호: ", req.query.userpw);
});

app.listen(3000, () => {
  console.log("서버 실행 중");
});
✨login.html
<!DOCTYPE html>
<html lang="en">
<head>
<meta charset="UTF-8" />
<meta name="viewport" content="width=device-width, initial-scale=1.0" />
<title>로그인</title>
</head>
<body>
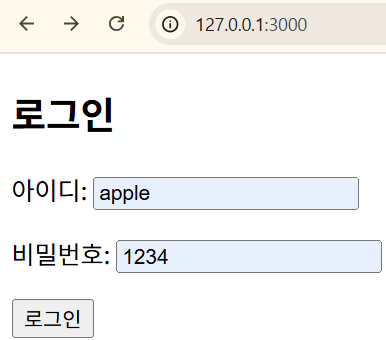
<h2>로그인</h2>
<form action="/login" method="get">
<p>아이디: <input type="text" name="userid" id="userid" /></p>
<p>비밀번호: <input type="text" name="userpw" id="userpw" /></p>
<p><button>로그인</button></p>
</form>
</body>
</html>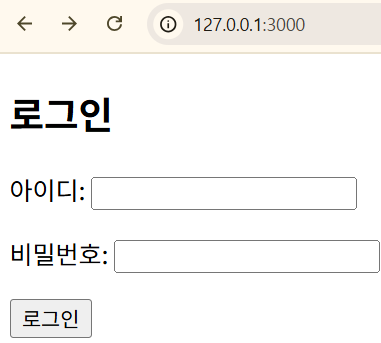
서버 실행 중
login 호출!(GET)
[Object: null prototype] { userid: 'apple', userpw: '1234' }
아이디:  apple
비밀번호:  1234
✨login2.html
<!DOCTYPE html>
<html lang="en">
  <head>
    <meta charset="UTF-8" />
    <meta name="viewport" content="width=device-width, initial-scale=1.0" />
    <title>로그인2</title>
  </head>
  <body>
    <h2>로그인2</h2>
    <p>아이디: <input type="text" name="userid" id="userid" /></p>
    <p>비밀번호: <input type="text" name="userpw" id="userpw" /></p>
    <p><button id="loginBtn">로그인</button></p>
    <script>
      document.getElementById("loginBtn").addEventListener("click", () => {
        const userid = document.getElementById("userid").value;
        const userpw = document.getElementById("userpw").value;
        fetch(`http://127.0.0.1:3000/login?userid=${userid}&userpw=${userpw}`)
          .then((res) => res.text())
          .then((data) => {
            console.log("서버 응답: " + data);
          })
          .catch((err) => {
            console.error("에러 발생!", err);
          });
      });
    </script>
  </body>
</html>
과제는 깃허브가 아닌 CloudType 에 배포하기로 했다..
