환경정보
전자정부 프레임워크 Spring JDBC 사용하기
pom.xml에 라이브러리 추가하기
<!-- https://mvnrepository.com/artifact/org.mariadb.jdbc/mariadb-java-client -->
<dependency>
	<groupId>org.mariadb.jdbc</groupId>
	<artifactId>mariadb-java-client</artifactId>
	<version>2.7.5</version>
</dependency>

<!-- https://mvnrepository.com/artifact/org.springframework/spring-jdbc -->
<dependency>
	<groupId>org.springframework</groupId>
	<artifactId>spring-jdbc</artifactId>
	<version>${org.springframework-version}</version>
</dependency>
${org.springframework-version} 은 위쪽에서 가져온다.
라이브러리 설치 확인
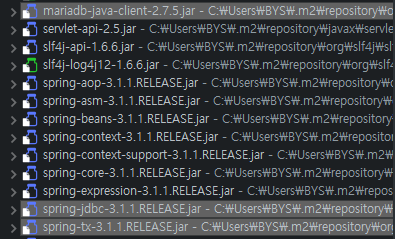
pom.xml 입력 후, 설치 완료시
3가지 항목이 정상적으로 설치되었는지 확인하면 된다.
공유 데이터로 데이터 소스 생성하기
root-context.xml 에서 공유 데이터 bean 설정을 해주어야 한다.
공유 데이터와 관련된 내용은 내가 예전에 적었던 글을 참조하자.
아래 링크를 따라가면 된다.
Spring 강의노트 : [Spring] 005 강의노트
<?xml version="1.0" encoding="UTF-8"?>
<beans xmlns="http://www.springframework.org/schema/beans"
	xmlns:xsi="http://www.w3.org/2001/XMLSchema-instance"
	xsi:schemaLocation="http://www.springframework.org/schema/beans
                        https://www.springframework.org/schema/beans/spring-beans.xsd">

	<!-- Root Context: defines shared resources visible to all other web components -->
	<bean id="dataSource" class="org.springframework.jdbc.datasource.DriverManagerDataSource">
		<property name="driverClassName" value="org.mariadb.jdbc.Driver" />
		<property name="url" value="jdbc:mysql://localhost:3306/sample" />
		<property name="username" value="root" />
		<property name="password" value="!123456" />
	</bean>
</beans>
그렇다면 Controller에서는 어떻게 매칭을 해줄까?
package com.exam.controller;

import java.sql.Connection;
import java.sql.PreparedStatement;
import java.sql.ResultSet;
import java.sql.SQLException;
import java.util.Locale;

import javax.sql.DataSource;

import org.springframework.beans.factory.annotation.Autowired;
import org.springframework.stereotype.Controller;
import org.springframework.ui.Model;
import org.springframework.web.bind.annotation.RequestMapping;

/**
 * Handles requests for the application home page.
 */
@Controller
public class HomeController {

	// @Autowired : 자동 검색에서 매칭해줘
	@Autowired
	private DataSource dataSource;

	@RequestMapping(value = "/index.do")
	public String home(Locale locale, Model model) {

		System.out.println("dataSource : " + dataSource);

		Connection conn = null;
		PreparedStatement pstmt = null;
		ResultSet rs = null;

		try {
			conn = this.dataSource.getConnection();

			String sql = "SELECT now() as now ";
			pstmt = conn.prepareStatement(sql);

			rs = pstmt.executeQuery();
			if(rs.next()) {
				System.out.println("시간 출력 : " + rs.getString("now"));
			}
		} catch(SQLException e) {
			System.out.println("[Error] " + e.getMessage());
		} finally {
			if(rs != null) try {rs.close();} catch(SQLException e) {}
			if(pstmt != null) try {pstmt.close();} catch(SQLException e) {}
			if(conn != null) try {conn.close();} catch(SQLException e) {}
		}
		return "home";
	}
}
DataSource 객체를 생성하고 변수명은 반드시 root-context.xml에서 설정한 bean id 값으로 입력해야 한다.
@Autowired를 사용하면 Spring에서 자동 검색하여 공유 데이터를 매칭해준다.
이제 index.do 를 브라우저 주소창에 입력해보자.
dataSource : org.springframework.jdbc.datasource.DriverManagerDataSource@298ec76b
시간 출력 : 2022-07-08 12:44:34.0
다른 패키지의 클래스에서 Autowired 사용하는법
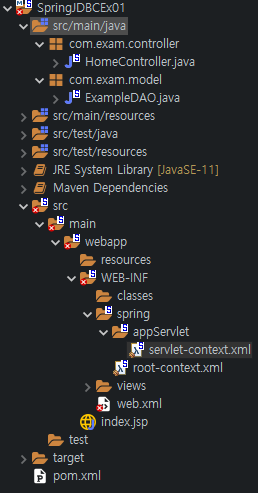
servlet-context.xml에 component-scan 패키지 추가하기.
<context:component-scan base-package="com.exam.model" />- Controller 클래스에 객체 생성하기 : 이때, 객체를 미리 생성해주어야 한다.
@Autowired
private ExampleDAO dao;- ExampleDAO 클래스에 공유 데이터 객체를 생성하고 어노테이션으로 Autowired를 추가한다.
@Autowired
private DataSource dataSource;- ExampleDAO 클래스에 메서드를 만들어두고 Controller 클래스에서 ExampleDAO 클래스 메서드 호출해서 사용하기.
public void viewDataSource() {
	System.out.println("dataSource : " + dataSource);
}
package com.exam.controller;
import java.util.Locale;
import javax.sql.DataSource;
import org.springframework.beans.factory.annotation.Autowired;
import org.springframework.stereotype.Controller;
import org.springframework.ui.Model;
import org.springframework.web.bind.annotation.RequestMapping;
import com.exam.model.ExampleDAO;
@Controller
public class HomeController {
// @Autowired : 자동 검색에서 매칭해줘
@Autowired
private DataSource dataSource;
@Autowired
private ExampleDAO dao;
@RequestMapping(value = "/index.do")
public String home(Locale locale, Model model) {
System.out.println("dataSource : " + dataSource);
System.out.println("dao : " + dao);
dao.viewDataSource();
return "home";
}
}7월 08, 2022 2:21:23 오후 org.apache.coyote.AbstractProtocol start
INFO: 프로토콜 핸들러 ["http-nio-80"]을(를) 시작합니다.
7월 08, 2022 2:21:23 오후 org.apache.catalina.startup.Catalina start
INFO: 서버가 [8096] 밀리초 내에 시작되었습니다.
dataSource : org.springframework.jdbc.datasource.DriverManagerDataSource@677f1a1f
dao : com.exam.model.ExampleDAO@1873eb5d
dataSource : org.springframework.jdbc.datasource.DriverManagerDataSource@677f1a1fSpring 으로 우편번호 검색기 만들어보기
- Spring 레가시 프로젝트 생성
- Spring MVC 선택
- Java 버전 BuildPath 하고 Project Fasets 버전 11로 변경하기
- model1 패키지 추가하기
- pom.xml에 라이브러리 추가.
- web.xml에 다국어 필터 추가
- web.xml에 servlet-mapping 태그 내부 url-pattern 수정(나는 *.do 이걸로 변경함)
- servlet-context.xml 에 component-scan 패키지 추가하기
- root-context.xml에 공유 데이터 생성하기 : DataSource
JDBC Template
DriverManager, Connection, PrepareStatement, 데이터베이스 연결 해제 들을
JDBC Template가 대신 처리해, 사용한다.
사용자는 쿼리문 위주로만 작성할 수 있다. = 작업의 효율성?
JDBC Template 만드는 순서
- Spring 레가시 프로젝트 생성
- Spring MVC 선택
- Java 버전 BuildPath 하고 Project Fasets 버전 11로 변경하기
- pom.xml에 라이브러리 추가.
- web.xml에 다국어 필터 추가
- web.xml에 servlet-mapping 태그 내부 url-pattern 수정(나는 *.do 이걸로 변경함)
- servlet-context.xml 에 component-scan 패키지 추가하기
- root-context.xml에 공유 데이터 생성하기 : DataSource
- root-context.xml에 JDBC Template 생성하기
<?xml version="1.0" encoding="UTF-8"?>
<beans xmlns="http://www.springframework.org/schema/beans"
	xmlns:xsi="http://www.w3.org/2001/XMLSchema-instance"
	xsi:schemaLocation="http://www.springframework.org/schema/beans https://www.springframework.org/schema/beans/spring-beans.xsd">

	<!-- Root Context: defines shared resources visible to all other web components -->

	<!-- 1. dataSource -->
	<bean id="dataSource" class="org.springframework.jdbc.datasource.DriverManagerDataSource">
		<property name="driverClassName" value="org.mariadb.jdbc.Driver" />
		<property name="url" value="jdbc:mysql://localhost:3306/sample" />
		<property name="username" value="root" />
		<property name="password" value="!123456" />
	</bean>

	<!-- 2. JDBC Template -->
	<bean id="jdbcTemplate" class="org.springframework.jdbc.core.JdbcTemplate">
		<property name="dataSource" ref="dataSource" />
	</bean>
</beans>
JDBC Template 메서드
dml : update
select : queryXXX
Spring JDBC Template로 우편번호 검색기 만들기

차근차근 한 걸음씩 걸어나가는 개발자 꿈나무.