React 프로젝트에서 JSON Server 사용해보기
안녕하세요! 이번 글에서는 React 프로젝트에서 JSON Server를 설치하고 데이터를 불러오는 과정을 정리해봤어요. 🔥
간단한 테스트 서버로 API를 빠르게 연동해볼 수 있어 정말 편리했답니다.
참고로 아래 글을 많이 참고
👉 React - JSON 서버 생성 후 데이터 받아오기
📦 1. JSON Server 설치하기
먼저 프로젝트 루트에서 아래 명령어를 실행해 json-server를 설치했어요.
npm install --save-dev json-server🗂️ 2. db.json 파일 생성하기
프로젝트 루트에 db.json 파일을 만들고 샘플 데이터를 작성
{
  "chat": [
    { "id": 1, "chatSeq": 1, "title": "상담문의", "userId": 1, "userNm": "홍길동", "mgrId": 1, "mgrNm": "김상담원", "status": "처리완료", "statusNm": "처리완료", "type": "콜", "typeNm": "콜", "title": "홍길동님 긴급문의" }
    ...
  ],
  "chatData": [
    { "id": 1, "chatSeq": 1, "chatNo": 1, "userId": 1, "userNm": "홍길동", "mgrNm": "김상담원", "text": "안녕하세요, 상담사님. 문의드립니다.", "sender": "user", "timestamp": "2025-05-29T10:00:00Z" },
    ...
  ],
  "users": [
    { "id": 1, "userId": 1, "userNm": "홍길동", "mobile": "010-1111-1111" },
    ...
  ],
  "mgr": [
    { "id": 1, "mgrId": 1, "mgrNm": "김상담원", "dptNm": "상담1팀", "status": "working" },
    ...
  ],
  "code": [
    { "id": 1, "groupNm": "상담상태", "detailNm": "미처리", "color": "green" },
    ...
  ]
}
🔧 3. package.json에 스크립트 추가하기
package.json에 JSON Server를 실행할 수 있는 스크립트를 추가했어요.
"scripts": {
  "dev": "vite",
  "server": "json-server --watch db.json --port 3001"
--watch db.json:db.json파일을 감시해서 변경될 때 자동으로 반영되도록 설정
--port 3001: JSON Server를 3001번 포트에서 실행
🚀 4. JSON Server 실행하기
터미널에서 아래 명령어를 실행하면 JSON Server가 켜집니다.
npm run server
성공적으로 실행되면 터미널에 JSON Server가 실행되었다는 메시지가 뜨고,
브라우저에서 http://localhost:3001/posts로 접속하면 JSON 데이터를 확인할 수 있음.
🔌 5. API 사용하기
json-server가 /chat과 /chatData 엔드포인트로 데이터를 제공해주기 때문에 React에서 쉽게 데이터를 가져올 수 있었어요.
1) API 모듈
우선 API 호출 모듈(api.ts)을 만들어서 axios를 래핑해두고, /chat, /chatData를 호출하는 함수를 만들어줬어요.
import Api from './api';
import type { Chat, ChatData } from '@/types';
// 채팅 리스트 가져오기
export const getChatList = async () => {
const response = await Api.get<Chat[]>('/chat');
return response;
};
// 특정 채팅방 데이터 가져오기
export const getChatDetail = async (chatSeq: number) => {
const response = await Api.get<ChatData[]>(`/chatData?chatSeq=${chatSeq}`);
return response.data;
};
// 메시지 보내기
export const sendMessage = async (message: {
chatSeq: number;
text: string;
sender: 'user' | 'mgr';
userId: number;
userNm: string;
mgrNm: string;
}) => {
const response = await Api.post('/chatData', {
...message,
id: Date.now(),
chatNo: 0,
timestamp: new Date().toISOString()
});
return response.data;
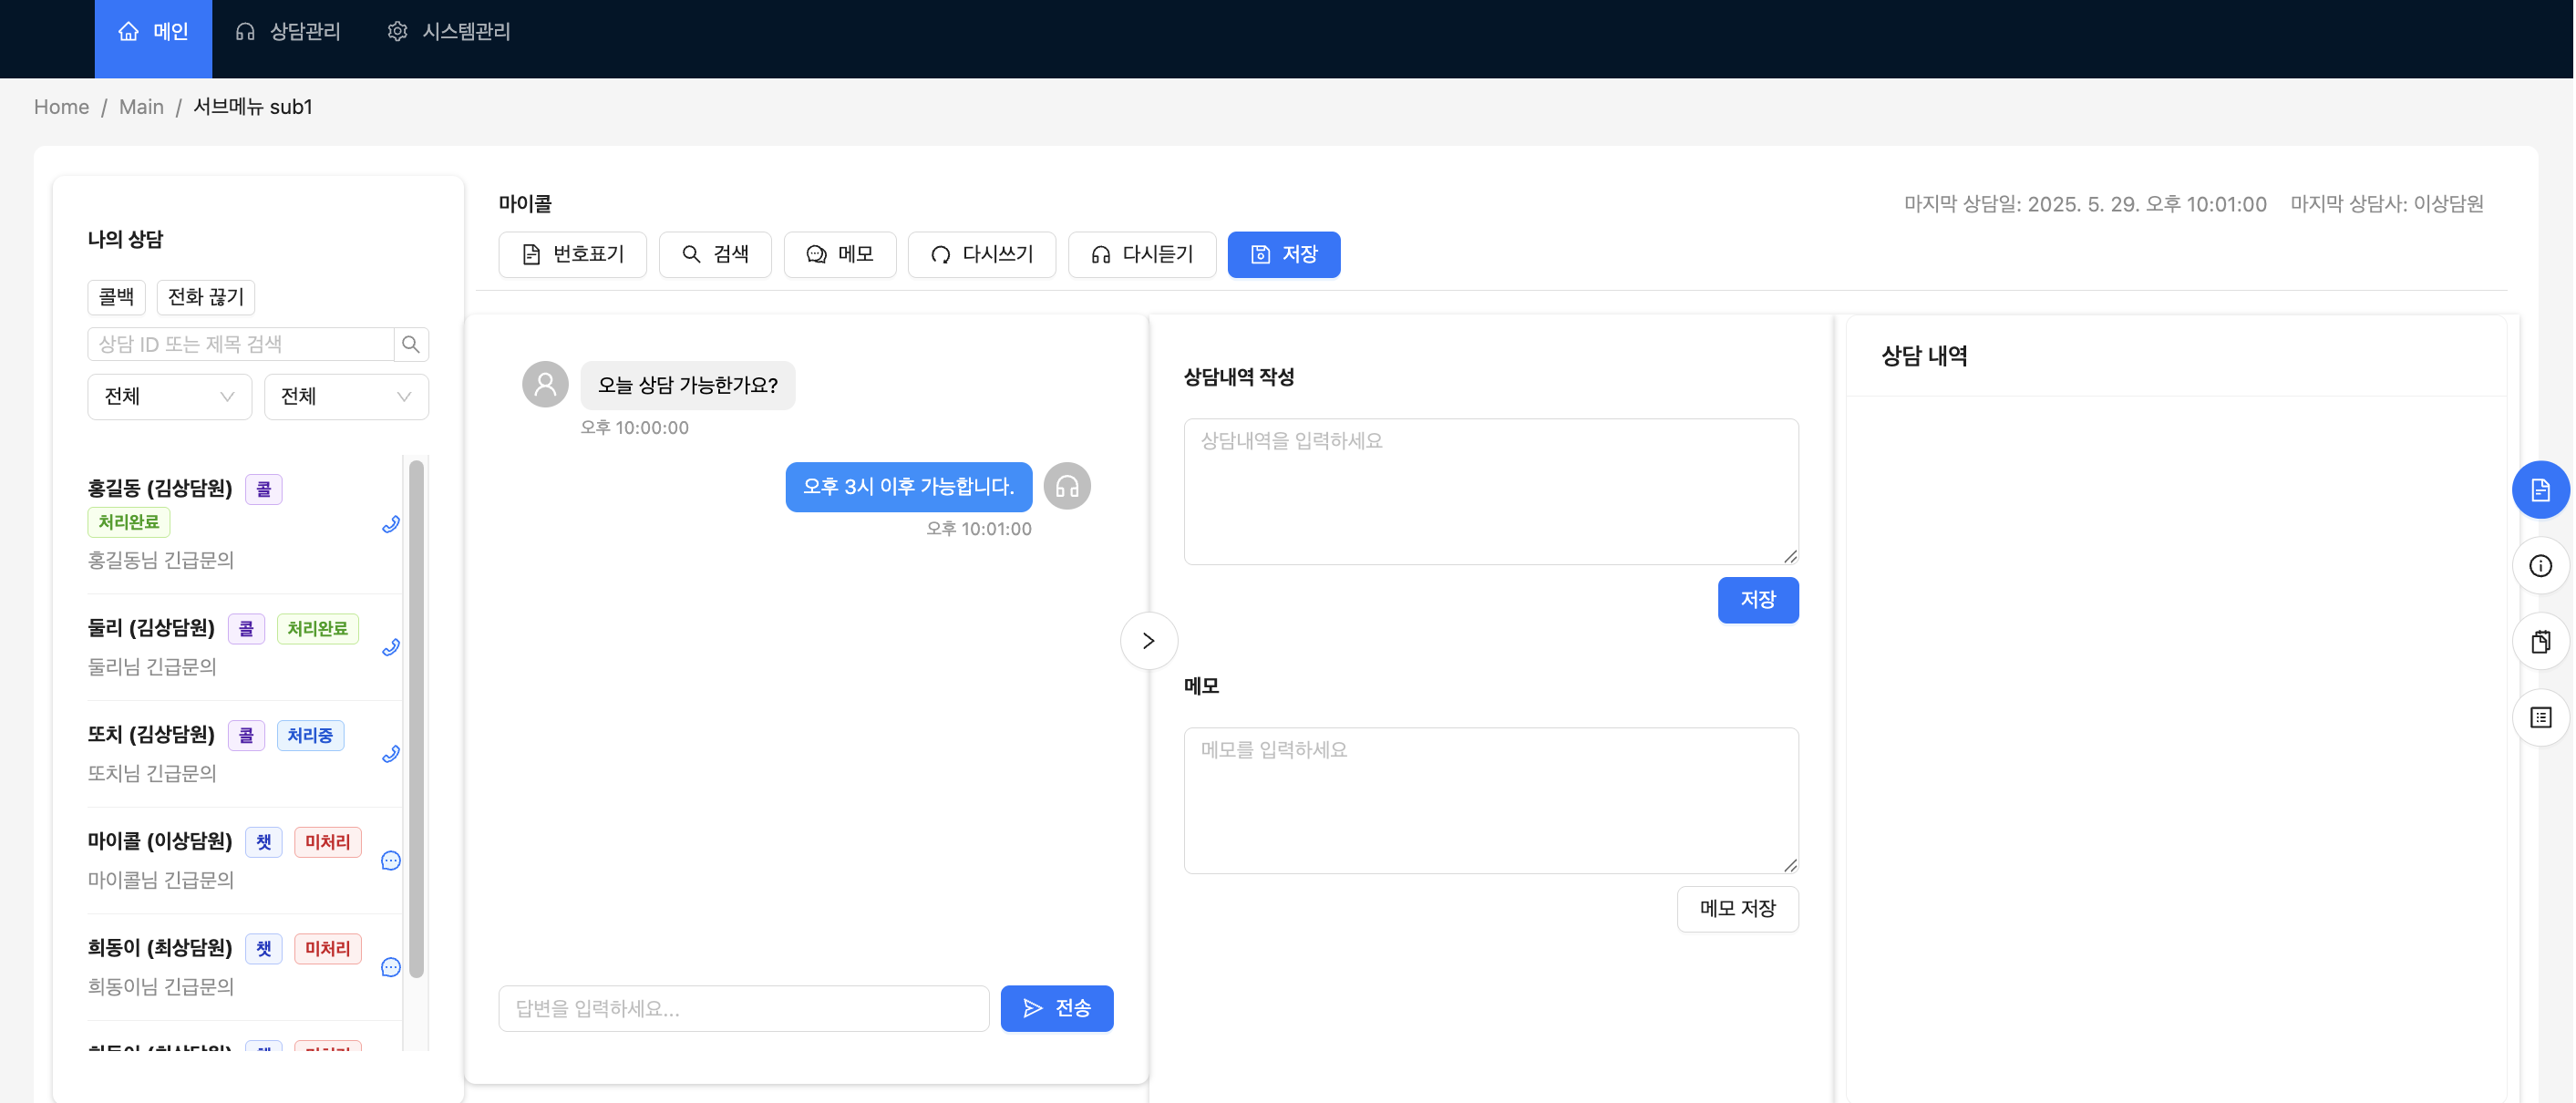
};⚛️ 6. React에서 데이터 불러오기(예시)
이제 React에서 Axios로 JSON Server에 GET 요청을 보내 데이터를 가져왔어요.
import { getChatDetail } from '@api/chatApi';

const LeftContent = ({ chatSeq, templateContent, setTemplateContent }: LeftContentProps) => {
    const [messages, setMessages] = useState<Message[]>([]);

    const fetchChatMessages = async () => {
        if (!chatSeq) return;

        try {
            const res = await getChatDetail(chatSeq);
            const formattedMessages: Message[] = res.map((msg: any) => ({
                ...msg,
                timestamp: msg.timestamp
            }));
            setMessages(formattedMessages);
        } catch (error) {
            console.error('채팅 데이터 가져오기 실패:', error);
        }
    }

    useEffect(() => {
        fetchChatMessages();
    }, [chatSeq]);