회사 앱 프로젝트에서 회원가입/로그인 기능을 진행하게 됐다.통신 연습를 연습을 위해서 서버가 필요했다.
node.js 환경에서는 좋은 라이브러리가 있어서 회원가입을 구현은 할 수 있었다.
필요한 라이브러리
body 파싱을 위해서 body-parser와 db 연결을 위해서 mongoose를 설치한다.
npm install express body-parser mongoose --save
서버 띄우기
// server.js

const express = require("express");
const app = express();
const bodyParser = require("body-parser");
const { User } = require("./models/user");
const port = 3000;

app.use(bodyParser.urlencoded({ extended: true }));
app.use(bodyParser.json());

app.get("/", (req, res) => {
  res.status(200).json({ name: "jun", age: 04 });
});


// 회원가입은 대개 method를 post 방식으로 진행한다.
app.post("/signup", (req, res) => {
  //회원 가입 할때 필요한 정보들을 client에서 가져오면
  // 그것들을 데이터베이스에 넣는다.

  const user = new User(req.body);
  // save는 mongoose모듈의 메소드이다. 에러가 있으면 false 메세지를 날리고
  // 성공하면 200 상태메세지와 true 메세지를 날린다.
  user.save((err, userInfo) => {
    if (err) return res.json({ success: false, err });
    return res.status(200).json({
      success: true,
    });
  });
});


app.listen(port, () => {
  console.log(`listening on port ${port}`);
});
mongoDb와 서버 연결하기
mongoDB 사이트에 들어가서 회원가입 후 클러스터를 생성한다.
// config/dev.js

const moongoose = require("mongoose");
moongoose
  .connect(
    "mongodb+srv://Namjun:<"비밀번호 입력">@boilerplate.yqidv.mongodb.net/<"디비이름">?retryWrites=true&w=majority",
    {
      useNewUrlParser: true,
      useUnifiedTopology: true,
      useCreateIndex: true,
      useFindAndModify: false,
    }
  )
  .then(() => console.log("MongDO connected..."))
  .catch((err) => console.log(err));
mongoose라이브러리가 제공하는 connect메소드를 사용해서 쉽게 mongodb와 연결할 수 있다.
mongdb와 연결하기 위해서 mongodb 웹에서는 application code를 준다. 여기에 자신의 비밀번호와 디비이름을 입력해서 통신하면 쉽게 연결할 수 있다.
오타 조심❌ 그리고
{ useNewUrlParser: true, useUnifiedTopology: true, useCreateIndex: true, useFindAndModify: false, } 를 넣어주지 않으면 오류가 발생할 수 있다고 하니 넣어주자.
출처: https://www.npmjs.com/package/mongoose
중요!!
mongoose.connect는 노출되면 곤란한 부분이기 때문에 .gitignore 파일에 dev.js 또는 해당 코드가 있는곳에는 꼭 추가하도록한다.
데이터베이스 모델 만들기
// mongoose 라이브러리 가져오기
const mongoose = require("mongoose");

// mongoose 메소드를 통해서 userSchema라는 스키마를 생성
const userSchema = mongoose.Schema({
  name: {
    type: String,
    maxlength: 50,
  },
  email: {
    type: String,
    trim: true,
    unique: 1,
  },
  password: {
    type: String,
    minlength: 5,
  },
  image: { type: String },
  token: { type: String },
  tokenExp: { type: Number },
});


const User = mongoose.model("User", userSchema);

// 외부로 내보내기
module.exports = { User };
mongoDB 사이트에 들어가서 회원가입 후 클러스터를 생성한다.
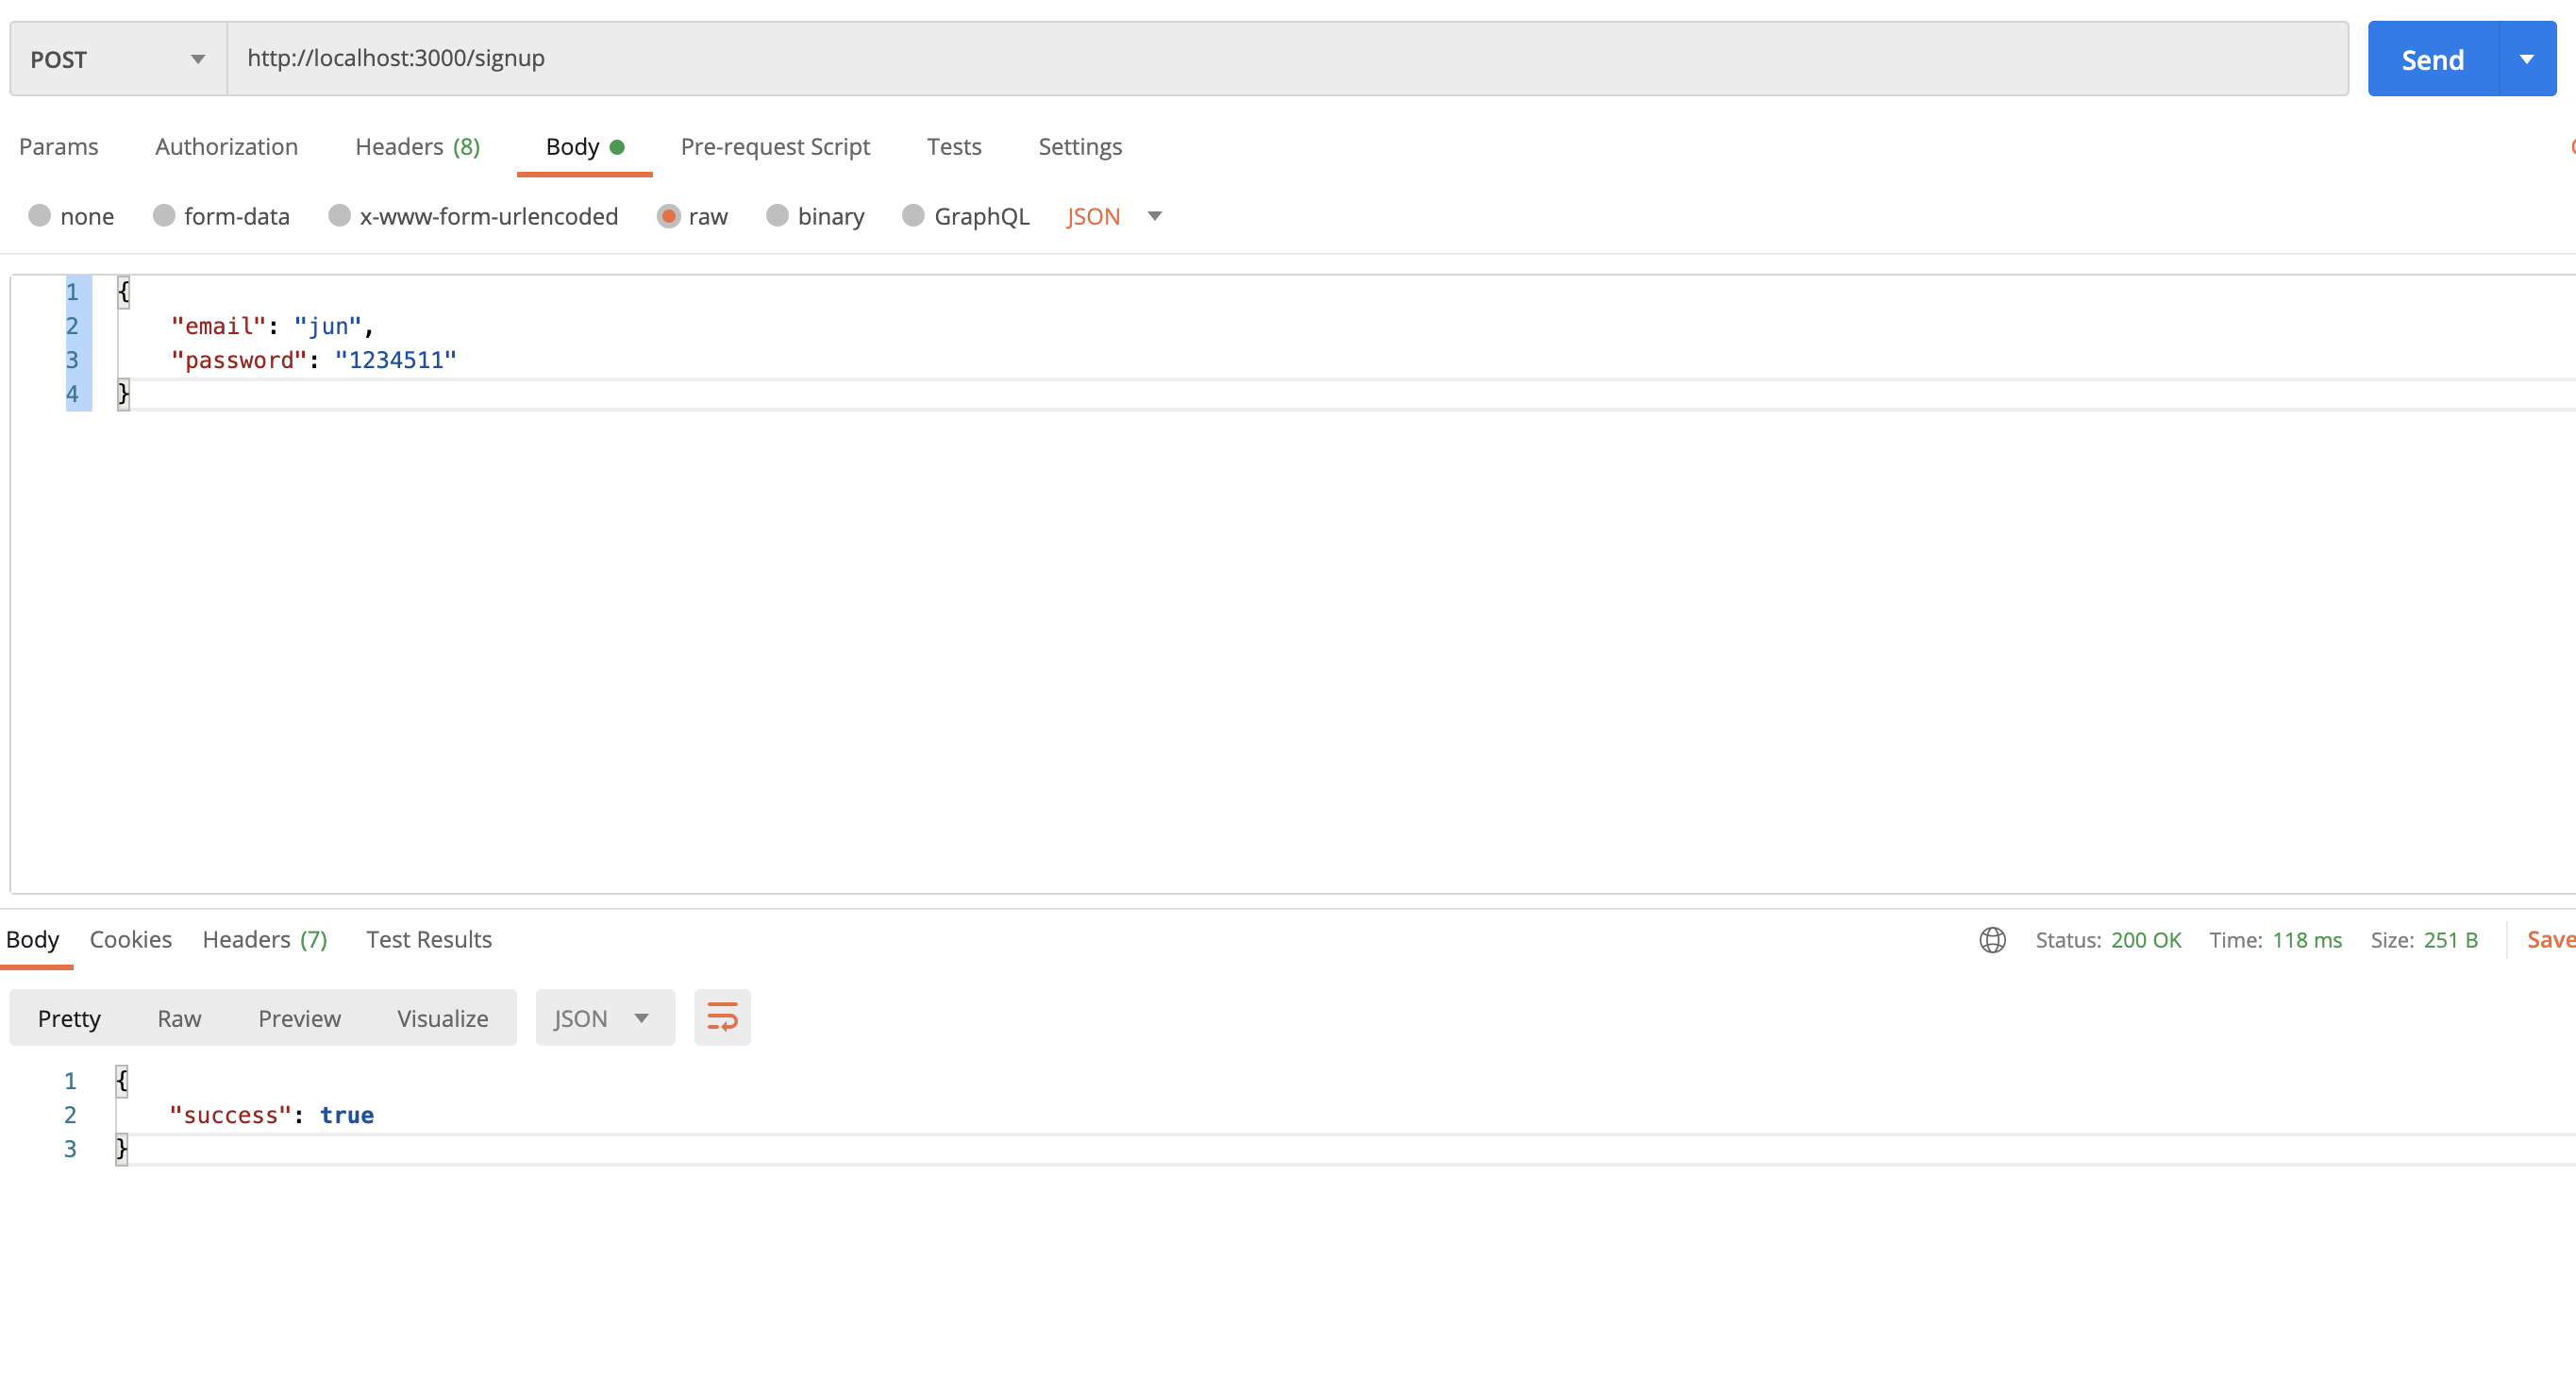
포스트맨에서 확인
db 모델에서 필수 입력을 입력하지 않았기 때문에 db에 들어가 모든 자료를 보내지 않아도 통신에 성공할 수 있었다.