🔷 작성한 코드
🔶 개인 피드 페이지
◾ Infinite Scroll
export default function Posts(props) {
  const [postData, setPostData] = useState();
  // 보여줄 데이터
  const [offset, setOffset] = useState(1);
	// 다음 통신때 보여줄 데이터 단위 (1 당 9개의 데이터 받아옴)
  const [loadingShow, setLoadingShow] = useState(true);
	// 로딩바를 보일지 말지 결정

  const target = useRef();
	// 타겟팅할 요소 → 로딩바
  const { tmpId } = props;
	// feed 주인의 id

  // offset이 변할 때마다 실행되는 메소드
  // 데이터를 받아올 통신, 로딩바 상태 및 postData 업데이트
  const fetchInstaPosts = async () => {
    await axios
      .get(`${FEED_THUMBNAILS}/${tmpId}?page=${offset}`)
      .then((response) => {
        if (response.data.post_list.length === 0) {
          setLoadingShow(false);
        }
				// 👆 다음 데이터가 없다면 loadingShow를 false로
        setPostData(
          postData
            ? postData.concat(response.data.post_list)
            : response.data.post_list,
        );
				// 👆 postData에 값이 있다면 새로운 데이터 배열과 병합, 아니면 그냥 업데이트
      })
      .catch((error) => {
        console.log("error", error);
      });
  };

  useEffect(() => {
    fetchInstaPosts();
  }, [offset]);

  useEffect(() => {
    // new 생성자로 IntersectionObserver 객체를 활용해서 observer를 생성
    const observer = new IntersectionObserver(handleObserver, {
      threshold: 1,
		  // 요소의 가시성이 100%일 때 handleObserver라는 메소드를 실행
    });

    if (target.current) {
      // ref객체의 current 값은 우리가 선택하고자 하는 DOM을 가리킴
      // = 로딩바가 생겼을 때
      return observer.observe(target.current);
      // 관찰할 대상(요소) 등록
    }
    return () => observer.disconnect(target.current);
    // target.current가 false일 때(=로딩바가 사라졌을 때), 관찰할 대상(요소) 등록 해지
  }, [target]);


  const handleObserver = ([refs]) => {
    if (refs.isIntersecting) {
		// refs.isIntersecting가 true일 때= 관찰 대상이 루트 요소와 교차 상태일 때
      setTimeout(() => {
        setOffset((prevNum) => prevNum + 1);
      }, 500);
    }
  };

  return (
    <PostsWrapper>
      <MenuTap>
        {MENUTAPS_PERSONAL_FEED.map((btnName) => {
          return <Btns>{btnName}</Btns>;
        })}
      </MenuTap>
      <Thumbnail
        postData={postData}
      />
      <LoadingAnimation
        show={postData?.length && loadingShow}
        ref={target}
        src="https://blog.kakaocdn.net/dn/bbG1RK/btqv0yFV1hL/VrPRCiDEklhGYyfut4KqJ1/loading.gif?attach=1&knm=img.gif"
        alt="로딩 중 입니다."
      />
    </PostsWrapper>
  );
}
🔶 모달창
◾ 따로 오는 데이터 매칭
ThumbnailModal.js (자식 컴포넌트)
export default function ThumbnailModal(props) {
  const {
    handleIdx,
    currentIdx,
  } = props;

  const ClickArrow = (e, num) => {
    handleIdx(num);
    e.stopPropagation();
  };

  return (
      <LeftArrow onClick={(e) => ClickArrow(e, -1)} currentIdx={currentIdx} />
      <ThumbnailModalWindow onClick={(e) => e.stopPropagation()}>
        // <모달창 내부 컨텐츠/>
      </ThumbnailModalWindow>
      <RightArrow
        onClick={(e) => ClickArrow(e, +1)}
        showPostLength={showPostLength - 1 === currentIdx}
      />
  );
}
Thumbnail.js (부모 컴포넌트)
export default function Thumbnail({ postData }) {
  const [eachModalAllData, setEachModalAllData] = useState();
  const [modalShow, setModalShow] = useState(false);
  const [currentIdx, setCurrentIdx] = useState();

  const handleIdx = (changeIdx) => {
    setCurrentIdx(currentIdx + changeIdx);
  };

  /*const onCloseModal = () => {
    setModalShow(false);
    setCurrentIdx(-1);
  };*/

  useEffect(() => {
    if (currentIdx >= 0) {
      fetch(`${MODAL_API}/${postData[currentIdx].post_id}`, {
        headers: {
          Authorization: localStorage.getItem("token"),
        },
      })
        .then((res) => res.json())
        .then((res) => setEachModalAllData(res.post));
      setModalShow(true);
    }
  }, [currentIdx]);
구현 원리
-
작동 방식
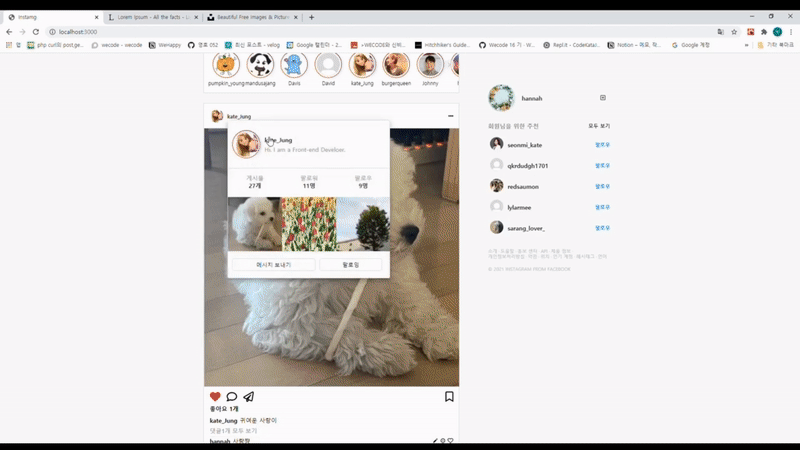
개인 피드 페이지에서 사진을 클릭했을 때 나오는 모달창의 데이터를 보여주기 위해서는 개인 피드 페이지 데이터와 모달창 데이터를 일치 시켜야 함
-
구현 방식
-
요약 : 서로의 데이터 idx가 같으니 idx를 매칭 시킨다.
-
디테일
-
자식 컴포넌트에서 화살표를 클릭할 때 화살표 방향에 따라 +1 or -1을 부모의 메소드에 업데이트 시킨다.
→
onClick={(e) => ClickArrow(e, -1 or +1)→
handleIdx(num); -
업데이트 받은 인자값(+1 or -1)을 현재 데이터 인덱스에 더한다
→
setCurrentIdx(currentIdx + changeIdx); -
현재 인덱스 값이 변하면 데이터를 받기 위해 통신하는 메소드를 부른다.
→
useEffect 의 [currentIdx]모달창에 보여줄 데이터를 업데이트 시켜준다.
→
.then((res) => setEachModalAllData(res.post));
-
-
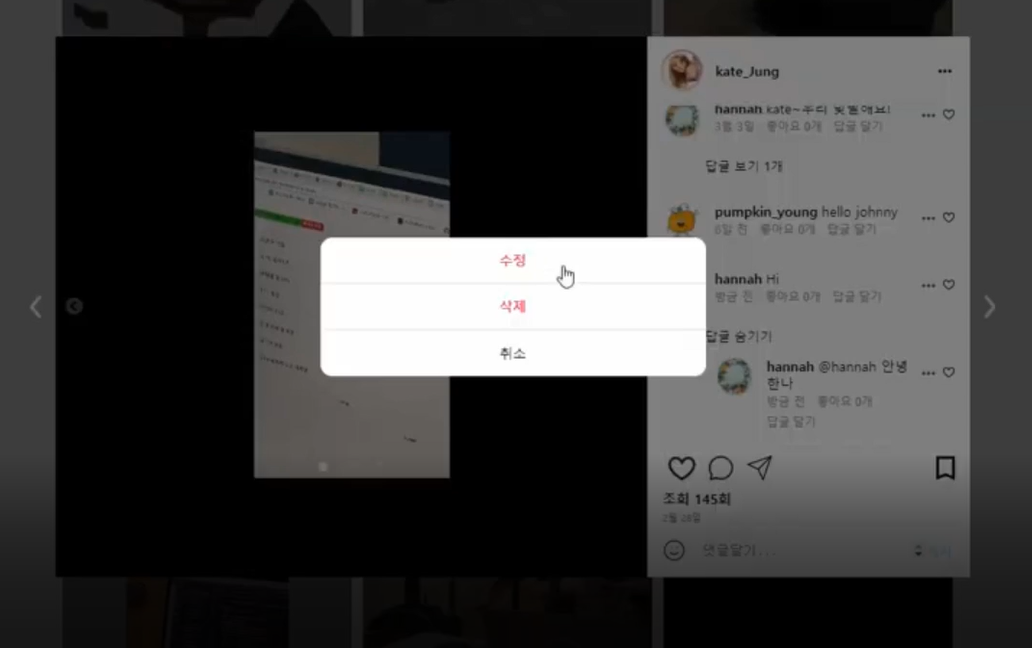
◾ 캡션 및 (대)댓글 컴포넌트


import React, { useState } from "react";
import { useHistory } from "react-router";
import styled from "styled-components";
import LikedIcon from "../Icons/LikedIcon";
import ProfilePic from "../ProfilePic/ProfilePic";
import { TimeFormat } from "../TimeFormat";
import BundleOfDotBtnModal from "../DotMenu/BundleOfDotBtnModal";
import { DELETE_COMMENT } from "../../../../../Config";

/**
 *
 *@param {string} loading - isComment(불린), data(키 명 일치해야 함), widthTextWrap(기본: 215px), handleReplyBtn('답글달기'버튼 온클릭 메소드), loginAccount
 */
// 👆 타 개발자가 사용법을 알 수 있도록 제작

export default function CommentCaption(props) {
  const [currentTime, setCurrentTime] = useState(new Date());
  const history = useHistory();

  const {
    isComment,
    data,
    widthTextWrap,
    handleReplyBtn,
    clickHeart,
    loginAccount,
    setModifyCommentInfo,
  } = props;

	// import한 버튼 모달창 style 속성 지정
  const dotBtnDivStyles = {
    padding: "5px",
    opacity: "0.7",
    "background-color": "white",
  };

	// import한 버튼 모달창 text 속성 지정
  const dotBtnContent =
    loginAccount === data?.account ? ["수정", "삭제"] : ["신고"];

	// import한 버튼 모달창 text에 따른 onClick 속성 지정
  const clickModalBtn = (e) => {
    if (e.currentTarget.textContent === "삭제") {
      fetch(
        `${DELETE_COMMENT}/${
          data?.recomment_id ? data?.recomment_id : data?.comment_id
        }`,
        {
          method: "POST",
          headers: {
            Authorization: localStorage.getItem("token"),
          },
        },
      );
    }

    if (e.currentTarget.textContent === "수정") {
      setModifyCommentInfo({
        modifyId: data?.recomment_id ? data?.recomment_id : data?.comment_id,
        modifyContent: data?.content,
      });
    }
  };

	// import한 프로필 style 속성 지정
  const ProfileDivStyles = {
    width: "42px",
    height: "42px",
    marginRight: "12px",
  };

	// currentTime을 현재 시간으로 update
  const updateTime = () => {
    setCurrentTime(new Date());
  };

	// 1분단위로 실시간 시간 계산을 위한 메소드
  setInterval(updateTime, 1000 * 60);

  return (
    <CommentCaptionWrapper show={data?.content} isComment={isComment}>
    /* 👆 isComment : 댓글인지 아닌지에 따라 style 변동 시키는 속성 */
      <ProfilePic
        src={data?.profile_photo}
        hasTodayLive={isComment ? null : data?.today_live}
        WrapDivstyles={ProfileDivStyles}
      />
      /* 👆 프로필 사진 컴포넌트 import*/
      <TextWrapper style={widthTextWrap}>
      /* 사용자(다른 개발자)가 유동적으로 댓글의 style 지정 가능 */
        <Content>
          <AccountId>{data?.account}</AccountId>
          {data?.content}
        </Content>
        <Bundle isComment={isComment}>
          <PostTime>{TimeFormat(data?.created_at, currentTime)}</PostTime>
          /* 👆 포스팅 시간 계산 (현재 시간-포스팅 시간)*/
          {isComment && (
            <LikeCount>
              좋아요 {data?.like_count.toLocaleString("ko-KR")}개
            </LikeCount>
          )}
          {isComment && (
            <ReplyBtn
              onClick={() => handleReplyBtn(data?.account, data?.comment_id)}
            >
              답글 달기
            </ReplyBtn>
          )}
	  /* 👆 댓글일 겨우 나타나는 컴포넌트 */
        </Bundle>
      </TextWrapper>
      <IconWrapper show={isComment}>
        <BundleOfDotBtnModal
          datatype={dotBtnContent}
          dotBtnDivStyles={dotBtnDivStyles}
          clickModalBtn={clickModalBtn}
        />
        <LikedIcon
          isFilled={data?.is_liked}
          size={"12px"}
          styles={{ "margin-top": "9px" }}
          clickHeart={clickHeart}
        />
      </IconWrapper>
    </CommentCaptionWrapper>
  );
}

const CommentCaptionWrapper = styled.section`
  position: relative;
  display: ${(props) => (props.show ? "flex" : "none")};
  padding: 12px 16px ${(props) => (props.isComment ? "0px" : "16px")};
`;
◾ 답글 보기/숨기기 (재 사용성)


export default function Recomments(props) {
  const [showRecommentIdx, setShowRecommentIdx] = useState(3);
	// 보여지는 대댓글의 인덱스 (3개씩 보여야되서 초기값 = 3)
  const [filteredDatas, setFilteredDatas] = useState([]);
	// 보여줄 대댓글 데이터를 담은 state


	// 각 댓글을 데이터를 props로 받아옴
  const { eachComment } = props;
	// 안보여준 대댓글 갯수 = 모든 대댓글의 갯수- 보여지는 대댓글 수(보여준 대댓글 인덱스+1 +3)
  const unShowedCounts = eachComment.recomment.length - showRecommentIdx + 3;

  const handleShowBtn = (datas) => {
		// 안보여준 대댓글이 있는 경우의 ('unShowedCounts > 0') 기능들
    setShowRecommentIdx(showRecommentIdx + 3);
		// 다음에 보여질 대댓글의 idx를 업데이트

    const filteringDatas = datas.filter((data, idx) => {
      return idx < showRecommentIdx;
    });
		// 현재 보여줘야할 대댓글 인덱스까지 대댓글 필터링한 변수

    setFilteredDatas(filteringDatas);
		// 필터링한 대댓글 데이터를 보여주게될 state에 업데이트

		// 대댓글 다 보여줬을 때
    if (unShowedCounts <= 0) {
      setShowRecommentIdx(3);
      setFilteredDatas([]);
      return;
    }
  };

  return (
    <RecommentsBtnWrapper>
      {eachComment.recomment.length > 0 && (
        <RecommentsShowBtn
          onClick={() => handleShowBtn(eachComment?.recomment)}
        >
          {unShowedCounts > 0 && `답글 보기 ${unShowedCounts}개`}
          {unShowedCounts <= 0 && `답글 숨기기`}
        </RecommentsShowBtn>
      )}
      <RecommentsWrapper>
        {filteredDatas.map((eachrecomment) => {
          return <CommentCaption data={eachrecomment} isComment={true} />;
        })}
      </RecommentsWrapper>
    </RecommentsBtnWrapper>
  );
}
해설
- 기존
- 따로 구현하기가 바로 만들어 내기에 편리해서 따로 만들까 했지만 레이아웃이 똑같아서 최대한 재 사용하고자 노력
- 현재 코드 해석
- 조건에 따라 글자만 바뀐다
- 레이아웃, onClick 메소드(handleShowBtn) 재사용
레이아웃, onClick 메소드를 같게 하고 메소드 내부에서 두 개의 조건에 따라 다른 결과(filteredDatas)가 나오게 한다
🔷 선임 Refactoring
🔶 [인풋/버튼] 배열, children 활용 예시
// 타 컴포넌트에서 이 컴포넌트에 hover시 나오는 문구
/**
 *
 * @param {string} loading - 로딩은 트루일때 그냥 로딩만 쓰고, 폴스 일때는 false를 어사인 해줘
 */

const layoutWrapper = (children) => (
    <div style={{ background: "red" }}>
      <div>
        <div>{children} </div>
      </div>
    </div>
  );

  var items = [
    {
      inputType: "button",
      buttonText: "test",
    },
    { inputType: "text", placeholder: "asjdlfjskladf" },
  ];

  const inputItem = (type, name, placeholder) => {

  }

  return (
    <>
      {items.map((item) => {
        return layoutWrapper(
          item.inputType == "button" ? (
            <button>{item.buttonText}</button>
          ) : (
            <input placeholder={item.placeholder} />
          ),
        );
      })}
🔶 fetch로 선택 항목 보내기
- 선택 항목 (값을 있어도 되고 없어도 되는)을 fetch로 보낼 때의 코드
    function SignForm(props) {
      const [signupValue, setSignupValue] = useState({
        phone: "",
        email: "",
        id: "",
        password: "",
      });

      const signupClicked = (e) => {

        fetch(SIGNUP, {
          method: "POST",
          body: JSON.stringify({
            account: id,
            password,
            ...(phone ? { phone } : {}),
            ...(email ? { email } : {}),
          }),
        })
      };
    }

    export default SignForm;
→ phone, email 의 경우에는 값이 있어도 되고 없어도 되는 선택 항목
-
값이 있을 때:
{ phone },{ email } -
값이 없을 때:
{}빈 객체를 반환

복습 목적 블로그 입니다.