
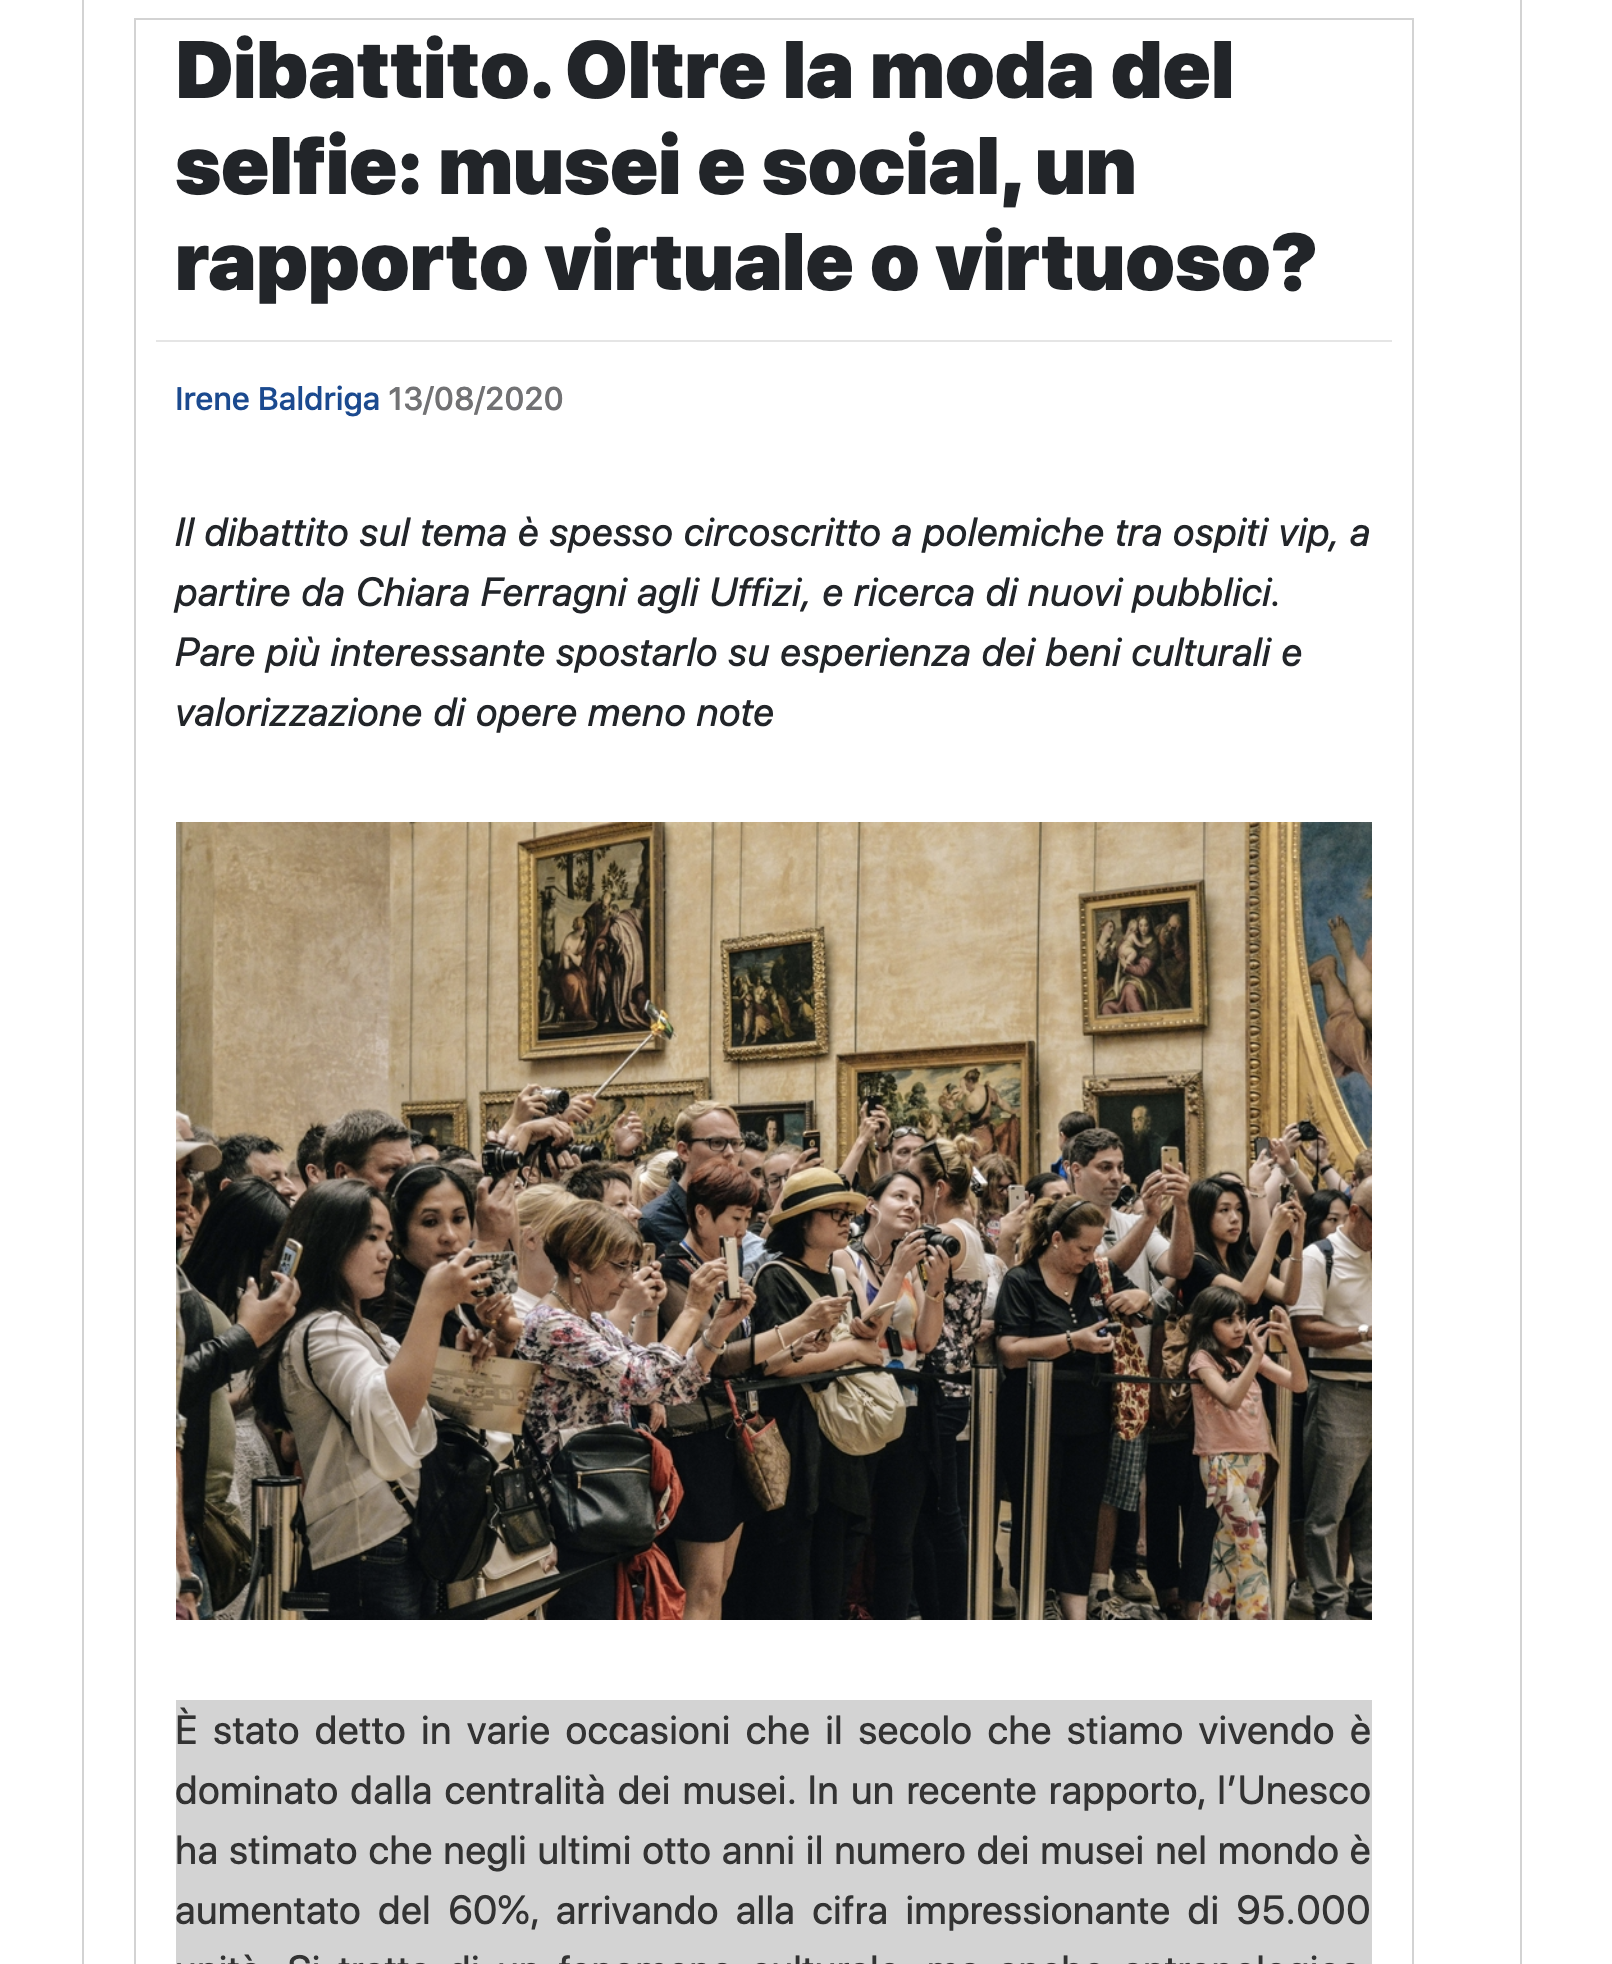
1. 개발 목표

뉴스 리스트를 가져왔으니 이제 두번째 단계인 기사 본문을 가져올 차례이다. 사용자가 선택한 기사의 본문을 스크랩해오고 DB에 저장하는 /news API를 설계했다.
2. 개발 과정
- BE 개발
- /news POST
우선 클라이언트에서 사용자가 선택한 뉴스 블록의 데이터를 가져와, 그 데이터를 기반으로 뉴스 기사의 본문 데이터를 크롤링하고 저장하는 POST API를 구현했다.
본문을 추출하는 방법으로는 newspaper3k라는 python의 외장 라이브러리를 사용했다. 기사의 url만 입력하면 뉴스 기사의 제목, 본문과 더불어 사진과 요약문장 같은 데이터를 쉽게 크롤링해올 수 있다.
본문 텍스트의 경우 앞서 포스팅에서 언급했듯이 기사의 종류 별로 형식이 조금씩 달라서 데이터를 정제하는 방법 또한 달랐다. 예를 들어 일반 기사의 경우 사진이 포함되어 있기 때문에 텍스트를 추출하면 사진에 대한 짧은 설명문부터 시작하지만, 평론 기사의 경우 바로 본문부터 시작한다. 따라서 조건문을 통해 기사의 종류를 구분하고 정제 코드를 다르게 구현하였다.
최종적으로 뉴스의 제목, 작성자, 날짜, 요약문, 이미지, 본문 데이터가 딕셔너리 형태로 mynews DB에 저장된다.
@app.route('/news', methods=['POST'])
def get_news():
    db.mynews.drop()

    url_receive = request.form['url_give']
    type_receive = request.form['type_give']
    author_receive = request.form['author_give']
    date_receive = request.form['date_give']

    news = Article(url_receive)
    news.download()
    news.parse()

    news_title = news.title
    news_image = news.top_image
    news_description = news.meta_description

    if type_receive == "editorial":
        news_text = textifyNews(news.text)
    else:
        news_text = textifyNews(news.text)
        news_text = news_text[2:]

    news_contents = {
        "title": news_title,
        "author": author_receive,
        "date": date_receive,
        "description": news_description,
        "image": news_image,
        "text": news_text
    }

    db.mynews.insert_one(news_contents)

    return jsonify({'result': 'success'})
def textifyNews(text):
news_text = []
text_list = text.split("\n")
for i in text_list:
if i != '':
news_text.append(i)
return news_text- /news GET
GET API 에서는 mynews DB에 접근하여 저장된 데이터를 Client에게 보내준다.
@app.route('/news', methods=['GET'])
def show_news():
    mynews = db.mynews.find_one({}, {'_id': False})

return jsonify({'result': 'success', 'news': mynews})- /newsedit
/newsedit API는 Client의 홈화면(index.html)에서 편집화면(edit.html)으로 넘어가는 기능을 구현하는 과정에서 설계하게 되었다.
Flask API를 설계할 때 필수적으로 들어가는 @app.route('/')와 기본적으로 구조는 동일하다. Client에서 해당 API에 접근하면 render_template("edit.html") 코드를 통해 edit.html 파일이 화면에 출력된다.
@app.route('/newsedit')
def news_edit():
    return render_template("edit.html")
- FE 개발
- getNews() 함수 만들기
먼저 클라이언트에서 사용자가 원하는 뉴스 블록을 클릭하면 실행되는 함수를 만들었다. 기본적으로 해당 뉴스 기사의 URL, 종류, 작성자, 날짜 정보를 서버로 보내주고, 데이터가 무사히 전달되면 '기사 불러오기 성공!'이라는 메세지와 함께 window.location = "/newsedit"; 코드가 실행된다.
해당 코드는 새로운 html 파일로 넘어가게 하는 명령으로 앞서 BE에서 구축했던 /newsedit API와 연결된다.
function getNews(url, type, author, date) {
                $.ajax({
                    type: "POST",
                    url: "/news",
                    data: {
                        url_give: url,
                        type_give: type,
                        author_give: author,
                        date_give: date
                    },
                    success: function (response) {
                        if (response["result"] == "success") {
                            alert('기사 불러오기 성공!');
                            window.location = "/newsedit";
                        } else {
                            alert("기사 불러오기 실패!");
                        }
                    }
                })
}- eidt.html 파일 만들기
다음으로 저장된 뉴스 기사의 본문 정보를 출력할 새로운 html 파일인 edit.html을 만들었다. 뉴스 기사 정보를 불러온 이후의 모든 기능들은 edit.html 파일에서 이루어진다. 아래는 예시 데이터를 바탕으로 기본적인 html 구조와 css 스타일링을 마친 사이트의 모습이다.
- showNews() 함수 만들기
이제 실제로 서버에서 DB를 가져와 edit.html 화면에 예시와 같은 형식으로 데이터를 출력해주면 된다. 이를 위해 페이지가 로딩된 직후 실행되는 showNews() 함수를 만들었다. 서버로부터 뉴스 기사의 제목, 작성자, 날짜, 요약 문장, 이미지 url, 본문 텍스트 리스트를 받아와 html 형식에 맞게 데이터를 출력한다.
function showNews() {
                $.ajax({
                    type: "GET",
                    url: "/news",
                    data: {},
                    success: function (response) {
                        let news = response["news"];
                        let title = news["title"];
                        let author = news["author"];
                        let date = news["date"];
                        let description = news["description"];
                        let image = news["image"];
                        let text = news["text"];

                        $("#myNews").empty();

                        let tempHtml = `<h1>${title}</h1>
                                        <hr>
                                        <div class="athr-date"><span class="author">${author}</span> <span class="date">${date}</span></div>
                                        <div class="des">${description}</div>
                                        <img src=${image}>
                                        <div class="text" id="myText"></div>`;

                        $("#myNews").append(tempHtml);

                        showTexts(text);
                    }
                })
            }
본문 텍스트 리스트를 출력하는 부분은 차후 번역 기능을 추가하면서 복잡해질 것 같아, 별개의 함수인 showTexts()로 구현하였다.
function showTexts(txt) {
                for (let i = 0; i < txt.length; i++) {
                    let text = txt[i]
                    let tempHtml = `<p>${text}</p>`
                    $("#myText").append(tempHtml)
                }
            }
- 결과물
최종적으로 서버를 실행했을 때, index.html 화면에서 선택한 뉴스 블록의 내용이 edit.html 화면에서 다음과 같이 정상적으로 출력되는 것을 확인할 수 있었다.
3. To do ..
이제 편집화면에 필요한 기능들을 구현할 차례이다.
다음 시간에는 각종 번역 API들을 활용해 번역기 기능을 만들어 보겠다.
