
FastAPI -1
FastAPI 공식 문서 공부하기!
Installation
pip install fastapi

# Production을 위해 'Uvicorn', 'Hypercorn'과 같은 ASGI server 필요
pip install "uvicorn[standard]"
ASGI?
먼저 웹 서버는 HTML/CSS/JS, img 파일 등과 같은 정적 컨테츠를 요청받아서 어플리케이션 서버를 거치지 않고 바로 응답해주거나, 동적 컨텐츠 요청을 WAS로 보내고 그 결과를 클라이언트에 전달하는 역활으 한다.
request -> Web Server(nginx, apache) -> WSGI server(gunicorn, uWSGU) -> Framework(django, flask)
기존의 django를 사용했을 때는 WSGI 서버를 주로 사용했는데, WSGI는 Websocket을 사용 할 수 없고 비동기를 사용할 수 없다는 단점이 있다.
이러한 WSGI의 단점을 극복하기 위해 나온 서버가 ASGI 서버로, WSGI의 상위호환 느낌이다. WSGI와 다르게 어플리케이션을 비동기로 연결해주고 HTTP, HTTP/2, WebSocket와 같은 다양한 프로토콜을 지원한다.
Example
Create it
main.py를 아래와 같이 생성
from typing import Optional

from fastapi import FastAPI

app = FastAPI()


@app.get("/")
def read_root():
    return {"Hello": "World"}


@app.get("/items/{item_id}")
def read_item(item_id: int, q: Optional[str] = None):
return {"item_id": item_id, "q": q}- 만약
async,await을 사용한다면
from typing import Optional

from fastapi import FastAPI

app = FastAPI()


# 'await' 라이브러리는 오직 'async def' 안에서만 사용 가능
@app.get('/')
async def read_results():
    results = await some_library()
    return results
Run it
서버 실행 명령어
$ uvicorn main:app --reloadmain:main.py파일을 뜻함app:main.py파일 안에 있는 app 오브젝트,app = FastAPI()를 뜻함--reload: 코드 변경 후 서버를 재시작 하도록 하는 명령어로 개발 단계에서만 사용한다
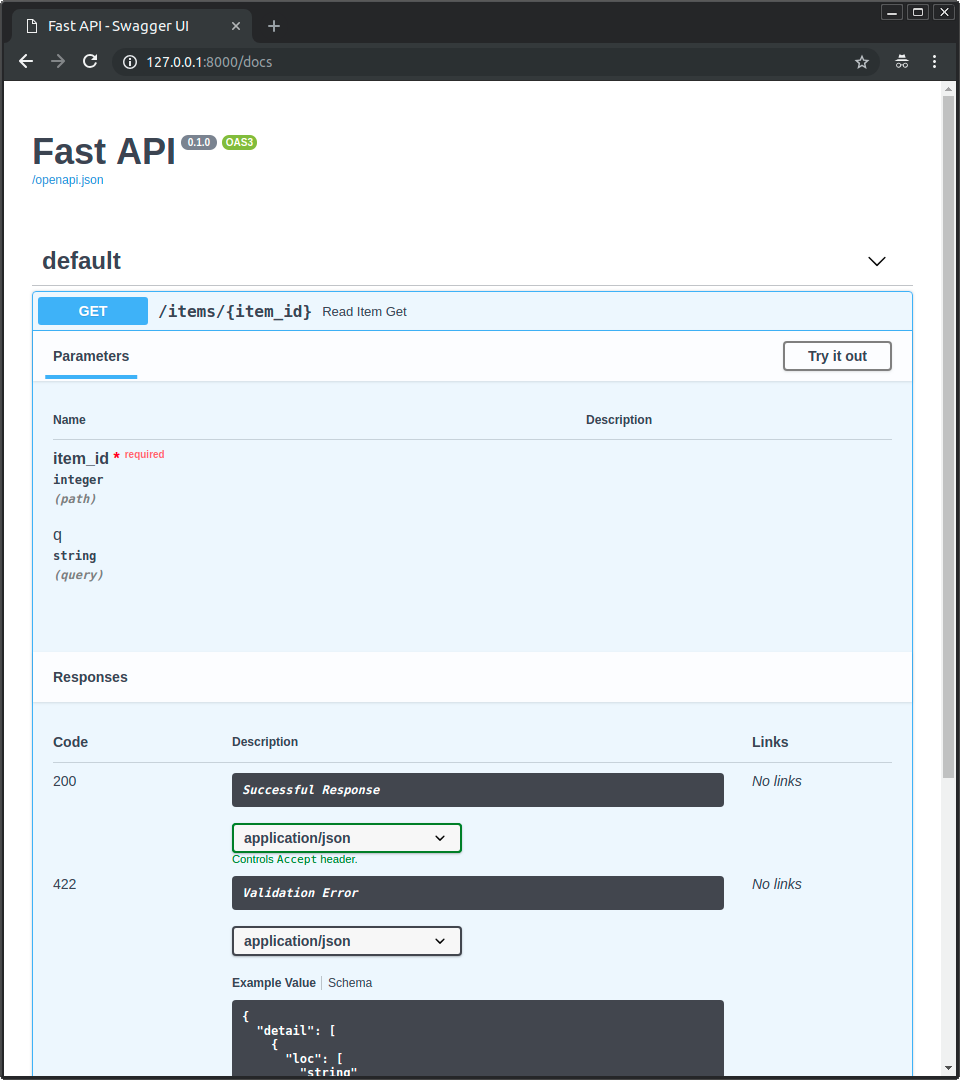
Interactive API docs
FastAPI는 자동으로 API Documentation을 지원한다.
서버를 실행 시킨 후 http://127.0.0.1:8000/docs 에 접속하면 Swagger UI에서 제공하는 Interactive API 문서를 볼수 있다.
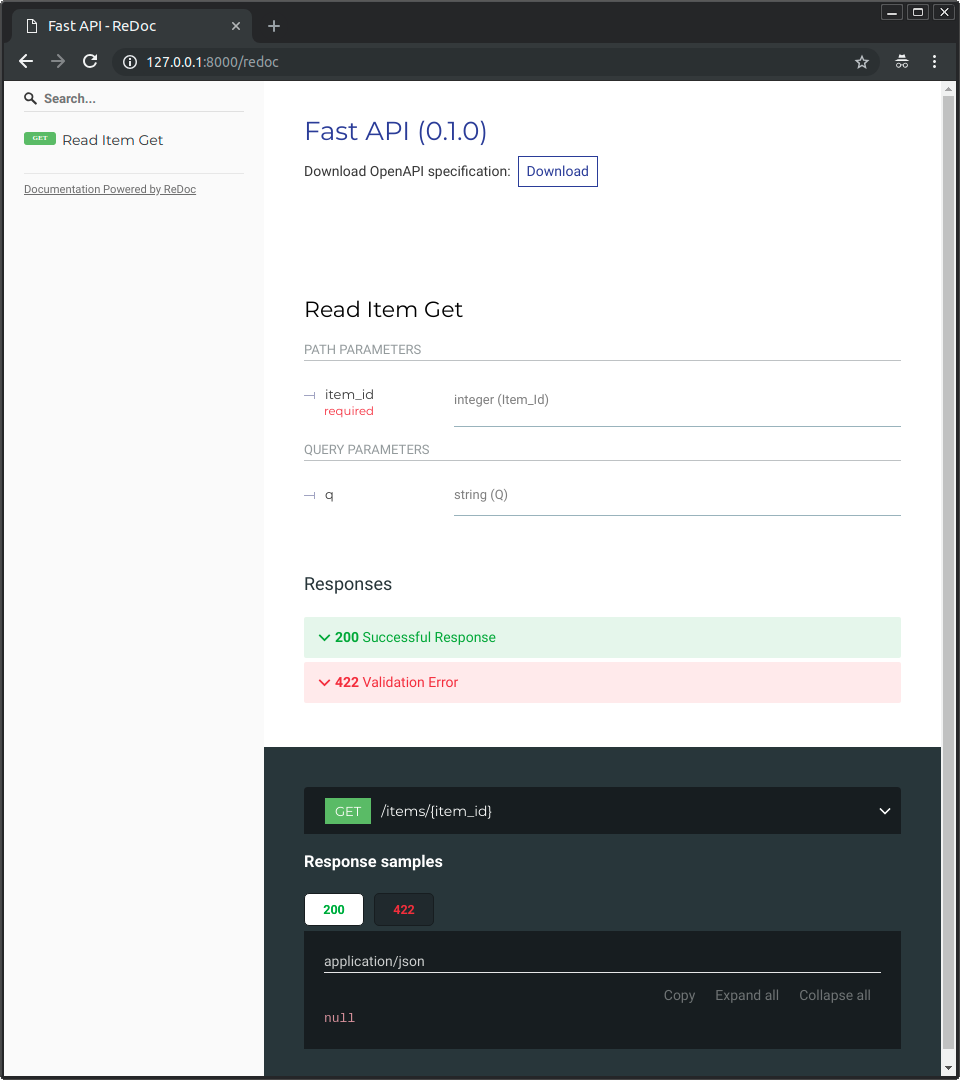
Alternative API docs
http://127.0.0.1:8000/redoc 에 접속하면 Alternative API 문서를 볼수 있다.
FastAPI의 문서 자동화
FastAPI를 이용해 어플리케이션을 개발하면, 개발자가 만든 EndPoint외에 기본적으로 아래의 EndPoint가 자동으로 생성된다.
/docs: FastAPI에 내장된 Swagger이 Interactive API 문서 생성redoc: FastAPI에 내장된 ReDoc가 Alternative API 문서 생성openapi.json: OpenAPI 규격에 맞는 json 파일 생성
Example Upgrade
main.py 파일을 PUT request로 부터 body를 받도록 수정해보자.
Pydantic 라이브러리를 활용해 body를 파이선 타입으로 정의한다.
from typing import Optional

from fastapi import FastAPI
from pydantic import BaseModel

app = FastAPI()


class Item(BaseModel):
    name: str
    price: float
    is_offer: Optional[bool] = None
Pydantic
Pydantic 공식문서 : https://pydantic-docs.helpmanual.io/
참고 블로그 : https://wookkl.tistory.com/62
FastAPI는 기존의 flask, django와 다르게, Pydantic 라이브러리를 사용해서 Data Validation을 하므로 파라미터 값에 어떤 자료형이 들어와야 하는지 코드상에 명시 하고, invalid data라면 에러를 제공한다.
from datetime import datetime
from typing import List, Optional
from pydantic import BaseModel


class User(BaseModel):
    id: int
    name = 'John Doe'
    signup_ts: Optional[datetime] = None
    friends: List[int] = []


external_data = {
    'id': '123',
    'signup_ts': '2019-06-01 12:22',
    'friends': [1, 2, '3'],
}
user = User(**external_data)
print(user.id)
#> 123
print(repr(user.signup_ts))
#> datetime.datetime(2019, 6, 1, 12, 22)
print(user.friends)
#> [1, 2, 3]
print(user.dict())
"""
{
    'id': 123,
    'signup_ts': datetime.datetime(2019, 6, 1, 12, 22),
    'friends': [1, 2, 3],
    'name': 'John Doe',
}
"""- id
타입으로만 정의하면 pydantic은 이 필드가 required filed라고 설정한다. str, float, byte 이 input으로 들어오면 int 형으로 바꾸고, 안된다면 Exception 에러를 일으킨다.
- name
id 필드와 다르게 'John Doe'라는 default 값을 지정해주었으므로 required fields는 아니다.
- signup_ts
datetime 필드로 지정되고 None이 주어졌으므로 required fields는 아니다.
- friends
id 필드와 같이, List 안에 Integer-like 원소가 있으면 Int형으로 바꿔준다.
Invalid한 데이터일 경우 아래와 같이 알려준다.
from pydantic import ValidationError

try:
    User(signup_ts='broken', friends=[1, 2, 'not number'])
except ValidationError as e:
    print(e.json())


[
  {
    "loc": [
      "id"
    ],
    "msg": "field required",
    "type": "value_error.missing"
  },
  {
    "loc": [
      "signup_ts"
    ],
    "msg": "invalid datetime format",
    "type": "value_error.datetime"
  },
  {
    "loc": [
      "friends",
      2
    ],
    "msg": "value is not a valid integer",
    "type": "type_error.integer"
  }
]
표준 파이썬 타입으로 파라미터, body 등을 정의 할 수 있기 때문에 새로운 문법이나 특정 라이브러리 사용방법 등을 배울 필요가 없다.
Example에서 FastAPI가 하는 일 예시
item_id에 대한GET,PUT요청을 Validateitem_id에 대한GET,PUT요청이int타입인지 Valitdate
- 만약 Invalid 하면 가독성 좋은 Error 출력
GET요청일 때,q라는 Optional한 쿼리 파라미터가 있는지 확인
- 만약에q파라미터가None으로 정의디어 있다면 이것은 필수 필드는 아니다.
-None이 아니라면 이것은 required fields 이다./items/{item_id}과 같은PUT요청일 때는 body를 JSON 형식으로 읽음
- 필수 필드인name이str타입인지 확인
- 필수 필드인price가float타입인지 확인- 선택적 필드인
is_offer가 만약 존재한다면bool타입이다.
- 선택적 필드인
- Input 받은 것을 JSON 타입을 자동으로 변환
- OpenAPI 규격으로 자동 문서화 제공