Entry 구상 🤔
- Entry 페이지는 블로그의 글을 보여주는 페이지이다.
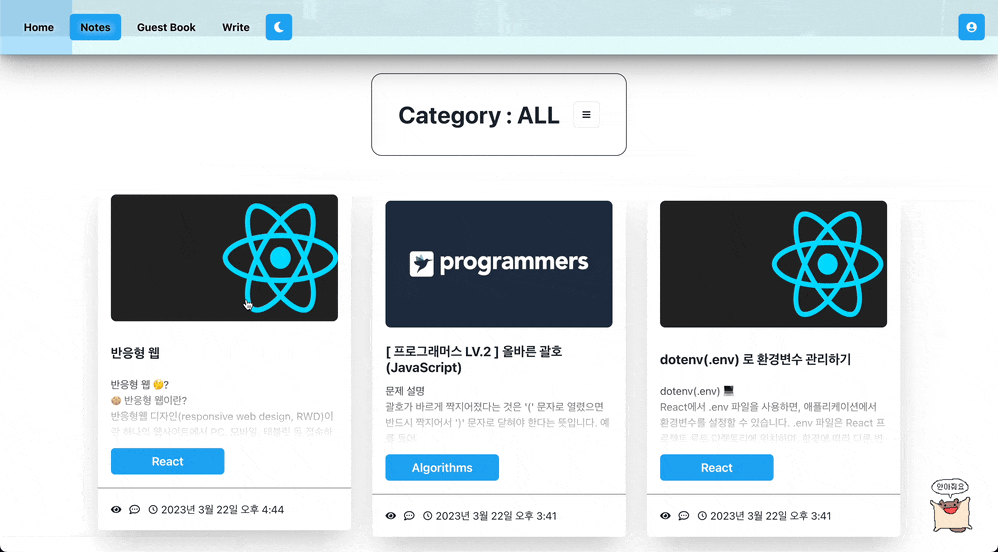
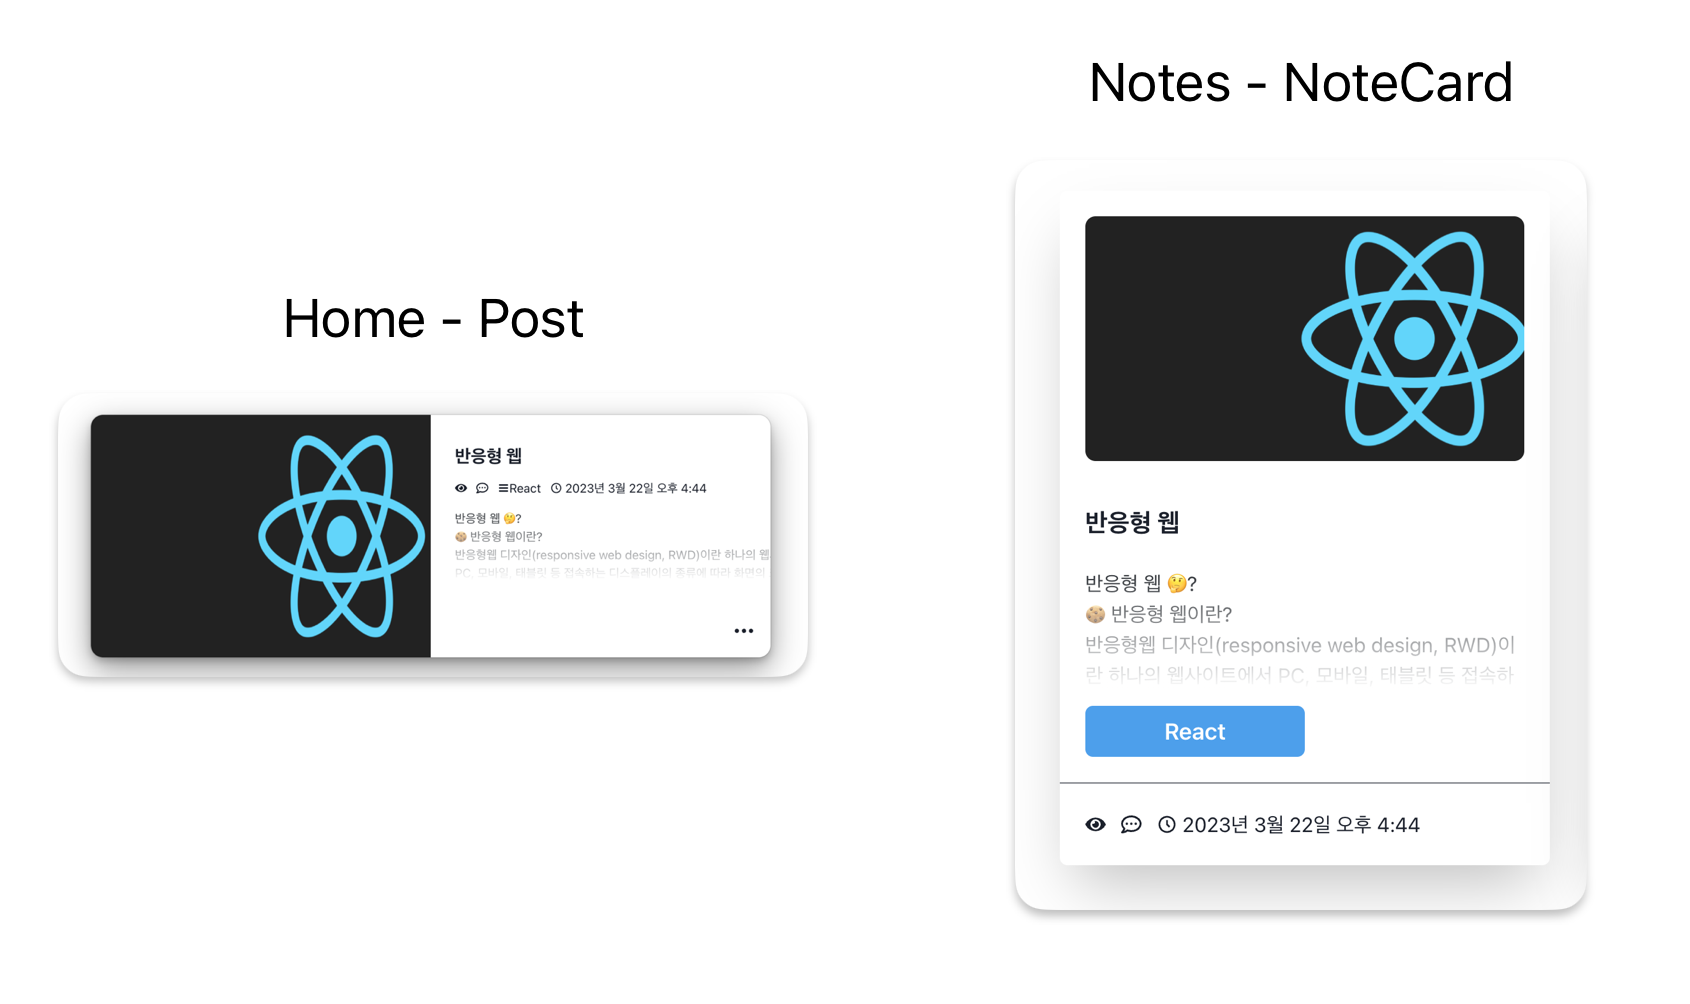
- Entry 페이지는 Home의 Post 컴포넌트나 Notes의 NoteCard컴포넌트를 눌러야만 갈수있는 페이지다.
- Firestore Database의 저장된 문서의 id를
:noteid로 할것이다. - Entry 페이지는
entry/:noteidurl 로 구성될것이다. - Entry 페이지는 다음과같이 구상할것이다.
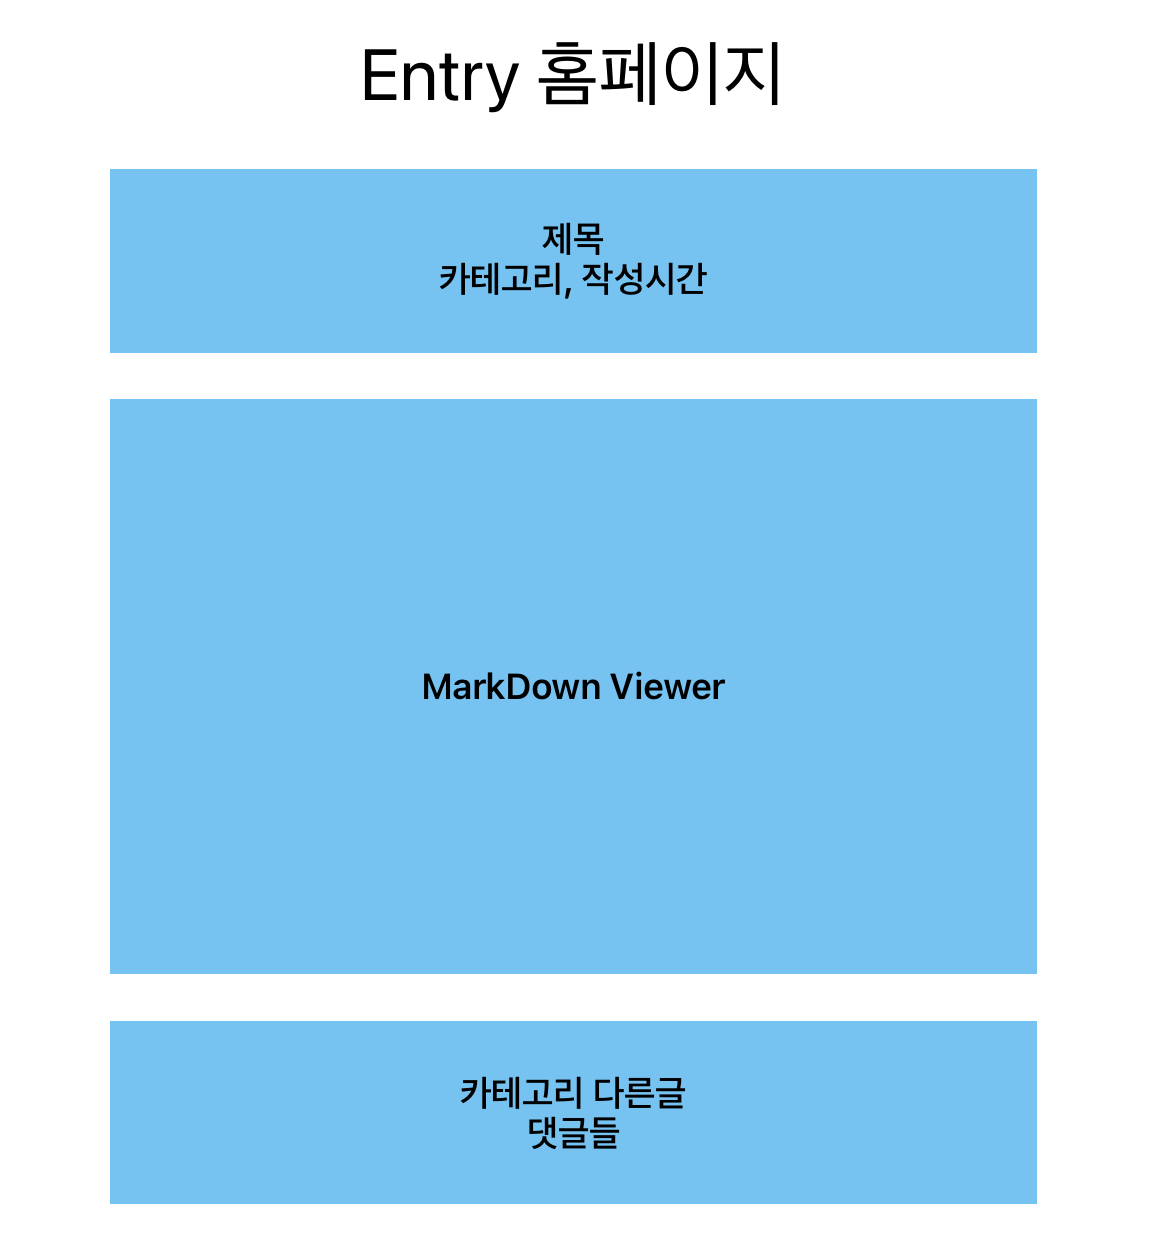
정보 가져오기
react-router-dom / Link
Post 컴포넌트와 NoteCard 컴포넌트는 Firestore Database의 저장된 문서의 id, 즉 :noteid를 가지고있다.
react-router-dom의 Link 컴포넌트로 entry/:noteid 페이지로 간다.
//Router.tsx
{
  path: "entry/:noteid",
    element: <Entry />,
},
//Post,NoteCard
import { Link } from "react-router-dom";
<Link
to={{
pathname: `/entry/${link}`,
}}
>
...
</Link>
Firestore Database 접근
//Entry.tsx
interface IDetail {
  category: string;
  createdAt: number;
  md: string;
  thumbnailUrl: string;
  title: string;
}

const loc = useLocation();
const [docId, setDocId] = useState(loc.pathname.slice(-20));
const [detail, setDetail] = useState<IDetail>();

const getDetail = async (id: string) => {
  const ref = doc(dbService, "notes", id);
  const snap = await getDoc(ref);
  const arr = snap.data();
  setDetail(arr as IDetail);
};

useEffect(() => {
  setDocId(loc.pathname.slice(-20));
  getDetail(docId);
}, [docId, loc.pathname]);useLocation을 이용해 현재 url의 정보를 가져온다.- Firestore Database의 랜덤 ID 규칙에 따라
:noteid는 전부 20자로 이루어져있기 때문에 loc.pathname.slice(-20)으로 끝의 20자리를 잘라 docId에 저장한다. - docId에 맞는 문서를
getDoc으로 가져온다 - detail state에 정보를 저장한다.
EntryHeader,EntryBody
이제 detail에 필요한 정보들을 얻었으니 Header 와 Body에 작성한다.
Header는 간단하지만,
markdown을 html태그로 라이브러리 없이 변환하는건 간단하지 않다..
원래 Toast UI Viewer를 사용할 예정이었으나 React 18에서는 지원하지 않는다.
그래서 찾은것이 MDEditor이다. 사용법은 간단하다.
//custom style for md view
const CustomStyle = styled.div`
  blockquote {
    background-color: gray;
    border: none;
    padding: 10px;
    color: white;
    border-radius: 10px;
  }
`;

...
const colorMode = useColorModeValue("light", "dark");

...
return

<Box
  width={"75vw"}
  height="auto"
  bgColor={"red"}
  data-color-mode={colorMode}
  >
  <CustomStyle>
    <MDEditor.Markdown
      source={detail?.md}
      />
  </CustomStyle>
</Box>data-color-mode는 테마에 따라 다른 배경색,글자색을 일일이 설정할 필요 없이 그냥 light면 "light" 이런식으로 간단하게 설정할수있다.MDEditor.Markdown은 markdown을 읽어서 html태그로 변환해준다.CustomStyle스타일 컴포넌트는 MDEditor가 변환한 html태그에 내가 따로 스타일을 지정하기 위해 그냥 내가 만든 컴포넌트이다. 꼭 이름이 CustomStyle일 필요가 없다.
완성