Tab
안드로이드에서 탭(Tab)은 사용자 인터페이스 내에서 여러 화면을 쉽게 전환할 수 있게 해주는 요소이다. 탭을 사용하면 앱의 탐색 구조를 단순화하고, 사용자에게 더 편리한 UI를 제공할수 있다.
최근에 배운 Fragment를 사용하여 탭을 구현하는 방법을 정리 할 것이다.
사용 방법
구현하는 방법 , 순서는 여러가지가 있겠지만 내가 구현했던 순서,방법을 바탕으로 정리할 것 이다.
-
우선 gradle에 프래그먼트 라이브러리를 추가해야한다.

-
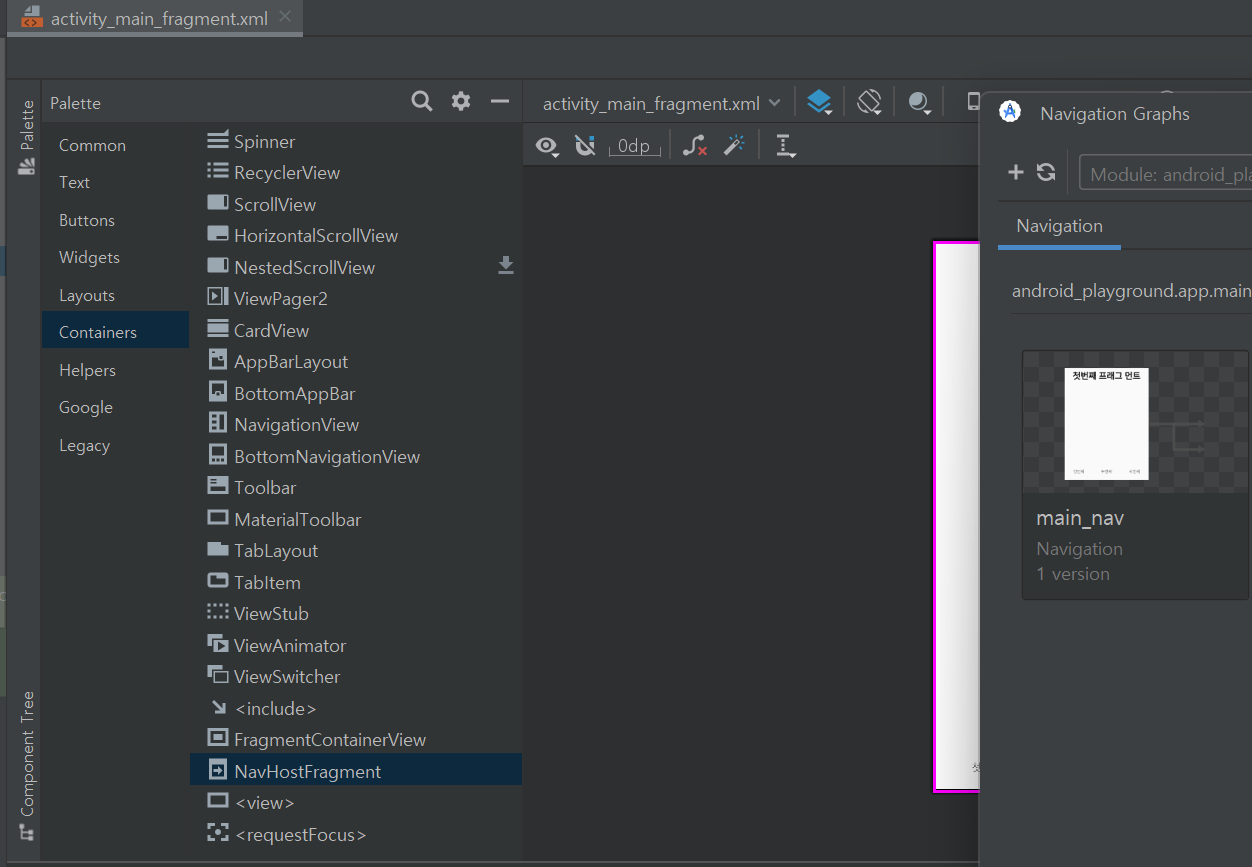
res/navigation/main_nav 생성

프래그먼트들의 네비게이션을 관리할 수 있는 main_nav를 navigation 패키지 하위에 생성한다.
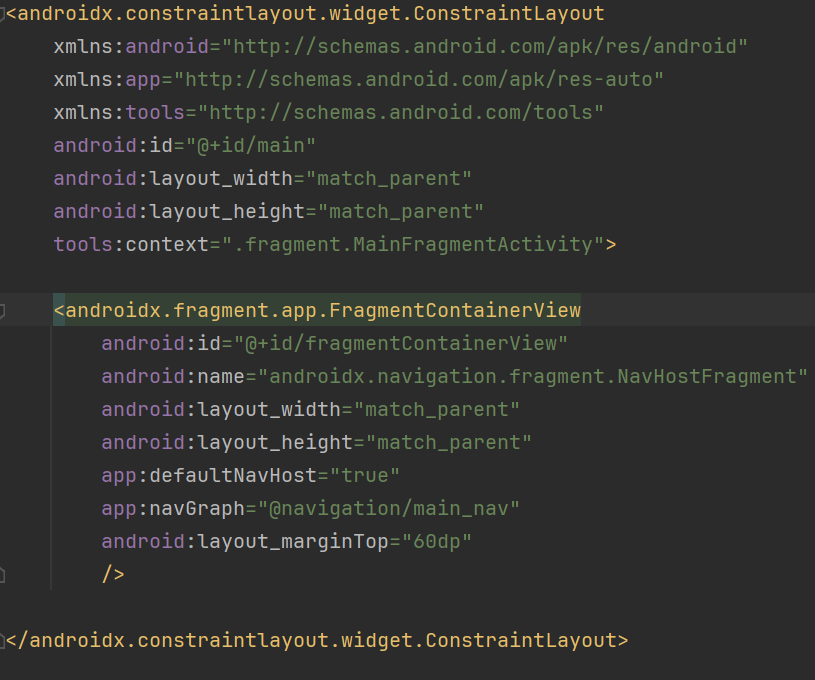
3.프래그먼트들을 관리하는 main 프래그먼트 액티비티를 생성하고, main 프래그먼트.xml 의design 탭에서 container -> NavHostFragment를 드래그하여 프래그먼트들의 네비게이션을 관리 하는 main_nav를 드래그한다.
그러면 xml 코드가 아래 화면처럼 작성된다.
- 프래그 먼트 1,2,3 을 생성한후 아래 레이아웃 처럼 꾸며준다.
<?xml version="1.0" encoding="utf-8"?>
<layout xmlns:tools="http://schemas.android.com/tools"
    xmlns:android="http://schemas.android.com/apk/res/android"
    xmlns:app="http://schemas.android.com/apk/res-auto">
    <androidx.constraintlayout.widget.ConstraintLayout
        android:layout_width="match_parent"
        android:layout_height="match_parent"
        tools:context=".fragment.FirstFragment">

        <LinearLayout
            android:layout_width="match_parent"
            android:layout_height="50dp"
            app:layout_constraintTop_toTopOf="parent">
            <TextView
                android:layout_width="match_parent"
                android:layout_height="match_parent"
                android:gravity="center"
                android:text="첫번째 프래그 먼트"
                android:textColor="@color/black"
                android:textSize="30sp"
                android:textStyle="bold" />
        </LinearLayout>

        <LinearLayout
            android:layout_width="match_parent"
            android:layout_height="60dp"
            app:layout_constraintBottom_toBottomOf="parent">

            <TextView
                android:id="@+id/firstF"
                android:layout_width="match_parent"
                android:layout_height="match_parent"
                android:layout_weight="1"
                android:gravity="center"
                android:text="첫번째" />

            <TextView
                android:id="@+id/secondF"
                android:layout_width="match_parent"
                android:layout_height="match_parent"
                android:layout_weight="1"
                android:gravity="center"
                android:text="두번째" />

            <TextView
                android:id="@+id/thirdF"
                android:layout_width="match_parent"
                android:layout_height="match_parent"
                android:layout_weight="1"
                android:gravity="center"
                android:text="세번째" />

        </LinearLayout>

    </androidx.constraintlayout.widget.ConstraintLayout>
</layout>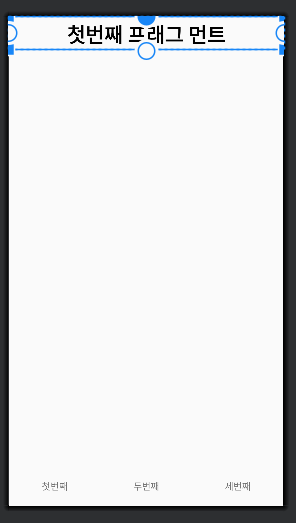
- 생성하 프래그 먼트들을 main_nav.xml에 추가한후, 프래그 먼트들을 연결한다.
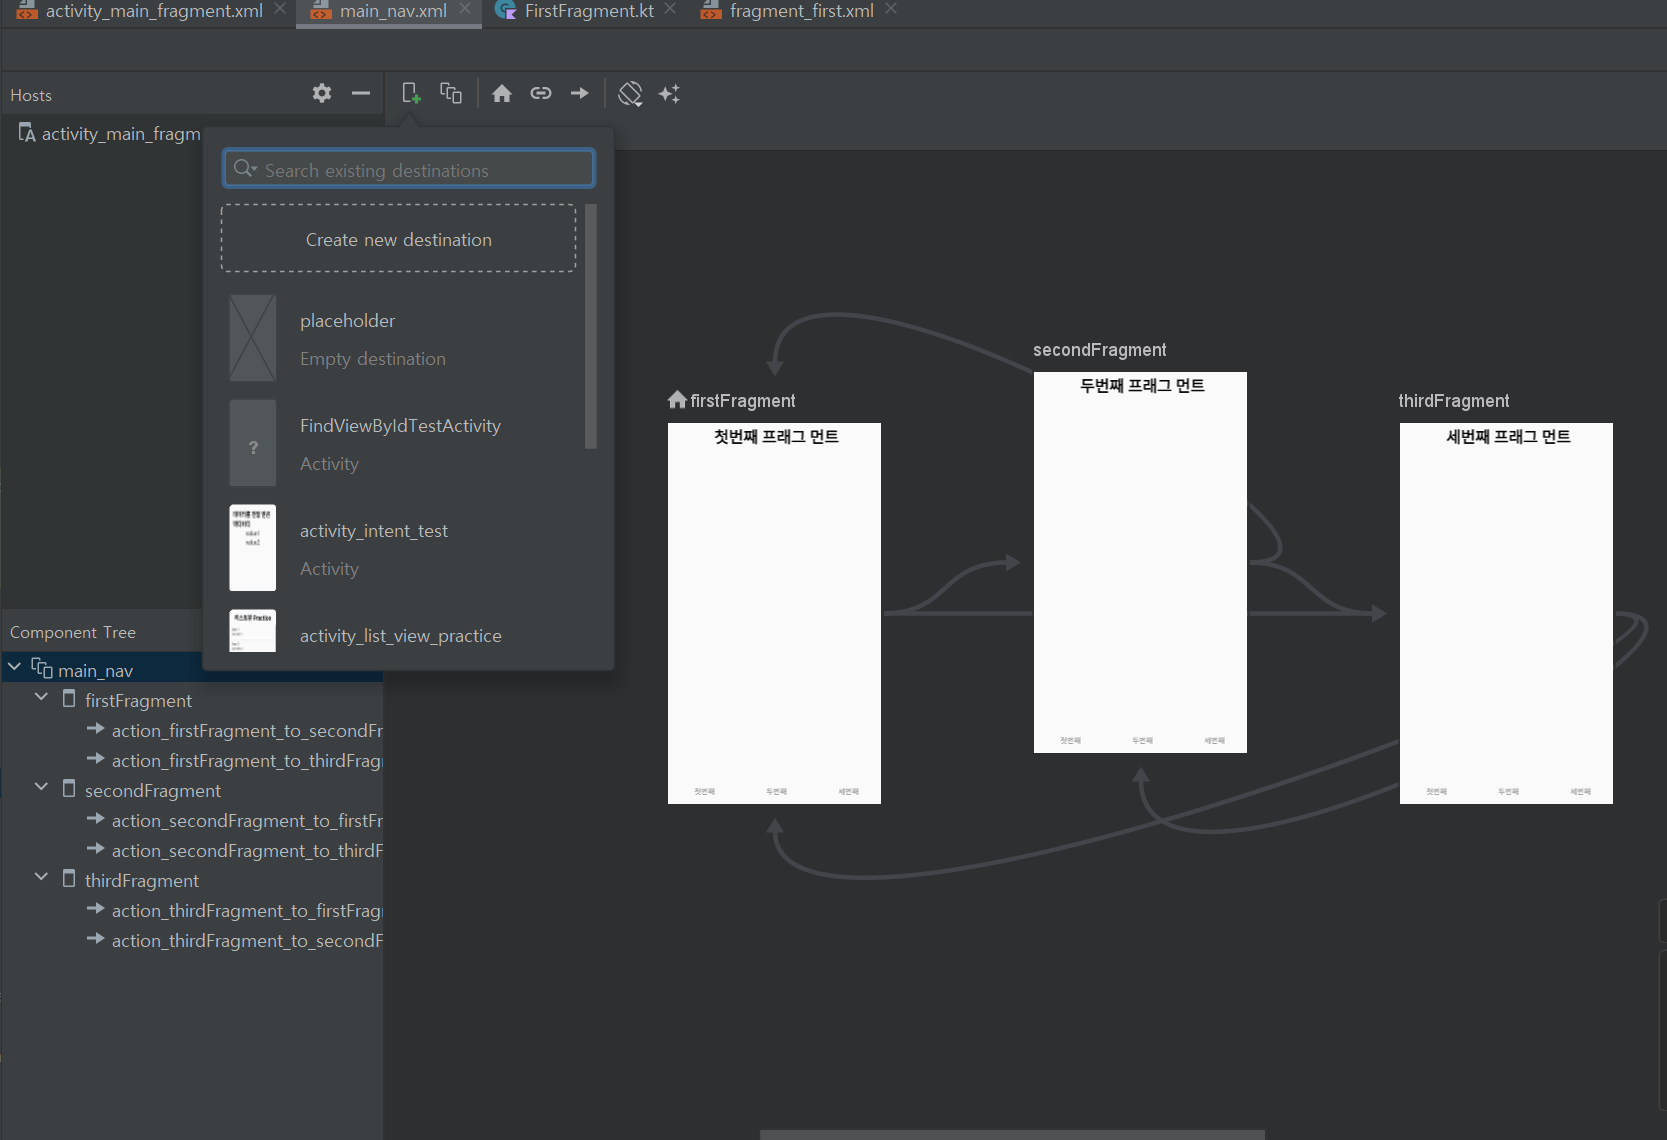
연결을 하게되면 main_nav.xml 에 아래 코드가 작성이 된다.
<?xml version="1.0" encoding="utf-8"?>
<navigation xmlns:android="http://schemas.android.com/apk/res/android"
             xmlns:app="http://schemas.android.com/apk/res-auto"
    xmlns:tools="http://schemas.android.com/tools"
    android:id="@+id/main_nav"
    app:startDestination="@id/firstFragment">

    <fragment
        android:id="@+id/firstFragment"
        android:name="com.wspyo.android_playground.fragment.FirstFragment"
        android:label="fragment_first"
        tools:layout="@layout/fragment_first" >
        <action
            android:id="@+id/action_firstFragment_to_secondFragment"
            app:destination="@id/secondFragment" />
        <action
            android:id="@+id/action_firstFragment_to_thirdFragment"
            app:destination="@id/thirdFragment" />
    </fragment>
    <fragment
        android:id="@+id/secondFragment"
        android:name="com.wspyo.android_playground.fragment.SecondFragment"
        android:label="fragment_second"
        tools:layout="@layout/fragment_second" >
        <action
            android:id="@+id/action_secondFragment_to_firstFragment"
            app:destination="@id/firstFragment" />
        <action
            android:id="@+id/action_secondFragment_to_thirdFragment"
            app:destination="@id/thirdFragment" />
    </fragment>
    <fragment
        android:id="@+id/thirdFragment"
        android:name="com.wspyo.android_playground.fragment.ThirdFragment"
        android:label="fragment_third"
        tools:layout="@layout/fragment_third" >
        <action
            android:id="@+id/action_thirdFragment_to_firstFragment"
            app:destination="@id/firstFragment" />
        <action
            android:id="@+id/action_thirdFragment_to_secondFragment"
            app:destination="@id/secondFragment" />
    </fragment>
</navigation>- 프래그 먼트들의 액티비티에서 네비게이션 작업을 해준다.
class FirstFragment : Fragment() {

    private  lateinit var  binding : FragmentFirstBinding

    override fun onCreate(savedInstanceState: Bundle?) {
        super.onCreate(savedInstanceState)
    }

    override fun onCreateView(
        inflater: LayoutInflater, container: ViewGroup?,
        savedInstanceState: Bundle?
    ): View? {

        binding = DataBindingUtil.inflate(inflater,R.layout.fragment_first,container,false)

        binding.secondF.setOnClickListener{
            it.findNavController().navigate(R.id.action_firstFragment_to_secondFragment)
        }

        binding.thirdF.setOnClickListener{
            it.findNavController().navigate(R.id.action_firstFragment_to_thirdFragment)
        }

        // Inflate the layout for this fragment
        return binding.root
    }

}
실행 결과