이번에는 로그인 기능을 만들어보자.
원활한 이해를 위해 회원가입 & Security 설정을 참고하길 추천한다.
회원가입에 비해 로그인기능은 조금 더 복잡하다.
우선 Controller이다.
@ApiOperation(value = "로그인 기능",notes = "회원가입한 정보로 로그인")
    @PostMapping("/login")
    public Response<UserLoginResponse> login(@RequestBody UserLoginRequest userLoginRequest) {
        log.info("id : {} password : {}\n", userLoginRequest.getUserName(),userLoginRequest.getPassword());
        //토큰이 발급됨
        return Response.success(userService.login(userLoginRequest));
    }
dto를 통해 받아올 수 있게 해주었으니 dto도 만들어주자
@Getter
@AllArgsConstructor
public class UserLoginRequest {
    private String userName;
    private String password;
}
반환 타입은 Token만 반환하게 해주었다.
@Getter
@AllArgsConstructor
public class UserLoginResponse {
    private String jwt;
}
로그인은 몇가지 예외처리를 해야한다.
1. userName이 없을경우
2. password가 다를경우
위 두가지 경우가 아닐경우에만 Token을 발급하였다.
토큰은 jwtKey와 만료시간(1시간)을 설정하여 생성하였다.
jwtKey는 환경변수를 통해 주입된다.
모든 비지니스 로직은 Service에서 처리하게 하였다.
@Service
@RequiredArgsConstructor
public class UserService {
    private final UserRepository userRepository;
    private final BCryptPasswordEncoder encoder;

    @Value("${jwt.secret}")
    private String key;

    private Long expireTimeMs = 1000 * 60 * 60L;

    public UserLoginResponse login(UserLoginRequest dto) {
        //userName 있는지
        User user = userRepository.findByUserName(dto.getUserName())
                .orElseThrow(() -> new AppException(ErrorCode.DUPLICATED_USER_NAME,
                        dto.getUserName() + "userName이 없습니다."));
        //password 일치하는지
        if (!encoder.matches(dto.getPassword(), user.getPassword())) {
            throw new AppException(ErrorCode.INVALID_PASSWORD,"password가 일치하지 않습니다.");
        }

        //token 발행
        String token = JwtUtil.CreateToken(user.getUserName(),key,expireTimeMs);
        UserLoginResponse userLoginResponse = new UserLoginResponse(token);
        return userLoginResponse;
    }

    // 권한을 확인
    public User getUserByUserName(String userName) {
        return userRepository.findByUserName(userName)
                .orElseThrow(()-> new AppException(ErrorCode.USERNAME_NOT_FOUND,"UserName이 없습니다."));
    }
}
Jwt를 발급받는 메소드를 가진 Class를 만들어보자.
Jwt에 저장될 userName과 secretKey와 만료 시간을 매개변수로 받는다.
public class JwtUtil {

    public static String getUserName(String token, String secretKey) {
        return Jwts.parser().setSigningKey(secretKey).parseClaimsJws(token)
                .getBody().get("userName", String.class);
    }

    public static boolean isExpired(String token, String secretKey) {
        return Jwts.parser().setSigningKey(secretKey).parseClaimsJws(token)
                .getBody().getExpiration().before(new Date());
    }

    public static String CreateToken(String userName, String key, Long expireTimeMs) {
        Claims claims = Jwts.claims(); //일종의 map
        claims.put("userName", userName);

        return Jwts.builder()
                .setClaims(claims)
                .setIssuedAt(new Date(System.currentTimeMillis()))
                .setExpiration(new Date(System.currentTimeMillis() + expireTimeMs))
                .signWith(SignatureAlgorithm.HS256,key)
                .compact()
                ;
    }
}
토큰이 유효한지 확인하고 유효하다면 jwt를 발급하는 클래스이다.
- 헤더에서 authentication을 꺼내 token이 형식에 맞게 있는지, 유효한지 확인한다.
- 토큰이 있다면, Token안에 Claims에서 userName꺼내기
- 꺼낸 userName으로 Role 꺼내기
UsernamePasswordAuthenticationToken에 유저 이름과 권환을 확인하여 정한다.
- 인가을 할때 토큰의 권한정보를 사용한다.
@RequiredArgsConstructor
@Slf4j
public class JwtFilter extends OncePerRequestFilter {

    private final UserService userService;
    private final String secretKey;

    @Override
    protected void doFilterInternal(HttpServletRequest request, HttpServletResponse response, FilterChain filterChain) throws ServletException, IOException {
        //SecurityConfig에서 Post요청을 전부 막아놓았는데 열여줄지 말지 결정하는 곳이다.

        //헤더에서 authentication을 꺼내서 문을 열어줄지 말지 결정 할 것이다.
        final String authorization = request.getHeader(HttpHeaders.AUTHORIZATION);
        log.info("authorization : {}", authorization);

        //token 안보냈다면 null이라면 권한부여하지 않고 리턴한다.
        if (authorization == null || !authorization.startsWith("Bearer ")) {
            log.error("authorization을 잘못보냈습니다.");
            filterChain.doFilter(request,response);
            return;
        }

        //토큰 꺼내기
        String token = authorization.split(" ")[1];

        //Token Expired 되었는지 여부
        if(JwtUtil.isExpired(token,secretKey)){
            log.error("token이 만료되었습니다.");
            filterChain.doFilter(request,response);
            return;
        }

        // UserName을 Token에서 꺼내기
        String userName = JwtUtil.getUserName(token,secretKey);
        log.info(userName);

        //Role 꺼내기
        User user = userService.getUserByUserName(userName);
        UserRole role = user.getRole();

        //문 열어주기
        UsernamePasswordAuthenticationToken authenticationToken = new UsernamePasswordAuthenticationToken
                (userName, null, List.of(new SimpleGrantedAuthority(role.toString())));

        //Detail을 넣는다.
        authenticationToken.setDetails(new WebAuthenticationDetailsSource().buildDetails(request));
        SecurityContextHolder.getContext().setAuthentication(authenticationToken);
        filterChain.doFilter(request,response);
    }
}
Swagger를 통해 확인해보자.
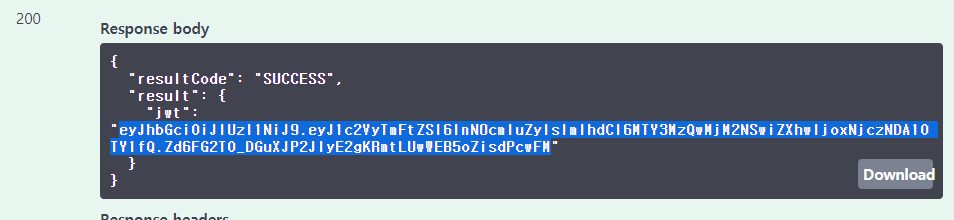
토큰이 잘 발급되었다.
이제 로그인 기능도 구현해 보았다.
다음에는 포스트 기능을 구현해 보자

배우고, 생각하고, 행동해라