🔭 실전 프로젝트 1) 뉴스 데이터 수집하기
1. 뉴스의 제목과 링크를 가지고 오자
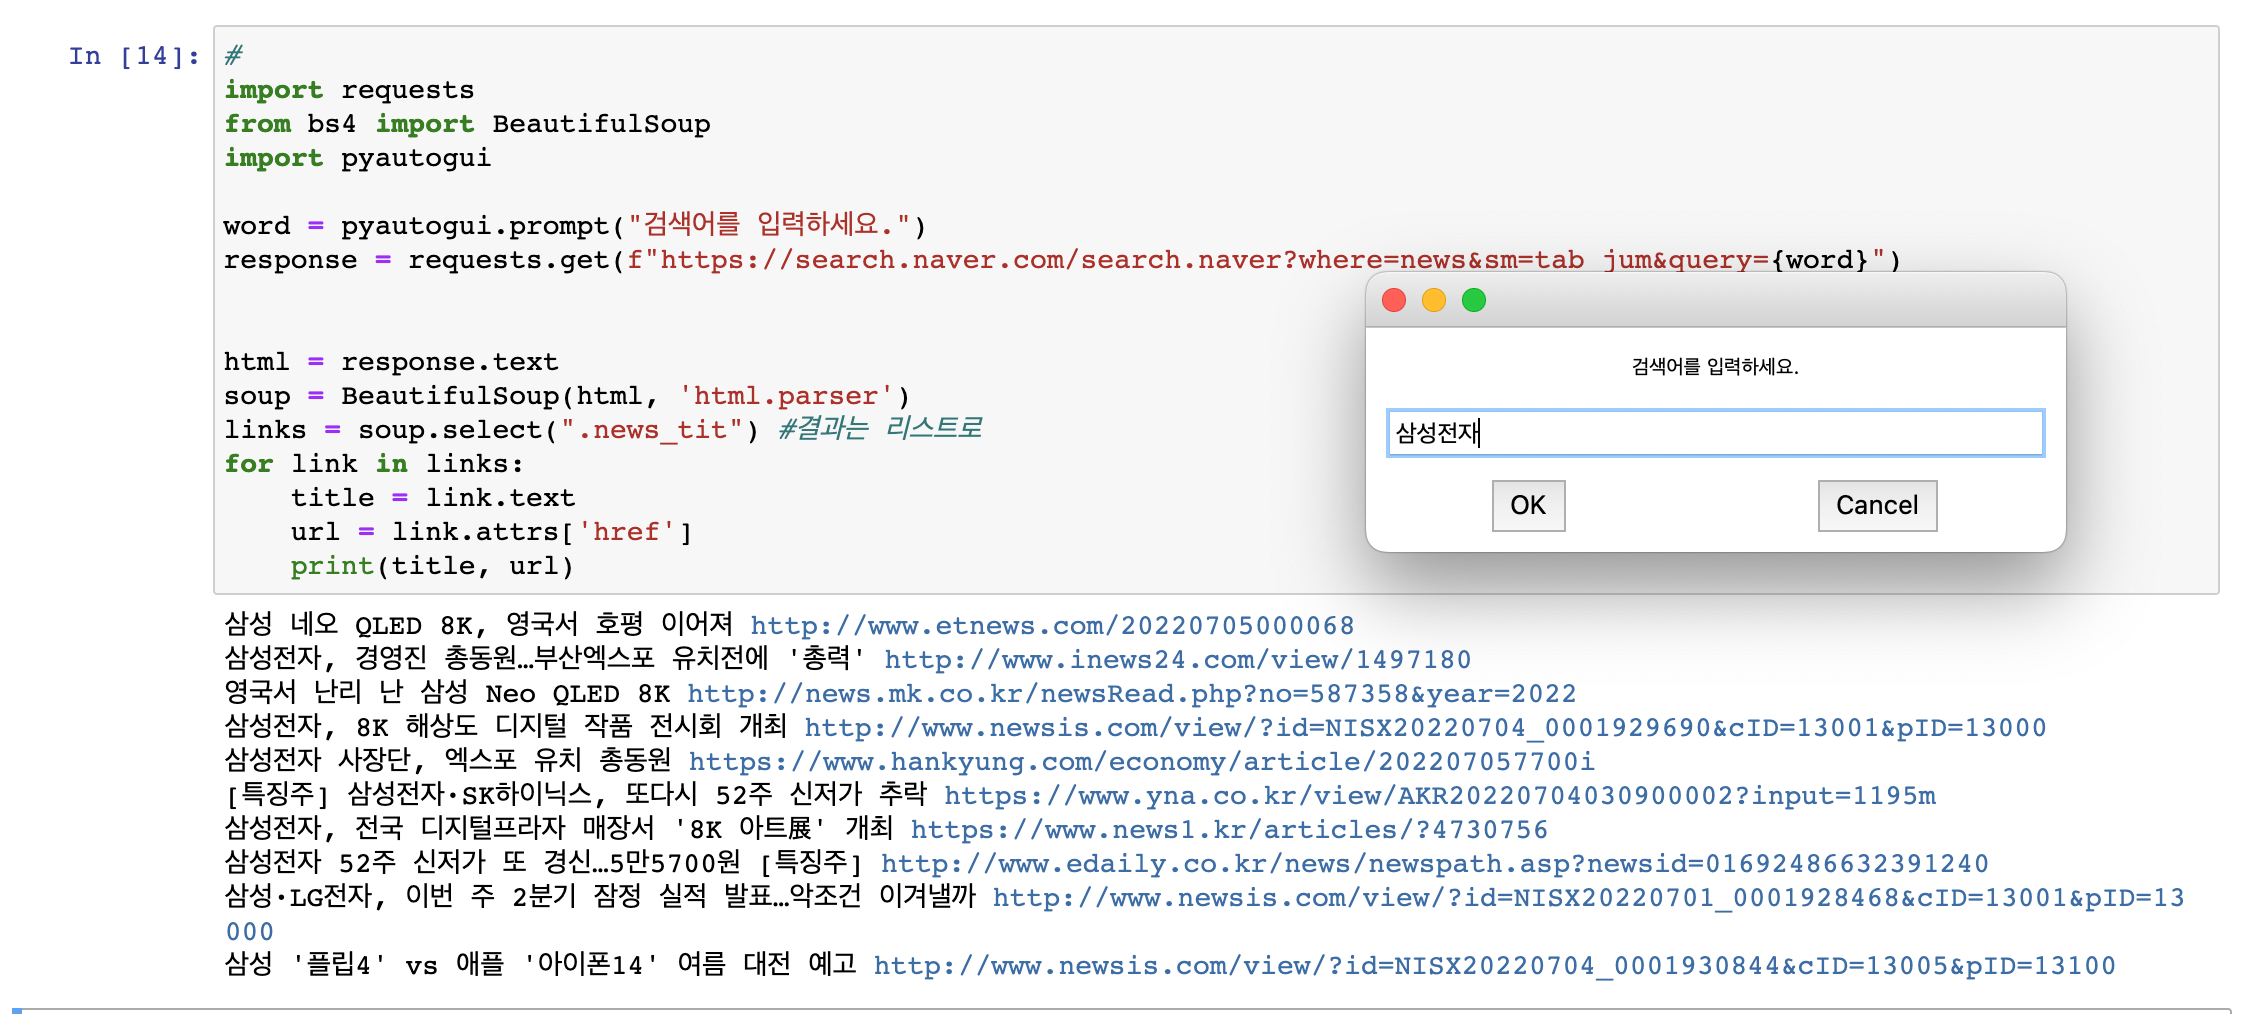
네이버에 삼성전자를 검색한 뒤, 뉴스탭으로 이동하여 뉴스의 제목과 기사로 가는 링크를 가져와보자.
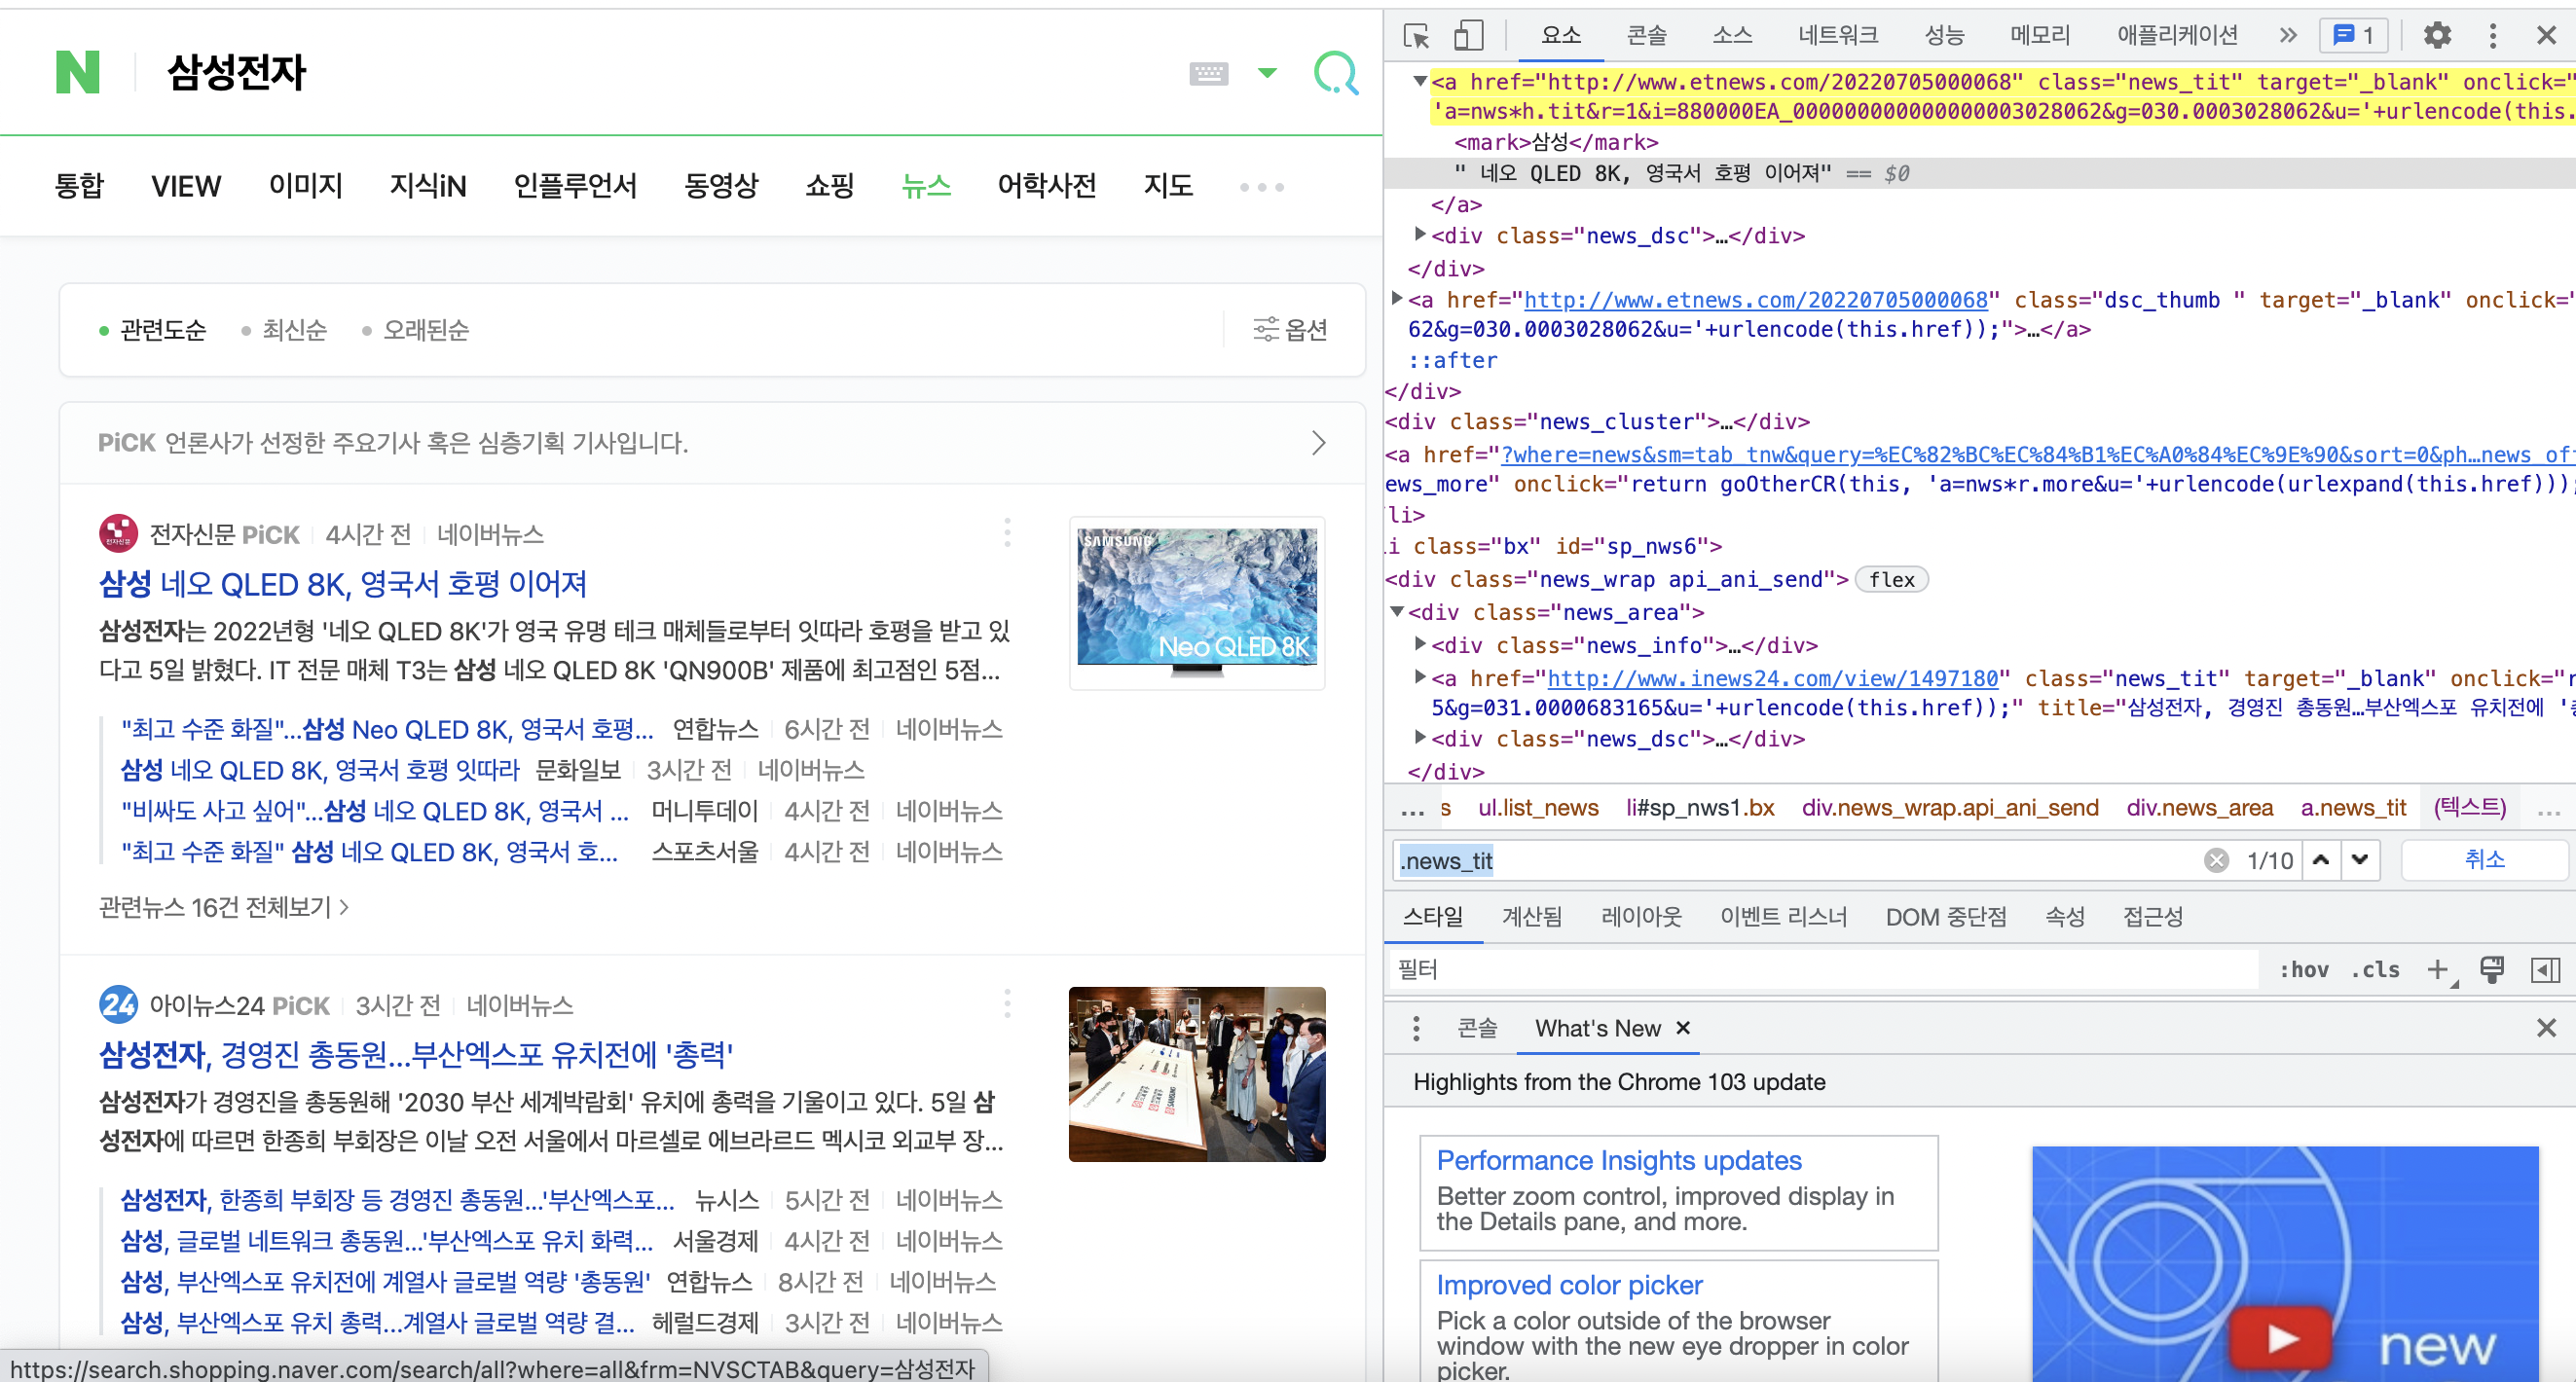
먼저 뉴스의 제목에 속성이 있는지 확인해준다. 여기서는 .news_tit이 모든 기사 제목의 속성을 나타내었다. 그래서 아래의 코드를 작성하여 페이지 내의 모든 기사 제목과 링크를 가져왔다.
#뉴스 제목과 링크 가져오기
import requests
from bs4 import BeautifulSoup

response = requests.get("https://search.naver.com/search.naver?where=news&sm=tab_jum&query=%EC%82%BC%EC%84%B1%EC%A0%84%EC%9E%90")
html = response.text
soup = BeautifulSoup(html, 'html.parser')
links = soup.select(".news_tit") #결과는 리스트로
for link in links:
    title = link.text
    url = link.attrs['href']
    print(title, url)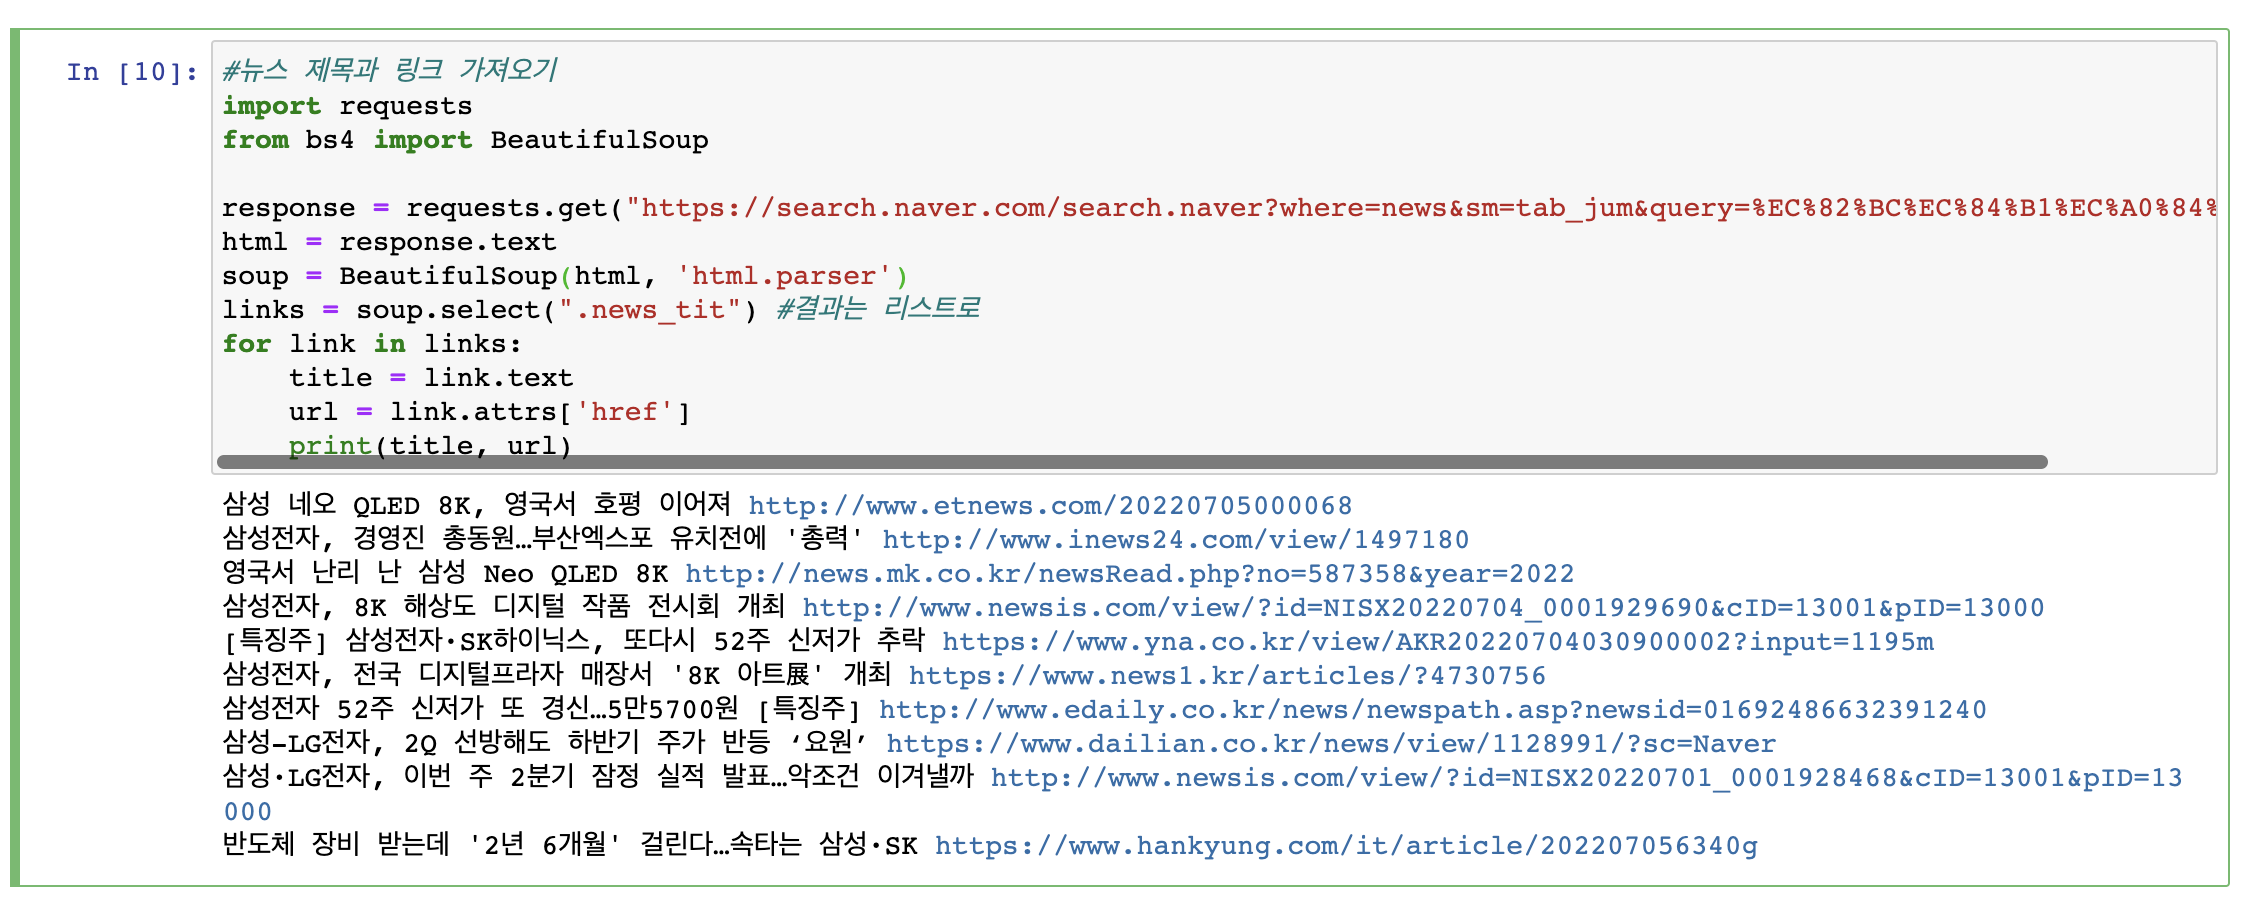
📍실습 과제
-
프로그램을 실행하면 검색어를 입력 받게 해서 해당 검색어로 크롤링 되게 만들어보자
#실습 과제1
import requests
from bs4 import BeautifulSoup

word = str(input('검색어를 입력하세요: '))
print()
addr = 'https://search.naver.com/search.naver?where=news&sm=tab_jum&query='+word
response = requests.get(addr)

html = response.text
soup = BeautifulSoup(html, 'html.parser')
links = soup.select(".news_tit") #결과는 리스트로
for link in links:
    title = link.text
    url = link.attrs['href']
    print(title, url)
2. 검색어에 따라 다른 결과를 나타내기
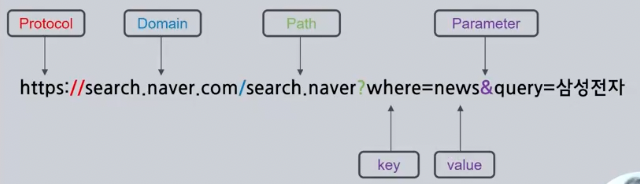
url이란?
인터넷 주소의 형식으로 Protocol - Domain - Path - Parameter로 구성되어있다.
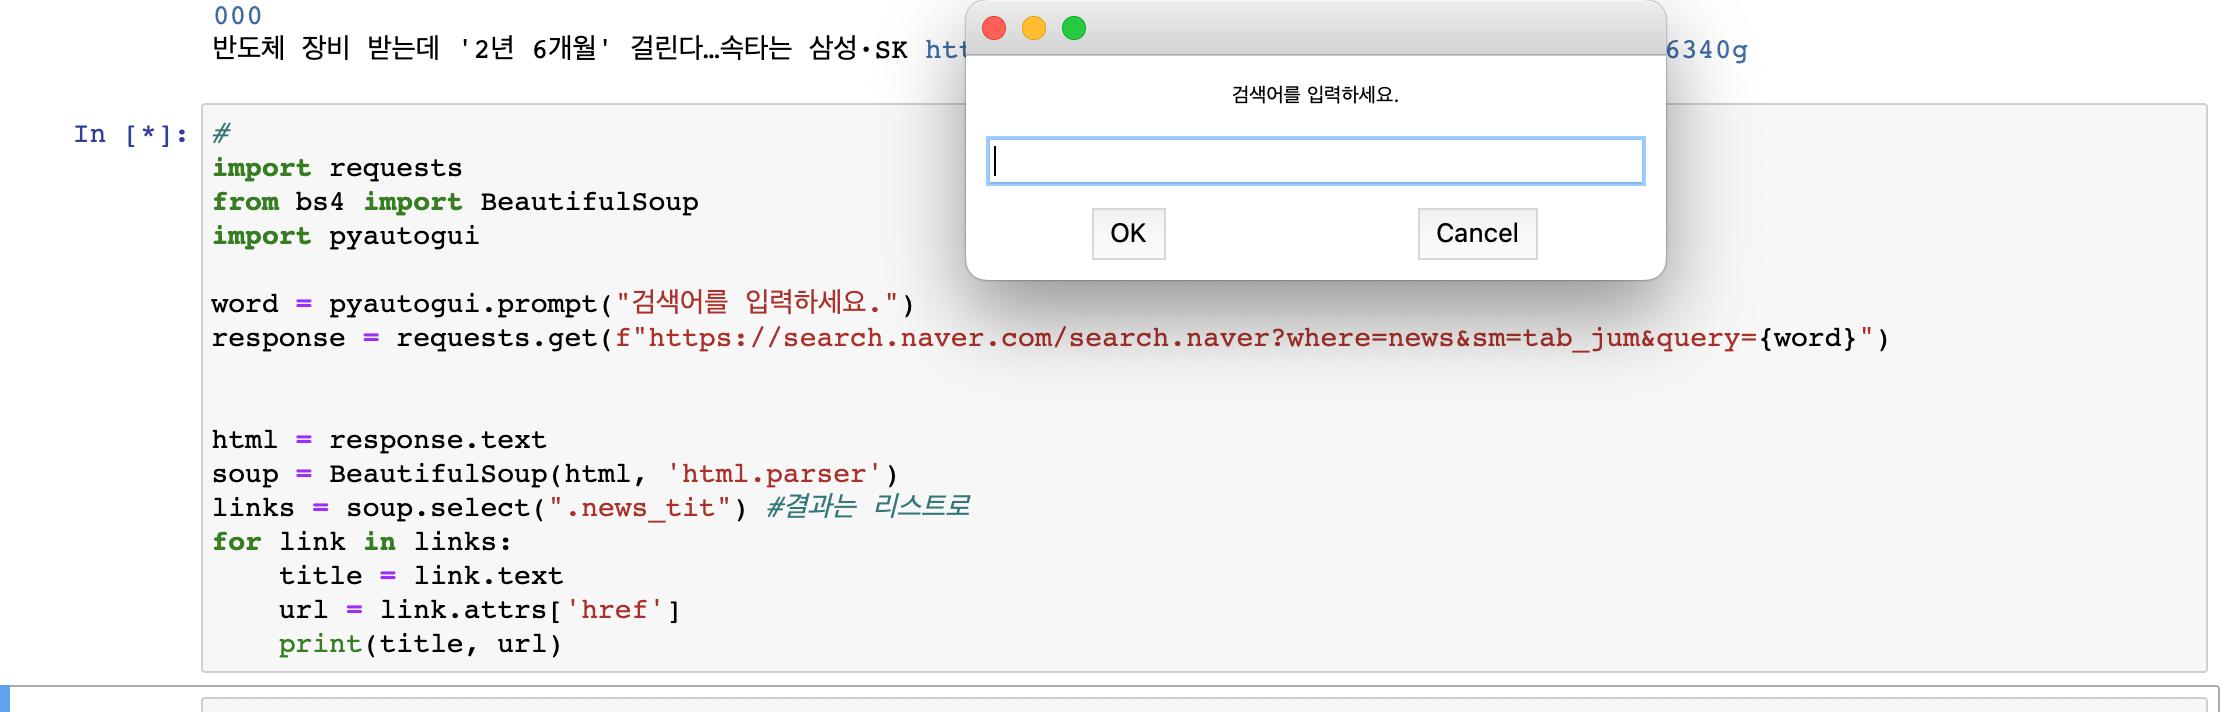
pyautogui
마우스, 키보드 매크로 라이브러리로 간단한 입력창을 띄울 수 있다.
#pyautogui 설치
pip install pyautogui
#pyautogui 입력창
pyautogui.prompt("검색어를 입력하세요")위에 혼자서 작성한 실습 과제를 pyautogui를 사용하여 실습을 진행해보자
3. 여러 페이지 결과 모두 가져오기
url 분석하기
웹 페이지가 1 페이지 ➡️ 2 페이지 ➡️ 3 페이지 이동하면서 어떻게 url이 변하는지 살펴보자
👉 a:all&start가 1 ➡️ 11 ➡️ 21 ➡️ 31 ➡️ ... 이렇게 바뀌고 있음.
#여러 페이지 결과 모두 가져오기
import requests
from bs4 import BeautifulSoup

word = str(input('검색어를 입력하세요: '))
pages = int(input('원하는 페이지를 입력하세요: '))
print()
pageNum = 1
for i in range(1, pages*10, 10):
    print(f"{pageNum}페이지 입니다.===============================================")
    response = requests.get(f"https://search.naver.com/search.naver?where=news&sm=tab_jum&query={word}&start={i}")
    html = response.text
    soup = BeautifulSoup(html, 'html.parser')
    links = soup.select(".news_tit") #결과는 리스트로
    for link in links:
        title = link.text
        url = link.attrs['href']
        print(title, url)
    print()
    pageNum+=1
위의 코드를 출력해보면 아래와 같은 실행화면이 나온다.

Master Student @ KU👩🏻🎓