
-
HTML : 구조를 만들고 (뼈대)
-
CSS : 꾸며주고 (근육)
-
JS : 구조를 움직이게 상호작용하는 (뇌) 👏🏻
HTML은 중요하다!
1. 시맨틱 태그
HTML에 의미를 부여하기 위함이다. <div></div> 와 외형은 같지만 <section></section> 혹은 <article></article>을 사용하여 content의 목적을 뚜렷하게 해준다.
특정 시맨틱 태그를 사용해야만 되는 것이 아닌, class나 id명을 통해서도 의미를 부여할 수 있다.
2. 구조 짜기
이 부분은 특히 css에서의 스타일적 요소를 생각하여, 구조를 잘 계획하여 HTML을 작성해야 한다. 처음 HTML과 CSS를 연습할 때, 구조때문에 엄청 고생했다. (class명을 엄청나게 열었던..) 하지면 처음부터 효율적인 구조를 짜주면, 훨씬 편한 스타일링이 될 수 있다.
3. 개인적으로 헷갈리는 태그!
1) input
input type="radio"는 여러 옵션 중복체크 가능하고,
input type="checkbox"는 여러 옵션중 하나만 체크할 수 있다.<input type= "radio" name = "choice"/> // self-closing tag<input type = "checkbox"/>2) div vs section
3) what is the difference between wrapper and container?
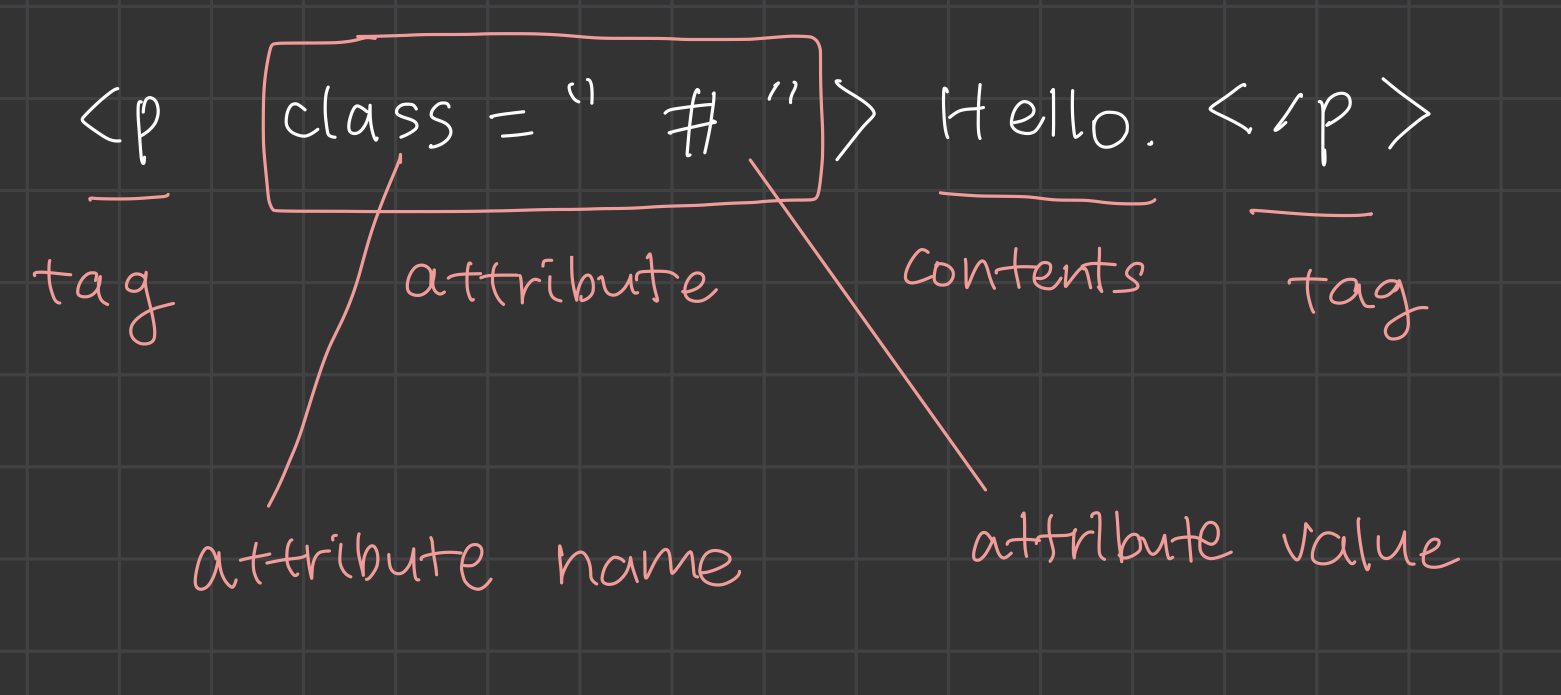
4. Tag? Attribute? 헷갈리는 html 용어!
CSS는 재미있다!
개인적으로, BEM(Block Element Modifier)을 적용하여 구조를 짜면 CSS에 효과를 적용하기 용이한 것 같다. class명은 길어질 수 있지만..!!! 그래도 한 번에 class명이 가리키고 있는 것을 확인할 수 있다.
Get BEM!
HTML 코드
<div class="user-component">
  <div class="user-component__column">
    <img
     src="#"
     class="user-component__avatar user-component__avatar"
     />
     <div class="user-component__text">
     <h4 class="user-component__title">soor</h4>
     <h6 class="user-component__subtitle">
CSS 코드
.user-component {
  justify-content: space-between;
}


.user-component,
.user-component__column:first-child {
  display: flex;
  align-items: center;
}

.user-component__avatar {
  width: 70px;
  height: 70px;
  border-radius: 25px;
  margin-right: 20px;
}

.user-component__title {
  font-size: 20px;
  font-weight: 600;
}

.user-component__subtitle {
  margin-top: 7px;
  font-size: 15px;
  color: rgba(0, 0, 0, 0.6);
}
JS 아직 너무 어렵다..
JS는 서서히 배워가면서 차근차근 정리할 예정이다.
코드스테이츠와 함께 한지 2주차의 첫날이다. 좀 힘들었다.
프리코스를 무사히 통과할 수는 있을까.. 하는 걱정이 들었다.
일희일비하지말자고 다짐했는데, 현재 내 상태는 풀리면 극도로 희😆 안 풀리면 비😰이다.
