🦨 자주쓰는 문법
🦊 split
"hi hello bye".components(separatedBy: " ") // ["hi", "hello", "bye"]🦨 튜플
🦊 튜플 예제 코드
let coordinates = (4, 6)

//튜플 각각에 이름이 없는 경우 아래처럼 접근해야함 (0, 1)
let x = coordinates.0
let y = coordinates.1

//이름을 주면 아래처럼 해당 이름으로 접근가능
let coordinatesNamed = (x: 2, y: 3)

let x2 = coordinatesNamed.x
let y2 = coordinatesNamed.y

//자바스크립트에 비구조화 할당하고 비슷한듯
let (x3, y3) = coordinatesNamed
x3
y3
🦨 배열
- 한 배열에 같은 데이터 타입만 넣을 수 있음
🦊 배열에 element추가
-
배열끝에 새로운 항목 추가
anArray.append("This String") -
배열끝에 다른 배열을 추가(js에 concat과 비슷함)
anArray += ["Moar", "Strings"]
anArray.append(contentsOf: ["Moar", "Strings"]) -
원하는 위치에 새로운 항목을 추가
anArray.insert("This String", at: 0) -
원하는 위치에 다른 배열을 추가
anArray.insert(contentsOf: ["Moar", "Strings"], at: 0) -
출처: https://stackoverflow.com/questions/24002733/add-an-element-to-an-array-in-swift
🦊 배열 slice
var evenNumbers: [Int] = [2, 4, 6, 8, 10, 12, 14, 16]
//원본에서 특정 부분 추출
evenNumbers[0...1] = [1, 2, 3, 4]
evenNumbers
//원본배열에서 특정 부분을 제외한 나머지 부분 추출
let firstThreeRemoved = evenNumbers.dropFirst(3)
evenNumbers
let lastRemoved = evenNumbers.dropLast()
evenNumbers
🦊 배열 반복되는 값 초기화
let fiveZs = Array(repeating: "Z", count: 5)
print(fiveZs)
// Prints "["Z", "Z", "Z", "Z", "Z"]"
🦊 배열 반복문
- 일반적인 반복문
var evenNumbers: [Int] = [2, 4, 6, 8, 10, 12, 14, 16]

//값만 반복
for num in evenNumbers{
    print(num)
}
//인덱스와 값 반복
for (index, num) in evenNumbers.enumerated() {
    print(index, num)
}- 반복을 거꾸로 해야될 때
for i in (1...10).reversed() {
    print(i) // prints 10 through 1
}- 거꾸로 혹은 띄엄띄엄 반복할 때
for index in stride(from: 5, to: 1, by: -1) {
    print(index)
}
//prints 5, 4, 3, 2

for index in stride(from: 5, through: 1, by: -1) {
    print(index)
}
//prints 5, 4, 3, 2, 1
출처 : 스택오버플로우
🦊 배열 슬라이스 후 다시 배열로 만들기
func randomNumberGen() -> Array<Int> {
    let sequence = 0 ..< 27
    print(type(of:sequence))
    //Range<Int>
    let shuffledSequence = sequence.shuffled()
    let sliced = shuffledSequence[0...8]
    print(type(of:sliced))
    //ArraySlice<Int>
    return Array(sliced)
}
print(randomNumberGen())
//[14, 25, 13, 16, 22, 1, 17, 11, 2]
0~26까지의 숫자를 랜덤 배열해서 앞 9개만 출력하는 함수
여기서 shuffledSequence[0...8] 로 바로 리턴하면 문제가 생김
이유: return 형식이 Array<Int>인데 슬라이스만 하면 타입이 ArraySlice<Int>여서
🦊 compactMap, map
map은 nil을 제거해주지 않지만 compactMap은 nil을 제거해줌
- 배열에 nil이 있는경우 -> compactMap
- 그렇지 않은 경우 -> map
🦊 그 이외에 유용한 메소드들
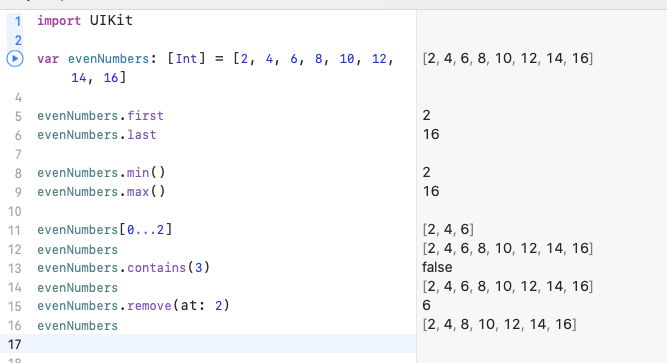
var evenNumbers: [Int] = [2, 4, 6, 8, 10, 12, 14, 16]

evenNumbers.first
evenNumbers.last

evenNumbers.min()
evenNumbers.max()

evenNumbers[0...2]
evenNumbers
evenNumbers.contains(3)
evenNumbers
evenNumbers.remove(at: 2)
evenNumbers
evenNumbers.count //8
evenNumbers.isEmpty // false
🦊 배열 firstIndex, filter
todos = todos.filter { existingTodo in
	return existingTodo.id != todo.id
}
if let index = todos.firstIndex(of: todo) {
todos.remove(at: index)
}🦨 Dictionary
🦊 초기화
//초기화는 아래 2가지 방식이 있지만 보통 위에 방식이 좀거 간단해서 위에 방식으로 많이 쓰이는 듯
var scoreDic: [String: Int] = ["Jason": 80, "Jay": 95, "Jake": 90]
//var scoreDic: Dictionary<String, Int> = ["Jason": 80, "Jay": 95, "Jake": 90]
🦊 딕셔너리 CRUD
var scoreDic: [String: Int] = ["Jason": 80, "Jay": 95, "Jake": 90]
//var scoreDic: Dictionary<String, Int> = ["Jason": 80, "Jay": 95, "Jake": 90]

//값을 참조하면 자료형이 String이 아니라 String?이다. (참조했는데 값이 없을 수도 있으므로)
// 따라서 결과가 nil이 나오면 딕셔너리에 없는 키 이다.
scoreDic["Jay"] // 95
scoreDic["Jerry"] //nil

//옵셔널을 보호해주기 위해서 아래처럼 optional binding이 필요하다.
if let score = scoreDic["Jason"] {
    score //80
} else {
    //.. score 없음
}

//scoreDic = [:] 빈 딕셔너리로 바꿔주는 코드
scoreDic.isEmpty
scoreDic.count


// 기존 사용자 업데이트
scoreDic["Jason"] = 99
scoreDic

// 사용자 추가
scoreDic["Jack"] = 100
scoreDic

// 사용자 제거
scoreDic["Jack"] = nil
scoreDic
🦊 딕셔너리 반복문
// 키와 값으로 반복
for (name, score) in scoreDic {
    print("\(name), \(score)")
}

//키값으로만 반복
for key in scoreDic.keys {
    print(key)
}
🦊 딕셔너리 grouping
let students = ["Kofi", "Abena", "Efua", "Kweku", "Akosua"]
let studentsByLetter = Dictionary(grouping: students, by: { $0.first! })
// ["E": ["Efua"], "K": ["Kofi", "Kweku"], "A": ["Abena", "Akosua"]]
예제코드
struct Person {
    let name: String
    let country: String

    init(name: String, country: String) {
        self.name = name
        self.country = country
    }
}

let taelee = Person(name: "taelee", country: "Korea")
let jehong = Person(name: "jehong", country: "Korea")
let yuma = Person(name: "Yuma", country: "Japan")

let personList: [Person] = [taelee, jehong, yuma]

let personDics = Dictionary(grouping: personList, by: {person in person.country})
print(personDics)
🦨 Set
🦊 Set 기본 코드
//var anArray: Array<Int> = [1, 2, 3, 4, 4, 4]   // [1, 2, 3, 4, 4, 4]
var aSet: Set<Int> = [1, 2, 3, 4, 4, 4]   //{2, 3, 1}

aSet.isEmpty //false
aSet.count   // 4

aSet.contains(4)    //true

aSet.insert(5)
aSet               //{3, 5, 4, 1, 2}

aSet.remove(1)     //1
aSet               //{3, 5, 4, 2}
🦨 함수
🦊 함수 기본형
func functionName(externalName param: ParamType) -> ReturnType {
	//.....
    return returnValue
}- overload 가능
func printTotalPrice(price: Int, count: Int) {
    print(" TOtal Price: \(price * count)")
}

func printTotalPrice(price: Double, count: Double) {
    print(" TOtal Price: \(price * count)")
}

func printTotalPrice(가격: Int, 개수: Int) {
    print(" TOtal Price: \(가격 * 개수)")
}
🦊 in-out parameter
C의 포인터와 비슷한 기능
원래 함수에 인자를 넘겨주면 원본에 영향을 안미치는데
이렇게 하면 원본에 영향을 미침
var value = 3
func incrementAndPrint(_ value: inout Int) {
    value += 1
    print(value)
}

incrementAndPrint(&value)
print(value)
🦊 function as a param
func add(_ a: Int, _ b: Int) -> Int {
    return a + b
}

func subtract(_ a: Int, _ b: Int) -> Int {
    return a - b
}

var function = add
function(4, 2)

func printResult(_ function: (Int, Int) -> Int, _ a: Int, _ b: Int) {
    let result = function(a, b)
    print(result)
}

printResult(add, 10, 5)
🦨 optional
🦊 optional은 있을 수도 없을 수도 있는값
- 파이썬이나 자바스크립트에서는 값을 넣었다가 None이나 null로 바꿔도 문제가 없음
- 하지만 스위프트에서는 nil이 될 수도 있는 값은 표시를 해줘서 이게 무조건 값이 있는건지, 아니면 값이 없을수도 있는 건지 변수 타입에서 알려줄 수 있음
- (위에 None, null, nil은 다 같은 기능이라고 생각하면 된다)
let num = Int("10")-여기에서 num은 Int?(Int optional)이다. (Int("글자")처럼 Int변환에 실패하면 nil이 될 수도 있기 때문에)
🦊 optional에 접근하기 - 1. force unwrapping
(억지로 optional에 접근하기)
- optional은 그냥 접근하면 value가 나오는게 아니라 optional(값)이런식으로 optional에 한번 감싸진 값을 반환한다.
- 안에 있는 값을 접근하려면 !기호를 쓴다
var carName : String? = "티코"
print(carName!)- 하지만 아래처럼 nil인 경우에는 !를 써서 optional을 접근하면 에럴를 내뱉는다.
var carName : String? = "티코"
carName = nil
print(carName!)
🦊 optional에 접근하기 - 2. optional binding (if let)
- 한번 검사해보고 값이 있으면 값에 접근
var carName : String? = "티코"

if let unwrappedCarName = carName {
    print(unwrappedCarName)
} else {
    print("car name 없다")
}- 💡 아래처럼 접근하면 Optional("티코")로 나오는데 위에는 그냥 "티코"로 나오는지는 모르겠다.
- 둘다 let으로 선언했고 print했는데 이상하다.
var carName : String? = "티코"
let a = carName
print(a)- if let 함수에 적용해보기
func printParsedInt(from: String) {
    if let parsedInt = Int(from) {
        print(parsedInt)
    } else {
        print("Int로 converting 실패")
    }
}

printParsedInt(from: "100")
printParsedInt(from: "문자문자")
🦊 optional에 접근하기 - 3. optional binding (guard)
- 위의 방식과 거의 비슷한데 depth가 깊어지지 않게 바꾼 방식
- 마치 if, if else문이 있을 때 if문을 하나만 써서 에러처리 해버리는 방식과 비슷한듯
func printParsedInt(from: String) {
    guard let parsedInt = Int(from) else {
        print("Int로 converting 실패")
        return
    }
    print(parsedInt)
}

printParsedInt(from: "100")
printParsedInt(from: "문자문자")
🦊 optional에 접근하기 - 4. nil coalescing
- String? 타입을 String타입으로 바꿀때 만약 값이 없으면 기본값을 넣어주는 방식
var carName : String? = "티코"
carName = nil

let myCarName: String = carName ?? "테슬라"
🦁 Closure
🦊 closure 예시 코드
var multiplyCLosure1: (Int, Int) -> Int = { (a: Int, b: Int) -> Int in
    return a * b
}

var multiplyCLosure2: (Int, Int) -> Int = { a, b in
    return a * b
}

var multiplyCLosure3: (Int, Int) -> Int = { $0 * $1}

let result1 = multiplyCLosure1(4, 2)
let result2 = multiplyCLosure2(4, 2)
let result3 = multiplyCLosure3(4, 2)

func operateTwoNum(a: Int, b: Int, operation: (Int, Int) -> Int) -> Int {
    let result = operation(a, b)
    return result
}

operateTwoNum(a: 4, b: 2, operation: multiplyCLosure1)

var addClosure: (Int, Int) -> Int = {a, b in
    return a + b
}

operateTwoNum(a: 4, b: 2, operation: addClosure) //6

operateTwoNum(a: 4, b: 2) {a, b in
    return a / b
}  // 2
🦁 structure
🦊 프로퍼티 예제 코드
struct Person {
    //stored property
    var firstName: String{
        didSet {
            print("didSet: \(oldValue) --> \(firstName)")
        }
    }
    var lastName: String

    // computed property
    var fullName: String {
        get {
            return "\(firstName) \(lastName)"
        }

        set {
            if let firstName = newValue.components(separatedBy: " ").first {
                self.firstName = firstName
            }

            if let lastName = newValue.components(separatedBy: " ").last {
                self.lastName = lastName
            }
        }
    }

    static let isAlien: Bool = false
}

var person = Person(firstName: "Jason", lastName: "Lee")

person.firstName
person.lastName

person.firstName = "Jim"
person.lastName = "Kim"

person.firstName
person.lastName
🦊
🦁 클래스
🦊 클래스 casting(upper, down)
import UIKit

class Person {
    var name:String

    init(name: String) {
        self.name = name
    }

    func printName() {
        print("I'm \(name)")
    }
}

class Student: Person {
    var lectures: [String] = []
}

var person = Person(name: "kim")
person.printName()

var student = Student(name: "student Kim")
student.lectures.append("math")
student.lectures

//upper casting
person = student as Person
person.name

//down casting
if let newStudent = person as? Student {
    print(newStudent.name)
} else {
    print("캐스팅 실패")
}
🦊
🦊
🦁
🦊
🦊
🦊
🦊
🦊
🦊
🦊
🦊

back-end, cloud, docker, web의 관심이 있는 예비개발자입니다.