1. 설정
- server.js 파일 생성
- 프로젝트 생성: npm init -y
- npm install express
- npm install -g nodemon
const express = require('express')
const app = express()

app.listen(8080, () => {
    console.log('http://localhost:8080 에서 서버 실행중')
})

app.get('/', (요청, 응답) => {
  응답.send('반갑다')
}) - 파일실행:
- (nodemon설치 안했을때) node server.js
- (nodemon 설치했을때) nodemon server.js
2. 특정 페이지 생성하고 싶을때 (send)
app.get('/news', (요청, 응답) => {
  응답.send('오늘비옴')
})
3. html 파일 보내고 싶을때 (sendFile)
- index.html 파일을 생성한다.
app.get('/news', (요청, 응답) => {
  응답.sendFile(__dirname + 'index.html')
})
📍 __dirname 은 현재의 파일(file)이 위치한 폴더(directory)의 절대경로(absolute path)를 알려준다.
4. 스타일 적용할때
1. app.use
폴더를 생성하고 그 폴더를 서버파일에 app.use라는 문법으로 등록해두어야 폴더 안에 있는 static 파일들(css, js, 이미지 파일들)을 사용할 수 있다.
app.use(express.static(__dirname + '/public'));2. index.html 에 css 파일을 첨부해서 사용한다.
<link href="/main.css" rel="stylesheet">5. mongodb 설치
- mongodb는 비관계형 데이터베이스
- 예외는 있지만 관계형 데이터베이스는 정확도, 비관계형 데이터베이스는 입출력이 빠른것에 장점을 가진다고 생각하자.
6. mongodb collection을 만든다.
- database 이름, collection 이름을 설정해준다.
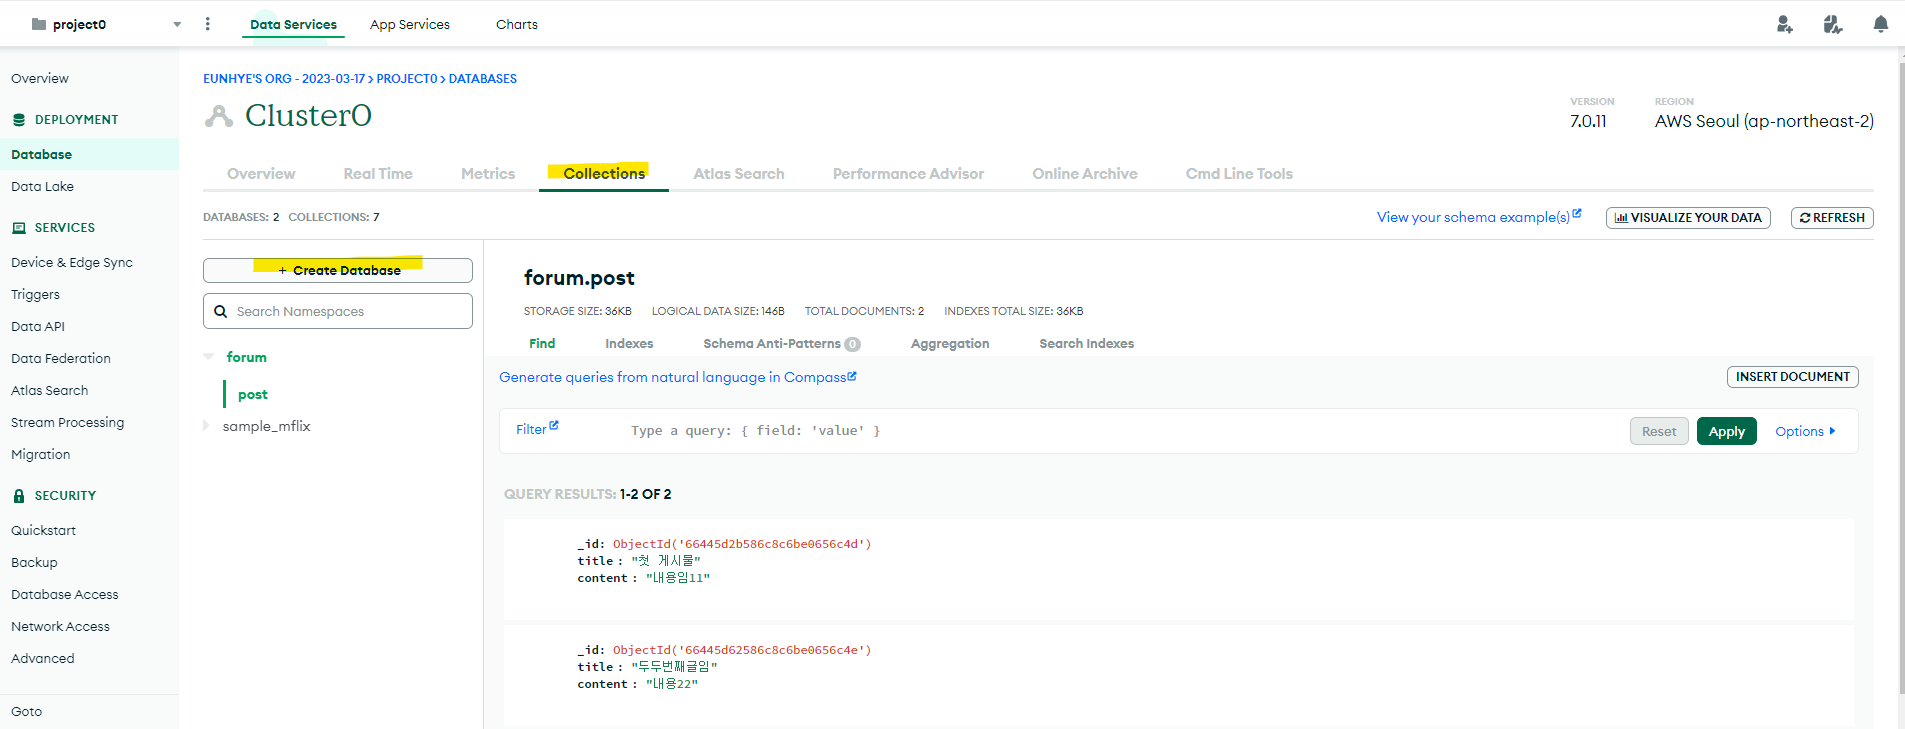
- insert document 하면 데이터 넣을 수 있다.

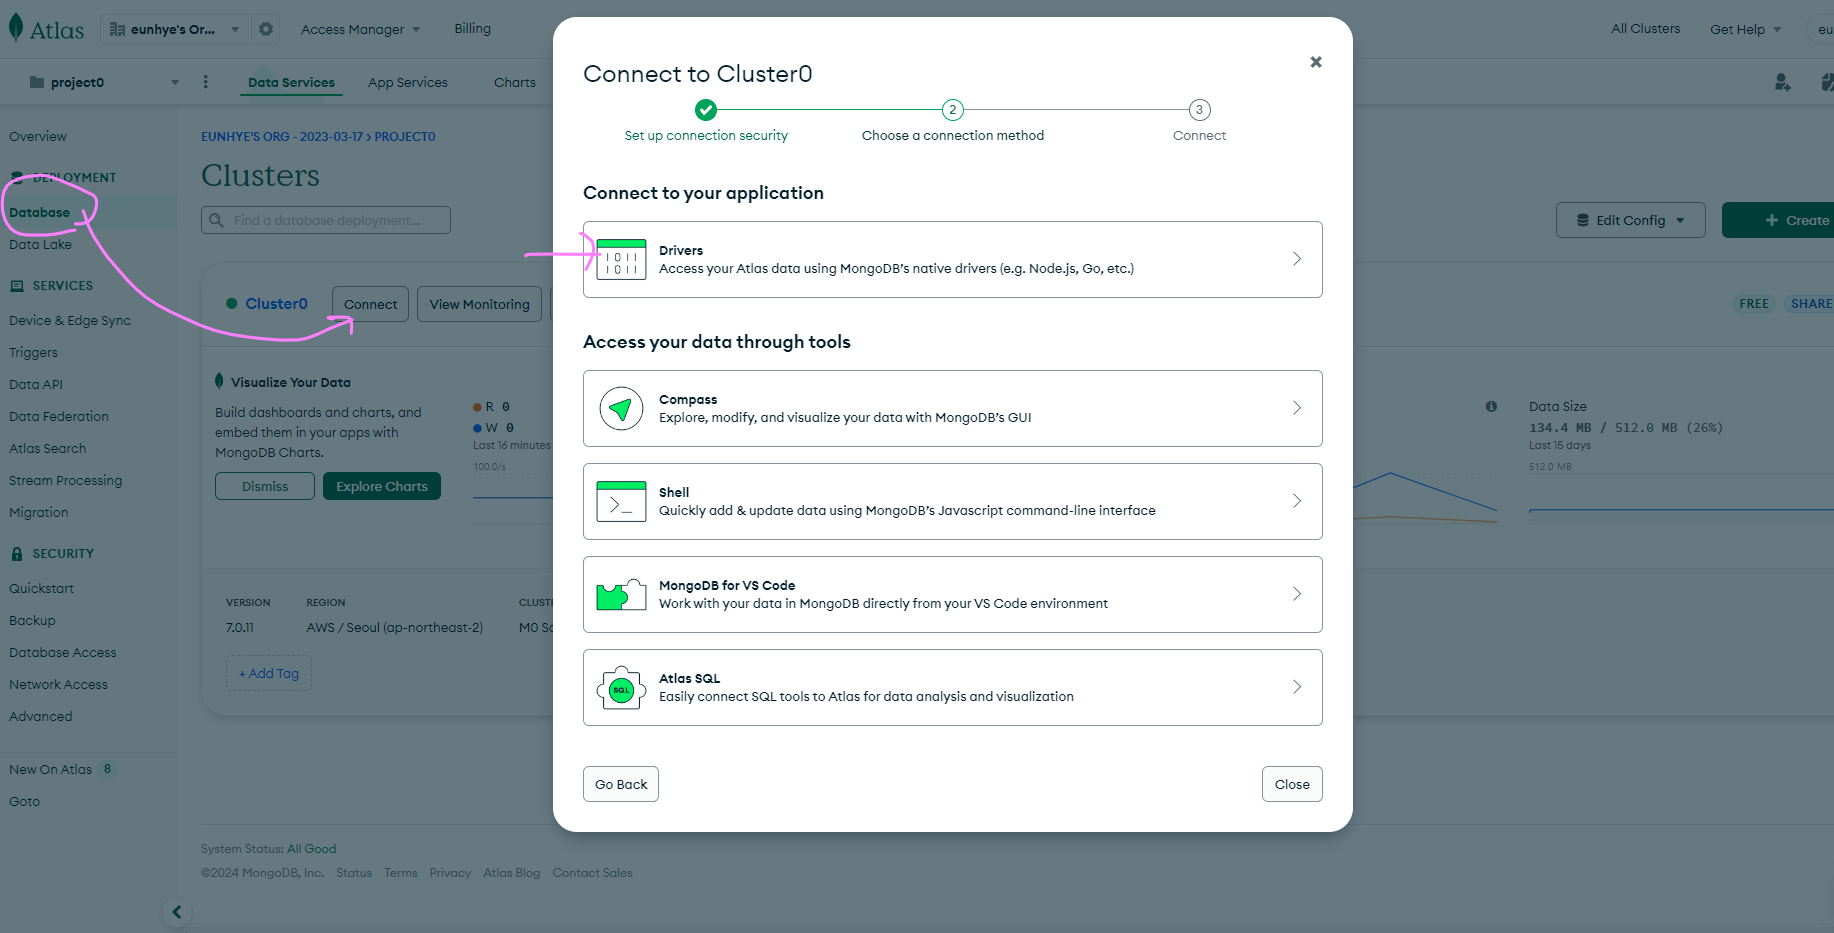
7. 서버 연결
1. mongodb 라이브러리 설치
npm install mongodb@5
2. mongodb 라이브러리 관련 코드 추가
- 서버를 띄우는 코드도 안에 넣어 놓는게 좋은 관습이다.
const { MongoClient } = require('mongodb')

let db
const url = 'mongodb사이트에 있던 접속 URL'
new MongoClient(url).connect().then((client)=>{
  console.log('DB연결성공')
  db = client.db('forum')

  app.listen(8080, () => {
    console.log('http://localhost:8080 에서 서버 실행중')
  })

}).catch((err)=>{
  console.log(err)
})- database -> delivers -> Add your connection string into your application code 에 있는 url 추가
8. 데이터 보내기
app.get("/news", () => { db.collection("콜렉션명").insertOne({보낼key값:보낼내용}
} )
9. db에서 콜렉션의 모든 document 출력
app.get("/news", () => {
let result = db.collection("콜렉션명").find().toArray()
console.log(result)
} )
기록은 희미해지지 않는다 🐾🧑💻