
콘텐츠 컬렉션
Astro 프로젝트의 콘텐츠를 관리하고 작성하는 방법.
전용 쿼리가 존재하는, 내부 콘텐츠 전용 DB같은 느낌으로 생각하면 될 듯!
- 문서 정리
- 프런트매터 유효성 검사
- 콘텐츠에 자동 TypeScript 유형 안전성 제공
콘텐츠 컬렉션이란 무엇입니까?
src/content 디렉터리에 존재하는 특정 컨텐츠 전용 디렉터리들.
해당 용도로 예약되어 다른 파일을 넣을 수 없다! (하위 디렉터리 생성은 가능)
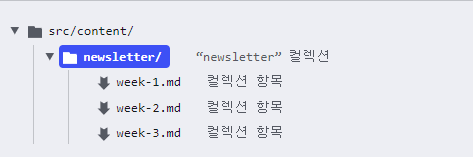
컬렉션 항목
콘텐츠 컬렉션 디렉터리에 저장된 콘텐츠.
확장자로 md, json, yaml를 가질 수 있다.
-> Astro의 내장 콘텐츠 API를 사용하여 콘텐츠 쿼리를 사용할 수 있다!
.astro 디렉터리
git ignore에 해당 디렉터리를 추가할 것
콘텐츠 컬렉션을 위한 메타데이터가 저장됨.
자동 유지관리 및 업데이트되므로 수동으로 건드리지 말 것.
컬렉션 정의
src/content/config.ts
import { defineCollection } from 'astro:content';

const blogCollection = defineCollection({ /* ... */ }); //컬렉션 정의

export const collections = { // 컬렉션 등록
  'blog': blogCollection,
};
tsconfig.json
{
  "extends": "astro/tsconfigs/base",
  "compilerOptions": {
    "strictNullChecks": true
  }
}
컬렉션 스키마 정의
컬렉션에 대한 규칙 같은 것!
- 데이터를 참조하거나 쿼리해야 할 때 이 데이터가 예측 가능한 형태로 존재함을 보장
- 컬렉션 스키마를 위반하는 경우 Astro가 알려줌
- TypeScript 인터페이스 자동 생성 및 적용
- 외부 npm 패키지 등에서 라이브러리처럼 스키마를 가져와 사용 가능
import { z, defineCollection } from 'astro:content';

const blogCollection = defineCollection({ //컬렉션 정의
  type: 'content',
  schema: z.object({   //컬렉션 스키마 정의
    title: z.string(),
    tags: z.array(z.string()),
    image: z.string().optional(),
  }),
});

export const collections = { //컬렉션 등록
  'blog': blogCollection,
};
컬렉션 참조 정의
reference 함수를 사용하여 컬렉션 스키마의 속성을 다른 컬렉션의 항목으로 정의할 수 있다!
import { defineCollection, reference, z } from 'astro:content';

const authors = defineCollection({
  type: 'data',
  schema: z.object({
    name: z.string(),
    portfolio: z.string().url(),
  })
});

const blog = defineCollection({
  type: 'content',
  schema: z.object({
    title: z.string(),
    author: reference('authors'),  // `authors` 컬렉션에서 참조
    relatedPosts: z.array(reference('blog')), // `blog` 컬렉션에서 참조
  })
});

export const collections = { blog, authors };
사용자 정의 슬러그 정의
슬러그(slug)
컬렉션에서 항목을 쿼리하는 데 사용되는 속성
-> velog같은 곳에서 url맨 뒤에 붙는 경로명 같은 거!
-> slug를 활용해 동적 라우팅을 할 수 있다! = url친화적인 속성!
type: 'content'를 사용하면 모든 콘텐츠 항목은 해당 파일 id에서 slug 속성을 생성한다.
아래처럼 slug를 재정의할수도 있음!
---
title: 내 블로그 게시물
slug: my-custom-slug/supports/slashes
---
컬렉션 쿼리
첫인상은 일단 firebase같은 느낌.
import { getCollection, getEntry } from 'astro:content';

const allBlogPosts = await getCollection('blog'); //해당 컬렉션의 모든 항목을 가져옴
const graceHopperProfile = await getEntry('authors', 'grace-hopper'); //해당 컬렉션의 해당 항목을 가져옴
참조 데이터 엑세스
object처럼 접근하여 특정 값 참조 가능
---
import { getEntry, getEntries } from 'astro:content';

const blogPost = await getEntry('blog', 'welcome');
const author = await getEntry(blogPost.data.author); // 단일 참조
const relatedPosts = await getEntries(blogPost.data.relatedPosts); // 배열 참조
---
필터링
array.filter처럼 쓸 수 있다.
import { getCollection } from 'astro:content';
const publishedBlogEntries = await getCollection('blog', ({ data }) => {
  return data.draft !== true;

  return data.startsWith('en/');  // 컬렉션 내 중첩된 디렉터리를 기준으로 한 필터링
  return import.meta.env.PROD && data //이렇게 하면 개발 서버에서만 보이는 부분 생성 가능
콘텐츠에서 경로 생성
콘텐츠 컬렉션은 src/pages/ 디렉터리 외부에 저장 = 경로생성x
-> 컬렉션 항목에서 HTML 페이지를 생성하려면 새 동적 경로 수동 생성 필요
동적 경로는 들어오는 요청 매개변수(예: src/pages/blog/[...slug].astro 파일의 Astro.params.slug)를 매핑하여 컬렉션의 올바른 항목을 가져옵니다.
정적출력(output:static)일 때 경로생성
getStaticPaths()함수를 사용하여 빌드하는 동안 src/pages에서 페이지 생성 가능
---
import { getCollection } from 'astro:content';

export async function getStaticPaths() {
  const blogEntries = await getCollection('blog');

  //blogEntries의 모든 목록에 대한 새 페이지가 생성된다.
  return blogEntries.map(entry => ({
    params: { slug: entry.slug },
    props: { entry },
  }));
}

const { entry } = Astro.props;
const { Content } = await entry.render();
---
<h1>{entry.data.title}</h1>
<Content />
동적출력(ssr)일 때 경로생성
경로 사전생성이 불가능하므로 필요할 때마다 해당 슬러그를 컬렉션에서 찾아 생성해야 함
---
import { getEntry } from "astro:content";

const { slug } = Astro.params; //요청을 우선 받아와야 함
if (slug === undefined) throw new Error("슬러그가 필요합니다");

const entry = await getEntry("blog", slug);
if (entry === undefined)  return Astro.redirect("/404");

const { Content } = await entry.render();
---

<Layout>
  {Content}
</Layout>
View Transitions
새로고침 없이 페이지 콘텐츠 업데이트가 가능한 탐색 방법
-> 기본적으로 모든 페이지는 일반 전체 페이지 브라우저 탐색으로 세팅되어 있음!
-> 필요한 곳에만 View Transitions사용 가능
- 선택적, 페이지별 설정 가능
- 커스텀 애니메이션
- 페이지가 아닌 링크에 대한 클라이언트 측 탐색 방지
- 크로스 브라우징용 대체 동작 제공
ViewTransitions 컴포넌트
head에 추가되는 경량 클라이언트 라우팅 컴포넌트.
탐색을 가로채 페이지 간 전환을 사용자 정의할 수 있다!
-> 모든 페이지에 적용을 원하면 레이아웃과 같은 공통 재사용 컴포넌트에 추가하면 됨.
---
import { ViewTransitions } from 'astro:transitions';
---
<html lang="ko">
  <head>
    <title>내 홈페이지</title>
    <ViewTransitions />
  </head>
  <body>
    <h1>나의 웹사이트에 오신 것을 환영합니다!</h1>
  </body>
</html>
전환 지시어
Astro는 페이지 이동시 직전 페이지와 현재 페이지에 같은 view-transition-name을 자동 할당
-> 이 이름을 통해 DOM에서의 해당 위치를 추론할 수 있다!
전환 이름 지정 (transition:name)
Astro가 자동 할당하는 전환 이름을 재설정할 수 있다.
//src/pages/old-page.astro
<aside transition:name="hero">

//src/pages/new-page.astro
<aside transition:name="hero">
상태 유지 (transition:persist)
페이지 이동시 컴포넌트 및 HTML 요소를 유지한다.
-> 동일한 비디오 요소가 포함된 다른 페이지로 이동하면 다음 video 태그가 계속 재생된다!
-> 뒤로가기, 앞으로가기에도 적용됨!
<video controls="" autoplay="" transition:persist> //태그에 직접 명시하면 된다
  <source src="https://ia804502.us.archive.org/33/items/GoldenGa1939_3/GoldenGa1939_3_512kb.mp4" type="video/mp4">
</video>


<Counter client:load transition:persist initialCount={5} /> //컴포넌트에 명시할 수도 있음.
다른 컴포넌트에 있는 경우 수동으로 식별자 지정 가능
//src/pages/old-page.astro
<Video controls="" autoplay="" transition:persist="media-player"/>

//src/pages/new-page.astro
<MyVideo controls="" autoplay="" transition:persist="media-player"/>
transition:persist-props
props유지 여부. 기존 컴포넌트의 props를 유지한다.
내장 애니메이션 지시어(transition:animate)
- fade (기본값): 이전 콘텐츠는 페이드 아웃되고 새 콘텐츠는 페이드 인
- initial: 브라우저의 기본 스타일
- slide: 이전 콘텐츠가 왼쪽으로 슬라이드되고 새 콘텐츠가 오른쪽에서 슬라이드. 뒤로 진행되는 탐색에서는 반대
- none: 브라우저의 기본 애니메이션 비활성화
---
import CommonHead from '../components/CommonHead.astro';

---
const anim = {
  old: {
    name: 'fadeIn',
    duration: '0.2s',
    easing: 'linear',
    fillMode: 'forwards',
  },
  new: {
    name: 'fadeOut',
    duration: '0.3s',
    easing: 'linear',
    fillMode: 'backwards',
  }
};

const myFade = {
  forwards: anim,
  backwards: anim,
};
---

<header transition:animate={myFade}> ... </header>
---

<html transition:animate="none"> //기본 설정을 비활성화하고
  <head>
    <CommonHead />
  </head>
  <body>
    <Header/>
    <Main1 transition:animate="slide"/> //바뀌는 부분만 애니메이션을 넣는다
    <Main2 transition:animate={myFade}/> //컴포넌트화해서 넣을 수도 있음
	<footer transition:animate={fade({ duration: '0.4s' })}/> //인라인 커스텀 가능
  </body>
</html>
라우터 제어
아래 사항들을 수신하여 ViewTransition으로 제어 가능!
- a태그 클릭
- 뒤로가기, 앞으로가기
- navigator 함수
클라이언트 측 탐색 방지
data-astro-reload 속성을 추가하면 해당 링크로 이동할 때 새로고침이 보장된다!
-> 해당 새로고침은 라우터에서 무시되어 히스토리에 쌓이지 않음!
<a href="/articles/emperor-penguins" data-astro-reload/>트리거 탐색
navigate를 사용하여 클라이언트측에서 라우팅 가능
navigate 옵션
- push: history.pushState
- replace: history.replaceState
- auto(기본값): url이 있다면 push, 없다면 현재 url 유지
- formData: POST 요청을 위한 FormData 객체
-> history.back(), history.forward(), history.go() 등 사용 가능
SSR
//form.astro
<script>
  import { navigate } from 'astro:transitions/client';

  document.querySelector('select').onchange = (ev) => {
      let href = ev.target.value;
      navigate(href);
  };
</script>
<select>
  <option value="/play">시작</option>
  <option value="/blog">블로그</option>
</select>


//index.astro
---
import Form from "../components/Form.astro";
import { ViewTransitions } from "astro:transitions";
---
<html>
  <head>
    <ViewTransitions />
  </head>
  <body>
    <Form />
  </body>
</html>
CRS
//form.jsx
import { navigate } from 'astro:transitions/client';

export default function Form() {
  return (
    <select onChange={(e) => navigate(e.target.value)}>
      <option value="/play">시작</option>
      <option value="/blog">블로그</option>
    </select>
  );
}


//index.astro
---
import Form from "../components/Form.jsx";
import { ViewTransitions } from "astro:transitions";
---
<html>
  <head>
    <ViewTransitions />
  </head>
  <body>
    <Form client:load /> //해당 옵션을 추가하면 됨!
  </body>
</html>
data-astro-history 옵션
SSR에서 navigator에 사용하는 옵션 사용 가능
<a href="/main" data-astro-history="replace"> //push, replace, auto 사용 가능대체 제어
크로스 브라우징을 위한 대체 옵션
animate (기본값, 권장) : 애니메이션o
swap: 애니메이션x. 이전 페이지를 즉시 새 페이지로 대체
none: 애니메이션x. 지원되지 않는 브라우저에서는 전체 페이지 탐색으로 대체
---
import { ViewTransitions } from 'astro:transitions';
---
<title>내 사이트</title>

<ViewTransitions fallback="swap" />
ViewTransitions 라우터의 클라이언트 측 탐색 순서
-
탐색 트리거
- a태그 클릭
- 뒤로가기, 앞으로 가기
-
라우터가 다음 페이지를 가져옴
-
라우터가 'forward' or 'back' 값을 사용하여 HTML 요소에 data-astro-transition 속성 추가
-
document.startViewTransition 함수 호출
-
4번 콜백에서 라우터가 swap 수행
swap
- head태그 일부 교체
- 새 페이지에 스타일시트 DOM 노드 존재시 유지 -> FOUC 방지
- 새 페이지에 스크립트 존재시 유지
- transition:persist가 있는 헤드 요소 유지
- body태그 완전 교체
- transition:persist -> 새 DOM으로 이동 및 스크롤 위치 복원
- astro:after-swap 이벤트는 document에서 트리거
- head태그 일부 교체
-
새 스타일시트, 새 스크립트 대기 및 실행
-
astro:page-load 이벤트 발생
FOUC(Flash of Unstyled Content)
페이지가 로드되는 동안 스타일 시트가 로드되지 않아 콘텐츠가 일시적으로 스타일이 없는 상태로 표시되는 현상
이해가 안 되는데...
새 페이지에 스타일시트가 존재시 유지한다는게 무슨 말이지?
헤더 dom노드가 사라질 일이 뭐가 있어서 유지를 해..?
그럼 해당 과정이 없으면 스타일시트 dom 노드가 사라진다는 거?? 그럼 fouc는 고사하고 아예 스타일도 못 적용하잖아
view Transition을 통한 스크립트 동작
스크립트 재실행
번들 모듈 스크립트(astro default)는 한 번만 실행된다!
-> 초기 실행 후에는 뒤로가기, 새로고침 등으로 돌아갔을 때 실행되지 않음..
data-astro-rerun
인라인 스크립트는 같은 상황에서 해당 속성을 추가하여 재실행 가능
-> Astro에 의해 처리되지 않는 스크립트에만 사용 가능
<script is:inline data-astro-rerun>
  if (!window.SomeGlobal) {
    //수명주기가 없으므로, 한번만 체크되어야 하는 경우 window 전역객체에 플래그를 추가해서 확인
    window.SomeGlobal = {} // ....
  }
  </script>
수명 주기 이벤트
ViewTransition 라우터가 탐색 중 document에 여러 이벤트를 발생시킴
-> 이벤트가 탐색 수명 주기에 후크 제공
-> 해당 후크로 현재 수명주기단계 파악 가능
수명 주기 단계
- 준비 단계
- DOM swap 단계: 이전 페이지 콘텐츠를 새 페이지 콘텐츠로 대체
- 완료 단계: 로딩 완료후 스크립트 실행 및 정리 작업 수행
astro:before-preparation (준비단계)
탐색 시작 후 ~ 새 콘텐츠 로드 전
- 로딩 스피너 표시
- 탐색 애니메이션 direction (forward or backward) 결정
<script is:inline>
  document.addEventListener('astro:before-preparation', ev => {
    const originalLoader = ev.loader;   //기존 콘텐츠 로더
    ev.loader = async () => {      //이렇게 하면 비동기 함수 적용 가능
      const { startSpinner } = await import('./spinner.js'); //수행할 작업 가져오기

      await originalLoader(); //기존 로더를 실행하고..
      startSpinner();		  //하려고 했던 작업을 수행.
    };
  });
</script>
astro:after-preparation (준비단계)
새 콘텐츠 로드 후 ~ 준비 단계 끝
<script is:inline>
  document.addEventListener('astro:before-preparation', () => {
    document.querySelector('#loading').classList.add('show');
  });
  document.addEventListener('astro:after-preparation', () => {
    document.querySelector('#loading').classList.remove('show');
  });
</script>
astro:before-swap (swap단계)
콘텐츠 swap 전
-> 현재 화면은 이전 페이지의 스냅샷.
<script is:inline>
  function setDarkMode(document) {
    let theme = localStorage.darkMode ? 'dark' : 'light';
    document.documentElement.dataset.theme = theme;
  }


  //서버의 느낌이 낭낭하게 나는군요....
  setDarkMode(document);
  document.addEventListener('astro:before-swap', ev => {
    //기본 swap. 헤드 콘텐츠 비교 후 이전 문서에서 유지되는 내용들을 newDocument로 옮기고 body와 치환
    setDarkMode(ev.newDocument);
  });


  document.addEventListener('astro:before-swap', ev => {
    //커스텀 swap. 스왑시 비교 구문을 직접 만들 수 있다.
      ev.swap = () => {
        diff(document, ev.newDocument);
      };
    });
</script>
astro:after-swap (swap단계)
콘텐츠 swap 후 ~ 새 페이지 렌더링 및 스크립트가 실행 전
- 나가는 페이지에서 수신
- 새 페이지로 전송되기 전 DOM의 복원이 여기서 이루어져야 함!
- 브라우저 기록 업데이트로 인한 스크롤 위치 초기화 직후
- 기록 탐색에 대한 기본 스크롤 복원이 여기서 이루어져야 함!
document.addEventListener('astro:after-swap',
        //스크롤 복원을 하자
  () => window.scrollTo({ left: 0, top: 0, behavior: 'instant' });
)
astro:page-load
새 페이지 로딩 완료 ~ 페이지 탐색 종료
<script>
  document.addEventListener('astro:page-load', () => {
    // 한번만 실행됨. useEffect(()=>{},[]) 같은 느낌..
    setupStuff();
  }, { once: true });
</script>
프리페치
Astro의 선택적 프리페칭
링크를 누르기 전에 스크립트가 백그라운드에서 페이지를 가져와둔다.
-> MPA의 페이지 탐색에서 즉각적으로 반응한다!
-> 단, 사이트 내 링크에 대해서만 작동하며 외부 링크에는 작동하지 않음.
프리페칭 활성화
//astro.cofig.mjs

import { defineConfig } from 'astro/config';

export default defineConfig({
  prefetch: true
});
프리페칭 구성
프리페칭 전략
- hover (기본값): 링크에 호버링/포커싱했을 때 페이지를 미리 가져온다
- tap: 링크 클릭 직전에 페이지를 미리 가져온다
- viewport: 링크가 뷰포트에 들어갈 때 페이지를 미리 가져온다
- load: 페이지가 로드된 후 모든 링크를 미리 가져온다
-> 단, 링크 위에 빠르게 마우스를 올리거나 스크롤할때는 적용되지 않음!
<a href="/about" data-astro-prefetch="tap">소개</a>프리페칭 성능
각 전략은 필요할 때만 미리 가져오고 사용자의 대역폭을 절약하도록 미세 조정된다!
- 데이터 절약 모드/느린 연결속도에는 tap으로 대체됨
- 옵션으로 해당 기능 무시 가능: prefetch('/about', { ignoreSlowConnection: true })
- viewport, load일 때는 네트워크 막힘을 방지하기 위해 프리페칭의 우선순위를 낮게 유지
프로그래밍 방식으로 프리패치하기
브라우저 API이므로 클라이언트 측 스크립트에서만 사용 가능!
<button id="btn">클릭</button>

<script>
  import { prefetch } from 'astro:prefetch';

  const btn = document.getElementById('btn');
  btn.addEventListener('click', () => {prefetch('/about');});
</script>
프로그래밍 방식으로 프리패치 우선순위 부여하기
prefetch('/about', { with: 'fetch' }); //언제나 최신이므로 우선순위 높음
prefetch('/about', { with: 'link' });  //캐싱되어있을 수 있으니 우선순위 낮음
View Transitions와 함께 사용
기본적으로 View Transitions 사용시 프리패치도 함께 활성화
astro.config.mjs에서 설정 가능. 설정값은 필요할 때 찾아보기..
