한 일
- @Controller를 사용해 view로 나타내기
- 타입리프를 사용해 view 만들기
- redirect로 새로운 요청을 할 때 정보 이동하기
- PMA 프로젝트
- 부분모듈화
타입리프를 사용해 view 만들기
사용 설정
pom.xml 우클릭 > Spring > Add staters
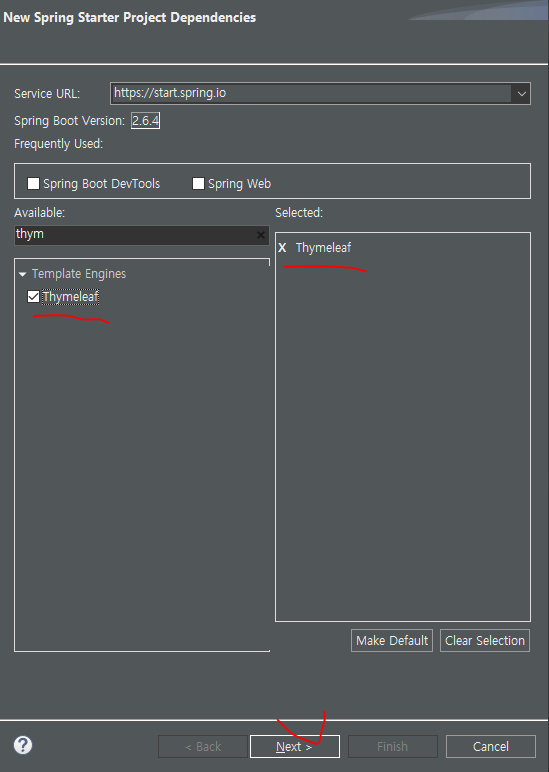
Thymeleaf 추가
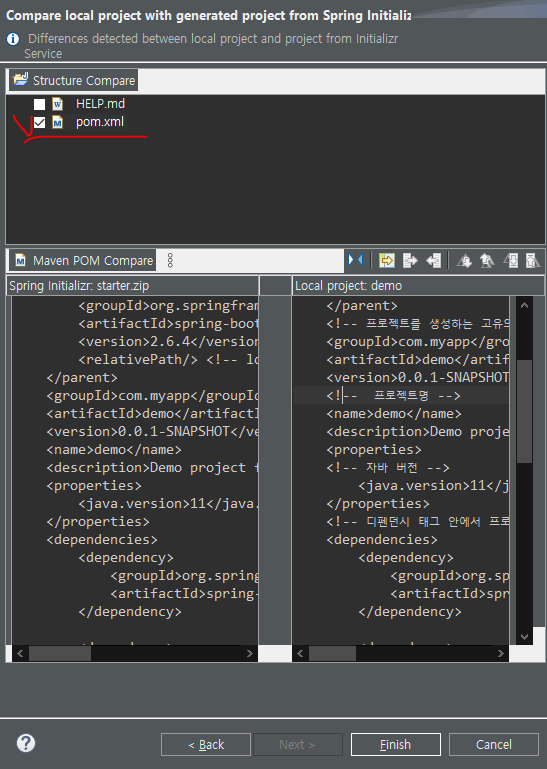
pom.xml 선택

추가하고 나면 pom.xml에서 확인가능.
이후 다운로드가 제대로 완료되지 않았을 경우를 대비해
pom.xml > maven > update 로 업데이트를 수동으로 해줌.
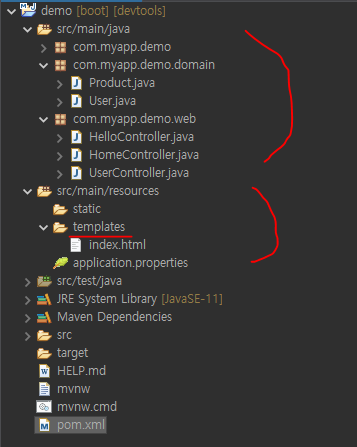
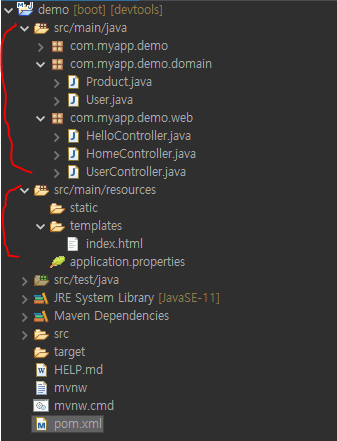
view가 들어갈 위치.
main/java 패키지 아래에는 java파일이, resources 패키지 아래에는 view파일이 위치하게 된다.
vs코드를 이용해 view만들기
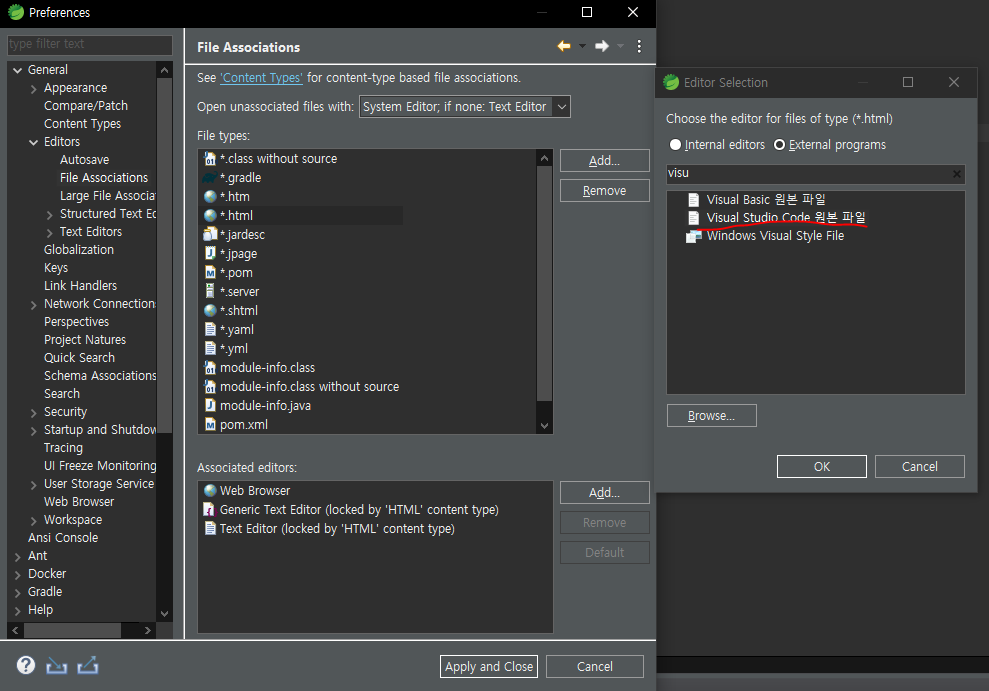
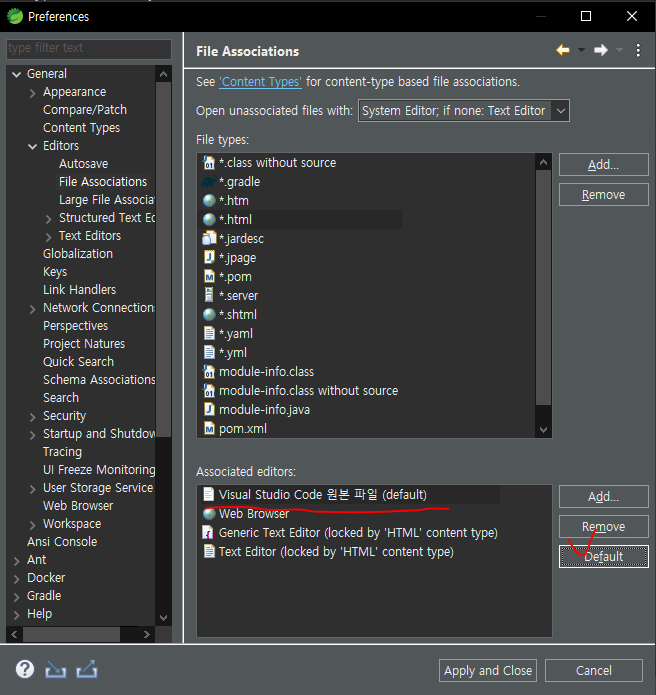
기본으로 설정
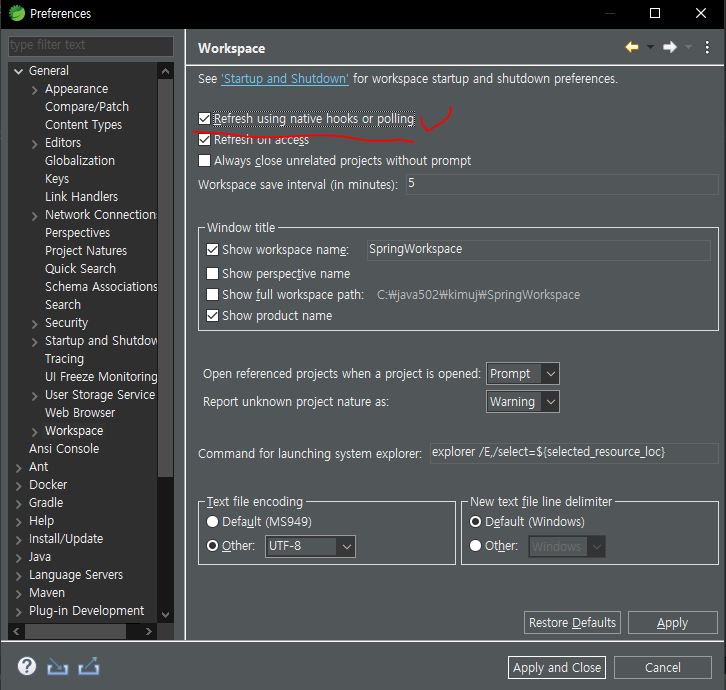
외부에서 파일을 수정하면 바로 적용되도록 설정
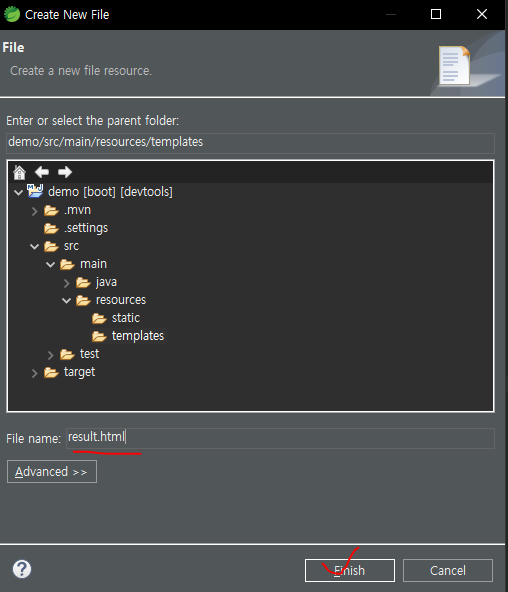
이후 templates > new > File > 'index.html' 생성
templates패키지 아래에 index.html파일을 생성하면 자동으로 vscode로 넘어감.
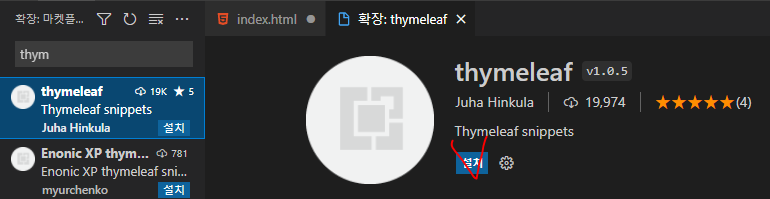
vscode 확장설치
빈 문서에서 thtmpl 입력해 자동완성
html태그에 xmlns:th="http://www.thymeleaf.org" 속성이 들어가야 타입리프 사용가능.
- index.html -
<!DOCTYPE html>
<html xmlns:th="http://www.thymeleaf.org">
  <head>
    <meta charset="UTF-8" />
    <meta http-equiv="X-UA-Compatible" content="IE=edge" />
    <meta name="viewport" content="width=device-width, initial-scale=1.0" />
    <title>인덱스</title>
  </head>
  <body>
    <h2>인덱스 페이지</h2>
    <form action="/create" method="post" th:object="${user}">
      <p>이름: <input type="text" th:field="${user.name}" /></p>
      <p>나이: <input type="text" th:field="${user.age}" /></p>
      <p>재직중: <input type="checkbox" th:field="${user.employed}" th:value="true" /></p>
      <p>성별을 선택:</p>
      <p>남성: <input type="radio" th:field="${user.gender}" th:value="남성" /> 여성: <input type="radio" th:field="${user.gender}" th:value="여성" /></p>
      <p>
        <input type="submit" value="서브밋" />
        <input type="reset" value="리셋" />
      </p>
    </form>
  </body>
</html>
result.html
<!DOCTYPE html>
<html xmlns:th="http://www.thymeleaf.org">
<head>
<meta charset="UTF-8" />
<meta http-equiv="X-UA-Compatible" content="IE=edge" />
<meta name="viewport" content="width=device-width, initial-scale=1.0" />
<title>결과 페이지</title>
</head>
<body>
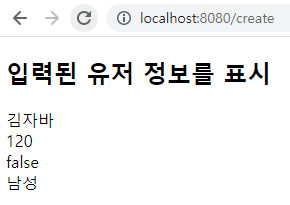
<h2>입력된 유저 정보를 표시</h2>
<div th:text="${user.name}"></div>
<div th:text="${user.age}"></div>
<div th:text="${user.employed}"></div>
<div th:text="${user.gender}"></div>
</body>
</html>- HomeController 생성
Model이 view와 controller사이의 데이터를 전달하므로
Model에 User객체를 추가한 후, User bean객체를 사용하여 하위 페이지에 값을 전달한다.
- HomeController -
package com.myapp.demo.web;

import org.springframework.stereotype.Controller;
import org.springframework.ui.Model;
import org.springframework.web.bind.annotation.GetMapping;
import org.springframework.web.bind.annotation.PostMapping;

import com.myapp.demo.domain.User;

@Controller
public class HomeController {
	// view와 controller사이의 데이터를 model을 통해 전달
	@GetMapping("/")
	public String home(Model model) {
		// "user"이름으로 User의 bean객체를 넣어서 "user" = new User();
		model.addAttribute("user", new User());
		// model을 통해 index.html페이지에 전달
		return "index";	// index라는 이름의 view를 찾음
	}

	@PostMapping("/create")	// User객체로 넘겨받기때문에 매개변수도 User객체로 받아야함
	public String processFormData(User user) {
		System.out.println(user.toString());
		return "result";
	}
}
domain패키지 아래 User클래스 생성
- User 클래스 -
public class User {
	private String name;
	private int age;
	private boolean employed;
	private String gender;

	public User() {	}

	public User(String name, int age, boolean employed, String gender) {
		super();
		this.name = name;
		this.age = age;
		this.employed = employed;
		this.gender = gender;
	}
	// 모든 속성 get/set toString 자동생성. 코드는 생략
}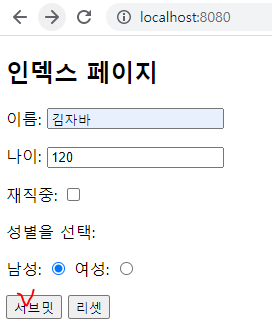

submit을 누르면 입력한 정보가 user객체에 담겨 이동함.
- th:field="${객체명.속성명}" 가 컨트롤러의 객체를 가져와 값을 넣음 = 값을 맵핑해줌.
- th:text="${객체명.속성명}" 에서 설정된 객체의 속성값을 출력
redirect로 새로운 요청을 할 때 정보 이동하기
redirect로 보낼 경우 User객체가 전달이 안되므로 정보전달이 불가능함. (redirect는 새로운 요청이기 때문)
=> RedirectAttributes 객체를 통해 전달
- HomeController 수정/추가 -
@PostMapping("/create")	// User객체로 넘겨받기때문에 매개변수도 User객체로 받아야함
public String processFormData(User user, RedirectAttributes attr) {
	attr.addFlashAttribute("user", user);
	return "redirect:/display";	// redirect가 새로운 요청을 하여 display페이지로 요청
} // redirect로 보낼 경우 User객체가 전달이 안되므로 정보전달이 불가능함. => RedirectAttributes의 객체를 통해 전달

@GetMapping("/display")
public String displayFormData(User user, RedirectAttributes attr) {
	return "result";
}
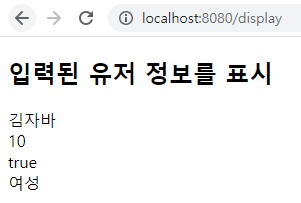
RedirectAttributes의 객체 attr을 통해 정보가 전달되도록 함.
객체를 사용하지 않으면 정보가 전달되지 않은 채로 페이지 이동만 되므로 주의.
maven 에러발생시
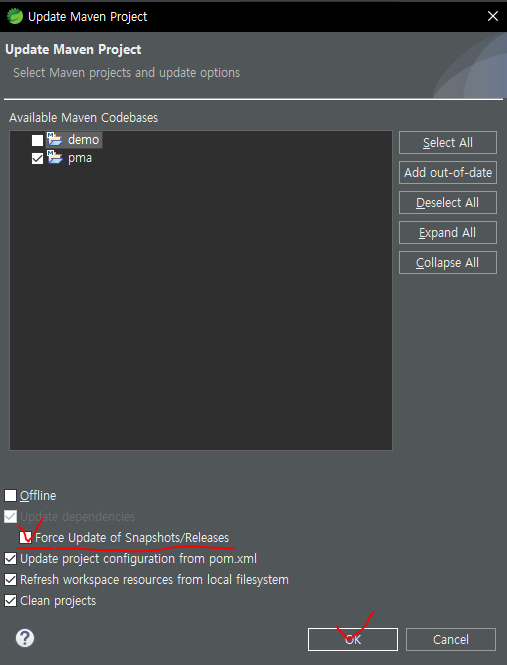
강제로 다시 다운로드를 받아야함
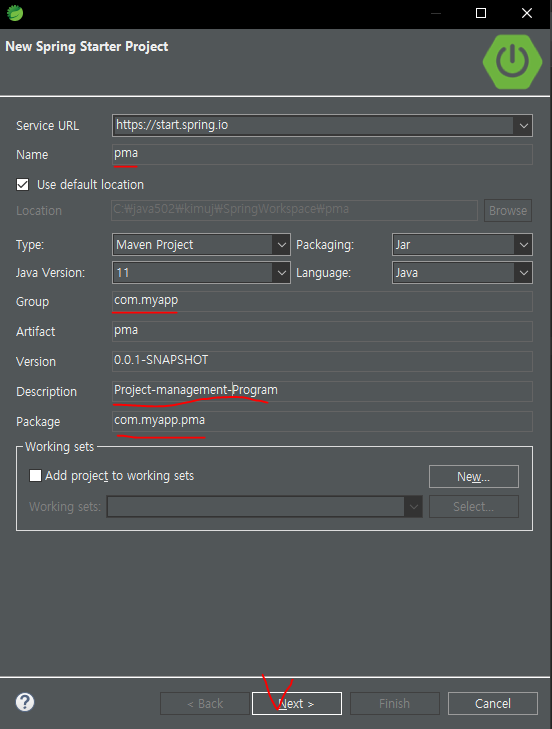
PMA 프로젝트
새 프로젝트 생성
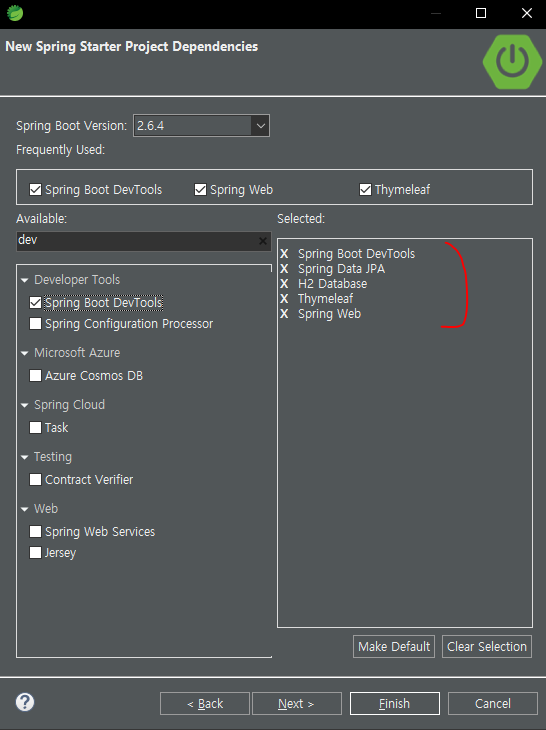
spring stater project
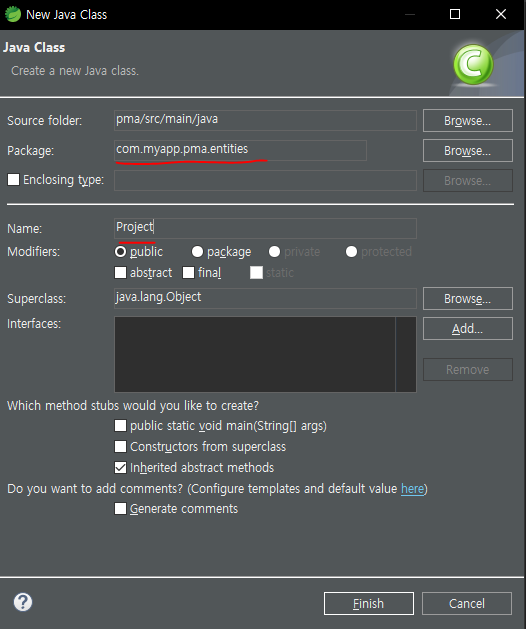
- Project -
package com.myapp.pma.entities;
import javax.persistence.Entity;

@Entity
public class Project {

	@Id		// Id가 기본키임을 알림
	@GeneratedValue(strategy = GenerationType.AUTO)	// id를 자동으로 생성할것을 알림
	private Long projectId;		// 프로젝트 아이디	(CamelCase => DB project_id)

	private String name;		// 프로젝트 이름
	private String stage;		// 프로젝트 상태 (시작전, 진행중, 완료)
	private String description;	// 프로젝트 설명

	public Project() {	}

	public Project(Long projectId, String name, String stage, String description) {
		// id는 DB 자동생성예정이므로 제외
		this.name = name;
		this.stage = stage;
		this.description = description;
	}
    // getset 자동생성
}
@Entity : DB에 있는 테이블과 매핑함을 알리는 어노테이션.
@Id : Id가 기본키임을 알림
@GeneratedValue(strategy = GenerationType.AUTO) : id를 자동으로 생성할것을 알림
참고
어노테이션의 경우 바로 아랫줄에 인접한 한 행에만 적용됨.
고로 Project클래스의 경우 @Id, @GeneratedValue이 projectId에만 적용됨.
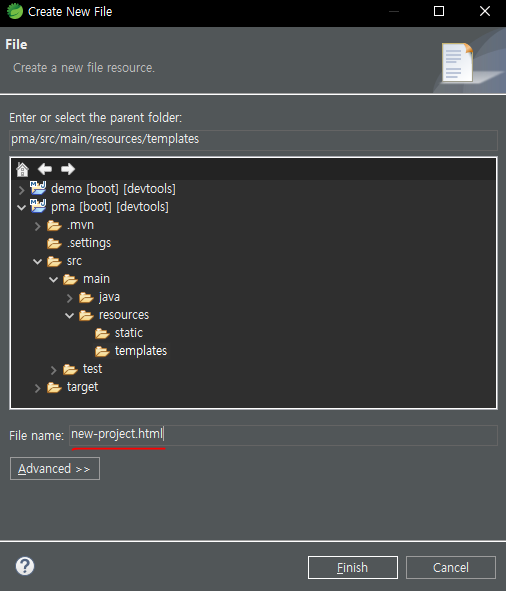
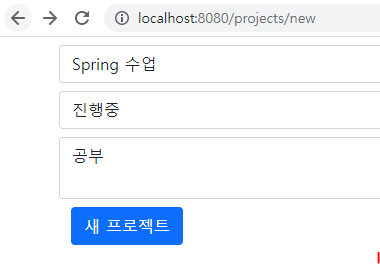
- new-project.html -
<!DOCTYPE html>
<html xmlns:th="http://www.thymeleaf.org">
<head>
<meta charset="UTF-8" />
<meta http-equiv="X-UA-Compatible" content="IE=edge" />
<meta name="viewport" content="width=device-width, initial-scale=1.0" />
<title>새 프로젝트</title>
<link href="https://cdn.jsdelivr.net/npm/bootstrap@5.1.3/dist/css/bootstrap.min.css" rel="stylesheet" />
</head>
<body>
<div class="container">
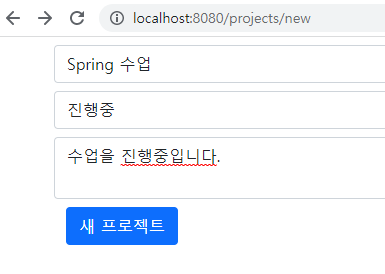
<form action="/projects/save" method="post" th:object="${project}">
<div class="row my-2">
<input class="form-control" type="text" th:field="*{name}" placeholder="프로젝트 이름" />
</div>
<div class="row my-2">
<select class="form-select" th:field="*{stage}">
<option th:value="시작전">시작전</option>
<option th:value="진행중">진행중</option>
<option th:value="완료">완료</option>
</select>
</div>
<div class="row my-2">
<textarea class="form-control" th:field="*{description}" placeholder="프로젝트 설명"></textarea>
</div>
<button class="btn btn-primary" type="submit">새 프로젝트</button>
</form>
</div>
</body>
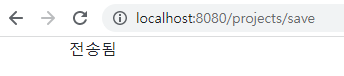
</html>- result.html -
결과를 받아온 후 보여질 화면. body외에는 new-project.html과 동일.
<body>
  <div class="container">
    <p>전송됨</p>
  </div>
</body>
새 컨트롤러 생성

- ProjectController -
@Controller
@RequestMapping("/projects")
public class ProjectController {

	@GetMapping("/new")
	public String displayProjectForm(Model model) {
		Project p = new Project();
		model.addAttribute("project", p);
		return "new-project";
	}

	@PostMapping("/save")
	public String createProject(Project project) {
		return "result";
	}
}
h2 DB설정
- application.properties -
# h2 DB 설정
spring.h2.console.enabled=true
spring.h2.console.path=/h2.console
# jpa에서 sql을 사용할때마다 log로 콘솔에 출력
spring.jpa.show-sql=true
spring.datasource.url=jdbc:h2:mem:testdb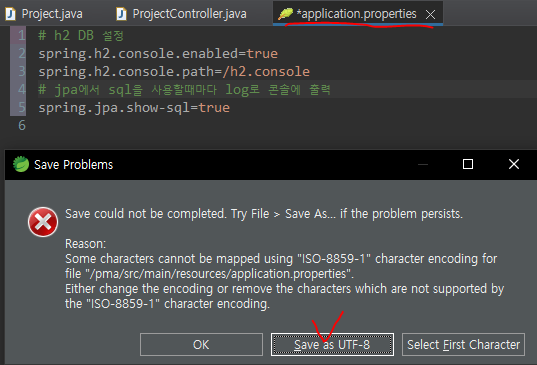
UTF-8 로 저장

=> DB를 자동으로 생성하는 과정. Project클래스파일과 DB가 매핑되어 자동생성됨.
인터페이스 생성
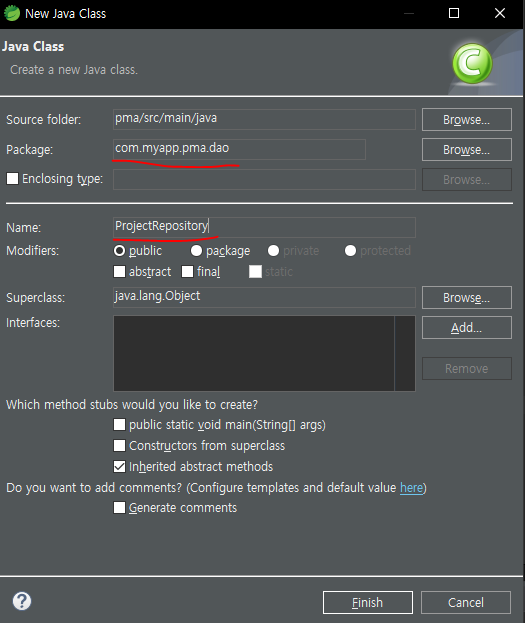
생성 후 인터페이스로 변경
- ProjectRepository -
// JPA에서는 repository에 CRUD 가능한 인터페이스 CrudRepository를 상속받음

public interface ProjectRepository extends CrudRepository<Project, Long>{
	// CrudRepository에 이미 CRUD 메서드가 완성되어있음. => JPA 하이버네이트가 구현코드까지 모두 자동생성함
}
- ProjectController 수정 -
@Controller
@RequestMapping("/projects")
public class ProjectController {
// 스피링에서 repository 객체를 처음에 자동생성하여 가지고 있다가 Autowired를 만나면 관련 객체가 필요할때 자동으로 연결해줌
@Autowired
private ProjectRepository projectRepository;
@GetMapping("/new")
public String displayProjectForm(Model model) {
Project p = new Project();
model.addAttribute("project", p);
return "new-project";
}
@PostMapping("/save")
public String createProject(Project project) {
projectRepository.save(project); // project객체를 DB의 테이블에 저장
return "redirect:/projects/new"; // post-redirect-get 패턴(/new > /save > /new)
}
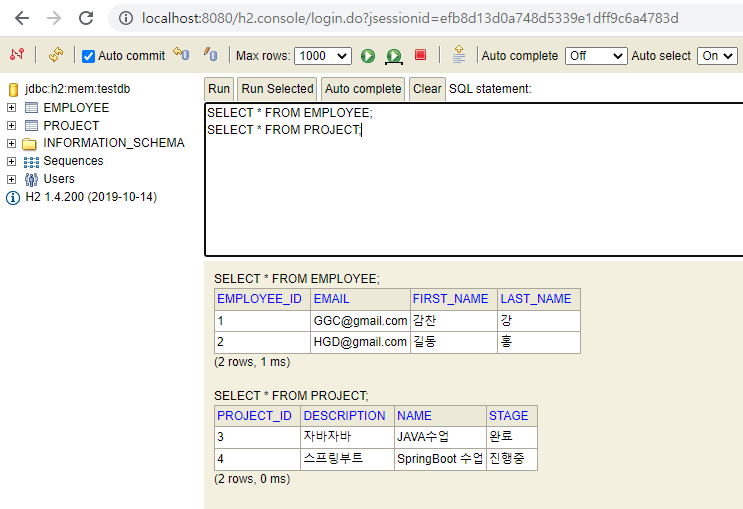
}http://localhost:8080/h2.console
DB확인을 위해 위의 주소 검색
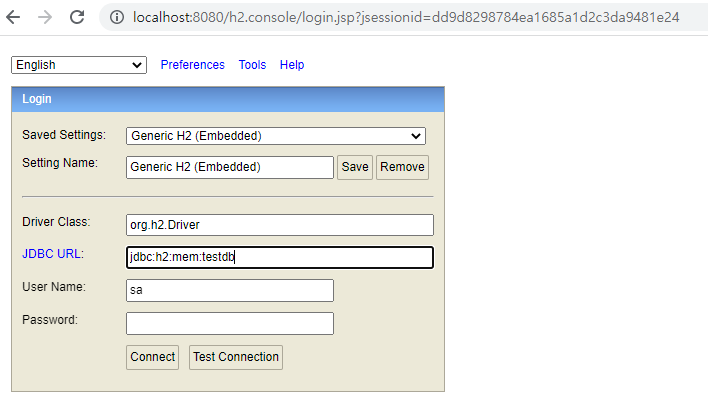
jdbc:url창에 application.properties에서 설정한 jdbc:h2:mem:testdb을 입력 후 connect
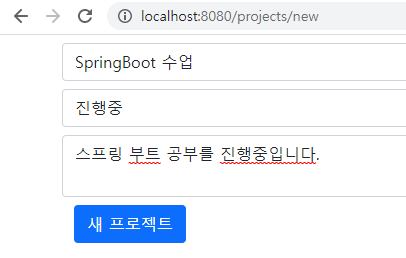
입력 후 전송

insert문 실행 콘솔창 확인
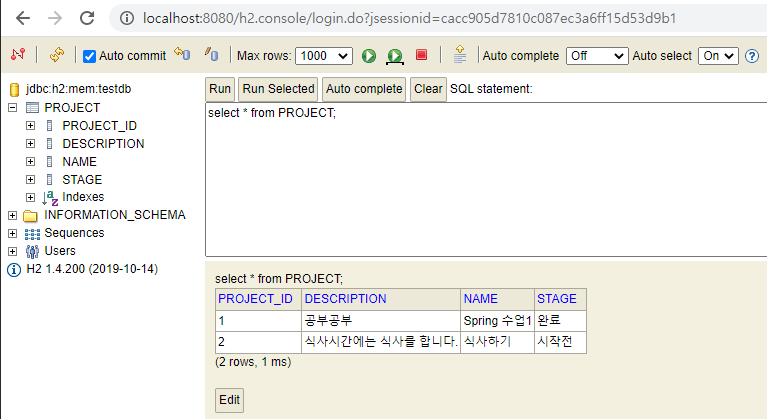
입력된 것을 확인가능.
h2 DB의 경우 프로젝트를 재시작하면 초기화됨.
*JPA의 개념에 대해서는 링크 참고.
Employee 클래스, EmployeeRepository인터페이스, EmployeeController, new-employee.html 생성
- Employee -
@Entity
public class Employee {

	@Id		// 기본키를 명시
	@GeneratedValue(strategy = GenerationType.AUTO)	// Id를 자동생성
	private Long employeeId;

	private String firstName;
	private String lastName;
	private String email;

	public Employee() {	}

	public Employee(String firstName, String lastName, String email) {
		super();
		this.firstName = firstName;
		this.lastName = lastName;
		this.email = email;
	}
    // getset 자동생성
}
- EmployeeRepository -
public interface EmployeeRepository extends CrudRepository<Employee, Long>{
	// 자동으로 CRUD 객체 생성
}
- EmployeeController -
@Controller
@RequestMapping("/employees")
public class EmployeeController {

	@Autowired		// db에서 project테이블을 가져오기 위함
	private EmployeeRepository employeeRepository;

	@GetMapping("/new")
	public String displayProjectForm(Model model) {
		Employee e = new Employee();
		model.addAttribute("employee", e);
		return "new-employee";
	}

	@PostMapping("/save")
	public String createProject(Employee employee) {
		employeeRepository.save(employee);
		return "redirect:/employees/new";
	}
}
- HomeController -
@Controller
public class HomeController {
@Autowired // db에서 project테이블을 가져오기 위함
ProjectRepository projectRepository;
@GetMapping("/")
public String displayHome(Model model) {
List<Project> projectList = projectRepository.findAll();
model.addAttribute("projectList", projectList);
return "home";
}
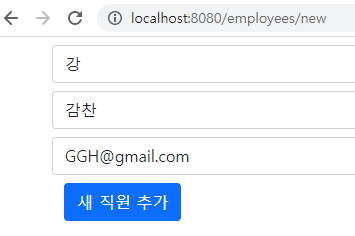
}- new-employee.html -
<div class="container">
  <form action="/employees/save" method="post" th:object="${employee}">
    <div class="row my-2">
      <input class="form-control" type="text" th:field="*{lastName}" placeholder="성" />
    </div>
    <div class="row my-2">
      <input class="form-control" type="text" th:field="*{firstName}" placeholder="이름" />
    </div>
    <div class="row my-2">
      <input class="form-control" type="email" th:field="*{email}" placeholder="이메일 주소" />
    </div>
    <button class="btn btn-primary" type="submit">새 직원 추가</button>
  </form>
</div>
- home.html -
<div class="container">
  <h3>프로젝트 진행상황</h3>
  <table class="table">
    <thead>
      <tr>
        <th>프로젝트 이름</th>
        <th>현재 진행상태</th>
      </tr>
    </thead>
    <tbody>
      <!-- 타임리프의 반복문 -->
      <tr th:each="project : ${projectList}">
        <td th:text="${project.name}"></td>
        <td th:text="${project.stage}"></td>
      </tr>
    </tbody>
  </table>
</div>
project객체를 하나씩 받아와 반복문으로 출력.
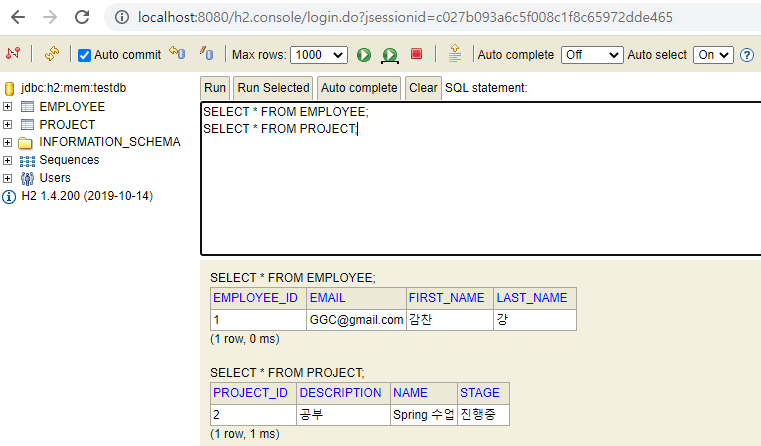
project, employee 테이블의 데이터 각각 확인 가능.
http://localhost:8080/projects/new 에 데이터 입력
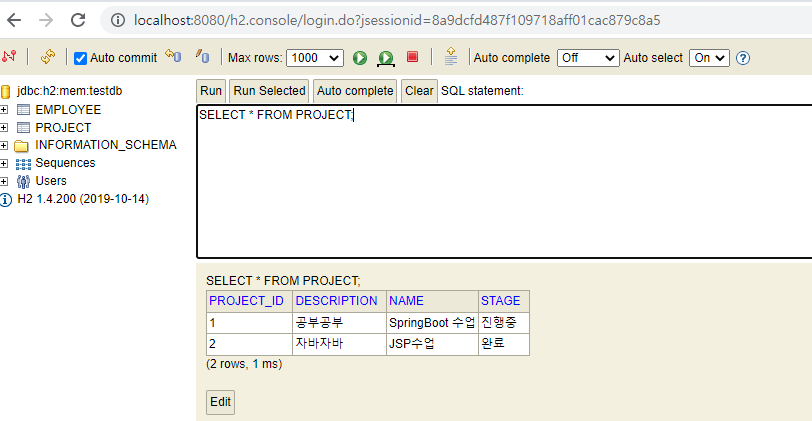

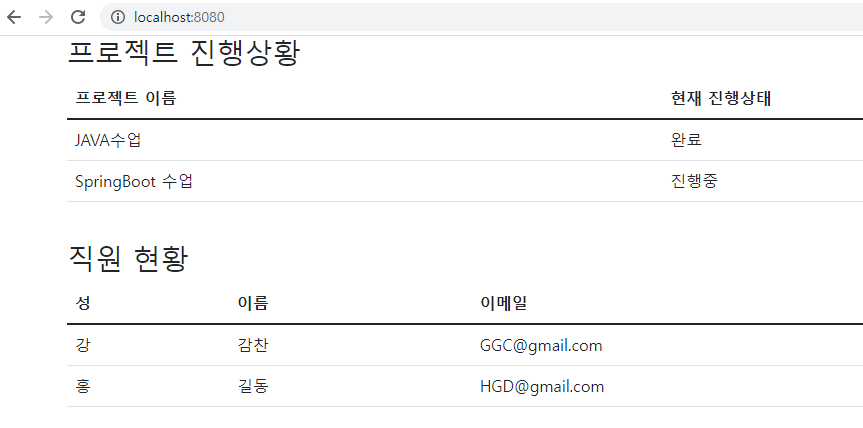
프로젝트 2개 입력 후 http://localhost:8080/ 에서 확인.
아래 사진처럼
http://localhost:8080/ 을 검색했을때 두 테이블을 한번에 확인하도록 수정해보기.
- HomeController -
@Controller
public class HomeController {

	@Autowired		// db에서 project테이블을 가져오기 위함
	ProjectRepository projectRepository;
	@Autowired
	EmployeeRepository employeeRepository;

	@GetMapping("/")
	public String displayHome(Model model) {
		List<Project> projectList = projectRepository.findAll();
		model.addAttribute("projectList", projectList);

		List<Employee> employeeList = employeeRepository.findAll();
		model.addAttribute("employeeList", employeeList);
		return "home";
	}
}
- EmployeeController -
@Controller
@RequestMapping("/employees")
public class EmployeeController {

	@Autowired		// db에서 project테이블을 가져오기 위함
	private EmployeeRepository employeeRepository;

	@GetMapping("/new")
	public String displayProjectForm(Model model) {
		Employee e = new Employee();
		model.addAttribute("employee", e);
		return "new-employee";
	}
	@PostMapping("/save")
	public String createProject(Employee employee) {
		employeeRepository.save(employee);
		return "redirect:/employees/new";
	}
}
- EmployeeRepository 인퍼테이스 -
public interface EmployeeRepository extends CrudRepository<Employee, Long>{
	// 자동으로 CRUD 객체 생성
	@Override
	List<Employee> findAll();
}
- home.html -
<div class="container">
  <h3>프로젝트 진행상황</h3>
  <table class="table">
    <thead>
      <tr>
        <th>프로젝트 이름</th>
        <th>현재 진행상태</th>
      </tr>
    </thead>
    <tbody>
      <tr th:each="project : ${projectList}">
        <td th:text="${project.name}"></td>
        <td th:text="${project.stage}"></td>
      </tr>
    </tbody>
  </table>
</div>
<br />
<div class="container">
  <h3>직원 현황</h3>
  <table class="table">
    <thead>
      <tr>
        <th>성</th>
        <th>이름</th>
        <th>이메일</th>
      </tr>
    </thead>
    <tbody>
      <tr th:each="employee : ${employeeList}">
        <td th:text="${employee.lastName}"></td>
        <td th:text="${employee.firstName}"></td>
        <td th:text="${employee.email}"></td>
      </tr>
    </tbody>
  </table>
</div>
부분모듈화
폴더구조 변경
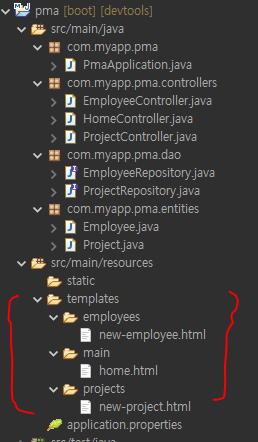
각 경로도 변경해야함.
Navbar 추가
home.html의 body태그 내 가장 윗줄에 추가
- home.html -
<nav class="navbar navbar-expand-md navbar-dark bg-dark">
  <div class="container-fluid">
    <a class="navbar-brand" href="#">LOGO</a>
    <button class="navbar-toggler" type="button" data-bs-toggle="collapse" data-bs-target="#navbarNavAltMarkup" aria-controls="navbarNavAltMarkup" aria-expanded="false" aria-label="Toggle navigation">
      <span class="navbar-toggler-icon"></span>
    </button>
    <div class="collapse navbar-collapse" id="navbarNavAltMarkup">
      <div class="navbar-nav">
        <a class="nav-link active" href="#">Project</a>
        <a class="nav-link" href="#">Employee</a>
      </div>
    </div>
  </div>
</nav>
사진에 내용은 기입하지 않아서 없음
Navbar, Head태그 th:fragment와 th:replace로 불러오기
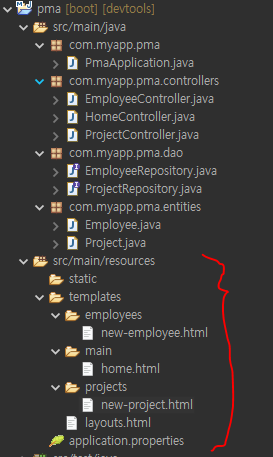
/resources패키지에 레이아웃 저장용 layout.html 추가
- layouts.html -
<!DOCTYPE html>
<html xmlns:th="http://www.thymeleaf.org">
  <head th:fragment="Head">
    <meta charset="UTF-8" />
    <meta http-equiv="X-UA-Compatible" content="IE=edge" />
    <meta name="viewport" content="width=device-width, initial-scale=1.0" />
    <title>홈페이지</title>
    <link href="https://cdn.jsdelivr.net/npm/bootstrap@5.1.3/dist/css/bootstrap.min.css" rel="stylesheet" />
  </head>
  <body>
    <!-- th:fragment 로 다른 html문서에서 복사가능 -->
    <nav th:fragment="Navbar" class="navbar navbar-expand-md navbar-dark bg-dark mb-5">
      <div class="container-fluid">
        <a class="navbar-brand" href="/">💻LOGO</a>
        <button class="navbar-toggler" type="button" data-bs-toggle="collapse" data-bs-target="#navbarNavAltMarkup" aria-controls="navbarNavAltMarkup" aria-expanded="false" aria-label="Toggle navigation">
          <span class="navbar-toggler-icon"></span>
        </button>
        <div class="collapse navbar-collapse" id="navbarNavAltMarkup">
          <div class="navbar-nav">
            <a class="nav-link active" href="#">Project</a>
            <a class="nav-link" href="/employee/employeeList">Employee</a>
          </div>
        </div>
      </div>
    </nav>
    <!-- 네브바 -->

    <div class="container my-5">
      <h3>프로젝트 진행상황</h3>
      <table class="table">
        <thead>
          <tr>
            <th>프로젝트 이름</th>
            <th>현재 진행상태</th>
          </tr>
        </thead>
        <tbody>
          <!-- 타임리프의 반복문 -->
          <tr th:each="project : ${projectList}">
            <td th:text="${project.name}"></td>
            <td th:text="${project.stage}"></td>
          </tr>
        </tbody>
      </table>
    </div>
    <br />
    <div class="container">
      <h3>직원 현황</h3>
      <table class="table">
        <thead>
          <tr>
            <th>성</th>
            <th>이름</th>
            <th>이메일</th>
          </tr>
        </thead>
        <tbody>
          <tr th:each="employee : ${employeeList}">
            <td th:text="${employee.lastName}"></td>
            <td th:text="${employee.firstName}"></td>
            <td th:text="${employee.email}"></td>
          </tr>
        </tbody>
      </table>
    </div>
  </body>
</html>
header와 navbar를 모듈화 했으므로 불러오고싶은 자리에 아래의 코드를 각각 기입하면 됨.
<head th:replace="layouts :: Head"></head>
<nav th:replace="layouts :: Navbar"></nav>
layout.html에 작성한 headder와 navbar를 불러와 사용하도록 앞서 작업했던 페이지 모두 수정.
해보기
navbar의 Project를 누르면 프로젝트 페이지가, Employee를 누르면 직원현황 페이지가 보이도록 수정해보기
