이 글은 Web3 University의 Road to Web3 튜토리얼을 보고 기록한 글입니다. 🥴
🌊 eth_getLogs
eth_getLogs 를 사용하면 블록에 있는 이벤트 및 로그들을 불러올 수 있다. 누가 어떤 NFT를 샀고, 언제 샀는지, 누구에게 전송했는지 등의 정보들을 가져올 수 있도록 해준다.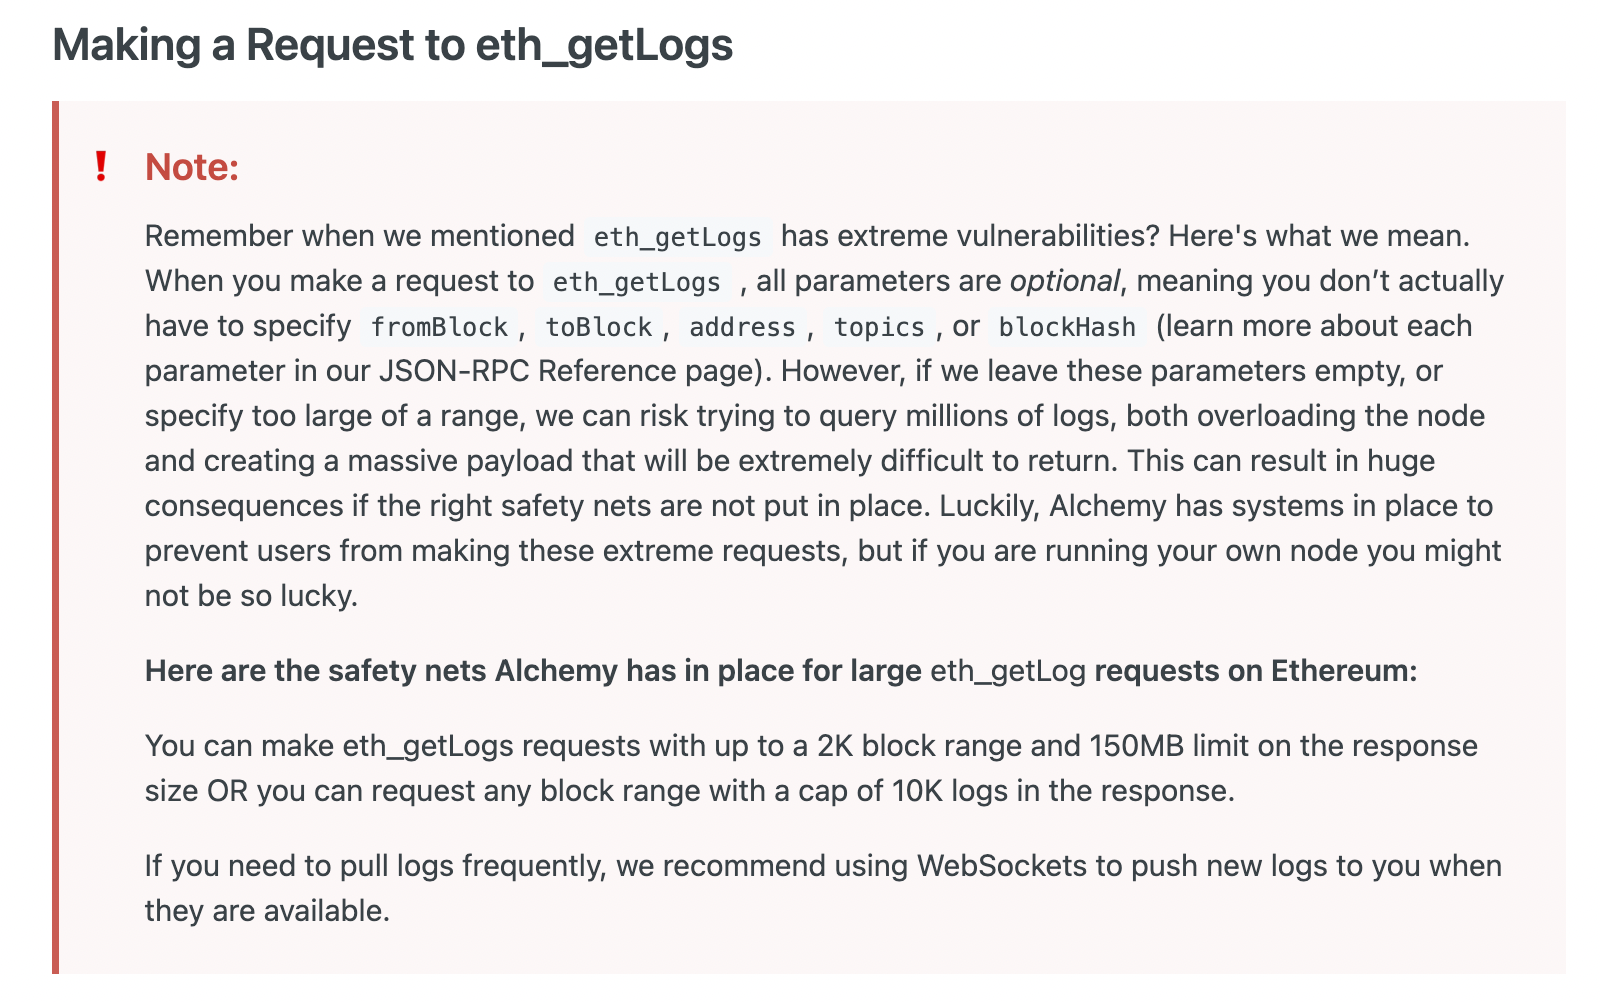
하지만 자칫 잘못 사용하면 엄청난 양의 데이터를 불러올 수 있기 때문에 사용 시 주의가 필요하다. 심지어 너무 많은 데이터가 요청될 경우 리턴 받기 어려울 수 있다. 이러한 이유로 Alchemy 측에서는 eth_getLogs를 통해 받을 수 있는 데이터의 크기를 제한해놨다.
📡 Alchemy API 활용
데이터를 다 받는다고 해도 그 안에서 유의미한 데이터를 찾는 것도 쉽지 않은 일이다. 그 많은 데이터에서 우리가 원하는 NFT에 대한 정보를 일일이 다 찾으려면 시간도 많이 걸릴 것이다. 따라서 우리는 Alchemy에서 이미 만들어 놓은 API를 활용해 필요한 정보만 가져오면 된다. Alcheymy API Documnet에 가면 이미 만들어 놓은 API들을 볼 수 있다.

⛓ 예제 코드
실제 예제에서는 fetch()를 사용했다. Alchemy에서 만든 앱의 apikey를 넣고 정보를 가져올 지갑 주소를 입력한다. 그러면 fetchURL에 맞춰서 nft의 정보를 얻을 수 있다.
// alchemy-nft-api/fetch-script.js
import fetch from 'node-fetch';

// Setup request options:
var requestOptions = {
  method: 'GET',
  redirect: 'follow'
};

// Replace with your Alchemy API key:
const apiKey = "demo";
const baseURL = `https://eth-mainnet.alchemyapi.io/nft/v2/${apiKey}/getNFTs/`;
// Replace with the wallet address you want to query:
const ownerAddr = "0xF5FFF32CF83A1A614e15F25Ce55B0c0A6b5F8F2c";
const fetchURL = `${baseURL}?owner=${ownerAddr}`;

// Make the request and print the formatted response:
fetch(fetchURL, requestOptions)
  .then(response => response.json())
  .then(response => JSON.stringify(response, null, 2))
  .then(result => console.log(result))
  .catch(error => console.log('error', error));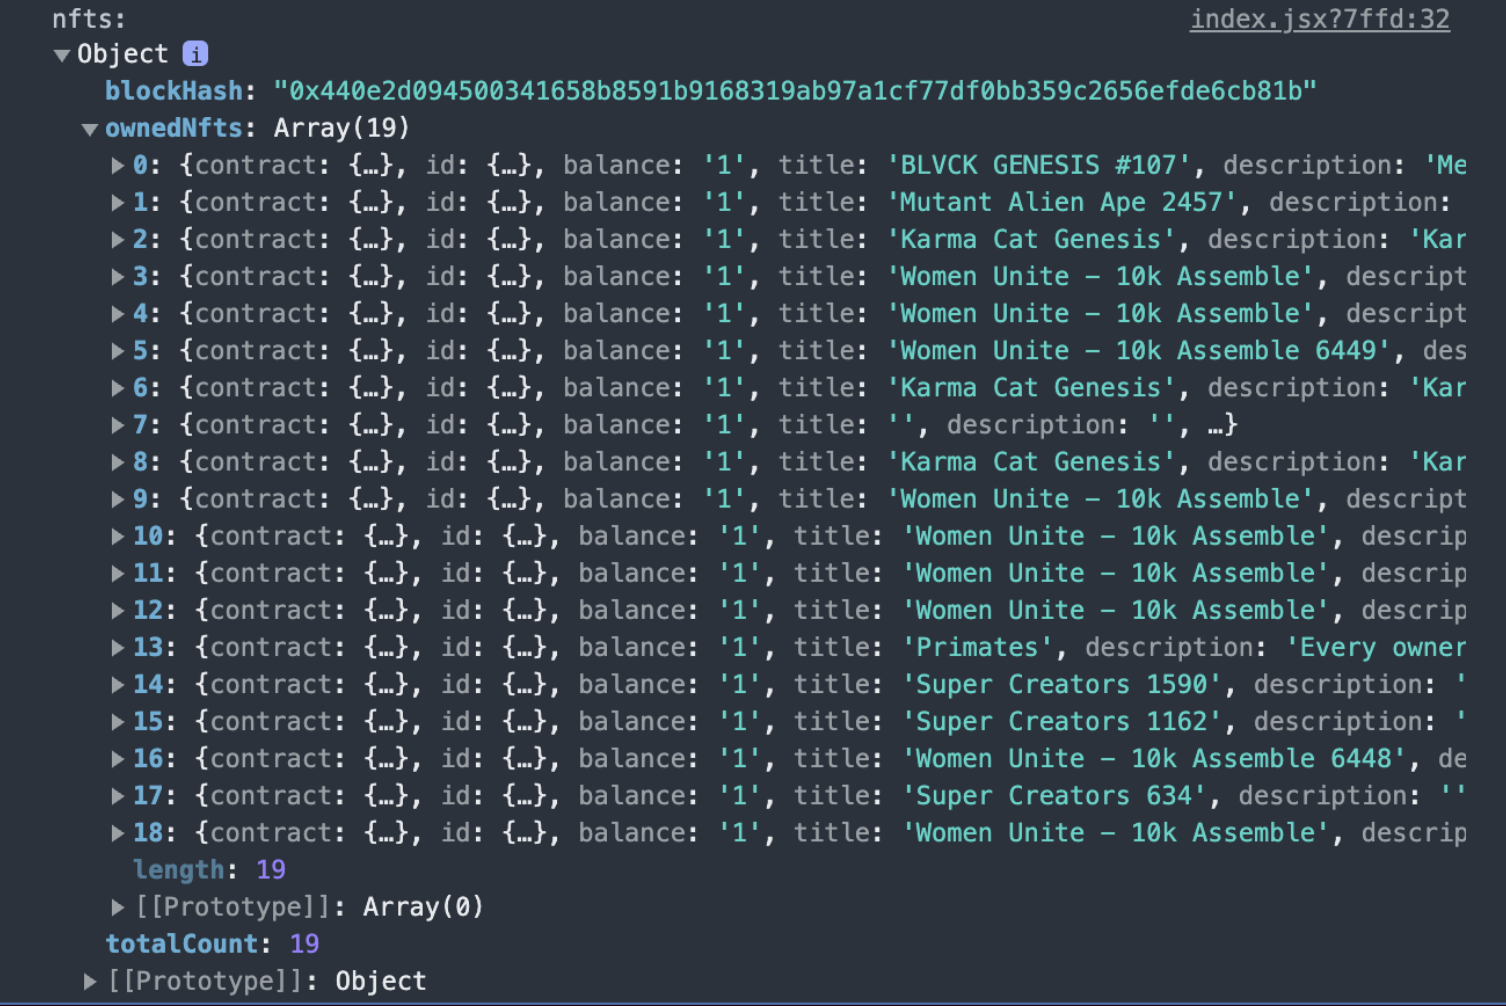
출처 및 참고자료

Just BUIDL :)