context-api사용법에 대한 더 자세한 정보는 여기
https://velog.io/@velopert/react-context-tutorial
mobx 를 공부하려다가
context-api로 하위 컴포넌트에게 전반적으로 props전달 하는 법도 모르고 있다는 것을 깨달았다.
context-api를 쓰면 좋은점:
-
각 컴포넌트에 로직을 일일히 작성하는 것보다 로직 파일을 따로 만들어 관리하는 것이 코드가 더 깔끔하다.
-
또 자식 컴포넌트들이 많은 경우 props를 아래 까지 전달시키는 코드를 짜는데 상당한 정신적 노동을 필요로 하는데 context-api는 이런 어려움에 대한 좋은 해결책이 된다.
그럼 만들어보자
목표: 앱 최상단에 HighestProvider라는 컴포넌트를 만들어 하위 컴포넌트들 전부가 HighestProvider가 제공하는 로직을, const highestContext = useHighestContext()을 통해 공유할 수 있게 하는 것
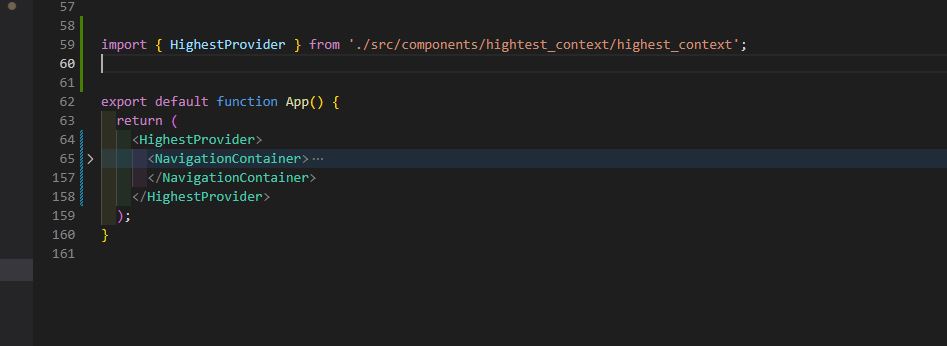
그림 1 : 앱 최상단에 HighestProvider를 올린 모습
context-api 컴포넌트 만드는 순서
import { createContext, ReactNode, useContext } from 'react';
import { View } from 'react-native';
import { GlobalLogics, TypeOfGlobalLogics } from '../../global_logic/global_logics';

type TypeOfHighestContext = TypeOfGlobalLogics;

// 1. createContext
// createContext 를 불러주면 자연스레 빨간줄이 그어짐
// (1)괄호안에 초기값을 넣어줘야하고 (2) 제네릭도 넣어주면 됨

const HighestContext = createContext<TypeOfHighestContext>(GlobalLogics);

// 2. () => useContext(HighestContext)

export const useHighestContext = () => useContext(HighestContext);

// 3. <HighestContext.provider value = {} >
type HighestProvider = {
  children: ReactNode;
};

export const HighestProvider = ({ children }: HighestProvider) => {
  return <HighestContext.Provider value={GlobalLogics}>{children}</HighestContext.Provider>;
};
코드 1: context-api 컴포넌트 만들기
1. createContext
- context-api로 컴포넌트를 만들겠다는 선언과 같다
- param으로 하위 컴포넌트에게 전달 하고 싶은 값을 넣고,
- typescript를 쓴다면 Generic으로 값의 타입을 넣어주면 된다
2. useContext
- 하위컴포넌트들이 context-api에 저장된 로직을 불러올수 있게 하는 코드이다
- 하위 컴포넌트에서 const highestContext = useHighestContext() 를 써주면, 이제 하위 컴포넌트들은 context-api에 넣어 놓은 로직을 가져다 쓸 수 있다.
- param으로 createContext로 정의한 컴포넌트의 이름을 적는다
- 다른 파일에서 열수 있어야 하므로 export는 필수이다.
- 화살표 함수로 작성을 한다
3. HighestProvider
- 실제로 app 상단에 덮어 씌울 컴포넌트를 만든다
- return 의 최상단 컴포넌트이름으로 1. 에서 정의한 이름에 .provider를 붙여서 정의한다.
- value={} 에 1.에서 넣었던 하위컴포넌트에게 전달하고 싶은 값을 다시 한번 넣어준다.
- children은 하위 컴포넌트들이 들어갈 자리이다. children의 타입으로 reactnode를 넣어준다.
만든 context-api를 통해 하위컴포넌트에게 로직 전달하기
context-api를 예쁘게 잘 만들었으니 적용 해보자
1. app 최상단을 HighestProvider로 감싼다
import { HighestProvider } from './src/components/hightest_context/highest_context';

export default function App() {
  return (
    <HighestProvider>
      <NavigationContainer>

        ~~~

      </NavigationContainer>
    </HighestProvider>
  );
}
이제 HighestProvider의 자식 컴포넌트들은 HighestProvider가 제공하는 로직을 받을 수 있게 된다
2. 하위 컴포넌트에 const highestContext = useHighestContext()를 적어준다
export function No9({ navigation }: any) {
  const highestContext = useHighestContext();

  return (
    <ScrollView>
      <QuestionPageBasicLayout

        globalLogics={highestContext}

      ></QuestionPageBasicLayout>
    </ScrollView>
  );
}
3. 만든 highestContext를 잘 사용하면 끝~~
이상입니다
나중에 내용 더 추가할 예정임