RecyclerView 란?
간단히 말해서, 리스트뷰랑 비슷한데 비슷한 형식의 뷰는 몇개만 그려놓고 스크롤 내리면 위의 뷰를 없애고 미리 그려진 뷰에 데이터를 할당하는 방식. (=Recycle!!🌈💫)

-
데이터집합을 각각의 개별 아이템 단위로 구성하여 화면에 출력해주는 ViewGroup.
동일한 형태를 갖는 수많은 리스트를 구현할때 사용 -
RecylcerView는 ListView보다 재사용성이 좋다!
-
ListView는 Viewholder가 아니라 getView()를 이용하여 접근하는데 리스트가 많아지면 비효율적
-
RecyclerView는 ViewHolder를 통해 만든 객체를 재사용하기 때문에 훨씬 효율적
1) RecyclerView를 레이아웃에 추가하고 각 아이템별 레이아웃 설정
2) 리스트의 각 아이템에 들어갈 데이터 결정 (data class)
3) ViewHolder (어떤 데이터를 어디에 넣을건지)
4) Adapter (리사이클러뷰에 데이터 연결)
사용법
① build.gradle(app) 에 implementation 추가
implementation 'androidx.recyclerview:recyclerview:1.1.0'② activity_main.xml 또는 recyclerview를 넣고 싶은 곳에 recyclerView 추가
activity_main.xml
<?xml version="1.0" encoding="utf-8"?>
<androidx.constraintlayout.widget.ConstraintLayout xmlns:android="http://schemas.android.com/apk/res/android"
    xmlns:app="http://schemas.android.com/apk/res-auto"
    xmlns:tools="http://schemas.android.com/tools"
    android:layout_width="match_parent"
    android:layout_height="match_parent"
    tools:context=".MainActivity">

    <androidx.recyclerview.widget.RecyclerView
        android:id="@+id/recyclerView"
        android:layout_width="match_parent"
        android:layout_height="0dp"
        app:layout_constraintLeft_toLeftOf="parent"
        app:layout_constraintRight_toRightOf="parent"
        app:layout_constraintEnd_toEndOf="parent"
        app:layout_constraintTop_toTopOf="parent"/>


</androidx.constraintlayout.widget.ConstraintLayout>
③ RecylerView 안 각 아이템 배치할 레이아웃 만들기
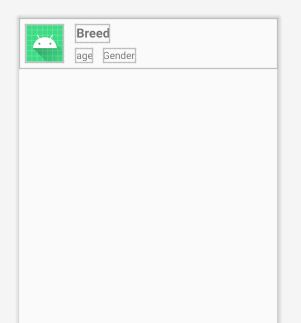
item_list.xml
<?xml version="1.0" encoding="utf-8"?>
<androidx.constraintlayout.widget.ConstraintLayout xmlns:android="http://schemas.android.com/apk/res/android"
    android:layout_width="match_parent"
    android:layout_height="80dp"
    xmlns:app="http://schemas.android.com/apk/res-auto"
    android:orientation="vertical">

    <ImageView
        android:id="@+id/dogPhotoImg"
        android:layout_width="60dp"
        android:layout_height="60dp"
        android:layout_margin="10dp"
        app:layout_constraintBottom_toBottomOf="parent"
        app:layout_constraintStart_toStartOf="parent"
        app:srcCompat="@mipmap/ic_launcher_round"
        app:layout_constraintTop_toTopOf="parent"/>

    <TextView
        android:id="@+id/dogBreedTv"
        android:layout_marginStart="20dp"
        android:layout_width="wrap_content"
        android:layout_height="wrap_content"
        android:textStyle="bold"
        android:textSize="20sp"
        app:layout_constraintStart_toEndOf="@id/dogPhotoImg"
        app:layout_constraintTop_toTopOf="@id/dogPhotoImg"
        android:text="Breed"
        android:layout_marginLeft="20dp" />

    <TextView
        android:id="@+id/dogAgeTv"
        android:layout_width="wrap_content"
        android:layout_height="wrap_content"
        android:textSize="16sp"
        app:layout_constraintBottom_toBottomOf="@id/dogPhotoImg"
        app:layout_constraintStart_toStartOf="@id/dogBreedTv"
        android:text="age"/>

    <TextView
        android:id="@+id/dogGenderTv"
        android:layout_width="wrap_content"
        android:layout_height="wrap_content"
        android:layout_marginStart="16dp"
        android:textSize="16sp"
        app:layout_constraintStart_toEndOf="@id/dogAgeTv"
        app:layout_constraintTop_toTopOf="@id/dogAgeTv"
        app:layout_constraintBottom_toBottomOf="@id/dogAgeTv"
        android:text="Gender"
        android:layout_marginLeft="16dp" />


</androidx.constraintlayout.widget.ConstraintLayout>
④ list_item에 넣을 data class 만들기
DogData.kt
package com.example.recyclerviewpractice

data class DogData(
    val dog_img : String,
    val dog_name : String,
    val dog_age: Int,
    val dog_gender:String
)
ViewHolder 만들기
📌 뷰홀더: 데이터가 틀 안에 들어갈 수 있게 하는 기능 정의
RecyclerViewAdapter.kt 클래스 안의 내부 클래스로 만들면 된다.
내가 만들 뷰홀더엔 val 예약어로 바인딩을 전달받아서 전역으로 사용
그리고 상속받는 ViewHolder생성자에는 꼭 binding.root를 전달해야 합니다.
inner class MyViewHolder(private val binding: ItemListBinding): RecyclerView.ViewHolder(binding.root) {
    //원래라면 class MyViewHolder(itemView:View):RecyclerView.Viewholder(itemView)인데 바인딩으로 구현!
        //binding전달받았기 때문에 홀더 내부 어디에서나 binding 사용가능
        fun bind(dogData:DogData){
            //binding.dogPhotoImg.=dogData.dog_img
            binding.dogBreedTv.text=dogData.dog_name
            binding.dogAgeTv.text= dogData.dog_age.toString()
            binding.dogGenderTv.text=dogData.dog_gender
        }
    }
⑤ RecyclerViewAdapter 만들기
📌 어댑터의 역할: 간단히 말해서, 데이터 리스트를 실제 눈으로 볼수있게 item으로 변환하는 중간다리 역할!
= 데이터를 받아오고 이를 레이아웃에 직접 연결하는 함수를 실행시키는 클래스
= 미리 생성해둔 뷰홀더 객체에 사용자가 원하는 data list를 주입하고 data list의 변경사항을 UI에 반영
RecyclerViewAdapter에는 필수로 구현해야 하는 메서드들이 있음!
-> OnCreateViewHolder(), getItemCount(), onBindViewHolder()
class RecyclerViewAdapter: RecyclerView.Adapter<RecyclerViewAdapter.MyViewHolder>() {

    var datalist = mutableListOf<DogData>()//리사이클러뷰에서 사용할 데이터 미리 정의 -> 나중에 MainActivity등에서 datalist에 실제 데이터 추가

    inner class MyViewHolder(private val binding: ItemListBinding): RecyclerView.ViewHolder(binding.root) {

        fun bind(dogData:DogData){
            //binding.dogPhotoImg.=dogData.dog_img
            binding.dogBreedTv.text=dogData.dog_name
            binding.dogAgeTv.text= dogData.dog_age.toString()
            binding.dogGenderTv.text=dogData.dog_gender
        }
    }


    //만들어진 뷰홀더 없을때 뷰홀더(레이아웃) 생성하는 함수
    override fun onCreateViewHolder(parent: ViewGroup, viewType: Int): MyViewHolder {
        val binding=ItemListBinding.inflate(LayoutInflater.from(parent.context),parent,false)
        return MyViewHolder(binding)
    }

    override fun getItemCount(): Int =datalist.size

    //recyclerview가 viewholder를 가져와 데이터 연결할때 호출
    //적절한 데이터를 가져와서 그 데이터를 사용하여 뷰홀더의 레이아웃 채움
    override fun onBindViewHolder(holder: MyViewHolder, position: Int) {
        holder.bind(datalist[position])
    }
  }
📍 binding.dogPhotoImg -> 이미지 삽입은 다음에 'Glide 라이브러리' 게시물에서 살펴보자!
⑥ MainActivity.kt에 연결
class MainActivity : AppCompatActivity() {

    private lateinit var binding:ActivityMainBinding
    private lateinit var adapter:RecyclerViewAdapter //adapter객체 먼저 선언해주기!

    val mDatas=mutableListOf<DogData>()

    override fun onCreate(savedInstanceState: Bundle?) {
        super.onCreate(savedInstanceState)
        binding=ActivityMainBinding.inflate(layoutInflater)
        setContentView(binding.root)


        initializelist()
        initDogRecyclerView()


    }

    fun initDogRecyclerView(){
        val adapter=RecyclerViewAdapter() //어댑터 객체 만듦
        adapter.datalist=mDatas //데이터 넣어줌
        binding.recyclerView.adapter=adapter //리사이클러뷰에 어댑터 연결
        binding.recyclerView.layoutManager=LinearLayoutManager(this) //레이아웃 매니저 연결
    }

    fun initializelist(){ //임의로 데이터 넣어서 만들어봄
        with(mDatas){
            add(DogData("","dog1",20,"M"))
            add(DogData("","dog2",20,"M"))
            add(DogData("","dog3",20,"M"))
            add(DogData("","dog4",20,"M"))
            add(DogData("","dog5",20,"M"))
            add(DogData("","dog2",20,"M"))
            add(DogData("","dog6",20,"M"))
            add(DogData("","dog7",20,"M"))
            add(DogData("","dog8",20,"M"))
            add(DogData("","dog9",20,"M"))
            add(DogData("","dog10",20,"M"))
            add(DogData("","dog11",20,"M"))
            add(DogData("","dog12",20,"M"))
        }
    }
}
⑦ 결과물

참고
https://recipes4dev.tistory.com/154
-> RecyclerView에 대한 개념잡기
https://velog.io/@l2hyunwoo/Android-%EA%B8%B0%EB%8A%A5-%EA%B5%AC%ED%98%84-5
-> 리사이클러뷰에 대해 자세하고 이해하기 쉬운 설명!! ViewHolder개념 굳굳
https://flow9.net/bbs/board.php?bo_table=thisisandroid&wr_id=27&page=4
-> 리사이클러뷰 유튜브 설명강의
https://juahnpop.tistory.com/229
-> 깔끔한 코드
