📒 스프링 입문 - 스프링 부트, 웹 MVX, DB접근 기술
📕 0. 개요
- 스프링 프로젝트 생성
- 스프링 부트로 웹 서버 실행
- 회원 도메인 개발
- 웹 MVC 개발
- DB 연동 - JDBC, JPA, 스프링 데이터 JPA
- 테스트 케이스 작성
📕 1. 프로젝트 환경설정
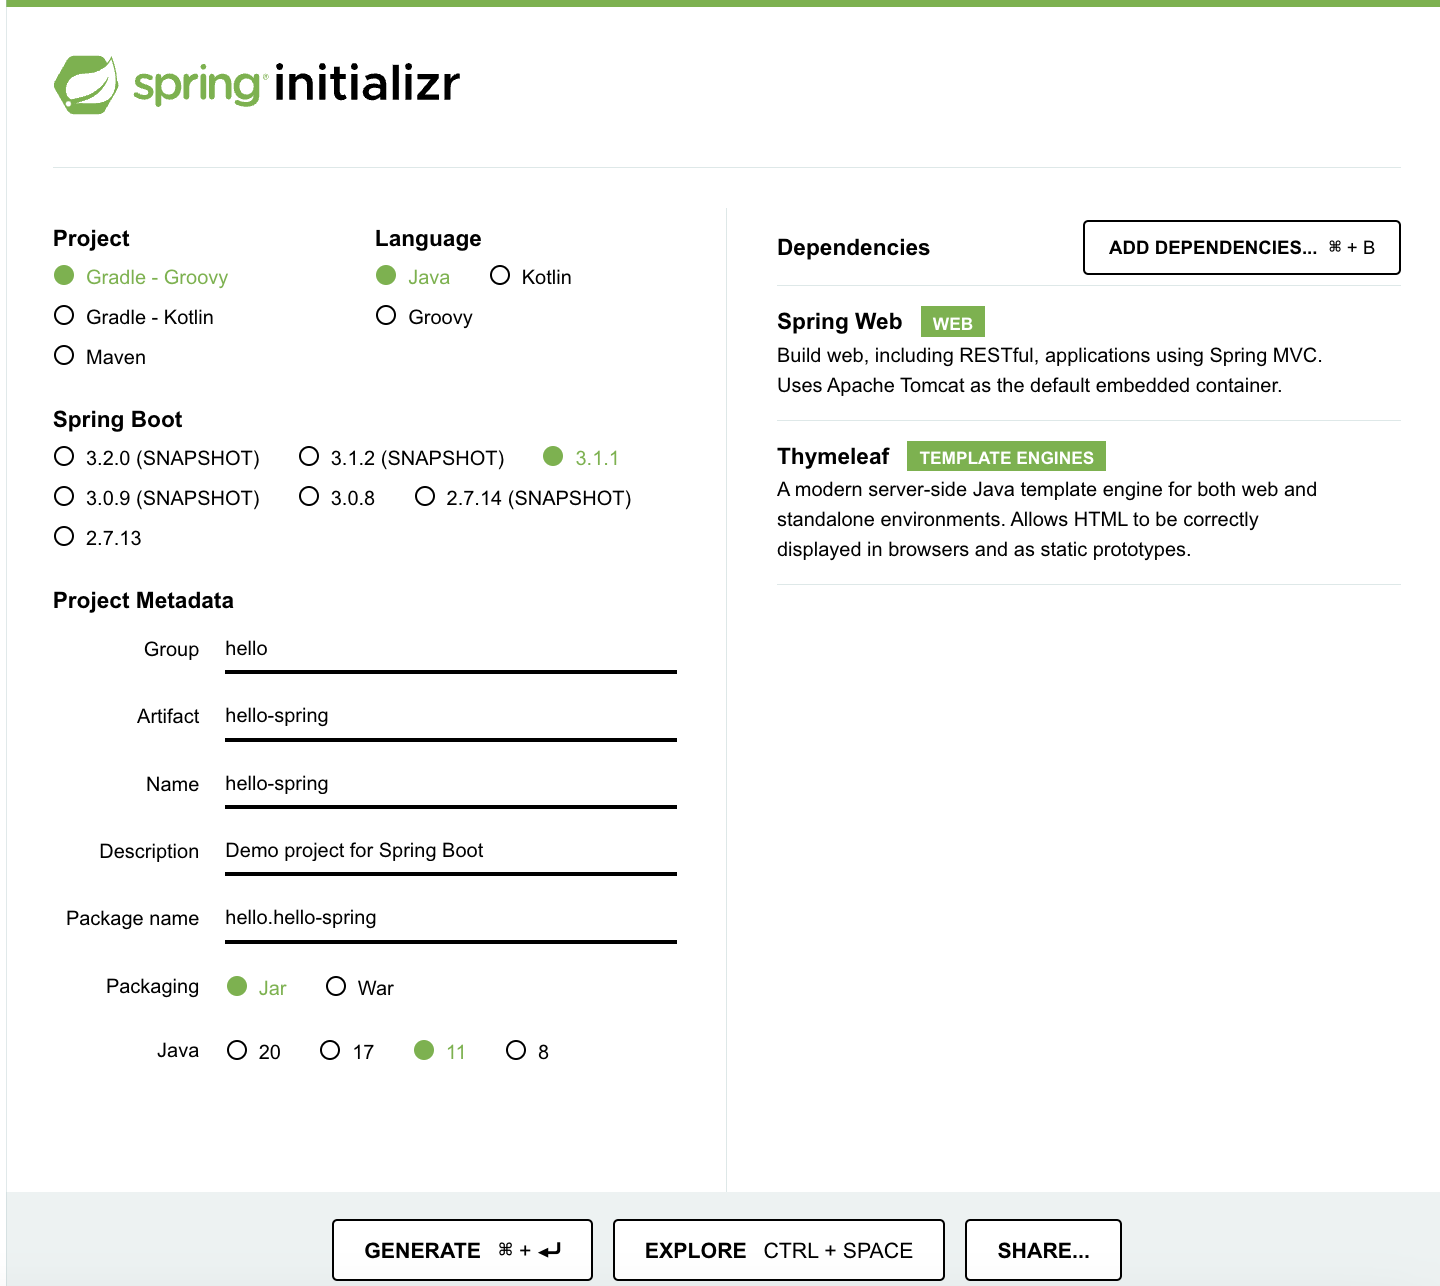
1) 프로젝트 생성
-
Java 11 설치 ➡️ IDE (IntelliJ 또는 Eclipse 설치)
-
스프링 부트 스타터 사이트 이용 ➡️ 스프링 프로젝트 생성
- SNAPSHOT : 아직 완성 안된 버전
- Artifact : 생성 프로젝트 이름
- Dependencies : 사용할 라이브러리
-
💻 hello-spring 실행
- tomcat 웹 서버를 내장하고 있어서, 자체적으로 띄우면서 spring boot와 함께 실행
- system.out.println 대신 log로 출력
2023-07-12T15:52:48.700+09:00  INFO 50345 --- [           main] h.hellospring.HelloSpringApplication     : Starting HelloSpringApplication using Java 17.0.7 with PID 50345 (/Users/soohykim/Desktop/Spring/hello-spring/build/classes/java/main started by soohykim in /Users/soohykim/Desktop/Spring/hello-spring)
2023-07-12T15:52:48.702+09:00  INFO 50345 --- [           main] h.hellospring.HelloSpringApplication     : No active profile set, falling back to 1 default profile: "default"
2023-07-12T15:52:49.036+09:00  INFO 50345 --- [           main] o.s.b.w.embedded.tomcat.TomcatWebServer  : Tomcat initialized with port(s): 8080 (http)
2023-07-12T15:52:49.040+09:00  INFO 50345 --- [           main] o.apache.catalina.core.StandardService   : Starting service [Tomcat]
2023-07-12T15:52:49.040+09:00  INFO 50345 --- [           main] o.apache.catalina.core.StandardEngine    : Starting Servlet engine: [Apache Tomcat/10.1.10]
2023-07-12T15:52:49.077+09:00  INFO 50345 --- [           main] o.a.c.c.C.[Tomcat].[localhost].[/]       : Initializing Spring embedded WebApplicationContext
2023-07-12T15:52:49.078+09:00  INFO 50345 --- [           main] w.s.c.ServletWebServerApplicationContext : Root WebApplicationContext: initialization completed in 355 ms
2023-07-12T15:52:49.204+09:00  INFO 50345 --- [           main] o.s.b.w.embedded.tomcat.TomcatWebServer  : Tomcat started on port(s): 8080 (http) with context path ''
2023-07-12T15:52:49.208+09:00  INFO 50345 --- [           main] h.hellospring.HelloSpringApplication     : Started HelloSpringApplication in 0.647 seconds (process running for 0.791)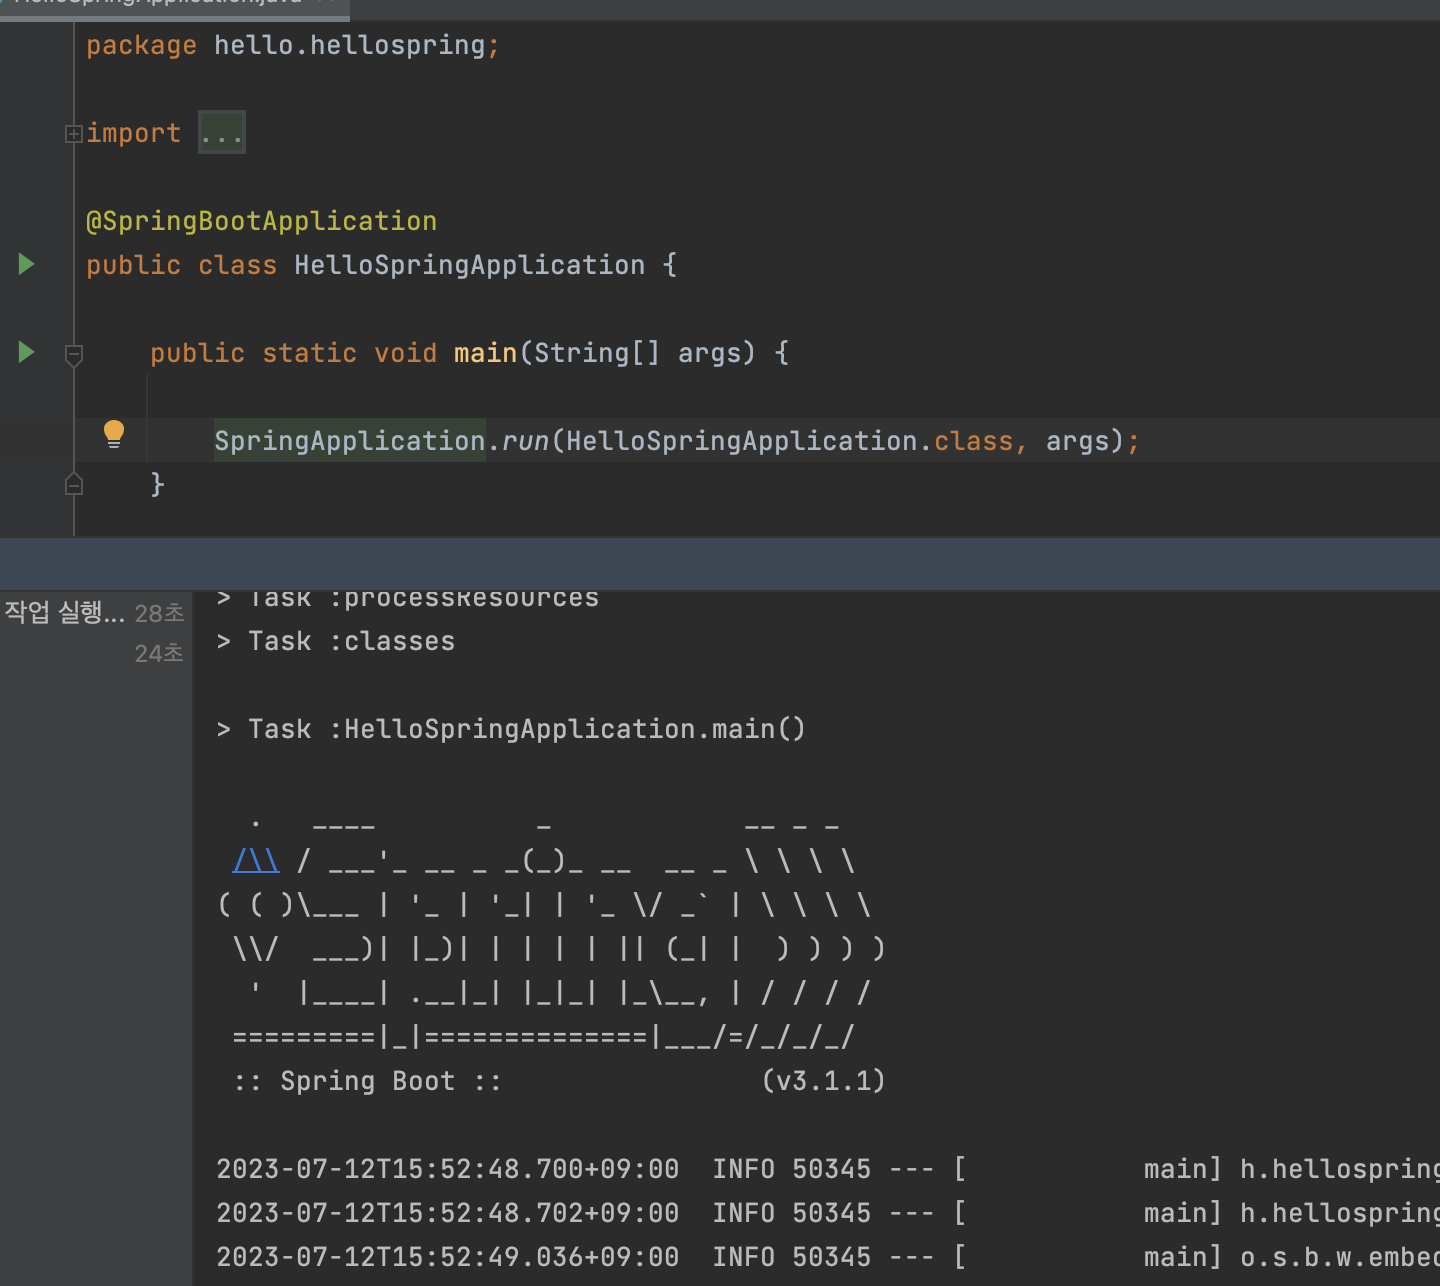
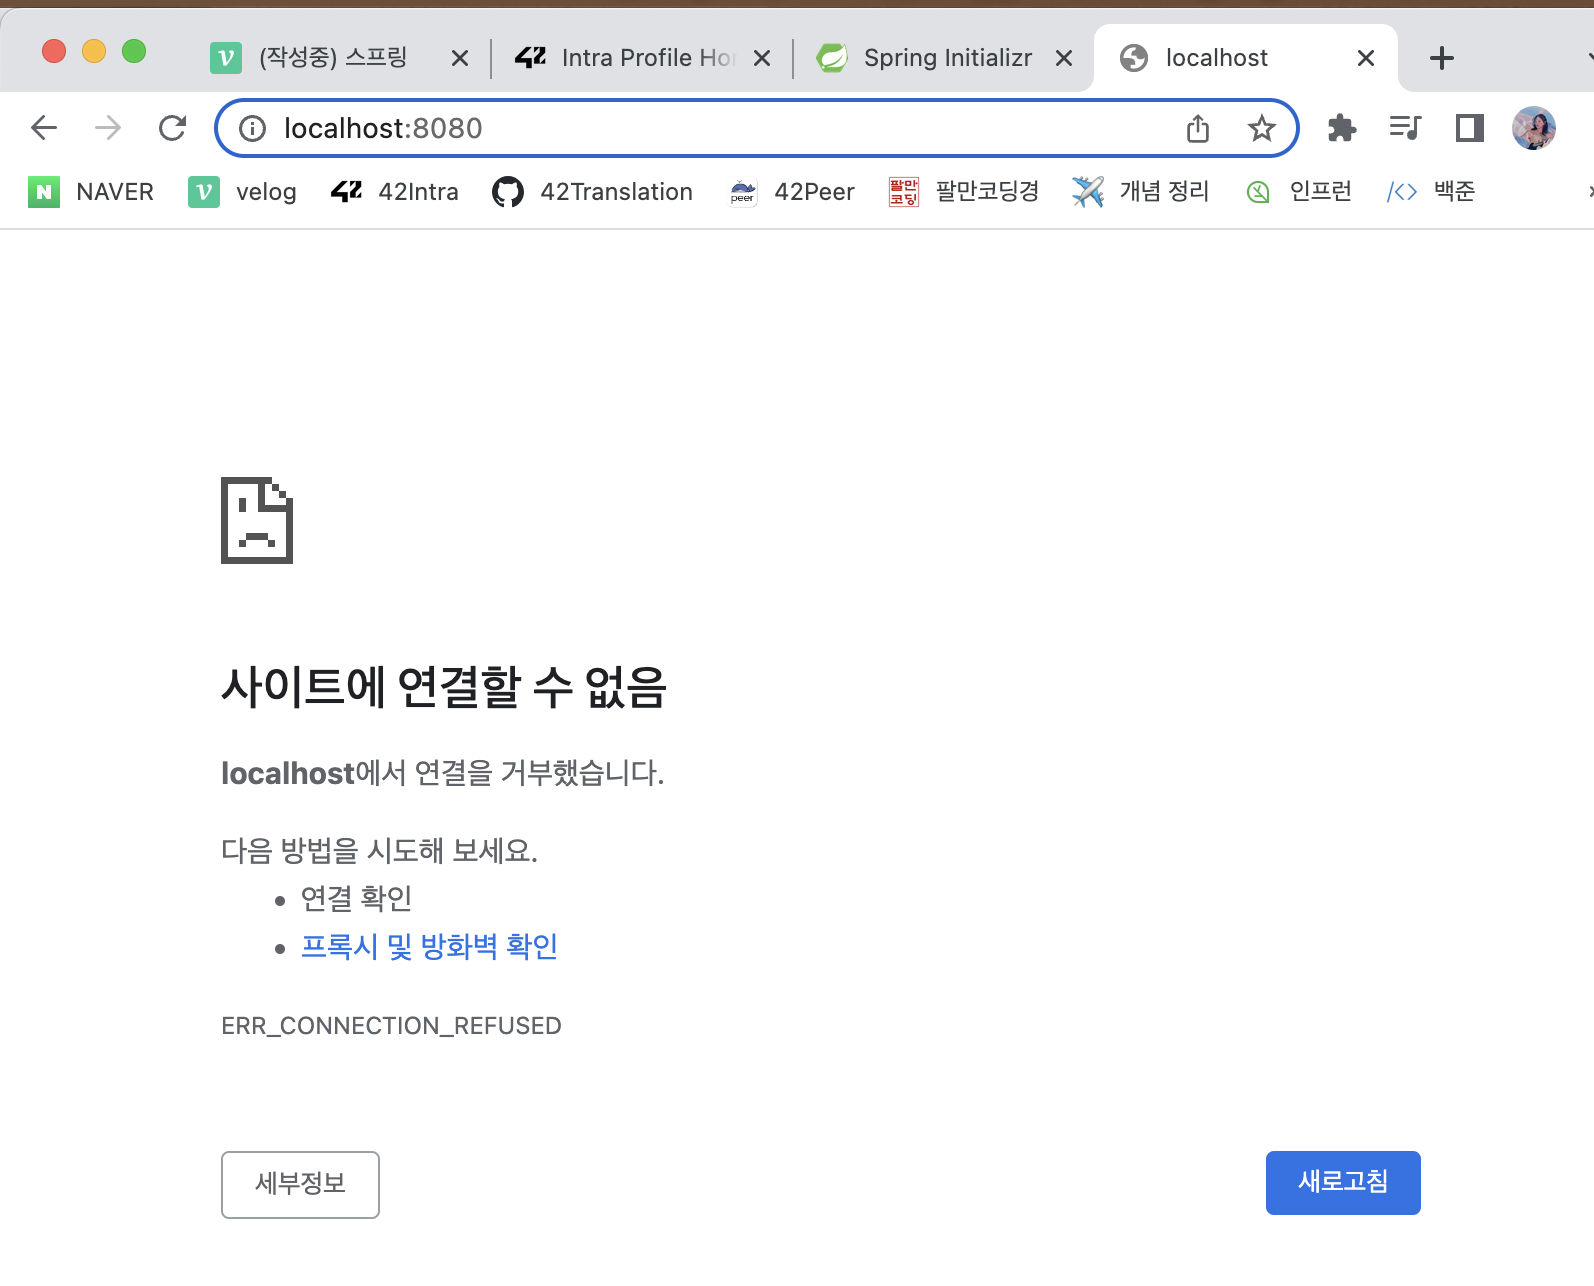
- 💻 localhost:8080 실행
- 성공시
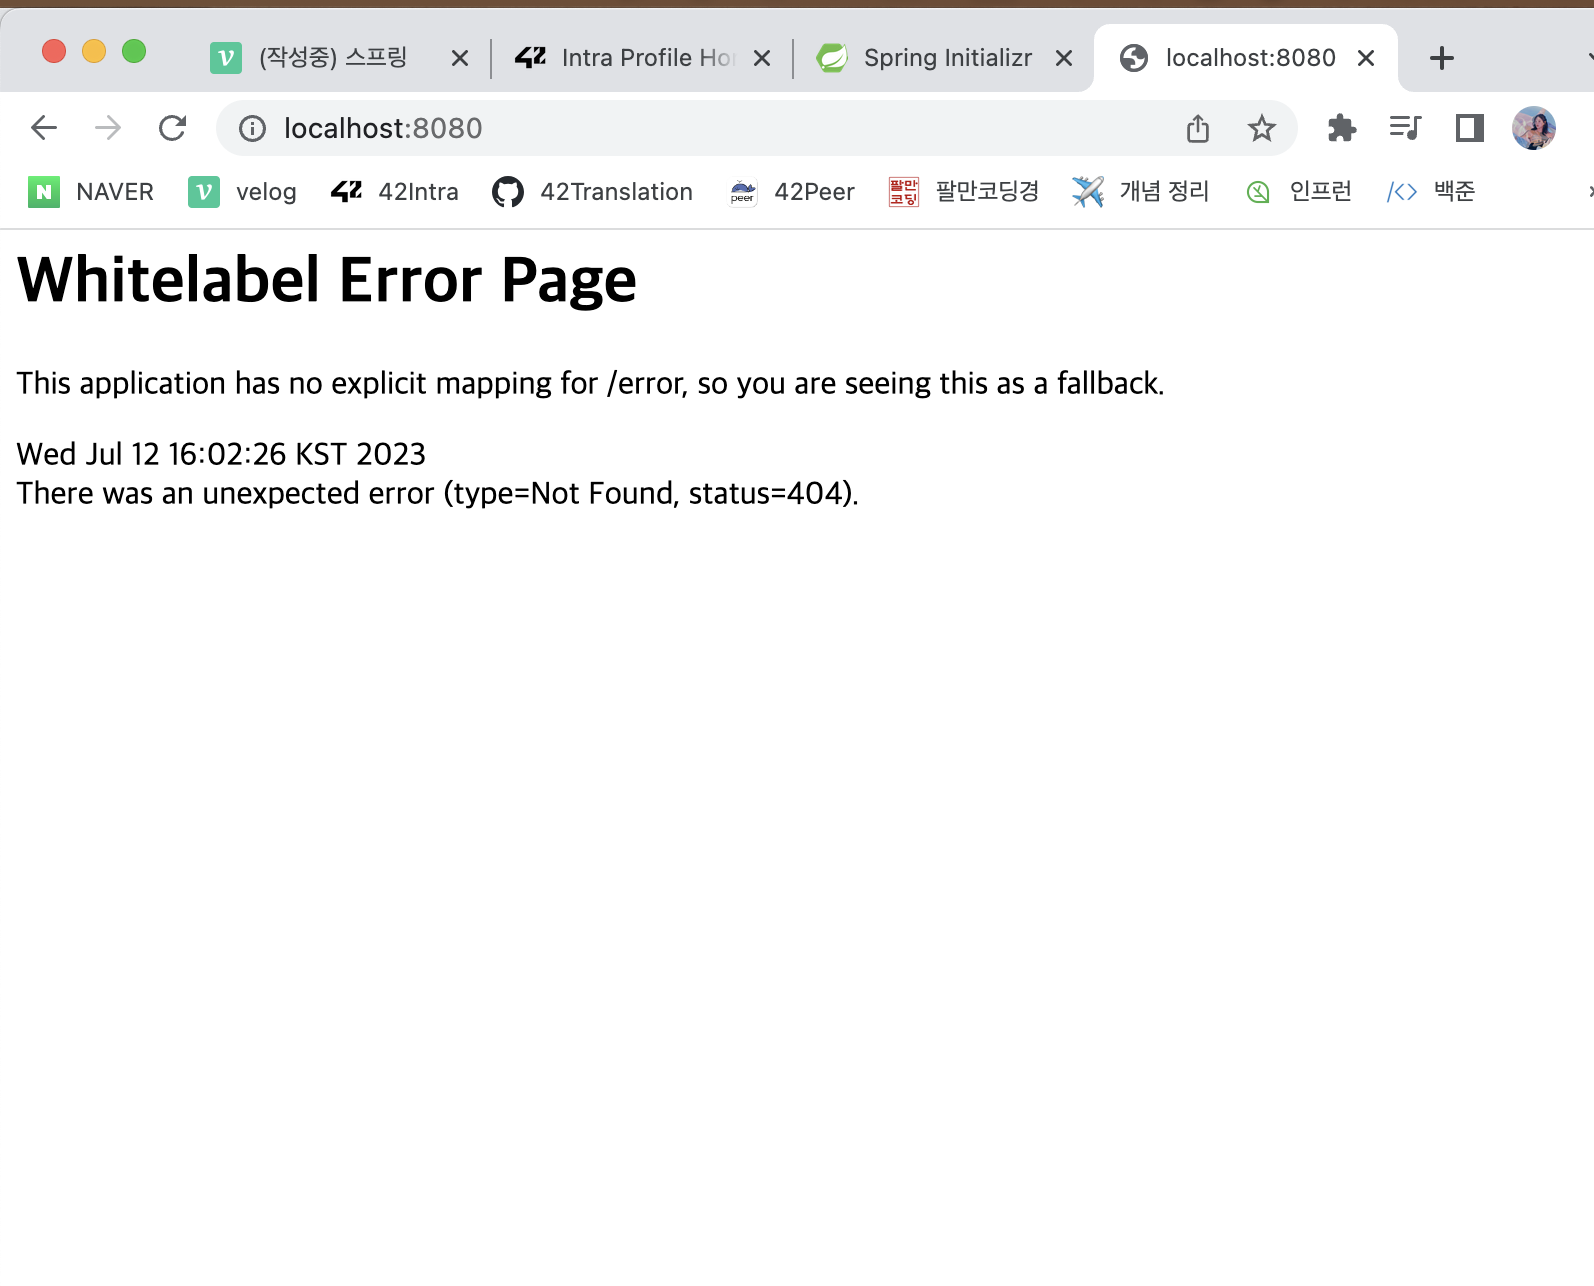
- 실패시
- 성공시
2) 라이브러리
- 스프링 부트 라이브러리
- spring-boot-starter-web
- spring-boot-starter-tomcat : 톰캣(웹서버)
- spring-webmvc : 스프링 웹 MVC
- spring-boot-starter-thymeleaf : 타임리프 템플릿 엔진(View)
- spring-boot-starter(공통) : 스프링 부트 + 스프링 코어 + 로깅
- spring-boot (spring-core)
- spring-boot-starter-logging (logback, slf4j)
- spring-boot-starter-web
- 테스트 라이브러리
- spring-boot-starter-test
- junit : 테스트 프레임워크
- mockito : 목 라이브러리
- assertj : 테스트 코드를 좀 더 편하게 작성하는 라이브러리
- spring-test : 스프링 통합 테스트 지원
- spring-boot-starter-test
3) View 환경설정
-
(1) Welcome Page 만들기
index.html생성 (경로 : resources/static/index.html)- 해당 파일이 Welcome (정적) Page가 됨
-
📁 index.html
<!DOCTYPE HTML>
<html>
  <head>
    <title>Hello</title>
    <meta http-equiv="Content-Type" content="text/html; charset=UTF-8" />
  </head>
  <body>
    Hello
    <a href="/hello">hello</a>
  </body>
</html>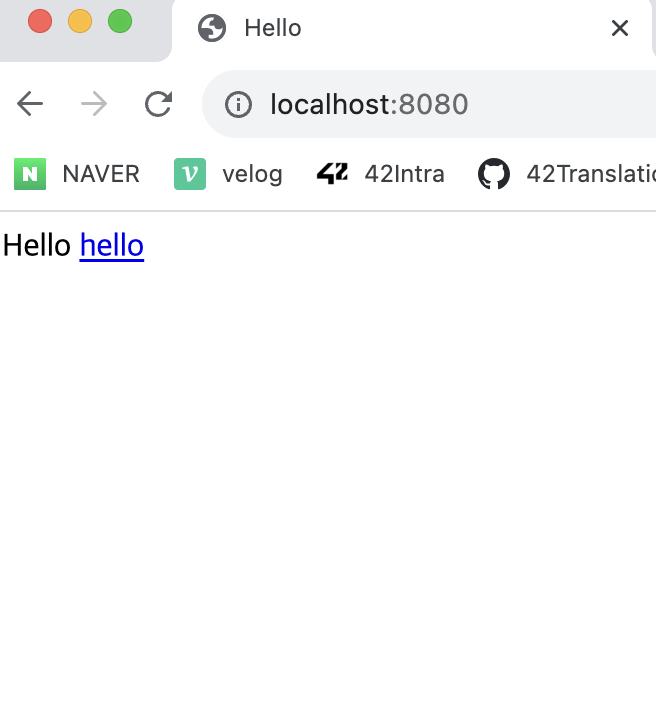
- (2) 템플릿 엔진 사용하기
- [thymeleaf 템플릿 엔진]으로 (동적)Page 생성(https://www.thymeleaf.org)
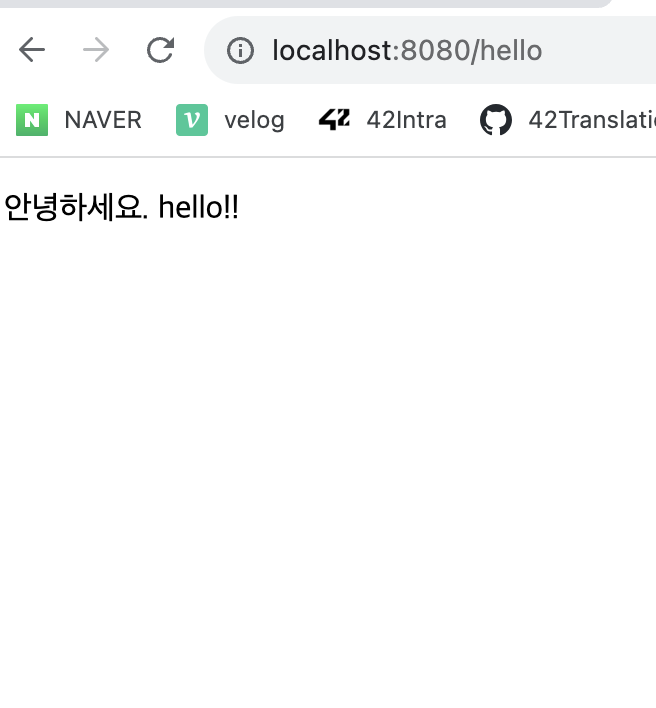
controller패키지 생성 (경로 : hello.hellospring.controller)HelloController클래스 생성- java에서는
@Controller선언 필요 - 웹애플리케이션에서는 컨트롤러로 처음 진입
- java에서는
- 📁 HelloController.java
- 경로 : java/hello.hellospring/controller/HelloController.java
  @Controller
  public class HelloController {
      @GetMapping("hello")
      public String hello(Model model) {
          model.addAttribute("data", "hello!!");
          return "hello";
      }
}- 📁 hello.html
- 경로 : resources/templates/hello.html
  <!DOCTYPE HTML>
  <html xmlns:th="http://www.thymeleaf.org">
  <head>
      <title>Hello</title>
      <meta http-equiv="Content-Type" content="text/html; charset=UTF-8" />
  </head>
<body>
<p th:text="'안녕하세요. ' + ${data}" >안녕하세요. 손님</p>
  </body>
  </html>
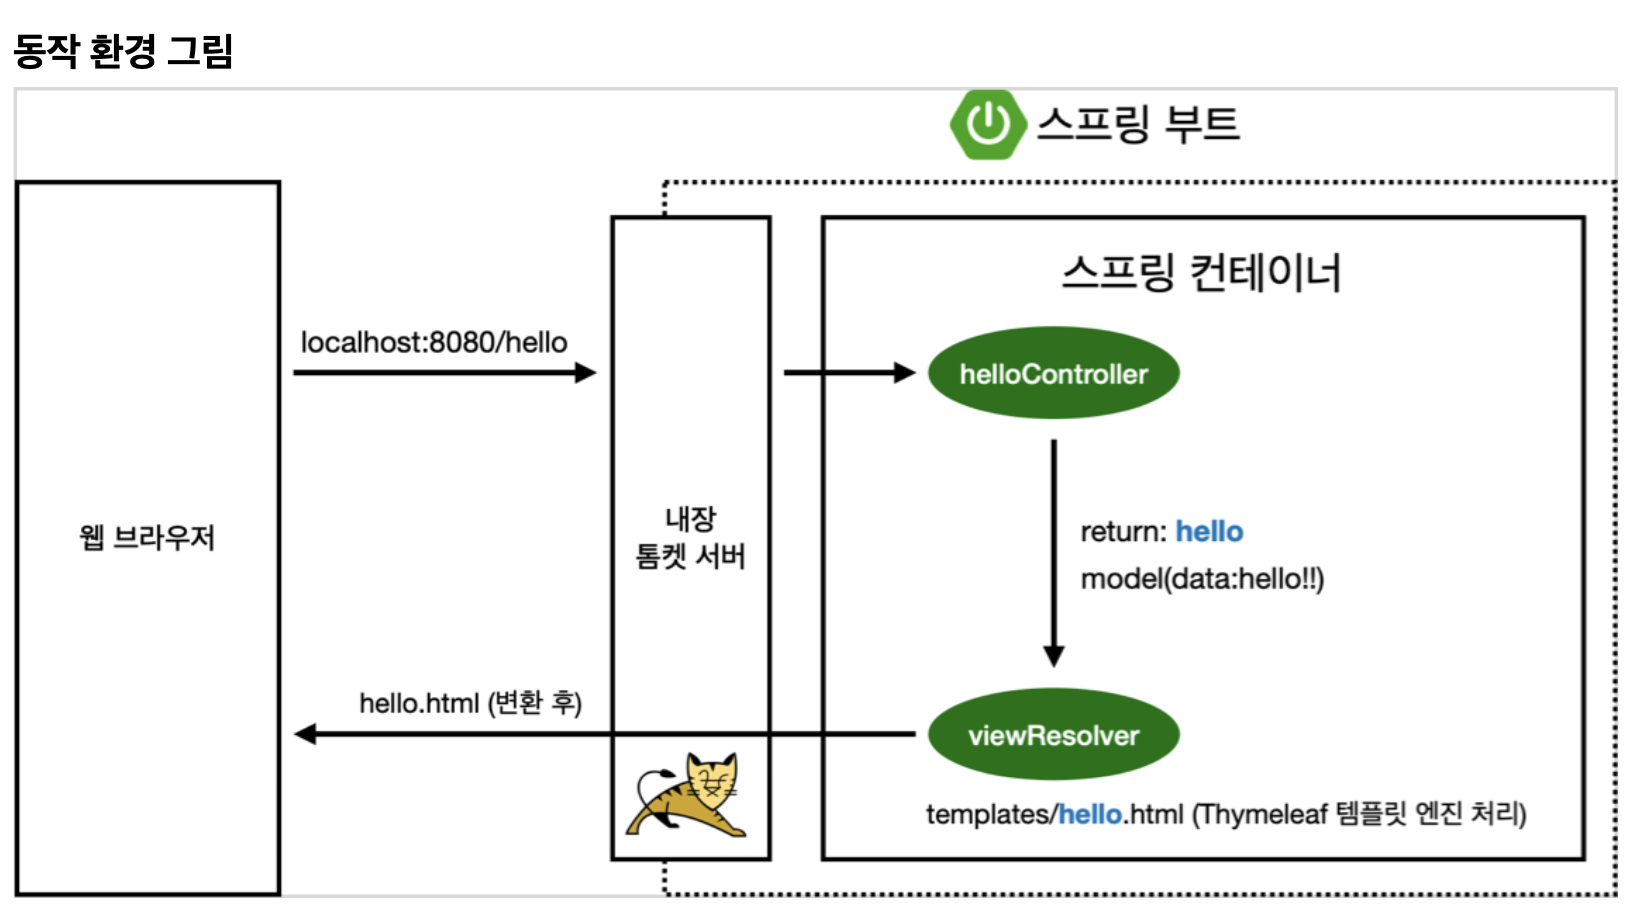
📌 스프링 부트 동작 환경
- (1) 웹브라우저 : localhost:8080 입력
- (2) 스프링부트에 내장된 톰캣 서버에서 받아
/hello확인- (3) hello Controller의
GetMapping을 통해 url 매칭 후 메소드 실행- (4) model의
data = hello!!
return값hello➡️ resources/templates에서hello.html찾아 렌더링
- Thymeleaf템플릿 엔진 처리
- (5) 컨트롤러에서 return값으로 문자 반환시 viewResolver가 화면을 찾아 처리함
- 스프링 부트 템플릿엔진 기본 viewName 매핑
resources:templates/+ {ViewName} +.html- (참고)
spring-boot-devtool라이브러리 추가하면,html파일만 컴파일해줘도 서버 재시작 없이 View 파일 변경 가능
- 인텔리J 컴파일 방법 : 메뉴build ➡️ Recompile
📖 참고 📖 스프링 부트 기능 찾기
- 기능 검색 : spring.io ➡️ spring-boot ➡️ 해당 버전 ➡️ reference
- 스프링 튜토리얼
- [스프링부트 매뉴얼](https://docs.spring.io/spring-boot/docs/2.3.1.RELEASE/reference/ html/spring-boot-features.html#boot-features-spring-mvc-template-engines)
4) 빌드 후 실행
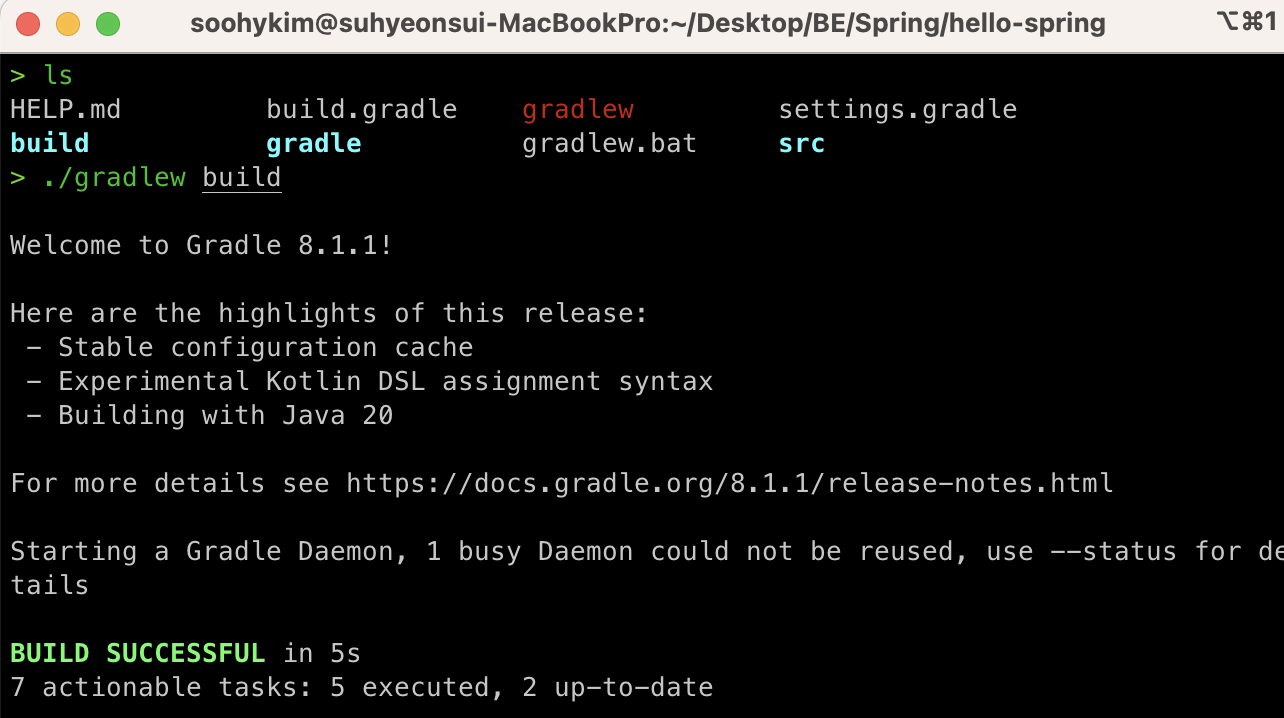
💻 ./gradlew build 실행
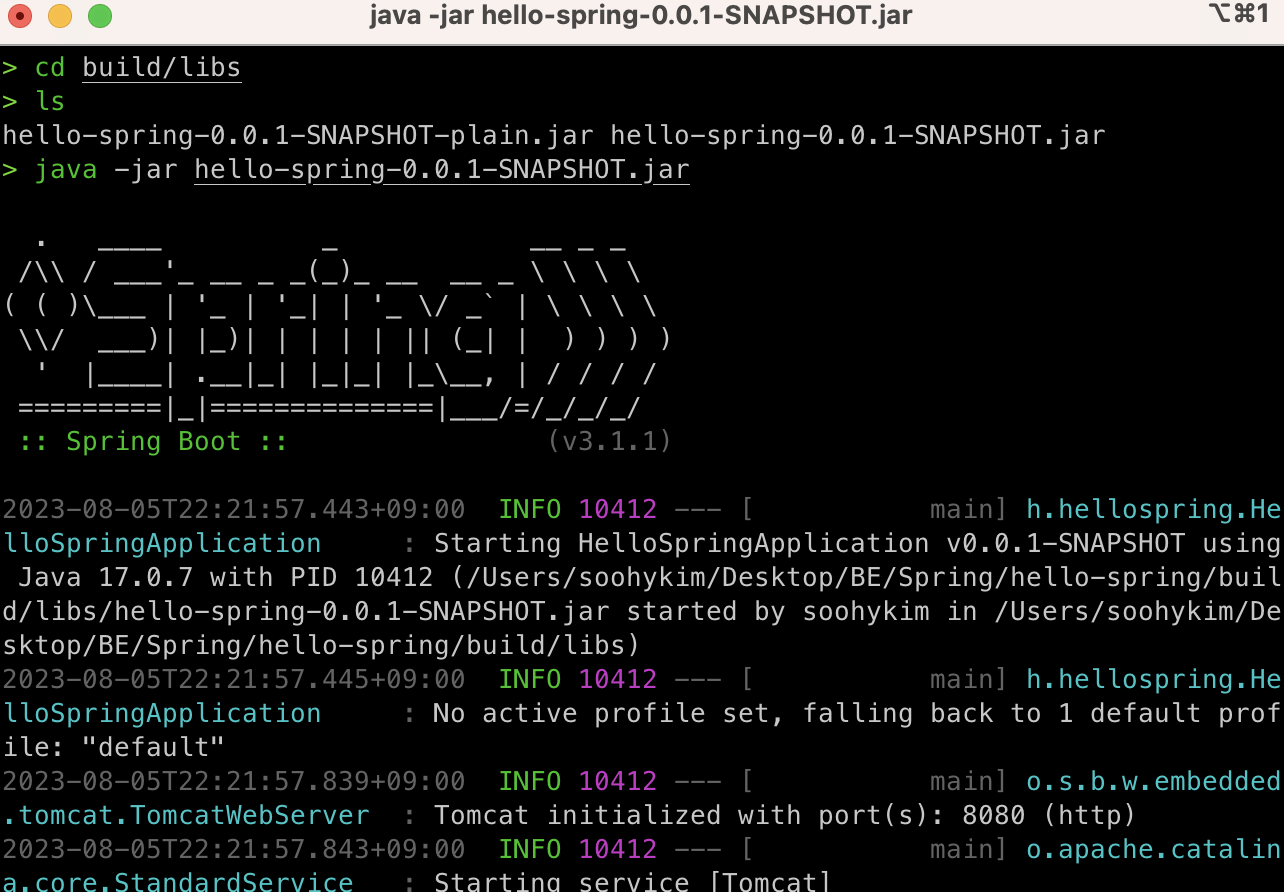
💻 cd build/libs
💻 java -jar hello-spring-0.0.1-SNAPSHOT.jar
2. 📕 스프링 웹 개발 기초
1) 정적 컨텐츠
-
스프링 부트는 자동 정적 컨텐츠 기능 제공
-
서버에서 바로
html파일그대로 전달 (프로그래밍 불가) -
📁 hello-static.html
- 경로 : resources/static/hello-static.html
<!DOCTYPE HTML>
<html>
<head>
    <title>static content</title>
    <meta http-equiv="Content-Type" content="text/html; charset=UTF-8" />
</head>
<body>
정적 컨텐츠 입니다.
</body>
</html>
- 경로 : resources/static/hello-static.html
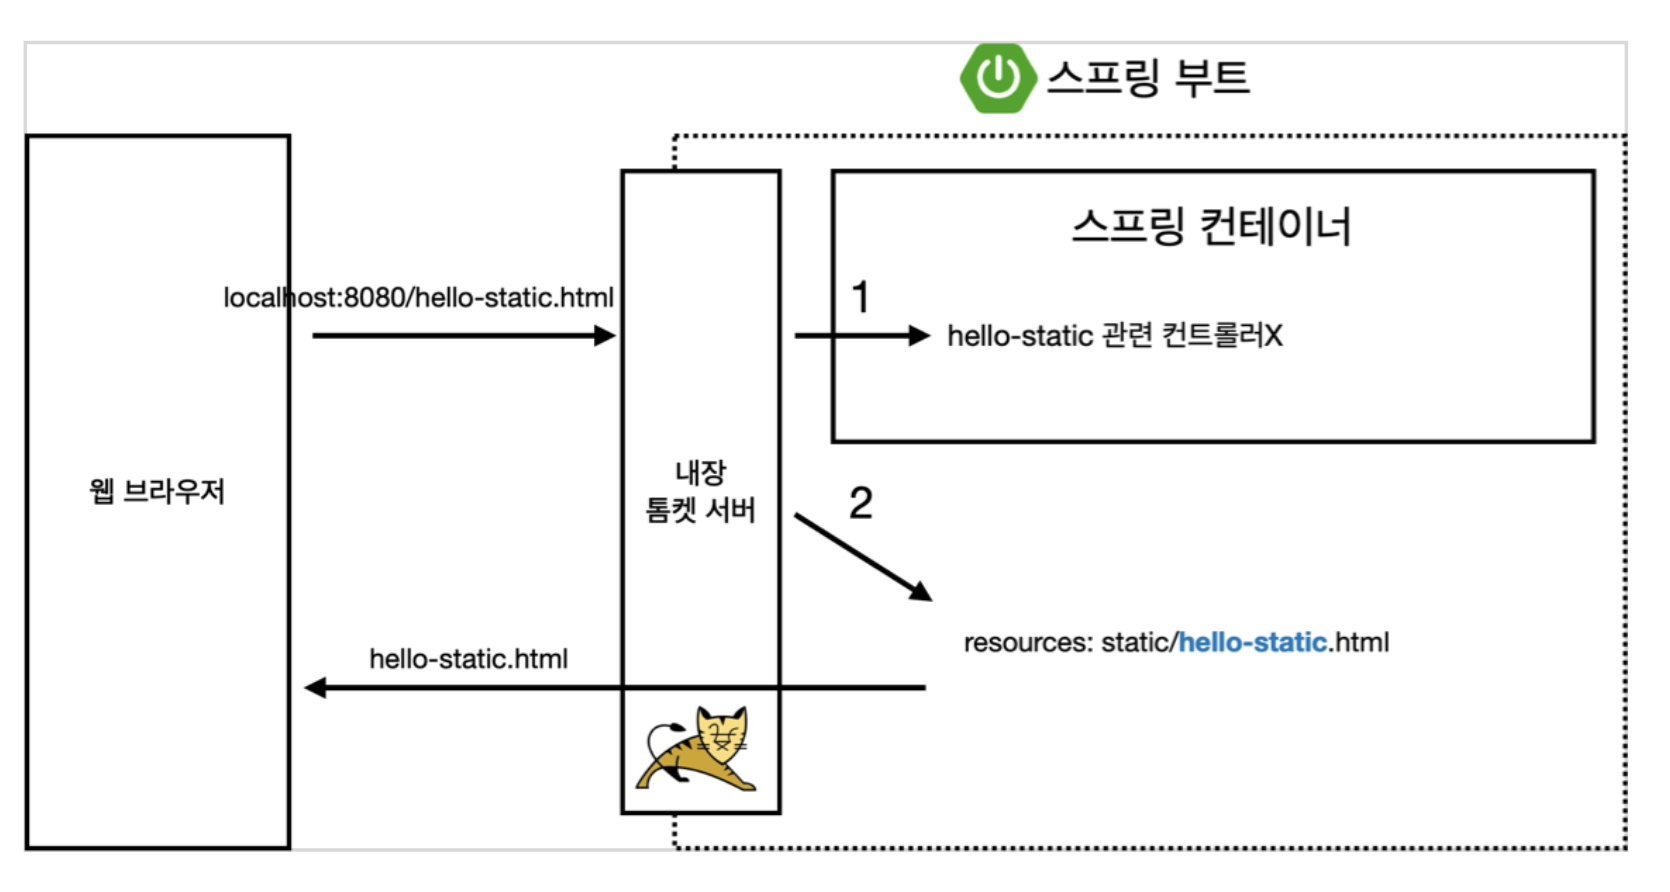
📌 정적 컨텐츠 동작 환경
- 스프링 부트에 내장된 톰캣 서버가 스프링 컨테이너에 html 전달
- 스프링에서
hello-static 컨트롤러있는지 확인 ➡️ 없음- 그다음
hello-static.html있는지 확인 ➡️ 있음, 스프링에서 웹 브라우저 전달
2) MVC와 템플릿 엔진
-
MVC : Model, View, Controller
- Model : 화면에 필요한 부분을 담아 화면에 넘겨주는 부분
- View : 화면을 그리는 부분
- Controller : 비즈니스 로직 및 내부 처리하는 부분
-
📁 Controller
 @Controller
  public class HelloController {
      @GetMapping("hello-mvc")
      public String helloMvc(@RequestParam("name") String name, Model model) {
          model.addAttribute("name", name);
          return "hello-template";
      }
}

// parameter 넘기는 것을 선택으로 변경시
 @Controller
  public class HelloController {
    @GetMapping("hello-mvc")
    public String helloMvc(@RequestParam(value = "name", required = false) String name, Model model) {
        model.addAttribute("name", name);
        return "hello-template";
}- 📁 View
- 경로 : resources/templates/hello-template.html
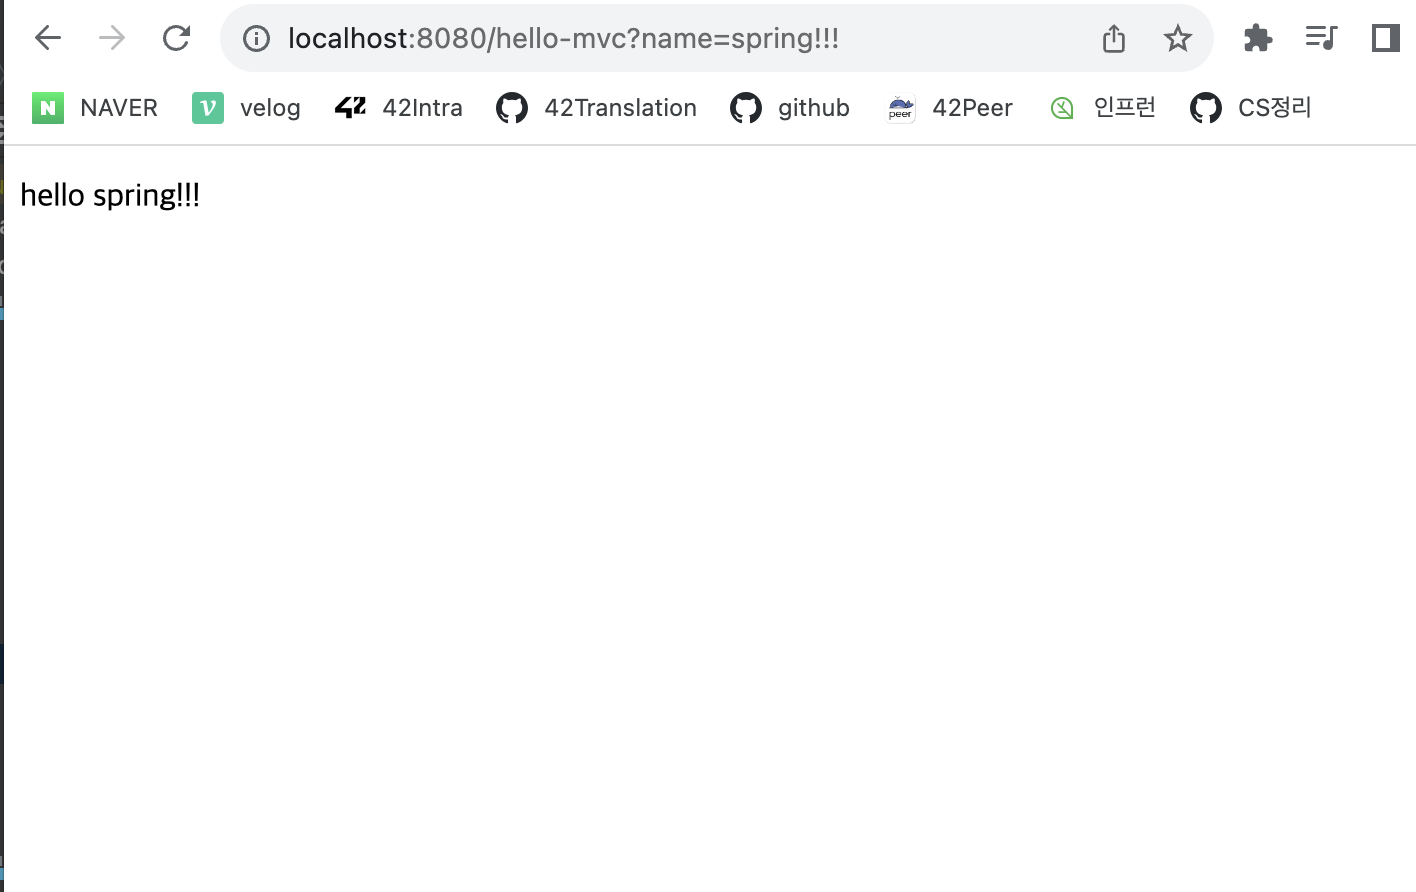
💻 http://localhost:8080/hello-mvc?name=[spring!!!](출력하고자 하는 파라미터) 실행<html xmlns:th="http://www.thymeleaf.org"> <body> <p th:text="'hello ' + ${name}">hello! empty</p> </body> </html>
- 경로 : resources/templates/hello-template.html
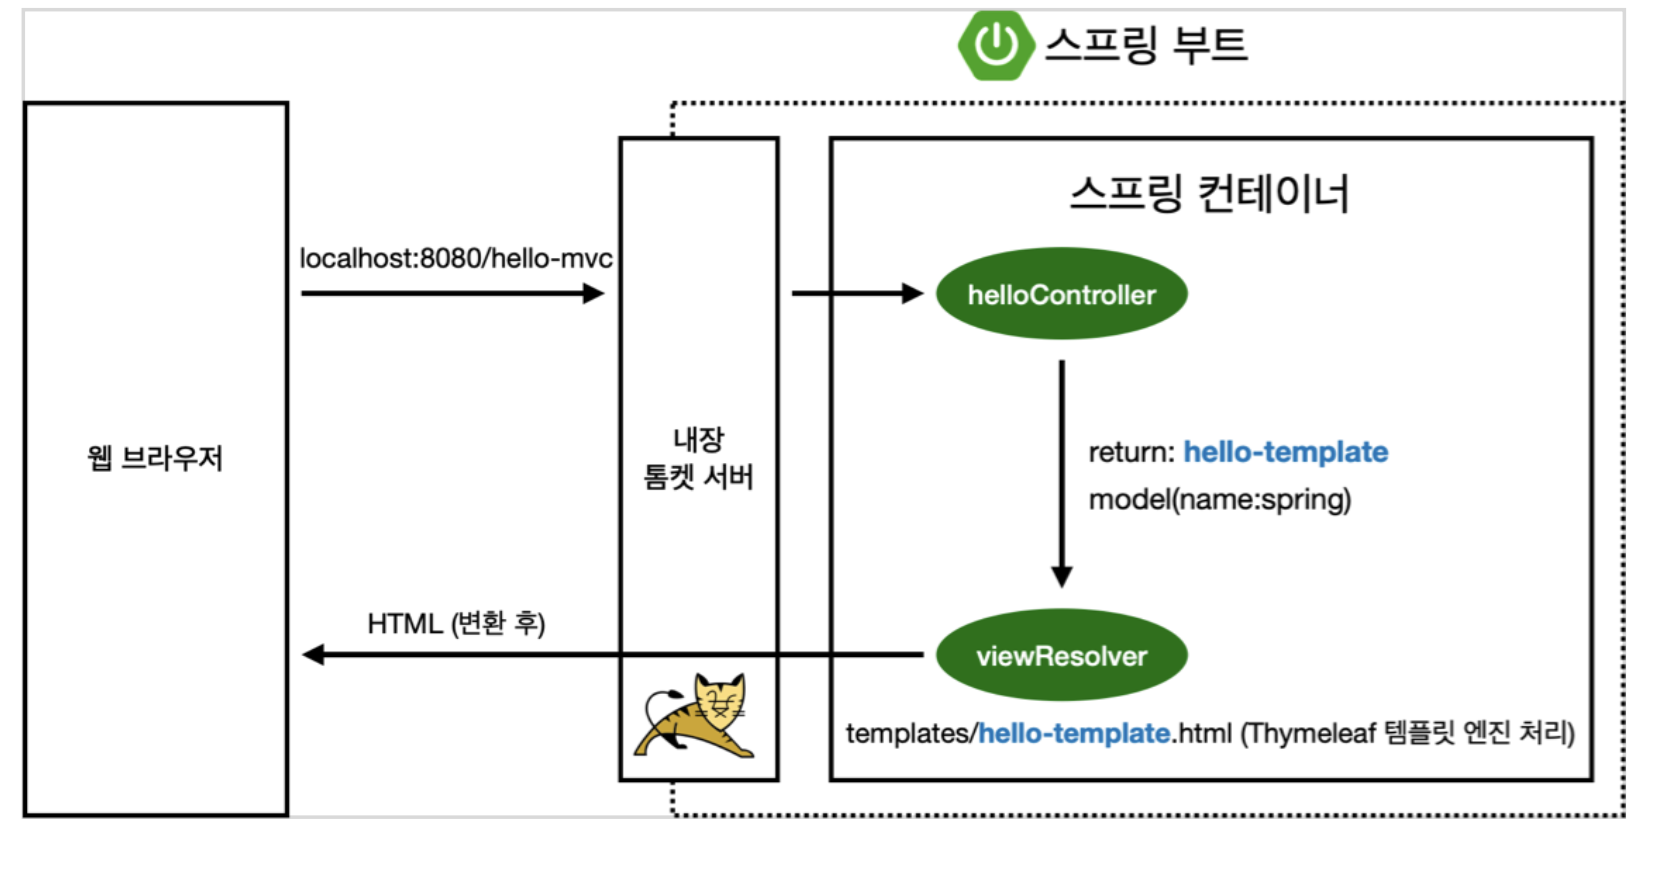
📌 MVC, 템플릿 엔진 동작 과정
- 스프링 부트에 내장된 톰캣 서버가 스프링 컨테이너에 html 전달
- 스프링은
helloController의 해당 메서드에 매핑 된 것을 확인 ➡️ 있음, 메서드 호출- return 값으로
hello-template과 model(name의 값 : spring) viewResolver에게 전달- viewResolver가 뷰 찾아주고, 템플릿 연결 ➡️ 있음,
templates/return값.html을 Thymeleaf 템플릿 엔진 처리를 위해 전달- 템플릿 엔진이 변환 후 렌더링하여 ➡️ HTML으로 반환 후 웹 브라우저 전달
3) API
-
@ResponseBody 사용 (ViewResolver 사용X)
-
대신 HTTP의 BODY 부에 해당 문자 내용을 직접 반환 (HTML의 Body 태그X)
-
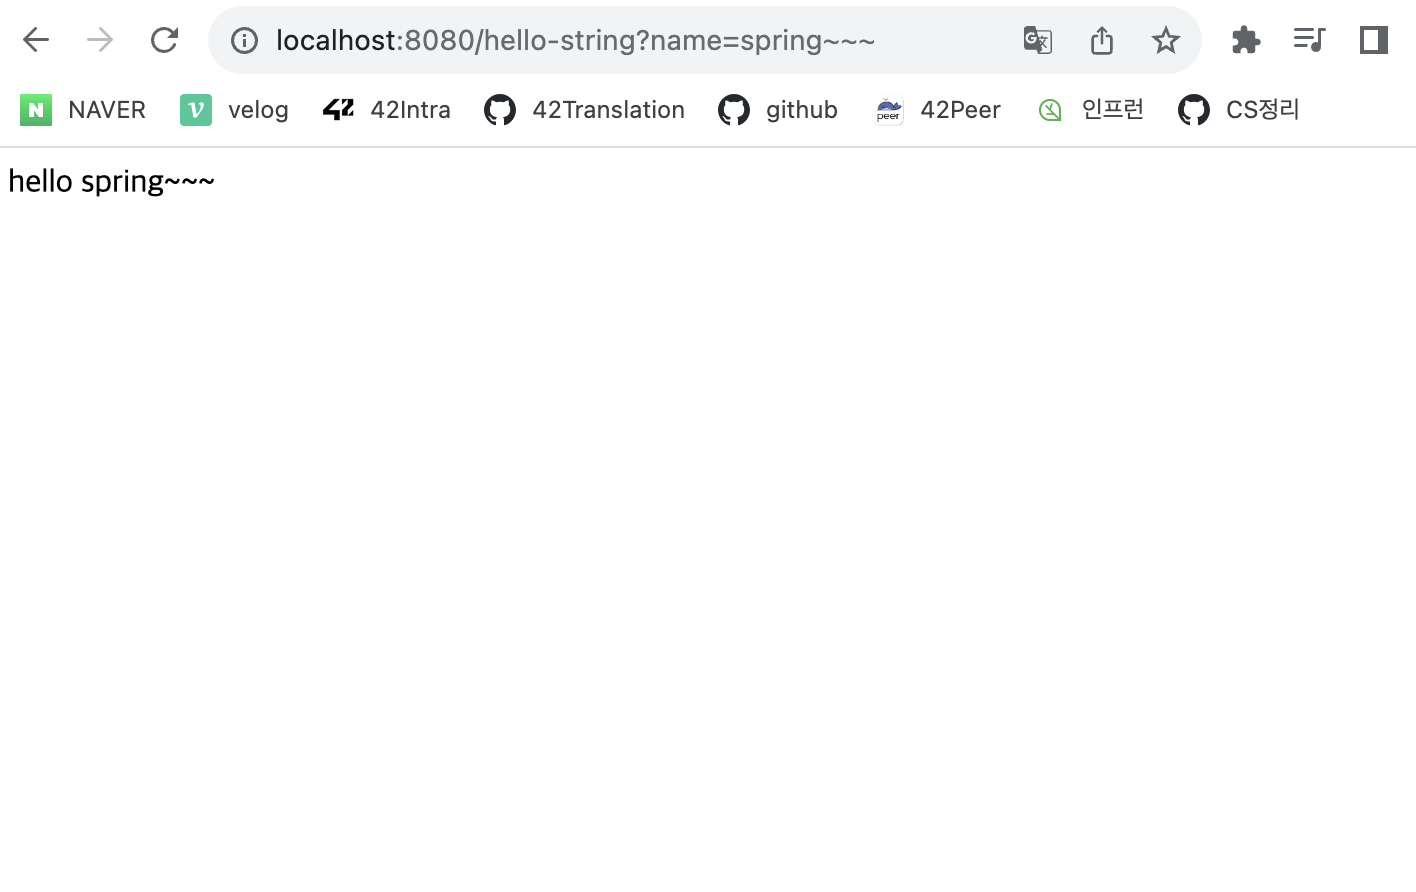
📁 @ResponseBody 문자 반환
@Controller
  public class HelloController {
      @GetMapping("hello-string")
      @ResponseBody
      public String helloString(@RequestParam("name") String name) {
          return "hello " + name;
      }
}
💻 http://localhost:8080/hello-string?name=[spring~~~](출력하고자 하는 파라미터) 실행
-
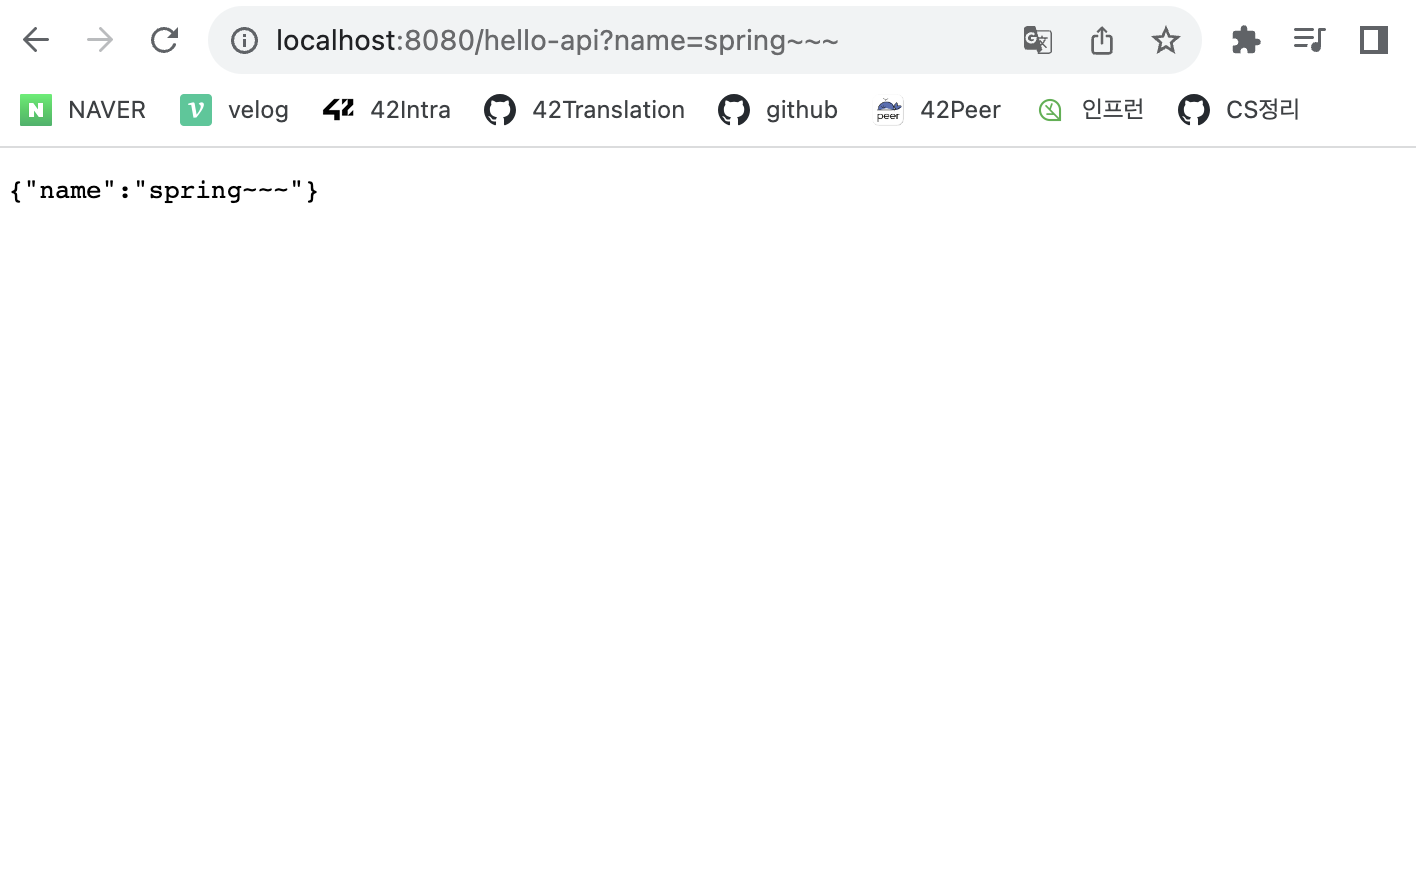
@ResponseBody을 사용 -
Hello 객체 생성
-
객체를 반환하면 객체가 JSON으로 변환됨
-
📁
@ResponseBody객체 반환
@Controller
  public class HelloController {
      @GetMapping("hello-api")
      @ResponseBody
      public Hello helloApi(@RequestParam("name") String name) {
          Hello hello = new Hello();
          hello.setName(name);
          return hello;
      }
      static class Hello {
          private String name;
          public String getName() {
              return name;
}
          public void setName(String name) {
              this.name = name;
		}
	}
}
💻 http://localhost:8080/hello-api?name=[spring~~~](출력하고자 하는 파라미터) 실행
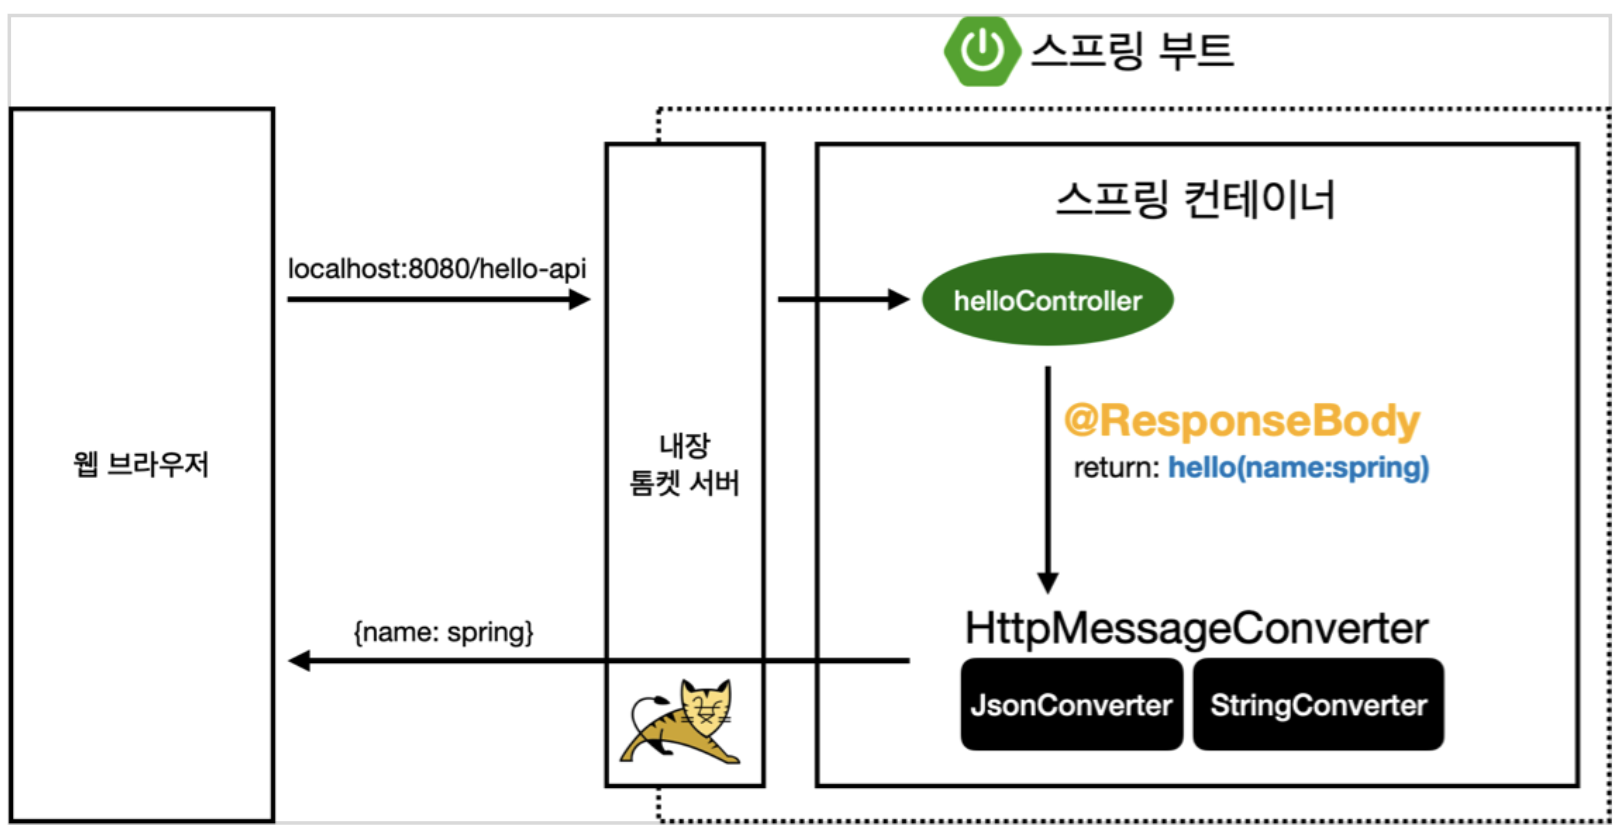
📌 API 동작 과정
- 스프링 부트에 내장된 톰켓 서버가 스프링 컨테이너에 html 전달
- 스프링은
hello-api있는지 확인@ResponseBody사용시 HTTP BODY에 그대로 응답 넘김 (없다면viewResolver에 전달)
환- HttpMessageConverter가 동작
- 기본 문자 처리 (return이 문자일 경우) : 그대로 넣어 HTTP 응답에 반환 ➡️ StringHttpMessageConverter 동작
- 기본 객체 처리 (return이 객체(hello)일 경우) : 기본 JSON 방식으로 데이터를 만들어서 HTTP 응답에 반환 ➡️ MappingJackson2HttpMessageConverter 동작
- byte 처리 등 기타
HttpMessageConverter가 기본으로 등록- (참고) 클라이언트의 HTTP Accpet 헤더와 서버의 컨트롤러 반환 타입 정보를 조합해서
HttpMessageConverter선택됨
📖 참고 📖 JSON
📖 참고 📖 MVC vs API 차이
3. 📕 회원 관리 예제 - 백엔드 개발
1) 비즈니스 요구사항 정리
2) 회원 도메인과 레포지터리 만들기
3) 회원 레포지터리 테스트 케이스 작성
4) 회원 서비스 개발
5) 회원 서비스 테스트
📖 참고 📖
💻📁📌
4. 📕 스프링 빈과 의존관계
1) 컴포넌트 스캔과 자동 의존관계 설정
2) 자바 코드로 직접 스토링 빈 등록하기
📖 참고 📖
💻📁📌
5. 📕 회원 관리 예제 - 웹 MVC 개발
1) 회원 웹 기능 - 홈 화면 추가
2) 회원 웹 기능 - 등록
3) 회원 웹 기능 - 조회
📖 참고 📖
💻📁📌
6. 📕 스프링 DB 접근 기술
1) H2 데이터베이스 설치
2) 순수 JDBC
3) 스프링 통합 테스트
4) 스프링 JdbcTemplate
5) JPA
6) 스프링 데이터 JPA
📖 참고 📖
💻📁📌
📖 참고 📖
💻📁📌
7. 📕 AOP
1) AOP가 필요한 상황
2) AOP 적용
📖 참고 📖
💻📁📌
📒 스프링 DB 데이터 접근 기술
1. 📕
1)
📖 참고 📖
💻📁📌
📒 실전! 스프링부트
1. 📕
1)
📖 참고 📖
💻📁📌


Notion으로 이동 (https://24tngus.notion.site/3a6883f0f47041fe8045ef330a147da3?v=973a0b5ec78a4462bac8010e3b4cd5c0&pvs=4)