
1. 크롬 설치
Chrome을 설치 후 버전을 확인합니다.
$ wget -q -O - https://dl-ssl.google.com/linux/linux_signing_key.pub | sudo apt-key add -
$ echo "deb [arch=amd64] http://dl.google.com/linux/chrome/deb/ stable main" | sudo tee -a /etc/apt/sources.list.d/google.list
$ sudo apt -y update
$ sudo apt -y install google-chrome-stable
$ google-chrome --version
수동 설치를 원한다면 Chrome 다운로드에서 최신 stable 버전을 다운로드할 수 있는데,
의존성이 많으니 하나하나 찾아서 같이 설치해 줘야 합니다.
의존성이 해결되어 있다면 설치해 줍니다.
$ sudo dpkg -i google-chrome-stable_current_amd64.debChrome Old version 다운로드에서 특정 오래된 버전을 설치할 수도 있어 보입니다.
2. 웹 드라이버 설치
chromedriver를 설치 후 버전을 확인합니다.
$ apt -y install chromium-chromedriver
$ chromedriver -v
수동 설치를 원한다면 Chrome driver 다운로드에서 버전과 운영체제를 확인 후 다운로드합니다.
$ wget https://chromedriver.storage.googleapis.com/106.0.5249.61/chromedriver_linux64.zip
$ unzip chromedriver_linux64.zip
Archive:  chromedriver_linux64.zip
  inflating: chromedriver
3. 접속
Google 검색 엔진으로 원하는 단어를 검색해 볼 수 있습니다.
그러기 위해서는 미리 해당 사이트의 구조를 알고 있어야 하며, Google 검색 엔진의 경우 name이 q인 태그가 질의가 들어갈 입력창입니다.
from selenium import webdriver
from selenium.webdriver.chrome.options import Options
from selenium.webdriver.common.keys import Keys
from selenium.webdriver.common.by import By
from selenium.webdriver.chrome.service import Service
from webdriver_manager.chrome import ChromeDriverManager

url             = 'http://www.google.com'
driver_path     = './chromedriver'
driver_options  = Options()
driver_options.add_argument("--headless")
driver_options.add_argument("--no-sandbox")
driver          = webdriver.Chrome(driver_path, options=driver_options)

driver.get(url)
elem           = driver.find_element(by=By.NAME, value='q')
elem.send_keys('apple' + Keys.ENTER) # = Keys.RETURN
print(driver.title)

driver.get(url)
elem           = driver.find_element(by=By.NAME, value='q')
elem.send_keys('apple')
elem.submit()
print(driver.title)

driver.quit()
웹 드라이버를 수동으로 다운로드하고 경로를 지정하는 방식이 아닌
다음과 같이 자동으로 검색한 뒤 설치해 주는 서비스도 존재합니다. (selenium 4)
driver = webdriver.Chrome(service=Service(ChromeDriverManager().install()), options=driver_options)find_element로 다른 기준을 찾을 경우 다음을 참고합니다.
| by | description |
|---|---|
| By.ID | 태그의 id 값 |
| By.NAME | 태그의 name 값 |
| By.XPATH | 태그의 경로 값 |
| By.LINK_TEXT | 링크 텍스트 값 |
| By.PARTIAL_LINK_TEXT | 링크 텍스트의 자식 텍스트 값 |
| By.TAG_NAME | 태그 이름 값 |
| By.CLASS_NAME | 태그의 class 이름 값 |
| By.CSS_SELECTOR | css 선택자 값 |
4. HTML
접속한 페이지의 HTML 소스를 긁어올 수 있습니다.
from selenium import webdriver
from selenium.webdriver.chrome.options import Options
from selenium.webdriver.common.keys import Keys
from selenium.webdriver.common.by import By
from selenium.webdriver.chrome.service import Service
from webdriver_manager.chrome import ChromeDriverManager

url             = 'http://www.google.com'
driver_options  = Options()
driver_options.add_argument("--headless")
driver_options.add_argument("--no-sandbox")
driver          = webdriver.Chrome(service=Service(ChromeDriverManager().install()), options=driver_options)
driver.get(url)
elem            = driver.find_element(by=By.NAME, value='q')
elem.send_keys('apple' + Keys.ENTER)

print(driver.page_source)

driver.quit()
5. 스크린샷
스크린샷을 찍을 때, 한글을 인식하기 위하여 폰트를 설치해 줍니다.
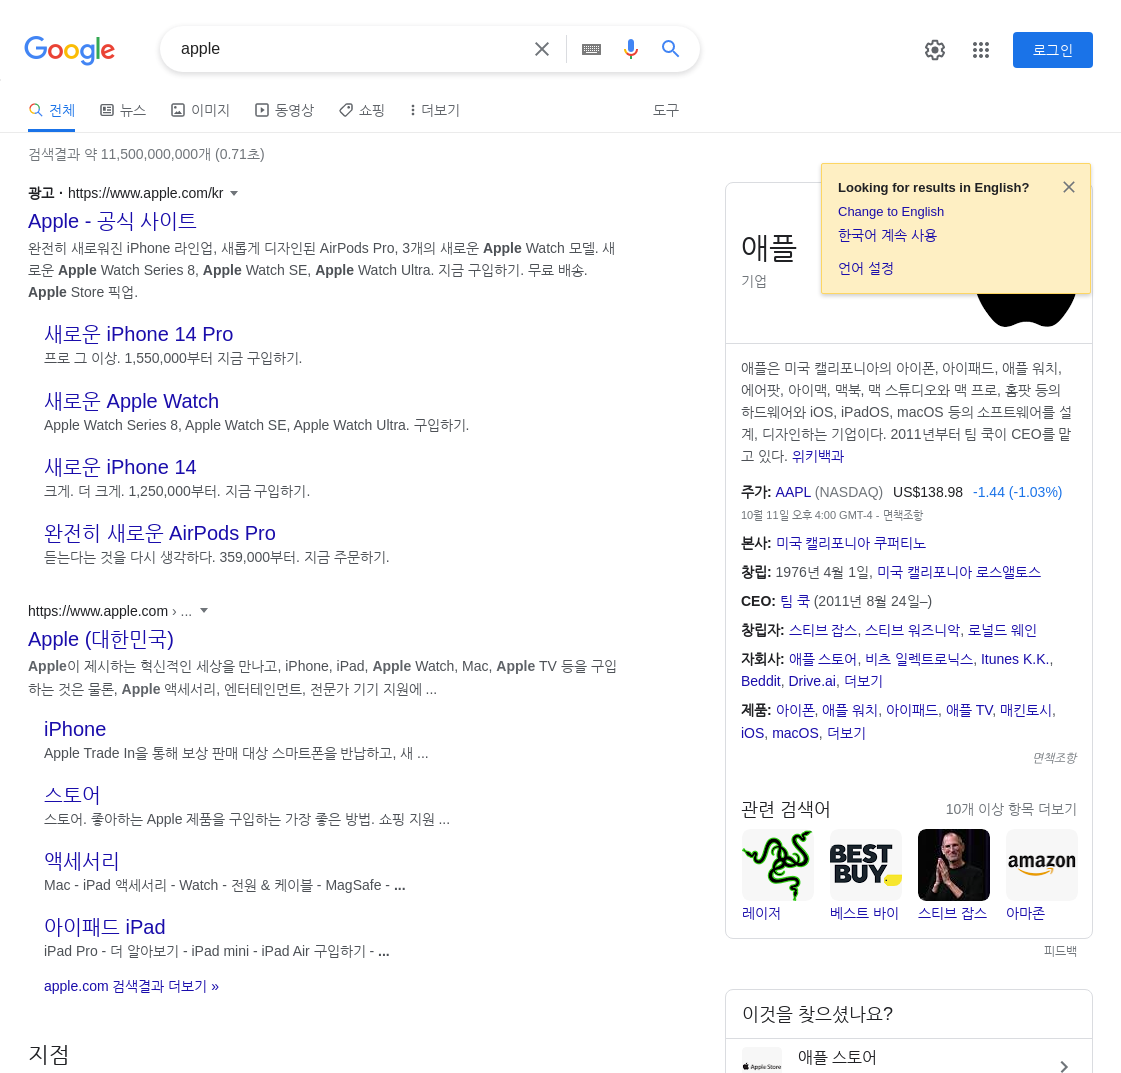
$ sudo apt -y install fonts-nanum fonts-nanum-coding이제 apple을 검색하였을 때의 화면을 저장해 봅니다.
from selenium import webdriver
from selenium.webdriver.chrome.options import Options
from selenium.webdriver.common.keys import Keys
from selenium.webdriver.common.by import By
from selenium.webdriver.chrome.service import Service
from webdriver_manager.chrome import ChromeDriverManager

url             = 'http://www.google.com'
driver_options  = Options()
driver_options.add_argument("--headless")
driver_options.add_argument("--no-sandbox")
driver          = webdriver.Chrome(service=Service(ChromeDriverManager().install()), options=driver_options)
driver.get(url)
elem            = driver.find_element(by=By.NAME, value='q')
elem.send_keys('apple' + Keys.ENTER)

driver.save_screenshot('screen-shot.png')
driver.quit()
전체 페이지 크기의 일부분만 찍힌 것을 확인할 수 있습니다.

전체 화면을 찍기 위하여 javascript를 이용하여 전체 사이즈를 구한 뒤 스크린샷을 찍어 봅니다.
total_height   = driver.execute_script("return document.body.parentNode.scrollHeight")
total_width    = driver.execute_script("return document.body.parentNode.scrollWidth")
driver.set_window_size(total_width, total_height)
driver.save_screenshot('screen-shot.png')
아래의 이미지는 원본의 길이가 길어서 편의 상 하단을 잘랐습니다.

IT 도서관