React + Spring 연동 및 배포
- 정글 마지막 프로젝트인
나만의 무기 만들기를 앞두고 각자 원하는 프레임워크를 학습하는 시간(2주)을 가지게 되었다. - 프레임워크를 학습하면서
개인별 과제인 게시판 기능 구현하기가 주어졌고 필수는 아니지만 풀스택으로 한번 구현해보고 싶어서React와Spring을 프레임워크로 선택하였고 두 개를 한번 공부해 보려고한다. - 두 개를 학습하여 공부하기에 앞서
React와Spring을 연동해야 하기에 공부한 내용을 공유하기 위해서 블로그를 작성한다.
Spring 프로젝트 생성
- 나는 학생 졸업한지 얼마 안됬고 학생때
Intellij를 학생인증 하여Ultimate를 사용하는 중이고Community버전은Spring 프로젝트생성 방법이 다른걸로 알고 있다. 나중에Community버전 생성을 추가하는 걸로 하고Ultimate기준으로 설명하겠다.
File > New > Project...
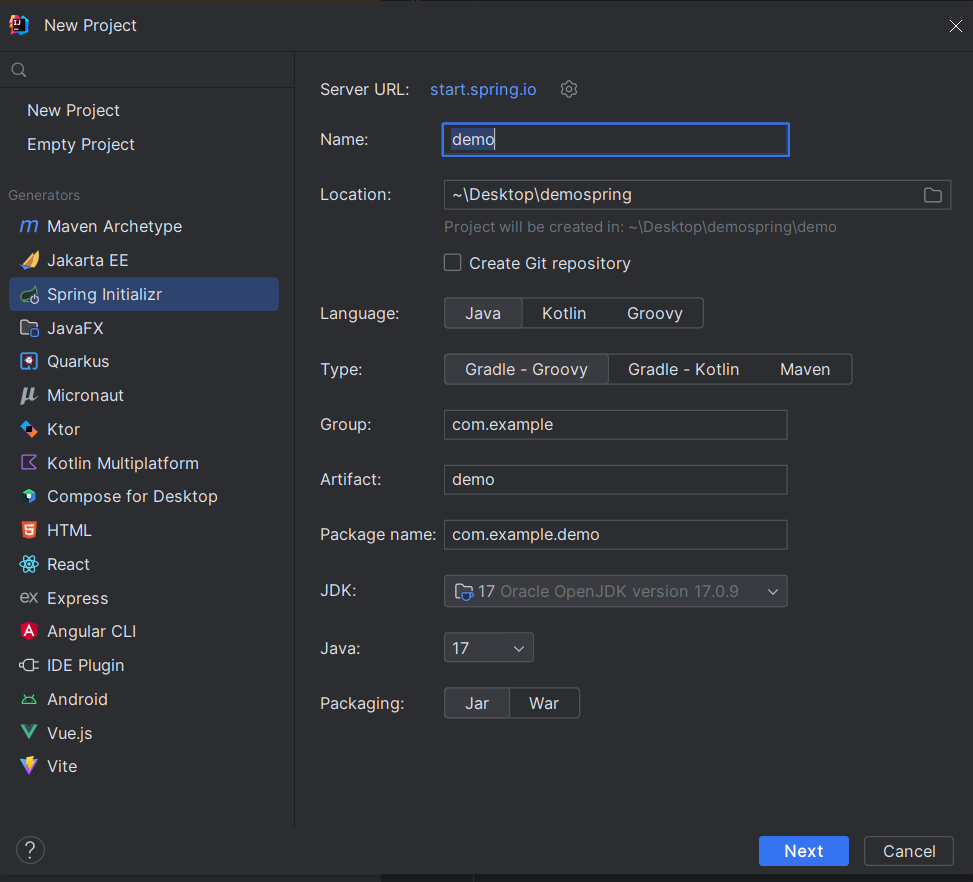
위에 순서를 따라가면 위에 이미지와 같은 화면이 나오고 설정들은 동일하게 할 필요는 없다.
Spring Boot 버전에 맞게 호환되는 Java 버전을 선택하면 되고 Spring Boot 3버전 이상 부터는 Java 17버전 이상으로 지원한다고한다.
나는 Java 9 와 Java 17을 사용했었고, Java 17을 가지고 있는 김에 Spring Boot 3을 사용하려고 Java 17을 선택했다.
Spring Boot 버전 선택 및 의존성 추가
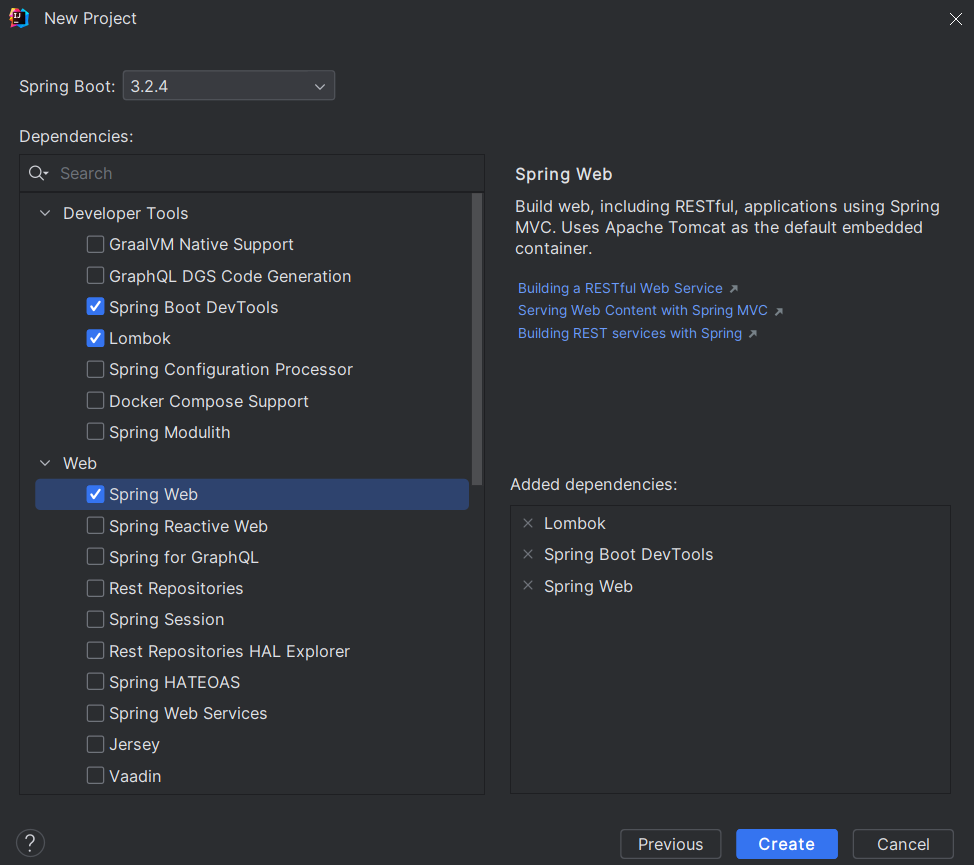
위에 세가지 옵션이 가장 기본적으로 추가되는 의존성이며, 지금은 연동만 해보는 것이니까 이정도로만 추가하고 넘어가도록 하겠다.
Gradle 설정
File > Settings > Build, Excution, Deployment > Build Tools > 해당 빌드 Tool
위의 설정을 따라가다가 보면 밑에 화면이 나오는데 Build and run using 과 Run tests using이 Gradle로 되어 있을 것이다.
이 부분을 Intellij IDE로 바꿔주고, 하단의 Gradle JVM 버전이 이전과 설정한 버전과 다르다면 설정한 버전으로 다시 바꿔주면 된다.

프로젝트 실행
위에 모든 설정이 정상적으로 완료 되었다면 ${프로젝트 이름} > src > main > java > ${패키지 이름} > ${프로젝트이름 + Application} 경로로 이동해서 실행시켜 보면 아래 결과가 출력된다.

http://localhost:8080 경로로 이동해 보면 브라우저 상에서 잘 실행되었는지 확인 할 수 있다.
아래와 같은 에러 화면이 뜬다면 정상적으로 서버가 가동되고 있다는 뜻이다.

React Project 생성
Spring Boot 생성 및 설정은 끝났으니 이제 React Project를 내부에 생성해보겠다.
https://nodejs.org/ 로 이동하여 node.js를 설치해준다음 명령프롬프트를 실행하여 npm -version 을 입력한 뒤 아래와 같이 10.5.0 버전이 뜬다면(설치 된 버전 -> 아래와 다를 수 있음) 설치가 성공적으로 완료 된 것이다.
npm -version
10.5.0
이렇게 하면 React 프로젝트를 생성하기 위한 모든 준비가 끝났고 다시 Intellij로 돌아가 터미널 창에 아래와 같이 입력한 다음 기다리면 React 프로젝트 생성이 성공적으로 완료된다.
여기서 ${project-name}을 react로 입력한다면 오작동이 발생할 수 있으니 피해준다.
cd src/main
npx create-react-app ${project-name}
React App 실행
프로젝트가 성공적으로 생성 되었다면 생성한 프로젝트 내부로 이동하여 아래 명령어를 실행시켜 React App을 실행시킨다.
cd ${project-name}
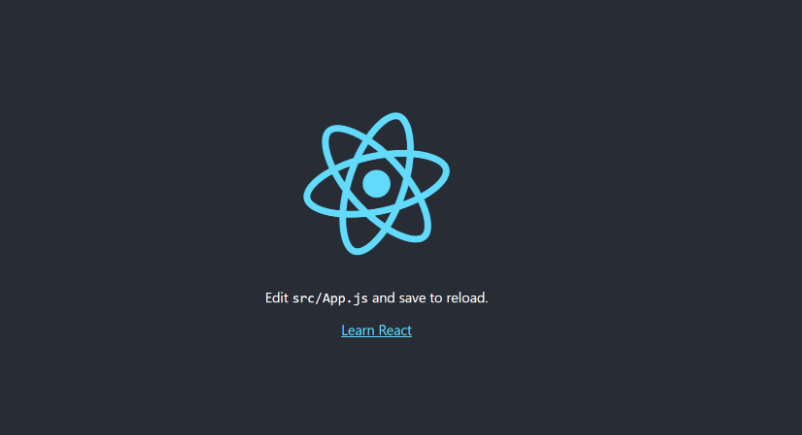
npm start위와 같이 입력해준다면 아래와 같은 화면이 나오게 되는데 명령어만 실행시켜도 브라우저가 자동으로 실행된다.
브라우저가 자동으로 실행되지 않는다면 브라우저에 localhost:3000을 입력하면 아래와 같은 화면이 뜨게 된다.
React App은 3000번 포트를 기본으로 사용하는데 만약에 3000번 포트가 사용중이라면 다른 포트가 설정되어 3000으로 접속시 안들어가질 수가있다.
만약에 3000번 포트로 접속이 되지 않는다면 터미널 창에 아래와 같이 localhost로 연결할 수 있는 주소를 알려주니 아래 주소로 접속하면 된다.

프로젝트 연동
Proxy 설정
지금까지 성공적으로 했다면 React는 3000번 포트에서 Spring Boot에서는 8080 Port에서 수행 중일 것이다. 두 프로젝트를 연동하기 전에 CORS와 관련한 오류를 방지하기 위해 Proxy Server를 설정해줘야한다.
CORS와 관련한 오류를 간단하게 설명하자면 출처(origin)가 다른 자원들간의 교류를 막는다 개념이다.
출처(origin)를 구분하는 기준은 Protocol, host, Port인데 이 세 가지가 같다면 출처가 같은 것이다.
React와 Spring은 localhost라는 ip는 같지만 포트번호가 다르기 때문에 동일 출처로 판단하지 않아서 오류가 발생하기 때문에 이런 부분을 방지 하기 위해 Proxy 설정을 해준다.
아래와 같이 React Project 내부의 package.json으로 이동한 다음 scripts위에 "proxy": "http://localhost:8080"를 추가해준다.
${project-name}>package.json
 },
  "proxy": "http://localhost:8080",
  "scripts": {
연결 테스트
테스트를 위한 라이브러리 설치
Proxy 까지 설정을 완료해주었다면 이제 React와 Spring Boot의 통신이 정상적으로 이루어지는지 테스트를 수행해야하는데 수행하기 전에 테스트에 사용 될 라이브러리를 설치해준다.
- 테스트에 사용 될 라이브러리는 Axios를 쓸 것이다.
아래 코드를 터미널 창에 입력 후 실행시켜준다.
npm install axios --save설치가 완료된다면 React Project 내부의 src안 App.js에 이동한다.
${project-name} > src > App.js
위에와 같은 경로로 이동했다면 아래코드를 App.js에 입력해준다.
function App() {
  const [hello, setHello] = useState('');

  useEffect(() => {
    axios.get('/api/test')
        .then((res) => {
          setHello(res.data);
        })
  }, []);
  return (
      <div className="App">
        Spring Boot로 부터 받은 데이터 : {hello}
      </div>
  );
}
위에 코드를 App.js에 작성해주었다면 아래와 같이 Controller를 생성하고 코드를 작성해준다. 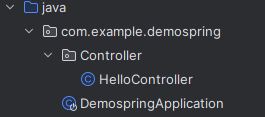
package com.example.demospring.Controller;

import org.springframework.web.bind.annotation.GetMapping;
import org.springframework.web.bind.annotation.RestController;

@RestController
public class HelloController {

    @GetMapping("/api/test")
    public String hello() {
        return "성공적인 연결";
    }
}
모든 코드를 작성해주었다면 Spring과 React를 가동시켜 결과를 확인해준다.
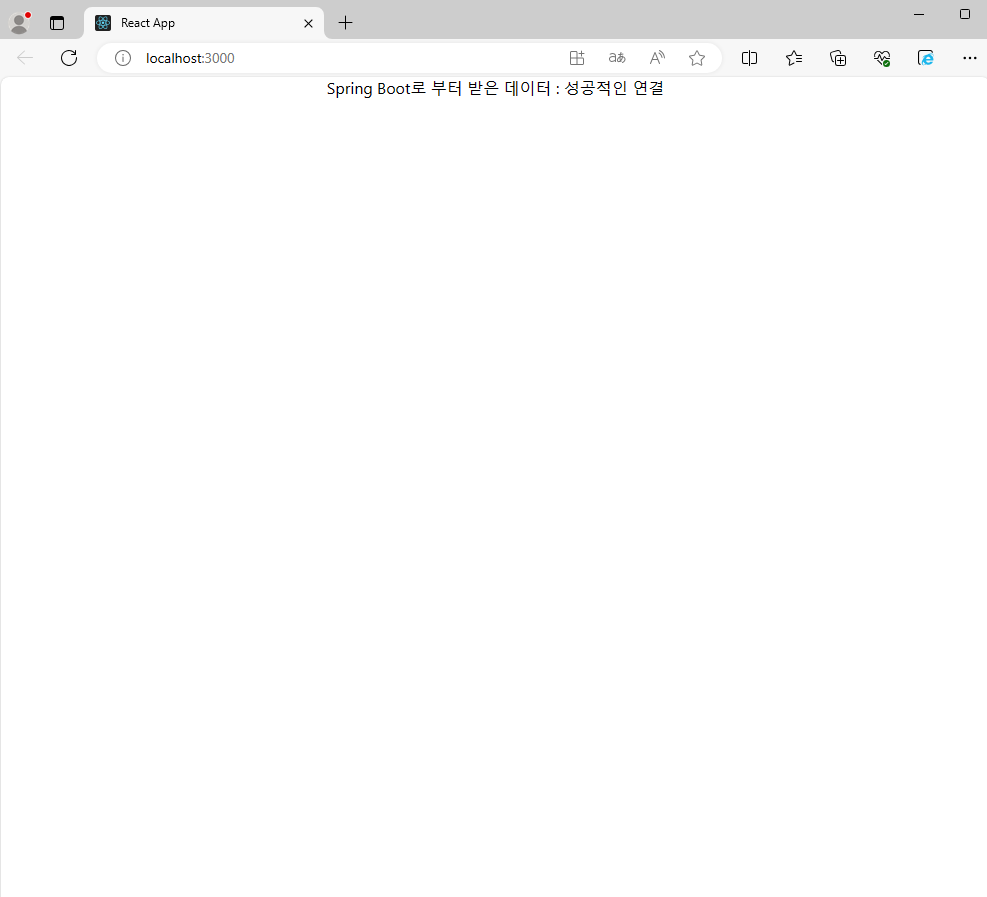
만약 위에 모든 과정을 성공적으로 수행했다면 연결이 잘 된것을 확인할 수 있다.
빌드
연결이 잘 되었다면 빌드 후 배포했을 때도 잘 동작하는지 확인하기 위해서 아래와 같은 코드를
build.gradle 파일 하단에 추가한다.
!!주의!! 여기서 코드를 그대로 복사한 후에 ${React-Project-Name}이 부분을 React 프로젝트 생성했을 때 정한 이름으로 바꿔줘야 한다.
Reason: An input file was expected to be present but it doesn't exist.이 에러가 발생했다면${React-Project-Name}를 제대로 못 찾은 것이므로 React Project이름으로 잘 설정 해주자.
def frontendDir = "$projectDir/src/main/${React-Project-Name}"

sourceSets {
	main {
		resources { srcDirs = ["$projectDir/src/main/resources"]
		}
	}
}

processResources { dependsOn "copyReactBuildFiles" }

task installReact(type: Exec) {
	workingDir "$frontendDir"
	inputs.dir "$frontendDir"
	group = BasePlugin.BUILD_GROUP
	if (System.getProperty('os.name').toLowerCase(Locale.ROOT).contains('windows')) {
		commandLine "npm.cmd", "audit", "fix"
		commandLine 'npm.cmd', 'install' }
	else {
		commandLine "npm", "audit", "fix" commandLine 'npm', 'install'
	}
}

task buildReact(type: Exec) {
	dependsOn "installReact"
	workingDir "$frontendDir"
	inputs.dir "$frontendDir"
	group = BasePlugin.BUILD_GROUP
	if (System.getProperty('os.name').toLowerCase(Locale.ROOT).contains('windows')) {
		commandLine "npm.cmd", "run-script", "build"
	} else {
		commandLine "npm", "run-script", "build"
	}
}

task copyReactBuildFiles(type: Copy) {
	dependsOn "buildReact"
	from "$frontendDir/build"
	into "$projectDir/src/main/resources/static"
}
위의 코드는 Spring Boot 프로젝트가 빌드 될 때 React 프로젝트를 먼저 빌드하고 결과를 Spring Boot 프로젝트에 포함시키겠다는 내용을 담고있다.
작성을 완료한다음 src가 있는 홈디렉토리 폴더로 이동하여 ./gradlew build 명령어로 빌드를 수행한다.
만약 윈도우에서 ./gradlew 명령어를 찾을 수 없다고 나오면 bash를 다른걸로 변경하여 명령어를 실행하면 해결할 수 있다.

위와 같은 화면이 나오면 정상적으로 빌드를 성공한 것이다.
FAILURE: Build failed with an exception.

* What went wrong:
A problem occurred configuring root project 'demospring'.
> Could not resolve all artifacts for configuration ':classpath'.
   > Could not resolve org.springframework.boot:spring-boot-gradle-plugin:3.2.4.
     Required by:
         project : > org.springframework.boot:org.springframework.boot.gradle.plugin:3.2.4
      > No matching variant of org.springframework.boot:spring-boot-gradle-plugin:3.2.4 was found. The consumer was configured to find a library for use during runtime, compatible with Java 9, packaged as a jar, and its dependen
cies declared externally, as well as attribute 'org.gradle.plugin.api-version' with value '8.7' but:
          - Variant 'apiElements' declares a library, packaged as a jar, and its dependencies declared externally:
              - Incompatible because this component declares a component for use during compile-time, compatible with Java 17 and the consumer needed a component for use during runtime, compatible with Java 9
              - Other compatible attribute:
                  - Doesn't say anything about org.gradle.plugin.api-version (required '8.7')
          - Variant 'javadocElements' declares a component for use during runtime, and its dependencies declared externally:
              - Incompatible because this component declares documentation and the consumer needed a library
              - Other compatible attributes:
                  - Doesn't say anything about its elements (required them packaged as a jar)
                  - Doesn't say anything about its target Java version (required compatibility with Java 9)
                  - Doesn't say anything about org.gradle.plugin.api-version (required '8.7')
          - Variant 'mavenOptionalApiElements' declares a library, packaged as a jar, and its dependencies declared externally:
              - Incompatible because this component declares a component for use during compile-time, compatible with Java 17 and the consumer needed a component for use during runtime, compatible with Java 9
              - Other compatible attribute:
                  - Doesn't say anything about org.gradle.plugin.api-version (required '8.7')
          - Variant 'mavenOptionalRuntimeElements' declares a library for use during runtime, packaged as a jar, and its dependencies declared externally:
              - Incompatible because this component declares a component, compatible with Java 17 and the consumer needed a component, compatible with Java 9
              - Other compatible attribute:
                  - Doesn't say anything about org.gradle.plugin.api-version (required '8.7')
          - Variant 'runtimeElements' declares a library for use during runtime, packaged as a jar, and its dependencies declared externally:
              - Incompatible because this component declares a component, compatible with Java 17 and the consumer needed a component, compatible with Java 9
              - Other compatible attribute:
                  - Doesn't say anything about org.gradle.plugin.api-version (required '8.7')
          - Variant 'sourcesElements' declares a component for use during runtime, and its dependencies declared externally:
              - Incompatible because this component declares documentation and the consumer needed a library
              - Other compatible attributes:
                  - Doesn't say anything about its elements (required them packaged as a jar)
                  - Doesn't say anything about its target Java version (required compatibility with Java 9)
                  - Doesn't say anything about org.gradle.plugin.api-version (required '8.7')

* Try:
> Review the variant matching algorithm at https://docs.gradle.org/8.7/userguide/variant_attributes.html#sec:abm_algorithm.
> No matching variant errors are explained in more detail at https://docs.gradle.org/8.7/userguide/variant_model.html#sub:variant-no-match.
> Run with --stacktrace option to get the stack trace.
> Run with --info or --debug option to get more log output.
> Run with --scan to get full insights.
> Get more help at https://help.gradle.org.

BUILD FAILED in 3s
만약에 위와 같은 메세지가 나오면서 빌드가 실패한다면 프로젝트가 사용하는 Java 버전이 Spring Boot Gradle 플러그인의 요구사항과 일치하지 않아 발생하는 문제로 아래와 같이 따라하면 해결 될 것이다.
IntelliJ IDEA 기준
1. Java 버전 확인 및 설정
- 프로젝트의 Java 버전 확인: 프로젝트가 사용하는
Java버전이Spring Boot Gradle플러그인의 요구사항과 일치하는지 확인. - Spring Boot 3.x 버전은 Java 17 이상을 요구
- IntelliJ에서 프로젝트 SDK 설정을 확인하고 조정하려면:
File>Project Structure를 선택Project섹션에서Project SDK를 확인하고, 필요한Java버전으로 설정Modules섹션에서 각 모듈의SDK가 올바르게 설정되어 있는지 확인Modules섹션에서 모든 모듈의Language level을 확인하고 필요한 경우 업데이트
2. Gradle 설정 확인
Gradle Wrapper 사용 여부 확인
gradle/wrapper/gradle-wrapper.properties파일에서distributionUrl을 확인하고, 필요하면 최신 버전으로 업데이트- Build Script 설정 확인:
build.gradle파일에서 Java 버전 설정이 올바른지 확인sourceCompatibility = '17' targetCompatibility = '17'
3. IntelliJ Gradle 설정 확인
File>Settings(Windows/Linux) 또는IntelliJ IDEA>Preferences(macOS)를 선택Build, Execution, Deployment>Build Tools>Gradle로 이동Gradle JVM설정이 프로젝트의 Java 버전과 일치하는지 확인
4. 캐시와 재시도
File>Invalidate Caches / Restart...>Invalidate and Restart.- Gradle 캐시를 클리어: 터미널에서 프로젝트 디렉토리로 이동 후
./gradlew --refresh-dependencies를 실행.
5. Gradle Wrapper 버전 업데이트
- 터미널에서 다음 명령어를 실행하여 Gradle Wrapper를 업데이트
여기서./gradlew wrapper --gradle-version=버전 --distribution-type=all버전에는 사용하고자 하는 Gradle 버전을 지정.
위에 과정을 다 해봤고 갑자기 이전에 Java 9과 Java 17를 같이 썼어서 환경변수 충돌이 난거 같다는 생각이 들었다. 환경변수 편집에서 JAVA_HOME 이 Java 9으로 되어있었고 Java 17로 바꿔준다음 Build를 해보고 위에 방법을 재 실행 했는데도 안되었다.
cmd에서 java -version으로 버전을 확인 했는데 잘 바뀌어 있었고 혹시 몰라서 컴퓨터를 재 부팅 해보고 위에 방법을 다시 해보니 Build가 성공적으로 수행 되었다.
아마도 위에 방법은 문제 없었고 재부팅을 해야 했던거 같다....(재부팅 해야하는 것은 알고 있었는데 java -version 으로 확인해봤는데 잘 바뀌어있어서 재부팅 할 생각을 안했었음)
빌드 후 애플리케이션 수행
빌드가 성공적으로 수행되었다면 java -jar build/libs/${Spring Project Name}-0.0.1-SNAPSHOT.jar를 터미널에 입력하여 실행한다.
만약에 실행되지 않는다면${프로젝트 홈 디렉토리} > build > libs > ${projectname}-0.0.1-SNAPSHOT으로 이동하여 이름을 확인한 후 ${projectname}-0.0.1-SNAPSHOT.jar를 터미널에 입력하여 실행시키면 된다.
실행하면 위에와 같이 터미널에 화면이 뜨고 http://localhost:8080/으로 이동하면 에러 화면이 뜨지 않고 아래와 같이 http://localhost:3000/ 이 아닌 8080에서 작동하게 된다.
- 여기서 8080으로 갔는데 안나오는 경우
Tomcat initialized with port ${포트번호} (http)위에 성공화면 밑에 이런 줄이 있는데 ${포트번호}를 입력하면 된다.
이제 React와 Spring Boot로 개발을 하고 다시 빌드를 하면 어플리케이션 배포를 할 수 있게 된다.

여기까지 하면 배포 안하고 빌드만 해도 지정한 포트로 가면 리액트 3000번 포트가 아닌 스프링 포트로 접속이 가능하다.
참고
https://velog.io/@ung6860/React-Spring-%ED%94%84%EB%A1%9C%EC%A0%9D%ED%8A%B8-%EC%83%9D%EC%84%B1
