1. 데이터베이스와 Spring Boot 연결 방식
실습에서 Spring 은 따로 Dockerize 하지 않고 로컬로 구동,
PostgresQL 은 Docker 로 구동할 예정
(1) 로컬 내 Docker 를 통해 데이터베이스 서버 구동 - PostgresQL
아래 명령어를 통해 바로 구동 가능
- 주의 : 도커 내 포트는 5432 이지만, 로컬 노출 포트는 54322
docker run --name postgresql-container \
-e POSTGRES_USER=asac \
-e POSTGRES_PASSWORD=1234 \
-e POSTGRES_DB=example \
-p 54322:5432 -d postgres:15
⚠️ 이전에 해당 명령어로 이미 컨테이너를 띄운 적이 있는 경우
docker stop postgresql-container명령어로
컨테이너가 종료된 상태여도 재구동이 가능
- 재구동을 위해
docker start postgresql-container수행 시
docker run과 동일docker rm -f postgresql-container명령어로 기존 컨테이너 삭제 후
이전 명령어 입력으로도 가능

- 컨테이너가 구동이 잘 되었는지 여부를 판단하기 위해서 구동중인 컨테이너 조회 (모든 컨테이너 조회는
-a)
docker ps
-
컨테이너를 구동시킬 때는
docker start container
→ 컨테이너를 종료시킬 때는docker stop container -
아래 명령어를 통해 컨테이너 내 접속하여, 직접 데이터베이스 접속 및 쿼리 수행 가능
docker exec -it postgresql-container bash- 구동된 PostgresQL 도커 컨테이너 안에 접속해서 아래 명령어를 통해 데이터베이스 확인
-
PostgresQL DBMS 접속 : MySQL 과 달리 접속 시 데이터베이스를 선택
psql -U asac -d example -
데이터베이스 확인
\l List of databases Name | Owner | Encoding | Collate | Ctype | ICU Locale | Locale Provider | Access privileges -----------+-------+----------+------------+------------+------------+-----------------+------------------- example | asac | UTF8 | en_US.utf8 | en_US.utf8 | | libc | postgres | asac | UTF8 | en_US.utf8 | en_US.utf8 | | libc | template0 | asac | UTF8 | en_US.utf8 | en_US.utf8 | | libc | =c/asac + | | | | | | | asac=CTc/asac template1 | asac | UTF8 | en_US.utf8 | en_US.utf8 | | libc | =c/asac + | | | | | | | asac=CTc/asac (4 rows) -
테이블 확인
\dt
Did not find any relations.
-

- 컨테이너 접속하기 → 컨테이너 내 DBMS(PostgresQL) 접속하기
→ 컨테이너 내 DBMS(PostgresQL) 나가기 → 컨테이너 나가기
# PostgresQL Docker 컨테이너 중지
docker stop postgresql-container

# PostgresQL Docker 컨테이너 시작
docker start postgresql-container

# PostgresQL Docker 컨테이너 재시작
docker restart postgresql-container
(2) Spring Boot 에서 위 도커 컨테이너로 동작되는 데이터베이스에 접속
[ Gradle 설정 파일 내 데이터베이스 사용을 위한 (A) Driver + (B) JPA ]
- 데이터베이스 접속 관리
: JDBC (Driver) - 데이터베이스 객체-쿼리
: JPA (Java ORM 표준, Dialect 통한 쿼리 변환) - 데이터베이스 쿼리 메서드
: Spring Data JPA (간편하게 데이터베이스를 활용)
dependencies {
//  runtimeOnly 'com.mysql:mysql-connector-j'
    runtimeOnly 'org.postgresql:postgresql'
//	runtimeOnly 'com.h2database:h2'
    implementation 'org.springframework.boot:spring-boot-starter-data-jpa'
		...
}
gradle.build
: PostgresQL Driver / Spring Data JPA 라이브러리 2개 직접 설정 필요
(A) Driver : PostgresQL Driver 설정
= 데이터베이스 접속을 위한 URL + ID/PW 및 스레드풀 관리
(B) JPA : Spring Data JPA 설정
= Java/Spring 내에서 데이터베이스 사용을 위한 JPA 관련 모듈
[ Spring Data JPA 사용을 위한 Spring 설정 파일 수정 ]
application.properties
# ORM
spring.datasource.driver-class-name=org.postgresql.Driver
spring.jpa.database-platform=org.hibernate.dialect.PostgreSQLDialect

# PostgresQL - CREATE USER user PASSWORD '!@#' SUPERUSER;
spring.datasource.url=jdbc:postgresql://localhost:54322/example?useSSL=false
spring.datasource.username=asac
spring.datasource.password=1234

# The SQL dialect makes Hibernate generate better SQL for the chosen database
spring.jpa.generate-ddl=true
spring.jpa.hibernate.ddl-auto=create
spring.jpa.show-sql=true
application.yml
spring:
  datasource:
    driver-class-name: org.postgresql.Driver
    url: jdbc:postgresql://localhost:54322/example?useSSL=false
    username: asac
    password: 1234
  jpa:
    generate-ddl: true
    hibernate:
      ddl-auto: create
    properties:
      hibernate:
        dialect: org.hibernate.dialect.PostgreSQLDialect
    show-sql: true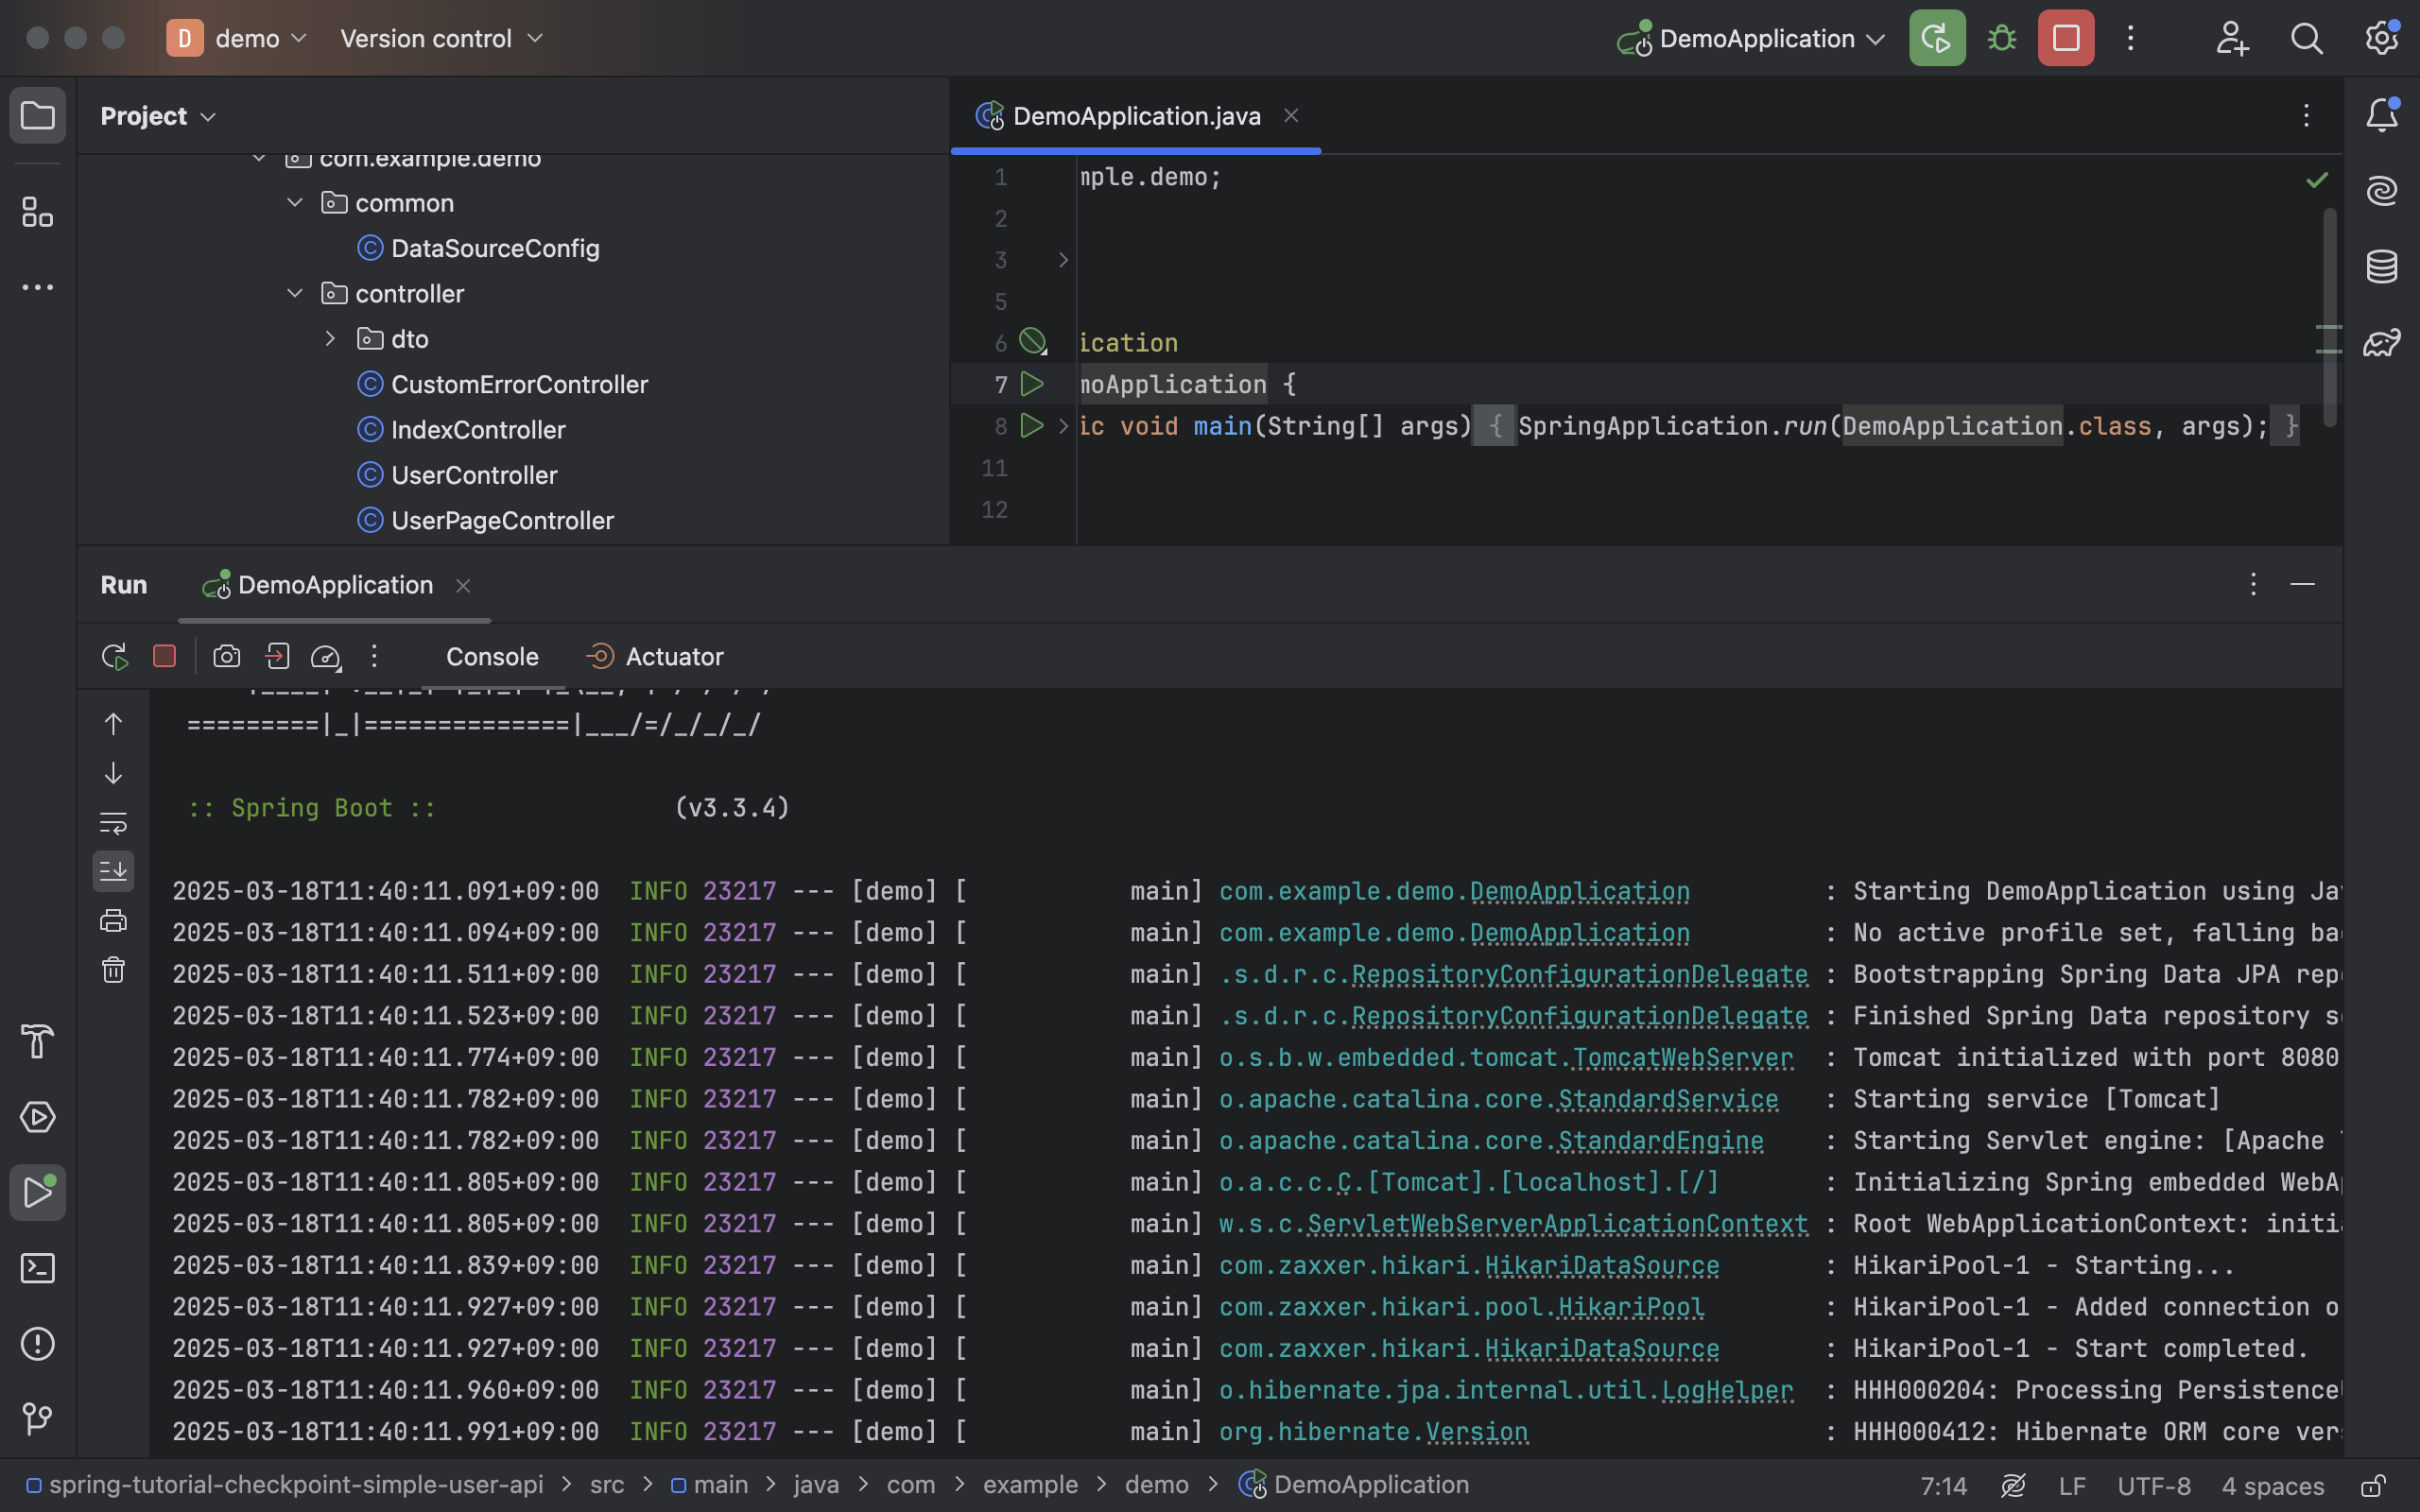
- 성공적으로 스프링 어플리케이션이 구동될 뿐만 아니라 hibernate 관련된 로그가 표기되는 것도 확인 가능
[ JPA 로부터 데이터베이스에 쿼리 실행 시 예약어 사용 문제 해결을 위한 추가 설정 ]
Entity 클래스 정의를 기반으로 데이터베이스 내
테이블을 생성하는 Auto DDL 이나 실제 DML 쿼리 수행 시
- 예약어(Reserved Words)가 포함되어있는 경우 Spring 에서 에러 로그와 함께 문법 오류 발생
- 해결을 위해 수행할 쿼리 내 존재하는 예약어에 대해
double-quote(") 필요 - 매 번 붙여주기 귀찮기에 JPA 설정으로 JPA 가 생성하는
모든 쿼리에 double-quote(") 적용
- 해결을 위해 수행할 쿼리 내 존재하는 예약어에 대해
spring.jpa.properties.hibernate.globally_quoted_identifiers=true- 위의 설정은
application.properties사용 설정 (application.yml에서는 나누어 작성)
컨테이너 내 PostgresQL 에서 SQL 쿼리를 수행할 때도 걸리적거리므로 아래와 같이 작성해줄 것
DROP TABLE employees, user ;DROP TABLE employees, "user";[ Auto DDL 통해 개발자가 정의한 Entity 클래스가 정상적으로 테이블로 생성되는지 확인 ]
앞의 설정으로 충분히 스프링 어플리케이션이 정상 구동되긴했지만,
좀 더 직접적으로 테이블 생성까지 완료해볼 것
@Getter
@Entity
@AllArgsConstructor
@NoArgsConstructor(access = AccessLevel.PROTECTED)
@ToString
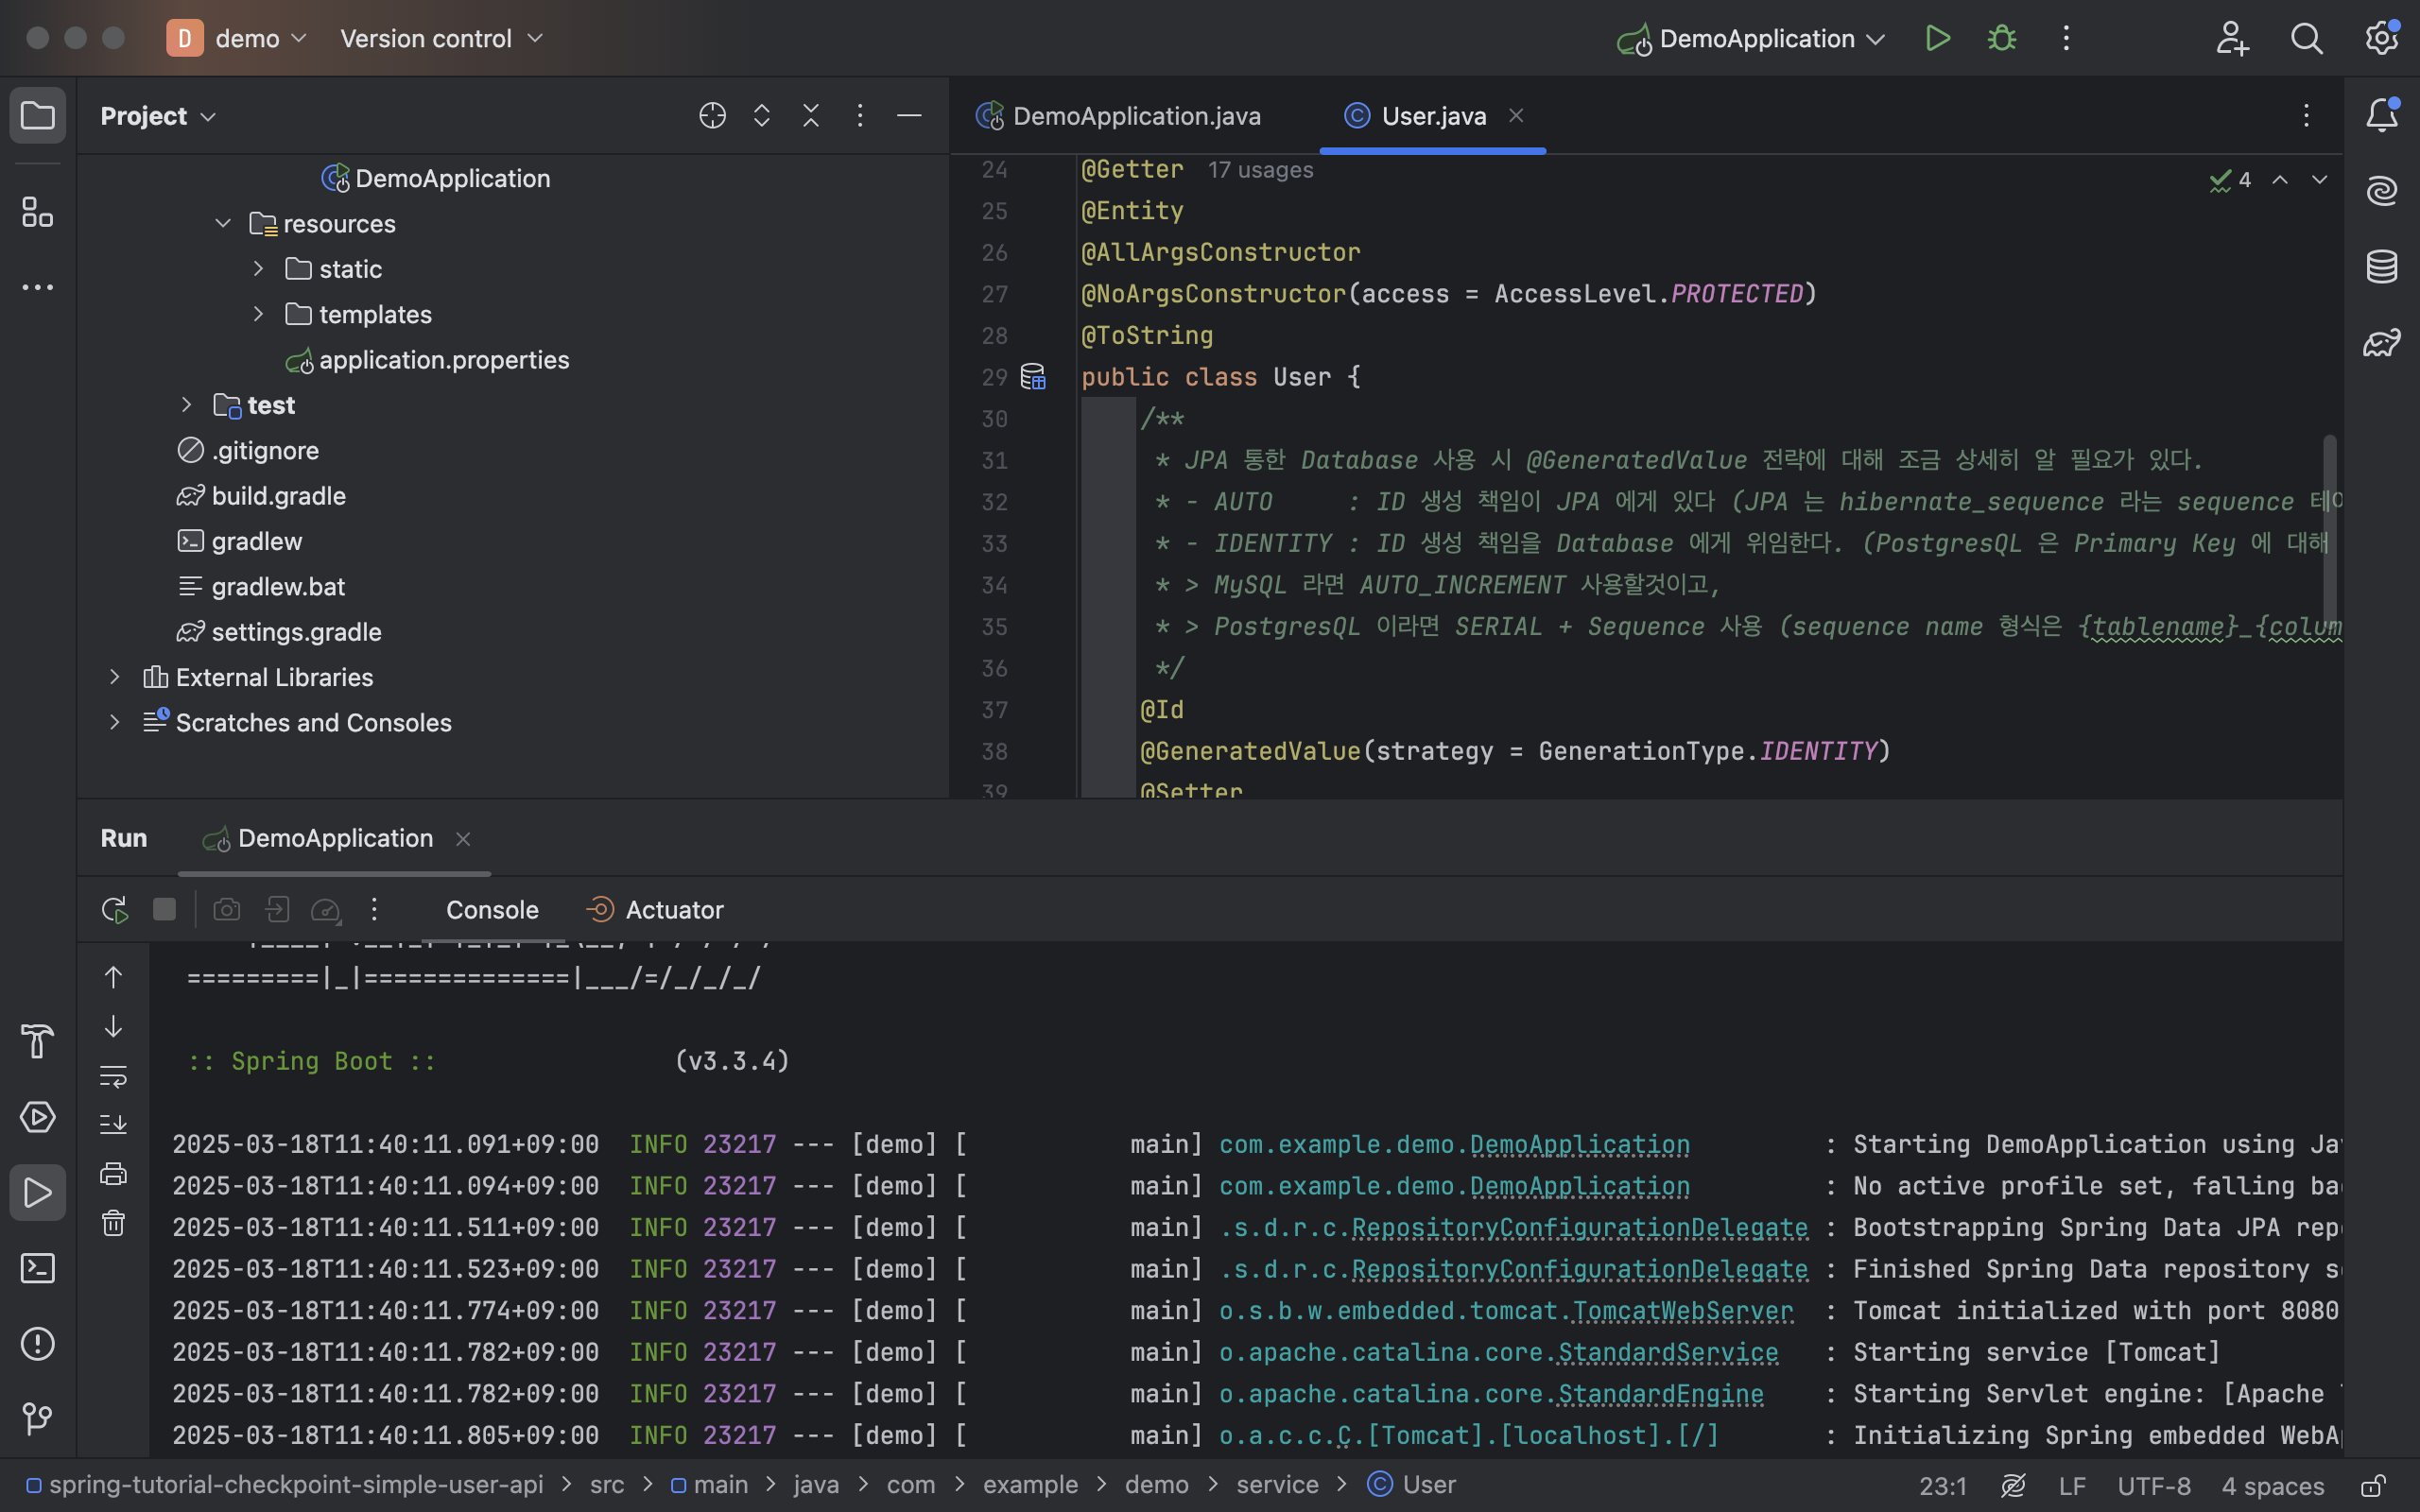
public class User {
/**
* JPA 통한 Database 사용 시 @GeneratedValue 전략에 대해 조금 상세히 알 필요가 있다.
* - AUTO : ID 생성 책임이 JPA 에게 있다 (JPA 는 hibernate_sequence 라는 sequence 테이블을 만들어 활용, nextval 호출)
* - IDENTITY : ID 생성 책임을 Database 에게 위임한다. (PostgresQL 은 Primary Key 에 대해 SERIAL 로 정의 및 DB 자체적으로 Sequence 생성)
* > MySQL 라면 AUTO_INCREMENT 사용할것이고,
* > PostgresQL 이라면 SERIAL + Sequence 사용 (sequence name 형식은 {tablename}_{columnname}_seq), currval 호출)
*/
@Id
@GeneratedValue(strategy = GenerationType.IDENTITY)
@Setter
private Integer id;
private String name;
private Integer age;
private String job;
private String specialty;
private LocalDateTime createdAt;
}com.example.demo.repository.entity라는
새 디렉토리 생성 후 User 라는 Entity 클래스를 생성
- Gradle 및 Spring 설정을 모두 마친 뒤 스프링 어플리케이션를 구동한 경우 Auto DDL 동작한걸 확인 가능
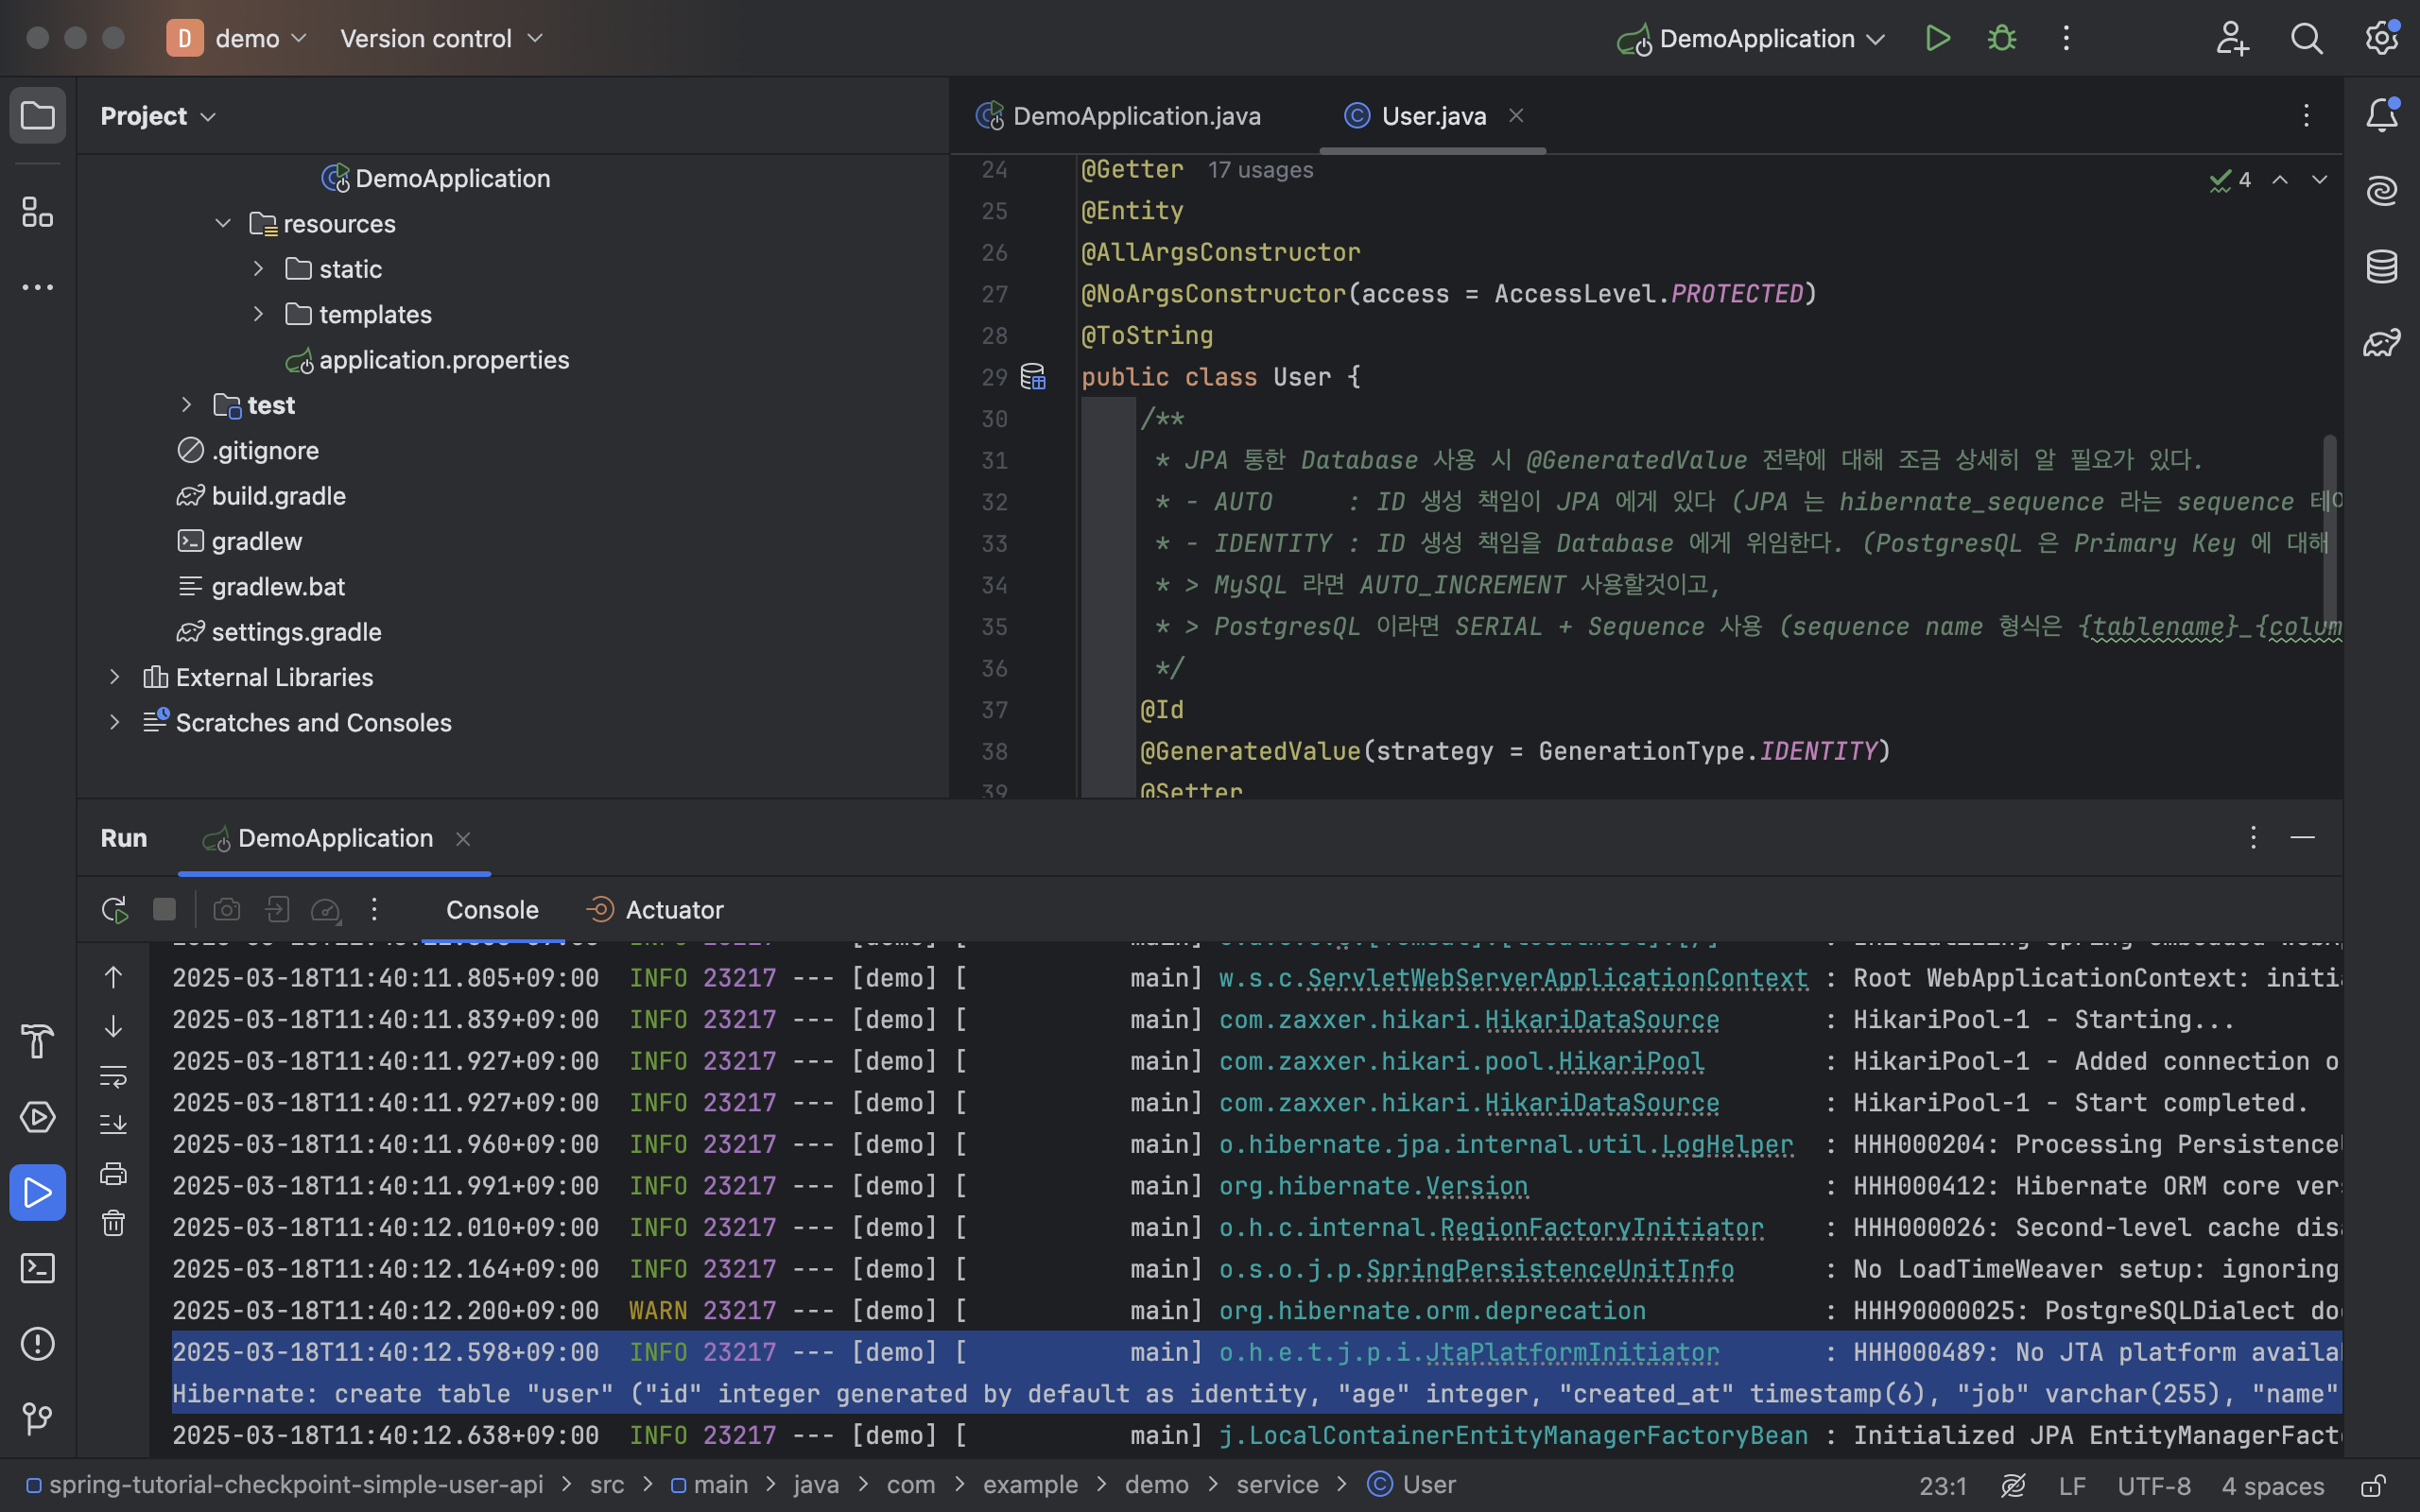
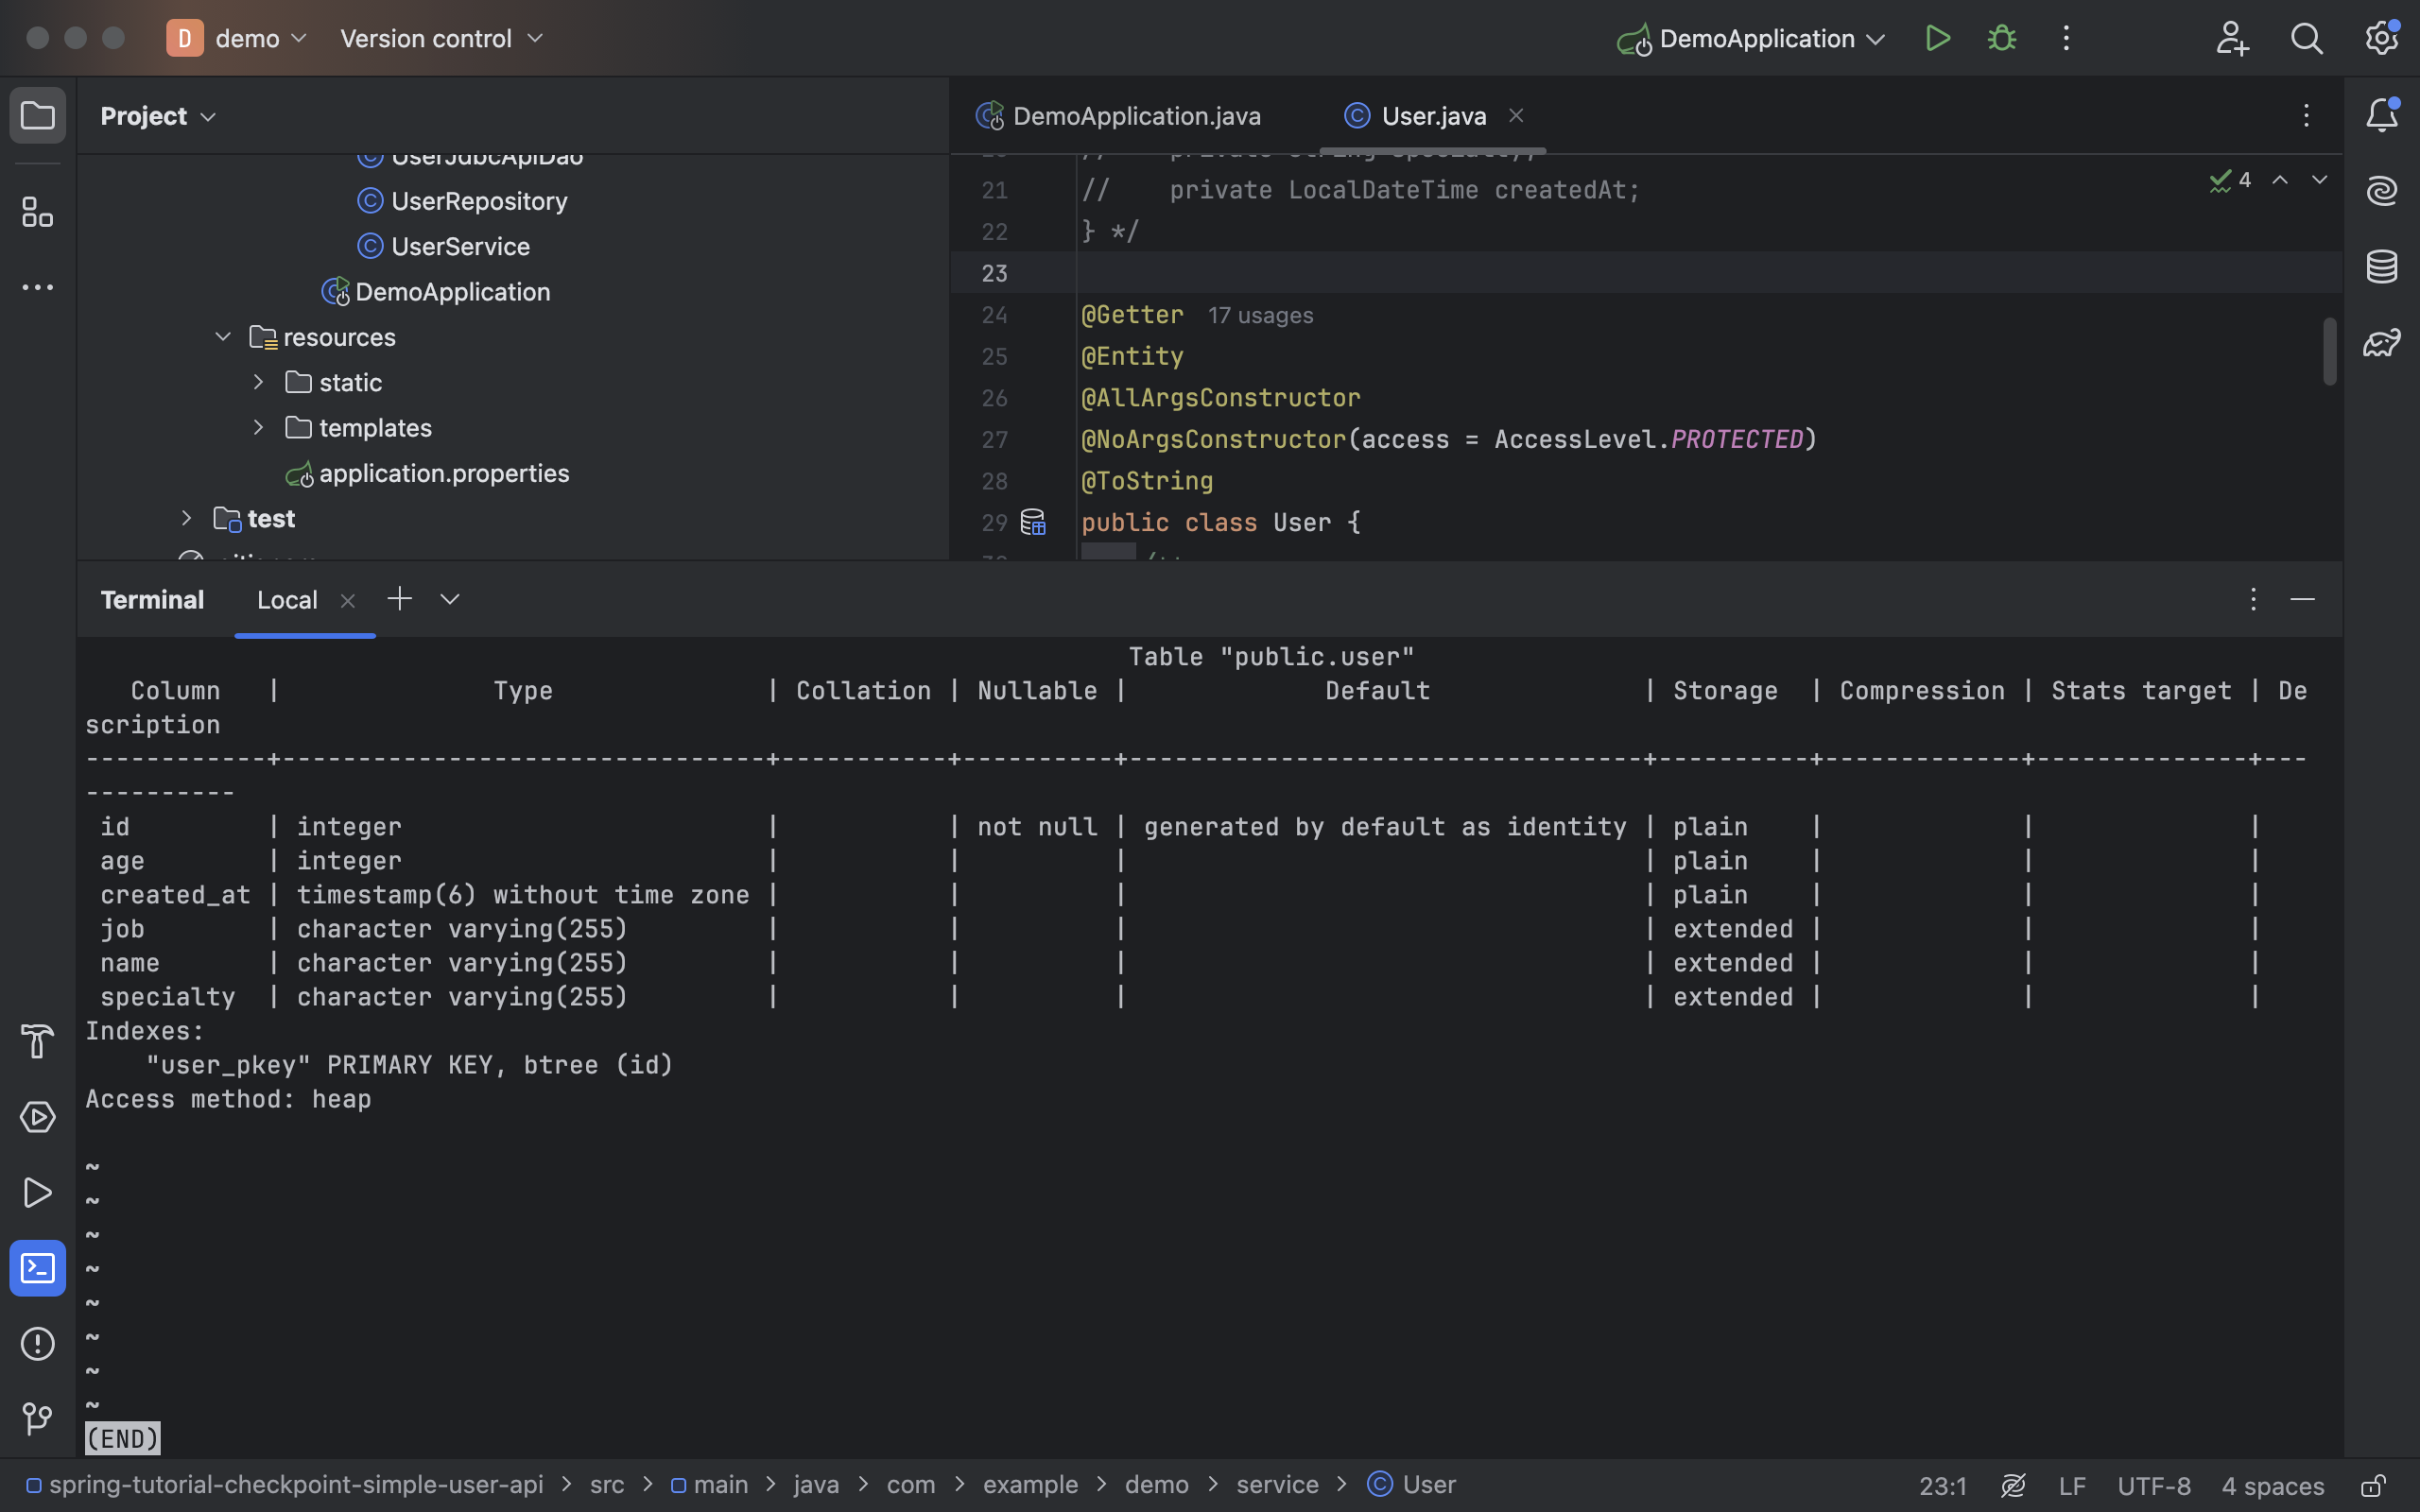
- 실제로 데이터베이스 내 테이블이 잘 생성되었는지 확인이 가능
- 로컬 스프링 어플리케이션 실행 이전
:Did not find any relations - 로컬 스프링 어플리케이션 실행 이후
: 생성된 테이블 표기 (Entity 클래스 내 필드들도 확인 가능)
- 로컬 스프링 어플리케이션 실행 이전

- 아래 명령어를 통해 특정 테이블의 스키마 확인 가능
- 확인 후
Control + Z
- 확인 후
\d+ user