 Redux의 기본 개념을 익혔으니 Redux Fundamentals 문서를 바탕으로 투두리스트 토이프로젝트를 진행해보겠습니다.
📜 요구사항 정의
-
3가지 UI 영역
1. 새로운 todo를 입력할input영역
2. 기존 todo-list 나타낼 영역
3. 수행되지 않은 todo의 개수, 필터링 옵션을 나타낼 영역 -
'수행완료' 를 표시할 수 있는 체크박스,색깔 태그,투두 삭제 버튼 -
모든 todo를 완료로 표시하는 버튼,완료된 todo를 todo-list에서 삭제하는 버튼 -
필터링 옵션
1.All,Active,Completed중 하나에 해당하는 완료 상태에 따라 투두리스트를 필터링하여 보여줌
2.1개 이상의 컬러태그에 따라 해당 투두리스트를 필터링하여 보여줌
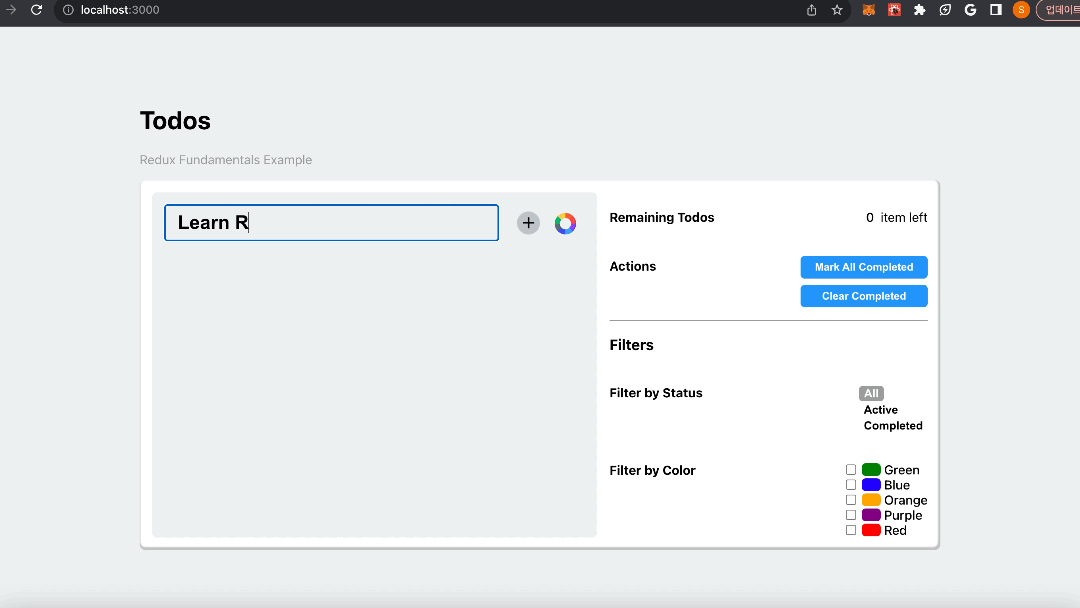
예상 UI 컴포넌트 모습은 아래와 같습니다.
🧩 State, Actions, Reducers 작성
State 구성
1. todo-list에 들어갈 todo 객체
📌 사용자가 입력한 text
📌 완료 / 미완료 를 나타낼 boolean
📌 고유한 id
📌 컬러 태그 (선택)
2. 필터링 옵션
📌 완료 상태: All , Active , Completed
📌 컬러: red , orange , green, blue , purple
예시 )
const todoAppState = {
  todos: [
    { id: 0, text: 'Learn React', completed: true, color: 'red' },
    { id: 1, text: 'Learn Redux', completed: false, color: 'purple' },
    { id: 2, text: 'Build something fun!', completed: false }
  ],
  filters: {
    status: 'Active',
    colors: ['red', 'blue']
  }
}
Actions 구성
1. Action 이름 정의 "ACTION_DOMAIN"
const ADD_TODO = "ADD_TODO";
const TOGGLE_COMPLETED="TOGGLE_COMPLETED";
...
2. Action Creator 작성
✅ 액션 객체의 내용을 구조화
✅ 캡슐화하여 작업이 추가되더라도 디스패치되는 과정의 일관성을 유지
위와 같은 이유로 액션 생성 함수를 작성하겠습니다.
이를 통해 매번 {type: ..., payload: ...} 를 넘겨야 할 필요가 없어집니다.
export const addTodo = (todoText, color) => {
  return {
    type: "ADD_TODO",
    payload: { todoText, color },
  };
};

export const toggleCompleted = (todoId) => {
  return {
    type: "TOGGLE_COMPLETED",
    payload: todoId,
  };
};

export const deleteTodo = (todoId) => {
  return {
    type: "DELETE_TODO",
    payload: todoId,
  };
};

export const allComplete = () => {
  return {
    type: "ALL_COMPLETE_TODO",
  };
};

export const clearCompleted = () => {
  return {
    type: "CLEAR_COMPLETED_TODO",
  };
};
Reducers 작성
공식문서에선 기능에 따라 파일을 정리하길 권유하고 있기 때문에 상태의 종류에 따라 리듀서를 분리 해서 작성하고 하나의 root reducer 를 통해 분리된 리듀서를 통합하겠습니다.
📦 todo 객체에 관련된 상태를 관리하는 리듀서
//초기 상태값을 정의
const initialState = [
  { id: 0, text: 'Learn React', completed: true },
  { id: 1, text: 'Learn Redux', completed: false, color: 'purple' },
  { id: 2, text: 'Build something fun!', completed: false, color: 'blue' }
]

//
function nextTodoId(todos) {
  const maxId = todos.reduce((maxId, todo) => Math.max(todo.id, maxId), -1)
  return maxId + 1
}

export default function todosReducer(state = initialState, action) {
  switch (action.type) {
    case ADD_TODO: {
      return [
        ...state,	//불변성 법칙을 위해 copy
        {
          id: nextTodoId(state),
          text: action.payload,
          completed: false
        }
      ]
    }
    case TOGGLE_COMPLETED: {
      return state.map(todo => {
        if (todo.id !== action.payload) {
          return todo
        }

        return {
          ...todo,
          completed: !todo.completed
        }
      })
    }

    //... 그 외 action.type에 대한 코드

    default:
      return state
  }
}
📦 필터링에 관련된 상태를 관리하는 리듀서
const initialState = {
  status: "All",
  colors: [],
};

export const StatusFilters = {
  All: "All",
  Active: "Active",
  Completed: "Completed",
};

export default function filtersReducer(state = initialState, action) {
  switch (action.type) {
    case CHANGE_STATUS_FILTERS: {
      return {
        ...state,
        status: action.payload,
      };
    }

    case CHANGE_COLOR_FILTERS: {
      if (action.payload.changeType === true) {
        // 컬러 필터를 추가
        const updatedColors = [...state.colors, action.payload.color];
        return {
          ...state,
          colors: updatedColors,
        };
      } else {
        // 선택을 해제한 컬러 필터를 삭제
        const updatedColors = state.colors.filter(
          (color) => color !== action.payload.color
        );
        return {
          ...state,
          colors: updatedColors,
        };
      }
    }

    default:
      return state;
  }
}
🎁 하나의 root리듀서로 통합
import { combineReducers } from "redux";

import todosReducer from "./features/todos/todosSlice";
import filtersReducer from "./features/filters/filtersSlice";

const rootReducer = combineReducers({
  todos: todosReducer,
  filters: filtersReducer,
});

export default rootReducer;
🗳️ Store 작성
1. 스토어 생성
const store = Redux.createStore(rootReducer)2. 상태의 업데이트를 subscribe
//우리의 html 문서에 'value'라는 id를 가진 요소가 있다고 가정할 때
const valueEl = document.getElementById("value")

//render 함수를 통해
function render=()=>{
  //store에서 전체 상태를 얻어
  const state = store.getState()
  //필요한 데이터를 추출하고
  const newValue = state.value.toString()
  //UI를 업데이트
  valueEl.innerHTML=newValue
}

render()
//상태가 업데이트 될 때 마다 render함수를 호출해 UI를 다시 그려줌
store.subscribe(render)
3. 스토어에 액션을 디스패치
//우리의 html 문서에 button 요소가 있다고 가정할 때
const completeBtn = document.querySelector("complete-button")

button.onclick=()=>{
	store.dispatch(allComplete())
}
🎨 UI - Redux 연결
react-redux 라이브러리의 hook들을 이용해 리액트 컴포넌트에서 Redux store에 있는 상태를 업데이트해보겠습니다.
📂 컴포넌트 트리 구성
우선 리액트 컴포넌트의 구성은,
- 새로운 todo를 입력받고 todo-list를 보여줄 영역
TodoDiv - 그외 옵션이 들어갈 영역
Footer
으로 나눴습니다.
function App() {
  return (
    <>
      <TodoDiv>
        <Header />
        <TodoList />
      </TodoDiv>
      <Footer />
    </>
  );
}
useState 대신 useSelector
- 컴포넌트 내부에서 생성된 상태를 불러올 때 →
useState- 컴포넌트 외부 Redux store에 있는 상태를 불러올 때 →
useSelector
useSelector 훅을 호출하여 리액트 컴포넌트가 스토어로부터 상태를 읽어올 수 있도록 합니다.
1. selector 함수를 작성
//store에 위치한 state중 todos객체 전체를 반환
const selectTodos = state => state.todos

// completed가 true인 todo의 개수를 추출
const selectTotalCompletedTodos = state => {
  const completedTodos = state.todos.filter(todo => todo.completed)
  return completedTodos.length
}
2. useSelector에 selector함수를 인자로 넘김
import { useSelector } from 'react-redux'
import TodoListItem from './TodoListItem'

const selectTodos = state => state.todos

const TodoList = () => {
  const todos = useSelector(selectTodos)

  const renderedListItems = todos.map(todo => {
    return <TodoListItem key={todo.id} todo={todo} />
  })

  return <ul>{renderedListItems}</ul>
}

export default TodoList
useSelector 는 스토어를 자동으로 subscribe하기 때문에 액션이 디스패치 될 때 마다 즉시 selector 함수를 호출하고 새로운 데이터로 컴포넌트를 리렌더링합니다.
⇒ 컴포넌트에서 단 한 번만 useSelector를 호출해도 상태 변화를 UI에 즉시 반영할 수 있습니다. 😆 🤙
물론, 하나의 컴포넌트에서 여러 개의 selector를 사용할 수도 있습니다. 공식문서에서는 각 useSelector에 가능한 한 가장 작은 양의 데이터를 불러오기를 권유하고 있습니다.
예시 )
// 완료되지 않은 todo의 개수를 추출
const todosRemaining = useSelector(state => {
    const uncompletedTodos = state.todos.filter(todo => !todo.completed)
    return uncompletedTodos.length
  })

// 스토어에 있는 state 중 filters객체 전체를 반환
const { status, colors } = useSelector(state => state.filters)

return (
	<p>{todosRemaining} items left</p>
  	<StatusFilter value={status} />
  	<ColorFilter value={color} />
)useDispatch를 통해 store에 액션 dispatch
리액트 컴포넌트 파일에서는 store에 직접적으로 접근할 수 없습니다.
store.dispatch(action)→ ❌
대신, useDispatch 를 통해 store.dispatch() 를 반환받는 것과 같은 효과를 얻을 수 있습니다.
const dispatch=useDispatch()	//useDispatch 호출
const [text, setText]=useState('')

const handleInput=e=>{
	setText(e.target.value)
  	dispatch(addTodo(text))		//액션 디스패치
  	setText('')
}

return (
	<input type="text"
  		value={text}
		onChange={handleInput}
    />
)Provider로 컴포넌트와 store 연결
🙅♀️ react-redux의 훅은 자바스크립트 함수기 때문에 자동으로 store.js를 찾을 수 없습니다.
대신, react-redux가 제공하는 Provider 컴포넌트를 이용합니다.
- Provider 컴포넌트로
루트 컴포넌트를 감싸기 - Provider의
props로store를 넘겨주기 - Provider를 렌더링
import { Provider } from 'react-redux'
import store from './store'
const root = ReactDOM.createRoot(document.getElementById("root"));
root.render(
<React.StrictMode>
<Provider store={store}>
<App />
</Provider>
</React.StrictMode>
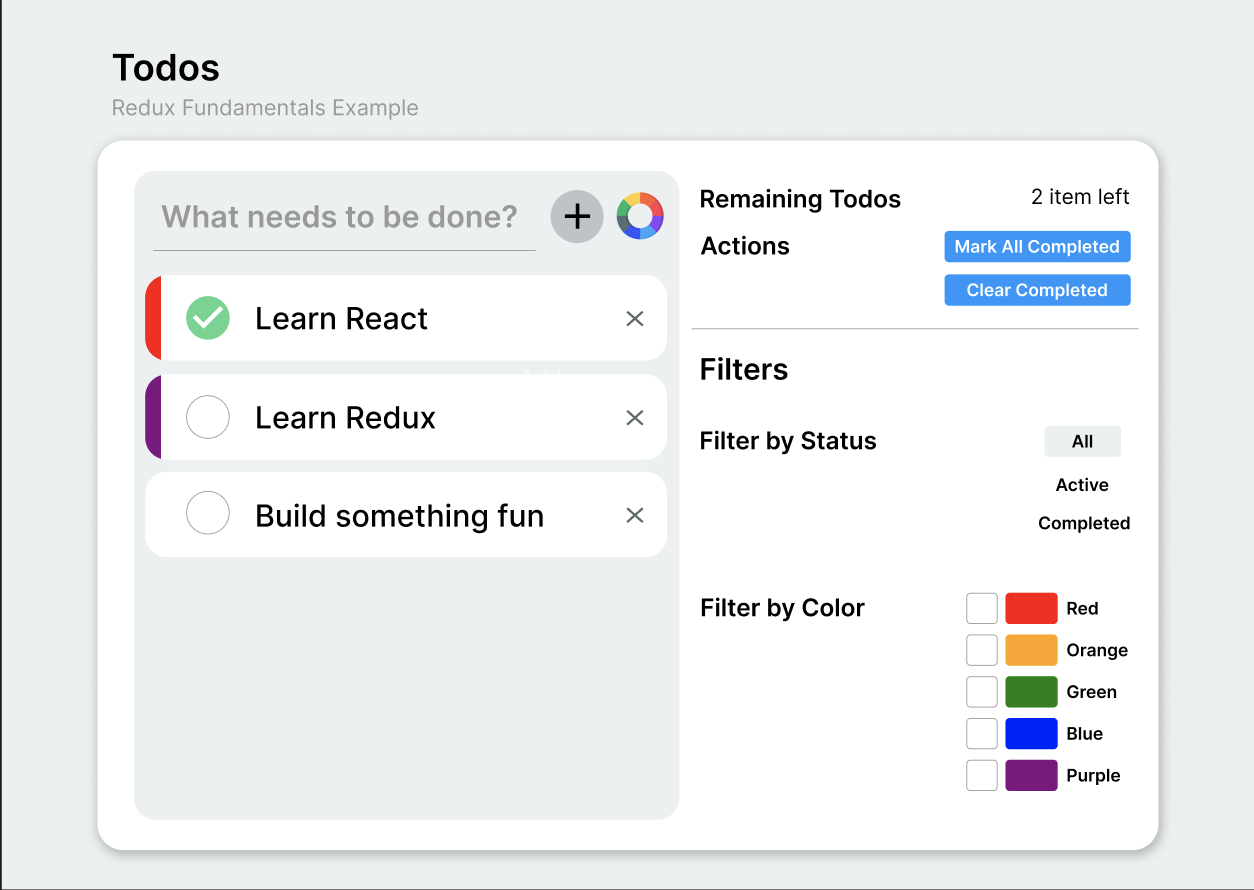
);✨ 완성 모습