1. 🗃️Page Query
게시물 파일이름의 목록을 나열하는 블로그 페이지 만들기.
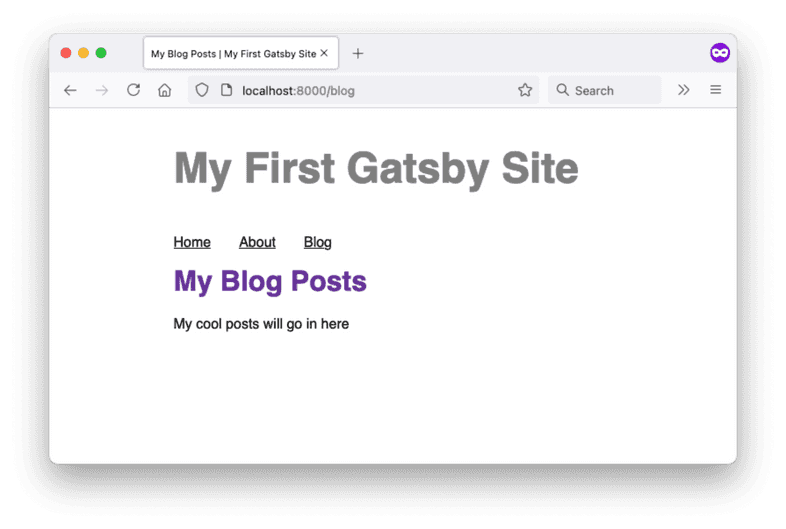
1-1. Blog 컴포넌트 만들기
src/pages/blog.tsx파일을 만듭니다.
/* src/pages/blog.tsx */
import React from "react";
import Layout from "../components/Layout";
import Seo from "../components/Seo";

export default function Blog() {
  return (
    <Layout title="Blog">
      <p>The most recent news from my shop.</p>
    </Layout>
  );
}

export const Head = () => <Seo title="Blog" />;
1-2. 레이아웃에서 Blog page를 Link 하기
Layout 컴포넌트에 새 블로그 페이지에 대한 링크를 추가합니다.
/* src/components/layout.js */
// ... import statements

interface ILayoutProps {
  children: any;
  title: string;
}

export default function Layout({ children, title }: ILayoutProps) {
  const data = useStaticQuery(graphql`
    query {
      site {
        siteMetadata {
          title
        }
      }
    }
  `);

  return (
    <div>
      <header>{data.site.siteMetadata.title}</header>
      <nav>
        <ul>
          <li>
            <Link to="/">Home</Link>
          </li>
          <li>
            <Link to="/about-us">About Us</Link>
          </li>
          <li>
            <Link to="/blog">Blog</Link>
          </li>
        </ul>
      </nav>
      <main>
        <h1>{title}</h1>
        {children}
      </main>
    </div>
  );
}
1-3. 📝MDX post 만들기
- blog-posts 폴더를 만듭니다.
- blog-posts 디렉토리에
mdx확장명으로 각각의 포스트를 만듭니다.

1-4. GraphiQL를 사용하여 쿼리 작성하기
이제 일부 게시물이 로컬 파일 시스템에 저장되었으므로 해당 파일을 Gatsby 데이터 계층으로 가져올 차례입니다.
gatsby-source-filesystem플러그인을 설치합니다.
npm install gatsby-source-filesystemgatsby-config.ts파일에서gatsby-source-filesystem플러그인의 옵션을 설정합니다.path에 파일 경로를 작성해줍니다.
/* gatsby-config.ts */
module.exports = {
  siteMetadata: {
    title: "My First Gatsby Site",
  },
  plugins: [
    "gatsby-plugin-image",
    "gatsby-plugin-sharp",
    {
      resolve: "gatsby-source-filesystem",
      options: {
        name: `blog-posts`,
        path: `${__dirname}/blog-posts`,
      }
    },
  ],
};
옵션
__dirname: 현재 실행 중인 파일이 포함된 디렉터리의 절대 경로를 저장하는 Node.js의 변수입니다.name: 각 파일의sourceInstanceName필드로 설정 됩니다. 여러 폴더로부터 source 파일을 원할 때 유용합니다. GraphQL 쿼리를 작성할 때, 각 폴더의name을 지정하면 특정 폴더를 필터링할 수 있습니다.
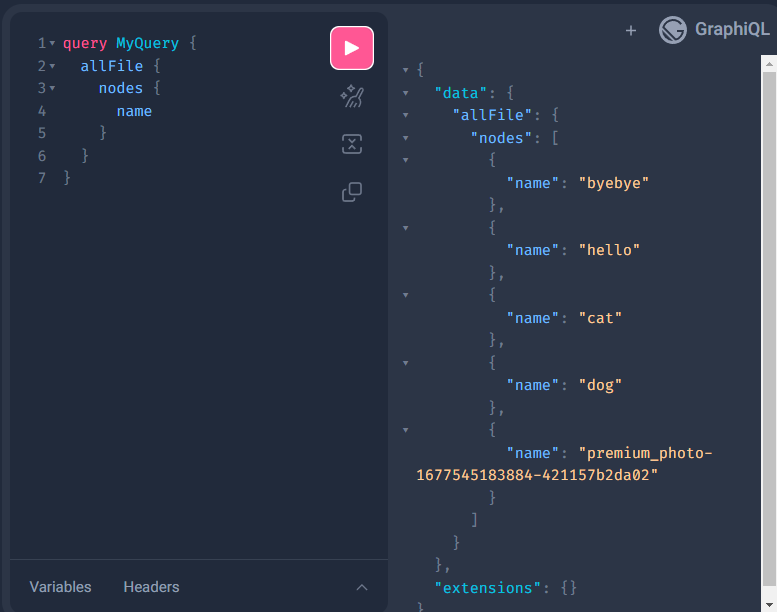
GraphiQL내부를 탐색하여 블로그 폴더에 있는allFile의 이름을 가져오는 쿼리를 작성합니다 .
1-5. 🔖Page query를 사용하여 게시물 파일 이름 목록을 Blog page로 가져오기
- import
graphqlfromgatsby. page query를 정의하고 내보냅니다.GraphiQL에서 작성한 쿼리를 복사합니다.
/* src/pages/blog.tsx */
import React from "react";
import Layout from "../components/Layout";
import Seo from "../components/Seo";
import { graphql } from "gatsby";

export default function Blog() {
  return (
    <Layout title="Blog">
      <p>The most recent news from my shop.</p>
    </Layout>
  );
}

export const query = graphql`
  query BlogTitles {
    allFile {
      nodes {
        name
      }
    }
  }
`;

export const Head = () => <Seo title="Blog" />;
- 함수 내에
data prop을 정의합니다.
-
GraphiQL에서 작성한 쿼리를 복사하고 쿼리의 이름을 지정해줍니다.
- 쿼리 이름은 Gatsby가 빌드 시 쿼리를 실행할 때 콘솔에 표시되는 오류를 디버깅하는 데 유용할 수 있습니다. -
data prop의 쿼리 타입을 작성해줍니다.
<Queries.BlogTitlesQuery> -
자바스크립트 메서드
.map()를 사용하여nodes배열을 각각의 파일명을 가지는 게시물로 렌더링합니다.
/* src/pages/blog.tsx */
import React from "react";
import Layout from "../components/Layout";
import Seo from "../components/Seo";
import { PageProps, graphql } from "gatsby";

export default function Blog({ data }: PageProps<Queries.BlogTitlesQuery>) {
  return (
    <Layout title="Blog">
      <ul>
        {data.allFile.nodes.map((node) => (
          <li key={node.name}>{node.name}</li>
        ))}
      </ul>
    </Layout>
  );
}

export const query = graphql`
  query BlogTitles {
    allFile {
      nodes {
        name
      }
    }
  }
`;

export const Head = () => <Seo title="Blog" />;
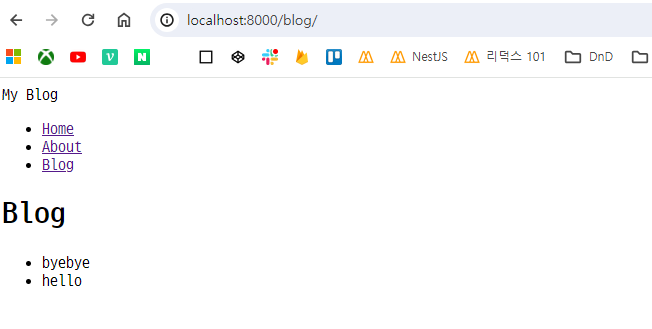
🐥결과
2. MDX
🔻MDX에서 Markdown 서식 사용
MDX 파일은 마크업 언어인 Markdown을 사용하여 텍스트 서식을 지정할 수 있습니다.
- example :
// mdx
---
name: "Fun Facts about Red Pandas"
datePublished: "2021-07-12"
author: "#1 Red Panda Fan"
---
🧪Install
MDX 변환기 플러그인(및 종속성) 설치 및 구성
npm install gatsby-plugin-mdx gatsby-source-filesystem @mdx-js/react`2-1. mdx 파일 만들기
blog-posts디렉토리에mdx파일을 만듭니다.
// blog-posts/my-first-post.mdx
---
title: "My First Post"
date: "2021-07-23"
slug: "my-first-post"
---

This is my first blog post! Isn't it *great*?

Some of my **favorite** things are:

* Petting dogs
* Singing
* Eating potato-based foods
2-2. gatsby-config.ts
gatsby-config 파일에 gatsby-plugin-mdx을 작성합니다.
import type { GatsbyConfig } from "gatsby";

const config: GatsbyConfig = {
  siteMetadata: {
    title: `My Blog`,
    description: `Example project for the Gatsby Head API`,
    siteUrl: `https://www.yourdomain.tld`,
  },
  graphqlTypegen: true,
  plugins: [
    "gatsby-plugin-image",
    "gatsby-plugin-sharp",
    {
      resolve: "gatsby-source-filesystem",
      options: {
        name: `blog-posts`,
        path: `${__dirname}/blog-posts`,
      },
    },
    "gatsby-plugin-mdx",
  ],
};

export default config;
2-3. allMdx 필드
allFile 대신 allMdx 필드를 사용하도록 블로그 페이지 쿼리를 업데이트하세요.
gatsby-plugin-mdx 플러그인은 GraphQL 쿼리에 사용할 수 있는 두 개의 새로운 필드를 제공합니다 : allMdx 및 mdx
allMdx:
각 블로그 게시물의 콘텐츠를 블로그 페이지에 추가하는 데 사용합니다.
필드를 사용하여 한 번에 여러 MDX 노드에 대한 데이터를 요청할 수 있습니다.
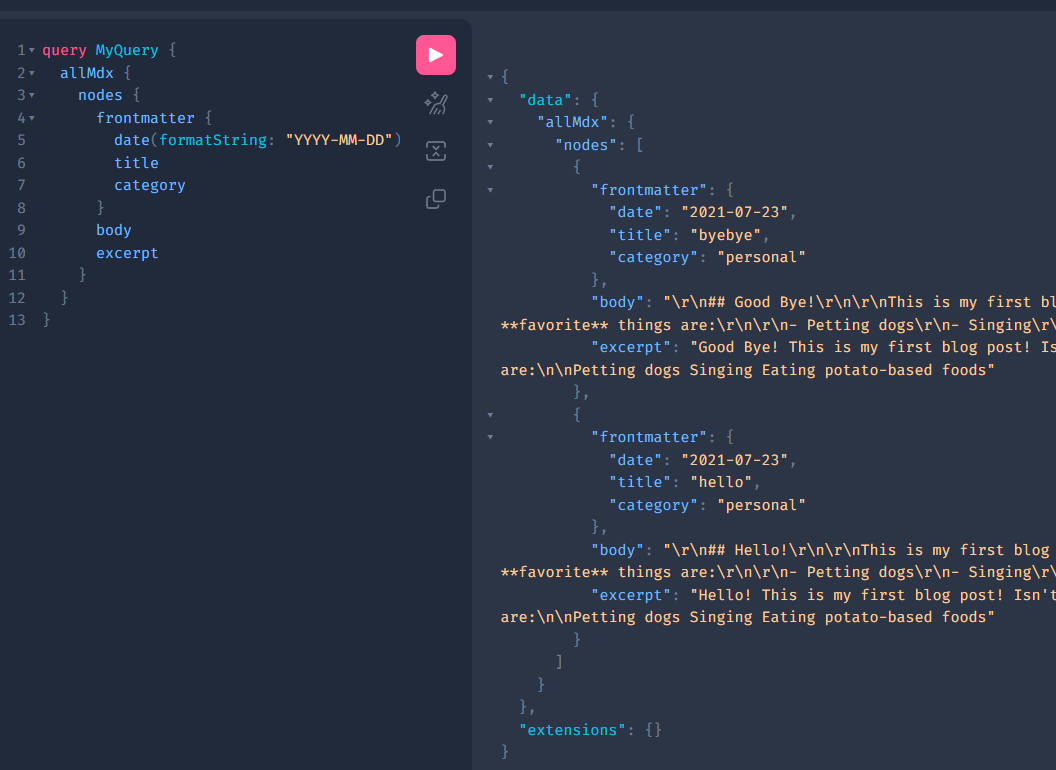
http://localhost:8000/___graphql 에서 쿼리를 생성하고 실행합니다.
// graphql
query MyQuery {
  allMdx {
    nodes {
      frontmatter {
        date(formatString: "YYYY-MM-DD")
        title
        category
      }
      body
      excerpt
    }
  }
}- 결과
2-4. id, sort, excerpt
-
id필드는 Gatsby가 데이터 영역의 모든 노드에 자동으로 추가하는 고유 문자열입니다. -
sort인수를 사용하여 최신 게시물이 먼저 나열되도록 게시물을 역시간순으로 나열할 수 있습니다.
쿼리 :
query MyQuery {
  allMdx(sort: { frontmatter: { date: DESC } }) {
    nodes {
      frontmatter {
        date(formatString: "MMMM D, YYYY")
        title
      }
      id
    }
  }
}
쿼리 실행 :
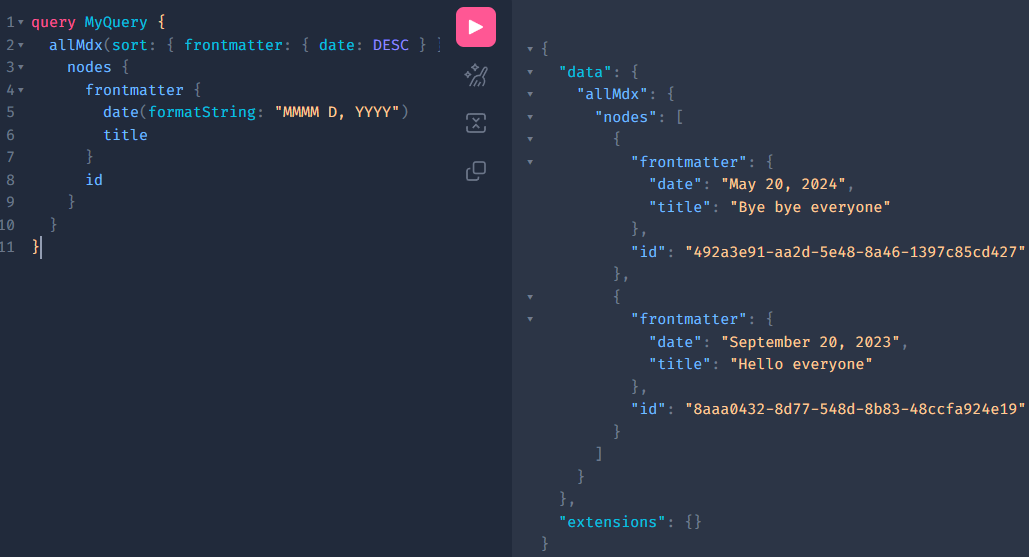
excerpt를 추가하면 각 게시물 콘텐츠의 미리보기를 추가할 수 있습니다.
쿼리 :
query MyQuery {
  allMdx(sort: { frontmatter: { date: DESC } }) {
    nodes {
      frontmatter {
        date(formatString: "MMMM D, YYYY")
        title
      }
      id
      excerpt
    }
  }
}
쿼리 실행 :
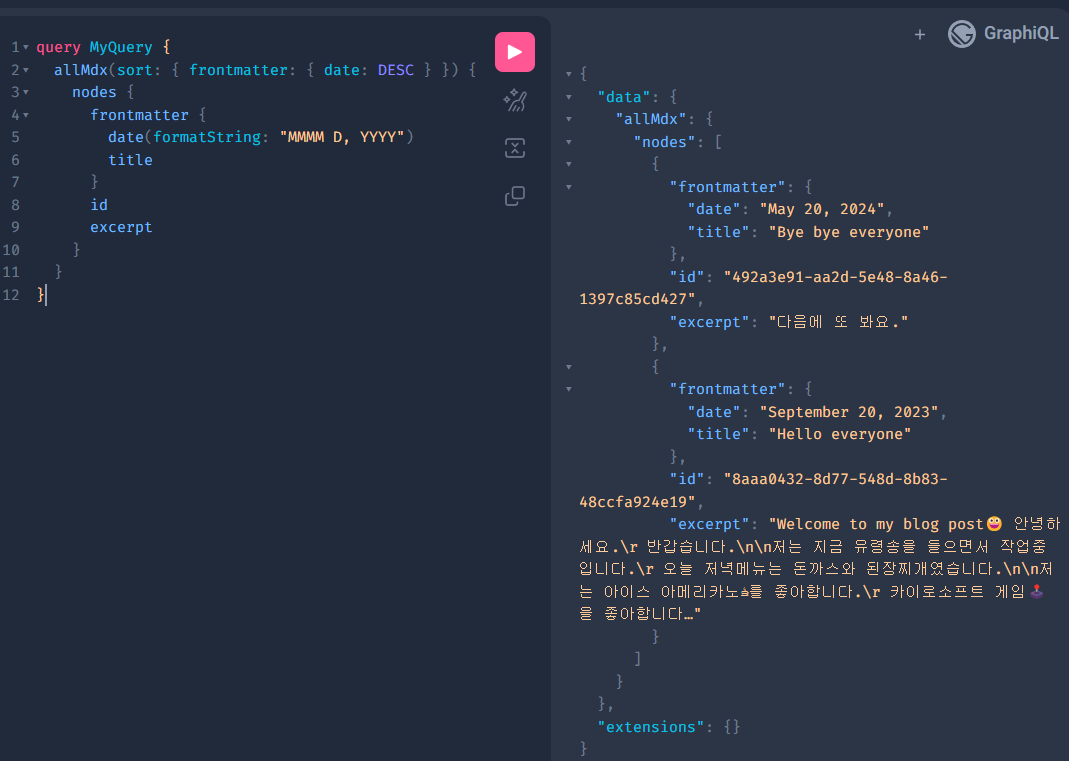
2-5. 블로그 페이지에 렌더링하기
pages/blog.tsx에서 BlogTitles 쿼리를allMdx로 수정합니다.
// pages/blog.tsx

export const query = graphql`
  query BlogTitles {
    allMdx {
      nodes {
        frontmatter {
          date(formatString: "YYYY-MM-DD")
          title
          category
        }
        body
        excerpt
      }
    }
  }
`;- 블로그 페이지의 JSX를 업데이트 합니다.
// pages/blog.tsx
export default function Blog({ data }: PageProps<Queries.BlogTitlesQuery>) {
  return (
    <Layout title="Blog">
      {data.allMdx.nodes.map((node) => (
        <article key={node.id}>
          <h2>{node.frontmatter?.title}</h2>
          <p>
            Posted: {node.frontmatter?.date} | {node.frontmatter?.category}
          </p>
          <p>{node.excerpt}</p>
          <hr />
        </article>
      ))}
    </Layout>
  );
}
2-6. 페이지 적용
localhost:8000/blog로 이동하여 확인합니다.
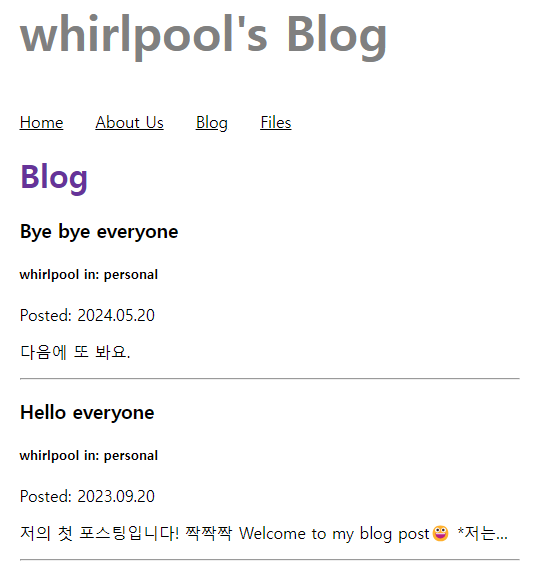
3. Dynamic Pages
Gatsby의 File System Route API를 사용하여 동적으로 새 경로 생성
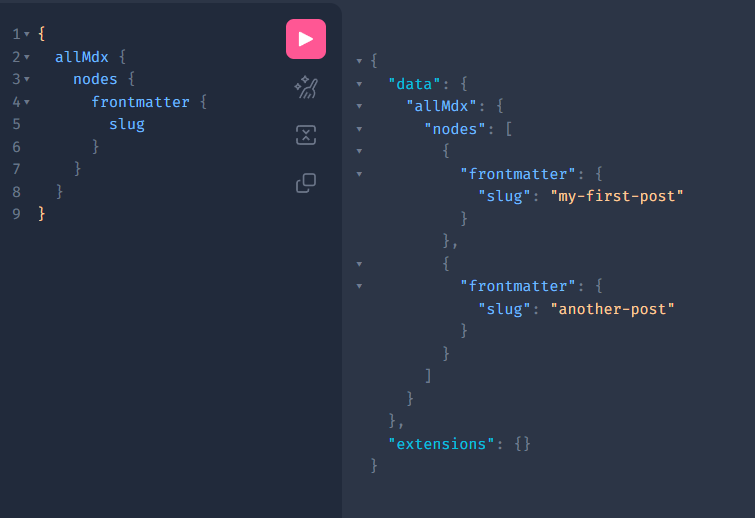
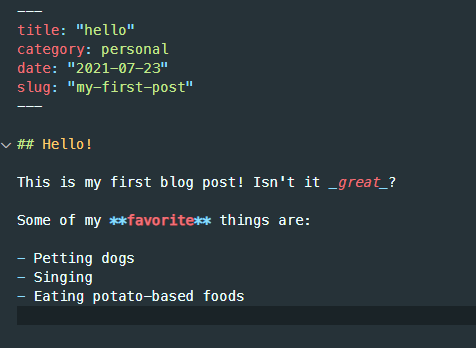
-
slug: 머리말 -
slug필드를 넣고 쿼리를 실행하면, 아래와 같은 결과가 반환됩니다.
3-1. 블로그 게시물 페이지 템플릿 만들기
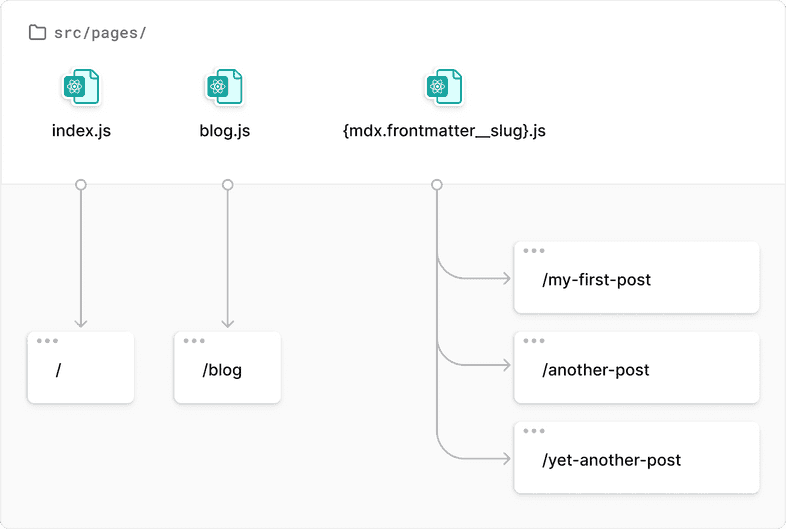
📁blog 폴더를 만들고 blog.tsx를 폴더로 옮겨줍니다.
- blog.tsx를 index.tsx로 바꿔줍니다.
src/pages/blog/{mdx.frontmatter__slug}.tsx파일을 만듭니다.
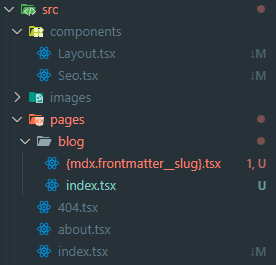
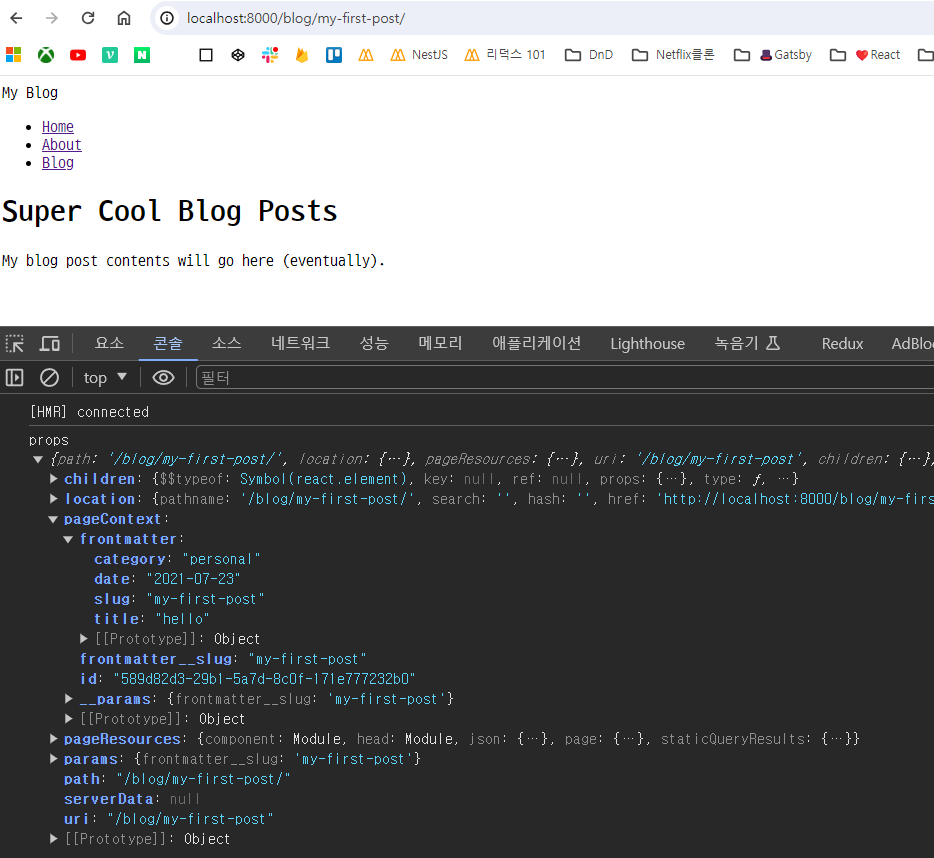
- 페이지 제목과 내용을 하드 코딩합니다.
// src/pages/blog/{mdx.frontmatter__slug}.tsx
import React from "react";
import Layout from "../../components/Layout";
import Seo from "../../components/Seo";

export default function BlogPost(props) {
  console.log("props", props);
  return (
    <Layout title="Super Cool Blog Posts">
      <p>My blog post contents will go here (eventually).</p>
    </Layout>
  );
}- 콘솔에서 props 를 확인할 수 있습니다.
3-2. 주요 GraphQL 개념: 쿼리 변수
GraphQL에서 쿼리 변수는 요청과 함께 추가 데이터를 보내는 방법입니다. 쿼리 변수를 사용하면 전달한 값에 따라 다른 데이터를 반환하는 동적 쿼리를 작성할 수 있습니다.
🌱쿼리 내에서 쿼리 변수를 사용하려면 다음을 수행합니다.
-
쿼리변수를 지정합니다.
- 변수 이름(
$가 앞에 오는) 과 GraphQL 데이터 타입이 포함되어야 합니다.
- 변수 이름(
-
나의 쿼리에 쿼리 변수를 사용합니다.
$변수이름을 추가합니다.
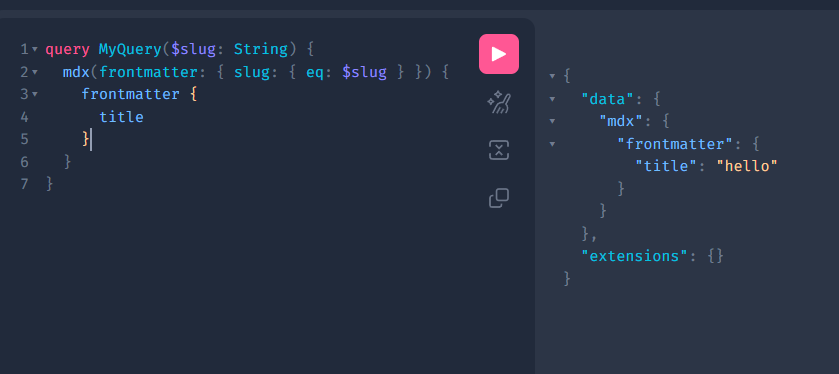
example :
query MyQuery($slug: String) {
  mdx(frontmatter: { slug: { eq: $slug } }) {
    frontmatter {
      title
    }
  }
}
결과 :
3-3. slug로 검색해서 상세내용 전달하기
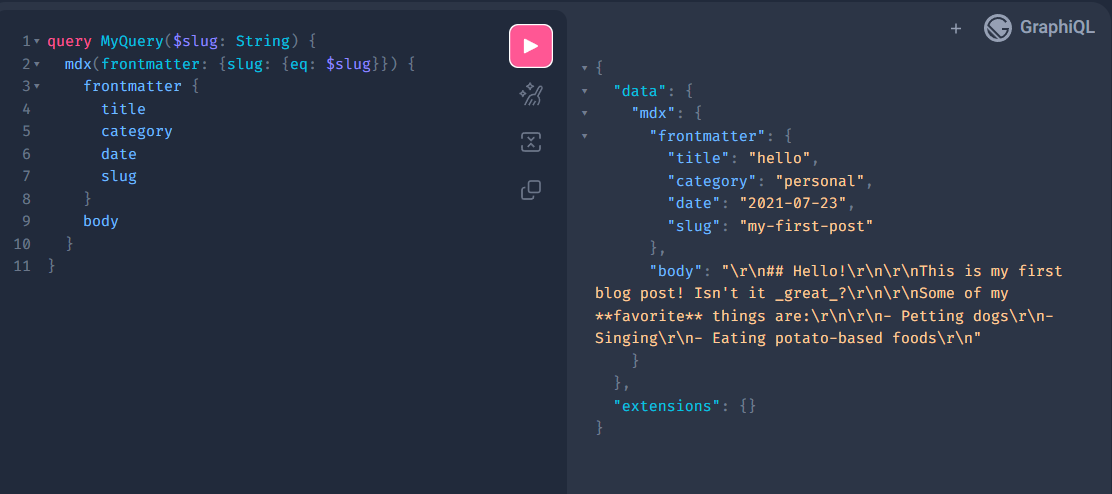
-
쿼리를 만들고 실행합니다.
-
{mdx.frontmatter__slug}.tsx에 쿼리를 추가합니다.
// pages/blog/{mdx.frontmatter__slug}.tsx
export const query = graphql`
  query PostDetail($frontmatter__slug: String) {
    mdx(frontmatter: { slug: { eq: $frontmatter__slug } }) {
      frontmatter {
        author
        title
        category
        date
        slug
      }
      body
    }
  }
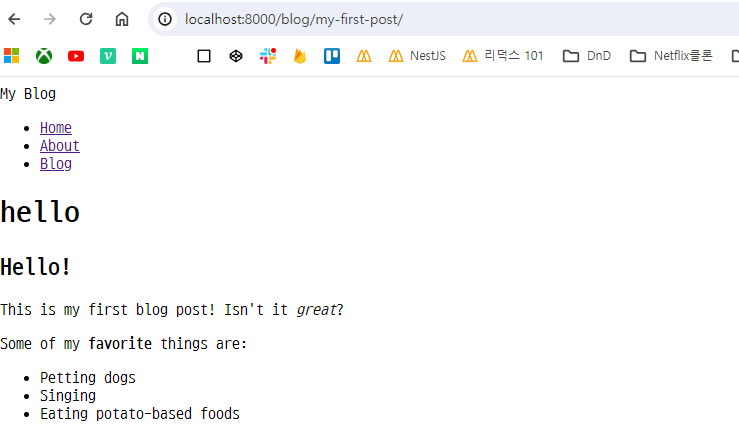
`;- mdx 내용을 렌더링합니다. Head API도 적용시켜 줍니다.
// pages/blog/{mdx.frontmatter__slug}.tsx
import React from "react";
import Layout from "../../components/Layout";
import Seo from "../../components/Seo";
import { graphql } from "gatsby";

interface BlogPostProps {
  data: Queries.PostDetailQuery;
  children: any;
}

export default function BlogPost({ data, children }: BlogPostProps) {
  return (
    <Layout title={data.mdx?.frontmatter?.title as string}>{children}</Layout>
  );
}

export const query = graphql`
  query PostDetail($frontmatter__slug: String) {
    mdx(frontmatter: { slug: { eq: $frontmatter__slug } }) {
      frontmatter {
        title
        category
        date
        slug
      }
      body
    }
  }
`;

export const Head = ({ data }: BlogPostProps) => (
  <Seo title={data.mdx?.frontmatter?.title as string} />
);
3-4. 게시물에 Link 달기
- 각 게시물로 넘어갈 수 있도록 blog page에 Link를 달아줍니다.
// pages/blog/index.tsx
import React from "react";
import Layout from "../../components/Layout";
import Seo from "../../components/Seo";
import { Link, PageProps, graphql } from "gatsby";

export default function Blog({ data }: PageProps<Queries.BlogTitlesQuery>) {
  return (
    <Layout title="Blog">
      {data.allMdx.nodes.map((node) => (
        <article key={node.id}>
          <Link to={`/blog/${node.frontmatter?.slug}`}>
            {node.frontmatter?.title}
          </Link>
          <p>
            Posted: {node.frontmatter?.date} | {node.frontmatter?.category}
          </p>
          <p>{node.excerpt}</p>
          <hr />
        </article>
      ))}
    </Layout>
  );
}

export const query = graphql`
  query BlogTitles {
    allMdx {
      nodes {
        frontmatter {
          date(formatString: "YYYY-MM-DD")
          title
          category
          slug
        }
        body
        id
        excerpt
      }
    }
  }
`;

export const Head = () => <Seo title="Blog" />;
✨결과
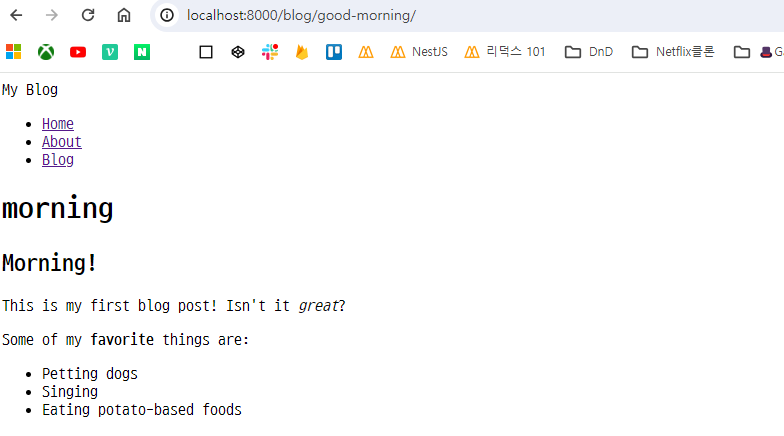
게시물의 제목을 클릭하면 포스팅 페이지로 이동된다.
참고문서
[gatsby] docs - 튜토리얼 part4
[gatsby] docs - 튜토리얼 part5
[gatsby] docs - 튜토리얼 part6