지금까지 배운것으로 뭐라도 만들어보자.
지금까지 혼자서 학습한 내용들을 토대로 뭐라도 만들어 보고 싶은 마음이 생겼다.
Flutter를 통해서 사용자들에게 대단한 기능을 제공하거나 디자인적으로 화려한 앱을 만들고 싶지만 나는 아직 그만한 실력을 갖추지 못했다. 하지만 그 동안 학습한 몇가지 위젯들을 가지고 뭐라도 만들어 보고 싶은 마음이 생겼다.
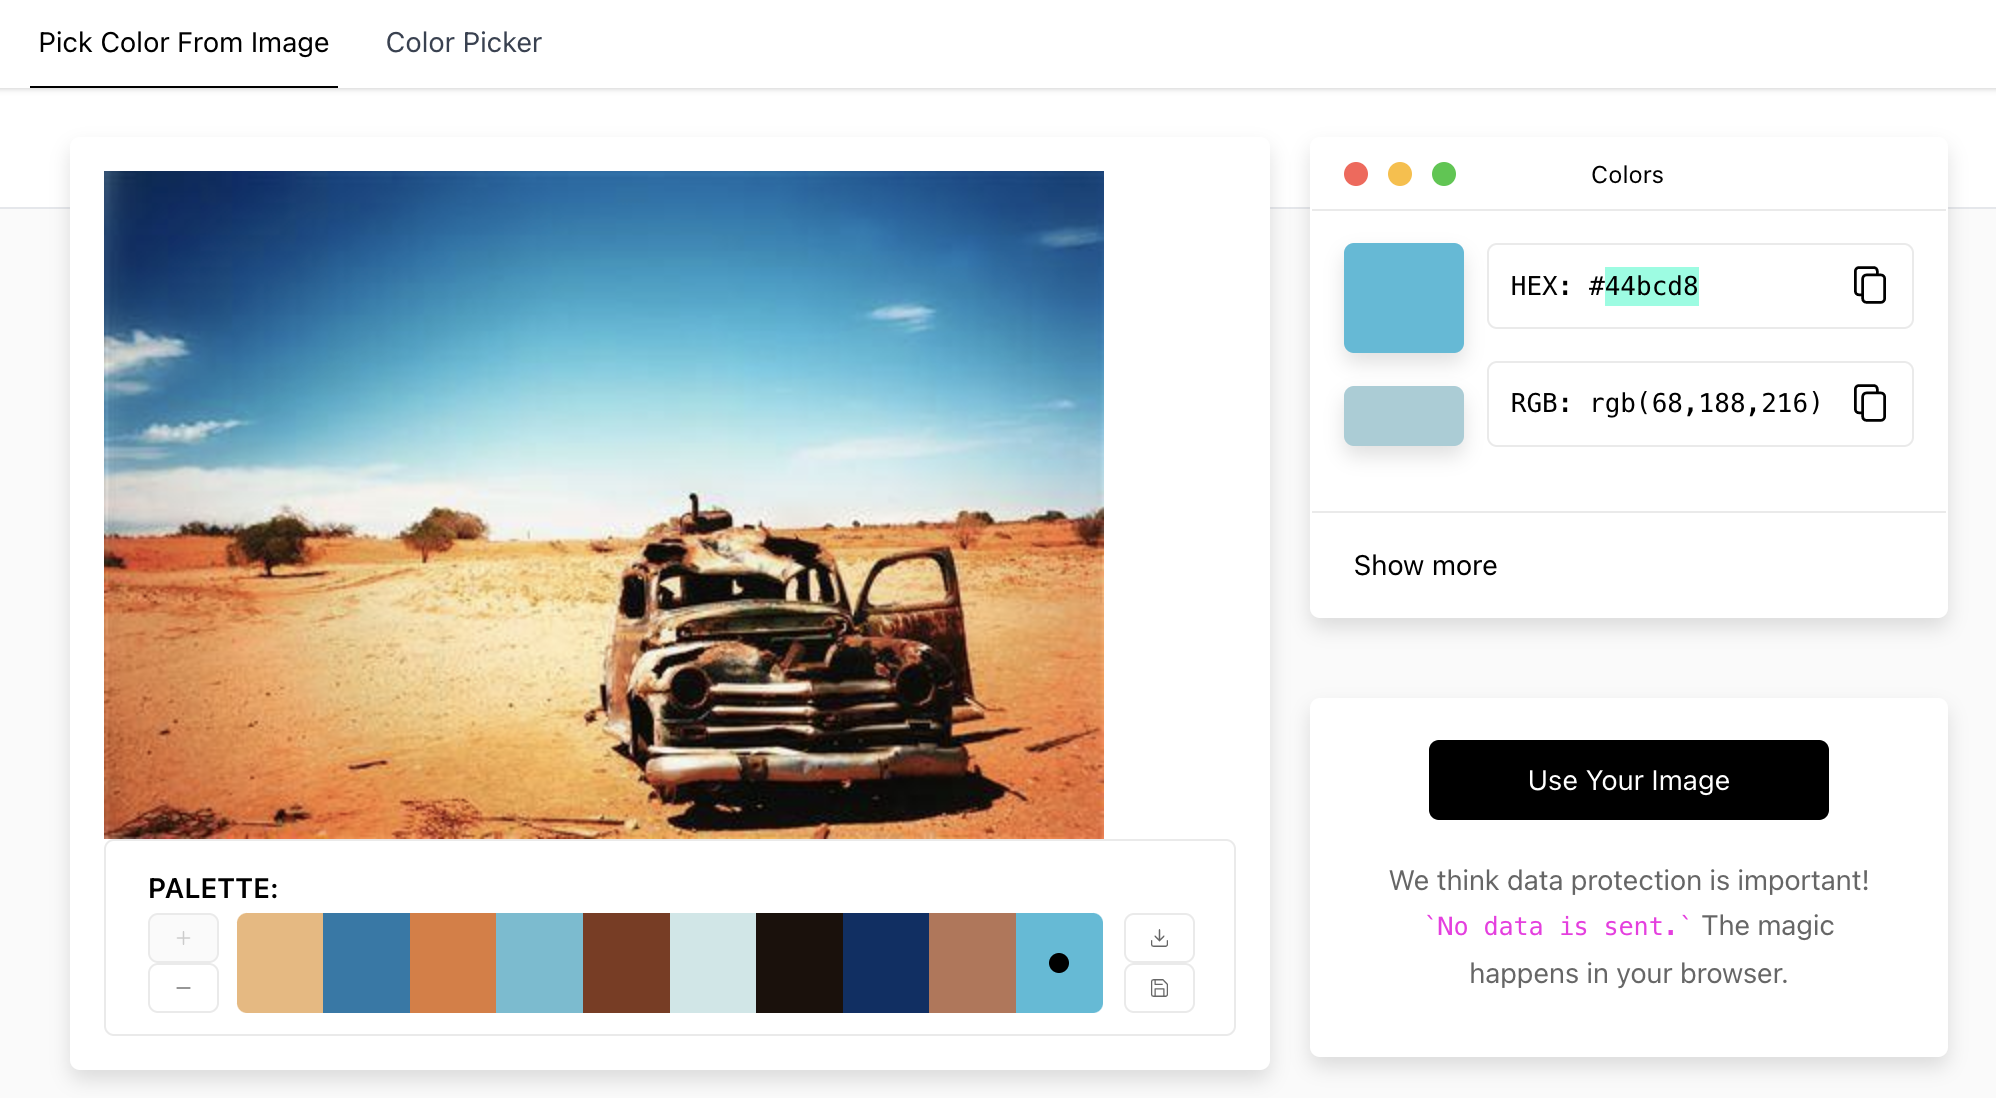
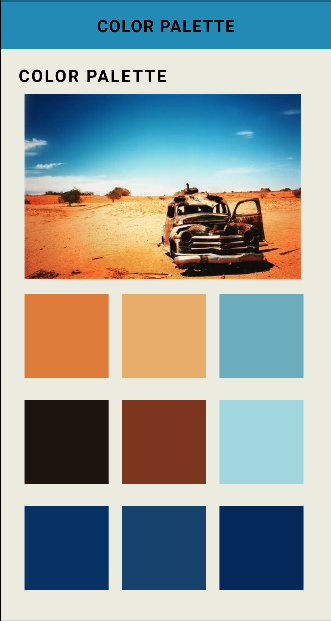
위의 사이트는 사용자가 특정 이미지를 업로드 하였을 때 이미지에서 보여지는 색상(Colors)들을 조색판(Palette)에 담아 사용자로 하여금 쉽게 색상에 대한 정보를 확인할 수 있도록 서비스를 제공하는 사이트이다. 이미지에서 확인이 가능한 색상의 HEX, RGB, CMYK 등의 값들을 쉽게 확인할 수 있다. 내가 만든 앱 페이지가 이러한 기능을 제공하진 않지만 지금까지 정리한 Column(), Row(), Container() 등의 위젯들을 통해 시각적으로 비슷한 느낌의 앱 페이지를 만들어 보고 싶었다.
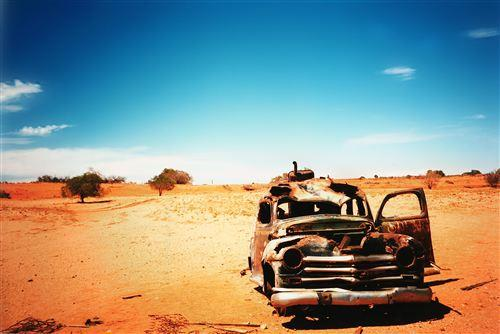
우선 제일 먼저사이트에서 이미지 사진을 다운로드 받아 플러터 프로젝트 내에 images 디렉토리 경로를 생성한 뒤 이미지 파일을 옮겨주고 pubspec.yaml 파일을 수정하고 pug get을 통해 플러터 프로젝트로 패키지들을 가져온다.
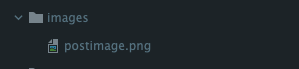
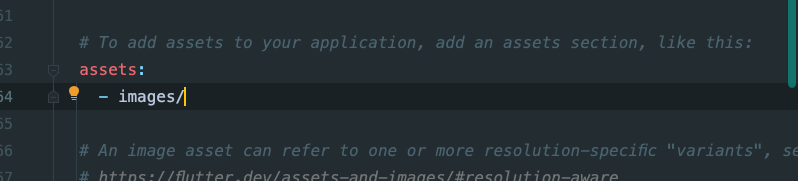
assets에 images 디렉토리 자체를 추가하였고 인덴트(들여쓰기)에 주의하자.
아래는 그 결과와 코드이며 지금까지 학습한 내용들을 간단히 한번 정리해보자.

import 'package:flutter/material.dart';
void main() => runApp(const MyApp());
class MyApp extends StatelessWidget {
const MyApp({Key? key}) : super(key: key);
Widget build(BuildContext context) {
return const MaterialApp(
title: 'Color Palette',
home: HomePage(),
debugShowCheckedModeBanner: false,
);
}
}
class HomePage extends StatelessWidget {
const HomePage({Key? key}) : super(key: key);
Widget build(BuildContext context) {
return Scaffold(
backgroundColor: const Color(0xffeeeee4),
appBar: AppBar(
title: const Text(
'COLOR PALETTE',
style: TextStyle(
color: Colors.black,
fontWeight: FontWeight.bold,
letterSpacing: 1.0),
),
backgroundColor: const Color(0xFF2596BE),
centerTitle: true,
elevation: 0.0,
),
body: Padding(
padding: const EdgeInsets.all(20.0),
child: Column(
crossAxisAlignment: CrossAxisAlignment.start,
children: [
Text(
'COLOR PALETTE',
style: TextStyle(
color: Colors.black,
letterSpacing: 2.0,
fontSize: 20.0,
fontWeight: FontWeight.bold,
),
),
SizedBox(
height: 10.0,
),
Container(
width: 345,
height: 220,
decoration: const BoxDecoration(
image: DecorationImage(
image: AssetImage('images/postimage.png'),
),
),
),
SizedBox(
height: 10.0,
),
Row(
children: [
Container(
height: 100,
width: 100,
color: const Color(0xffe28743),
margin: EdgeInsets.all(8.0),
),
Container(
height: 100,
width: 100,
color: const Color(0xffeab676),
margin: EdgeInsets.all(8.0),
),
Container(
height: 100,
width: 100,
color: const Color(0xff76b5c5),
margin: EdgeInsets.all(8.0),
),
],
),
SizedBox(
height: 10.0,
),
Row(
children: [
Container(
height: 100,
width: 100,
color: const Color(0xff21130d),
margin: EdgeInsets.all(8.0),
),
Container(
height: 100,
width: 100,
color: const Color(0xff873e23),
margin: EdgeInsets.all(8.0),
),
Container(
height: 100,
width: 100,
color: const Color(0xffabdbe3),
margin: EdgeInsets.all(8.0),
),
],
),
SizedBox(
height: 10.0,
),
Row(
children: [
Container(
height: 100,
width: 100,
color: const Color(0xff063970),
margin: EdgeInsets.all(8.0),
),
Container(
height: 100,
width: 100,
color: const Color(0xff154c79),
margin: EdgeInsets.all(8.0),
),
Container(
height: 100,
width: 100,
color: const Color(0xff042f66),
margin: EdgeInsets.all(8.0),
),
],
),
],
),
),
);
}
}
1. Flutter 앱을 만들기 전 기본 코드 작성하기.
import 'package:flutter/material.dart';
void main() => runApp(const MyApp());
class MyApp extends StatelessWidget {
const MyApp({Key? key}) : super(key: key);
Widget build(BuildContext context) {
return const MaterialApp(
title: 'Color Palette',
home: HomePage(),
debugShowCheckedModeBanner: false,
);
}
}import 'package:flutter/material.dart';
Flutter를 통해 앱을 개발하기 앞서 위의 코드를 통해 Flutter Material 라이브러리를 import한다.
이를 통해서 Flutter 프레임워크 즉, SDK에 포함된 모든 기본 위젯과 Material 디자인 테마 요소를 사용할 수 있게 된다.
void main() => runApp(const MyApp());
Flutter를 통해 앱을 개발할 때 이용되는 프로그래밍 언어는 Dart 언어이며 이를 통해 프로그램을 작성하려면 main()이라는 함수를 필수적으로 정의해야 한다. main() 함수는 프로그램이 시작하는 위치 즉, 프로그램의 "시작점", "진입점", "entry point" 라고 이해할 수 있다. 컴파일러가 우리가 작성한 코드를 컴퓨터가 이해할 수 있는 언어로 바꾸는 작업을 할 때 가장 먼저 참조되는 main() 함수.
runApp(const MyApp());
runApp() 함수는 플러터에서 최상위에 위치하는 함수로 처음 한번 호출되며 MyApp() 이라는 커스텀 위젯을 아규먼트로 전달 받도록 작성하였다. 또한 MyApp() 함수 안에는 MaterialApp() 위젯이 있어 사전에 import한 Flutter Material 라이브러리를 사용할 수 있는 초석을 제공하며 플러터 프레임워크가 제공하는 모든 기본 위젯과 디자인 테마를 본격적으로 사용할 수 있도록 한다.
MaterialApp()
간단하게 title 아규먼트를 통해 안드로이드의 최근 사용한 앱 목록에 보여지는 텍스트를 작성하였고 home 아규먼트에 HomePage() 라는 커스텀 위젯을 전달받도록하여 앱이 정상적으로 실행되었을 때 가장 먼저 화면에 로드 될 수 있도록 정의하였다. debugShowCheckedModeBaanner 아규먼트의 경우 boolean 값으로 정의되며 true 일 경우에는 오른쪽 상단 모서리에 Debug 배너가 생기지만 값이 false인 경우에는 Debug 배너가 숨겨지게 된다.
https://api.flutter.dev/flutter/material/MaterialApp/debugShowCheckedModeBanner.html

기본적으로 디버그 모드에서 debugShowCheckedModeBanner의 값은 true로 위의 사진에서와 같이 오른쪽 모서리 상단에 Debug 배너가 나타나도록 되어있다. 릴리스 모드에서는 아무런 효과가 없지만 앱을 작성하는 과정에서 별도로 false 값을 지정해주지 않는다면 위와 같이 표시가 나타나도록 되어있다. 꼴보기 싫어서 false 로 값을 적용하여 표시되지 않도록 하였다.
2. Flutter 앱을 만들기 전 기본 코드 작성하기.
class HomePage extends StatelessWidget {
const HomePage({Key? key}) : super(key: key);
Widget build(BuildContext context) {
return Scaffold(
backgroundColor: const Color(0xffeeeee4),
appBar: AppBar(
title: const Text(
'COLOR PALETTE',
style: TextStyle(
color: Colors.black,
fontWeight: FontWeight.bold,
letterSpacing: 1.0),
),
backgroundColor: const Color(0xFF2596BE),
centerTitle: true,
elevation: 0.0,
),
body: Padding(
padding: const EdgeInsets.all(20.0),
child: Column(
crossAxisAlignment: CrossAxisAlignment.start,
children: [
Text(
'COLOR PALETTE',
style: TextStyle(
color: Colors.black,
letterSpacing: 2.0,
fontSize: 20.0,
fontWeight: FontWeight.bold,
),
),
SizedBox(
height: 10.0,
),
Container(
width: 345,
height: 220,
decoration: const BoxDecoration(
image: DecorationImage(
image: AssetImage('images/postimage.png'),
),
),
),
SizedBox(
height: 10.0,
),
Row(
children: [
Container(
height: 100,
width: 100,
color: const Color(0xffe28743),
margin: EdgeInsets.all(8.0),
),
Container(
height: 100,
width: 100,
color: const Color(0xffeab676),
margin: EdgeInsets.all(8.0),
),
Container(
height: 100,
width: 100,
color: const Color(0xff76b5c5),
margin: EdgeInsets.all(8.0),
),
],
),
SizedBox(
height: 10.0,
),
Row(
children: [
Container(
height: 100,
width: 100,
color: const Color(0xff21130d),
margin: EdgeInsets.all(8.0),
),
Container(
height: 100,
width: 100,
color: const Color(0xff873e23),
margin: EdgeInsets.all(8.0),
),
Container(
height: 100,
width: 100,
color: const Color(0xffabdbe3),
margin: EdgeInsets.all(8.0),
),
],
),
SizedBox(
height: 10.0,
),
Row(
children: [
Container(
height: 100,
width: 100,
color: const Color(0xff063970),
margin: EdgeInsets.all(8.0),
),
Container(
height: 100,
width: 100,
color: const Color(0xff154c79),
margin: EdgeInsets.all(8.0),
),
Container(
height: 100,
width: 100,
color: const Color(0xff042f66),
margin: EdgeInsets.all(8.0),
),
],
),
],
),
),
);
}
}Stateless Widget? Stateful Widget?
HomePage() 위젯이라는 커스텀 위젯을 정의하기 앞서 사전에 Stateless Widget으로 위젯을 생성할 것인지 Stateful Widget으로 생성할 것인지 생각해 보아야 한다. StatelessWidget의 경우 어떠한 실시간 데이터도 저장하지 않으며 모양이나 상태를 변화시키거나 유발시키는 Value 값을 가지지 않으며 상태가 없는 정적인 위젯이고 StatefulWidget은 사용자의 상호 작용(interaction)에 따라서 모양이나 상태가 변하거나 바뀌는 위젯을 말한다. 나는 간단히 시각적으로 한번 그려낼 뿐 상태가 변하는 앱 페이지를 생성하지 않고 간단하게 앱 페이지를 만들어보기 위함이였기 때문에 간단히 Stateless Widget 의 형태로 커스텀 위젯을 생성했다.
Scaffold()
Scaffold() 위젯은 내가 작성한 위젯들이 앱 화면상에 그려지기 위해 기본적인 토대를 제공한다.
backgroundColor: const Color(0xffeeeee4),
Scaffold() 위젯 영역의 백그라운드 컬러를 Color 클래스를 통해서 정의한 구문이다.
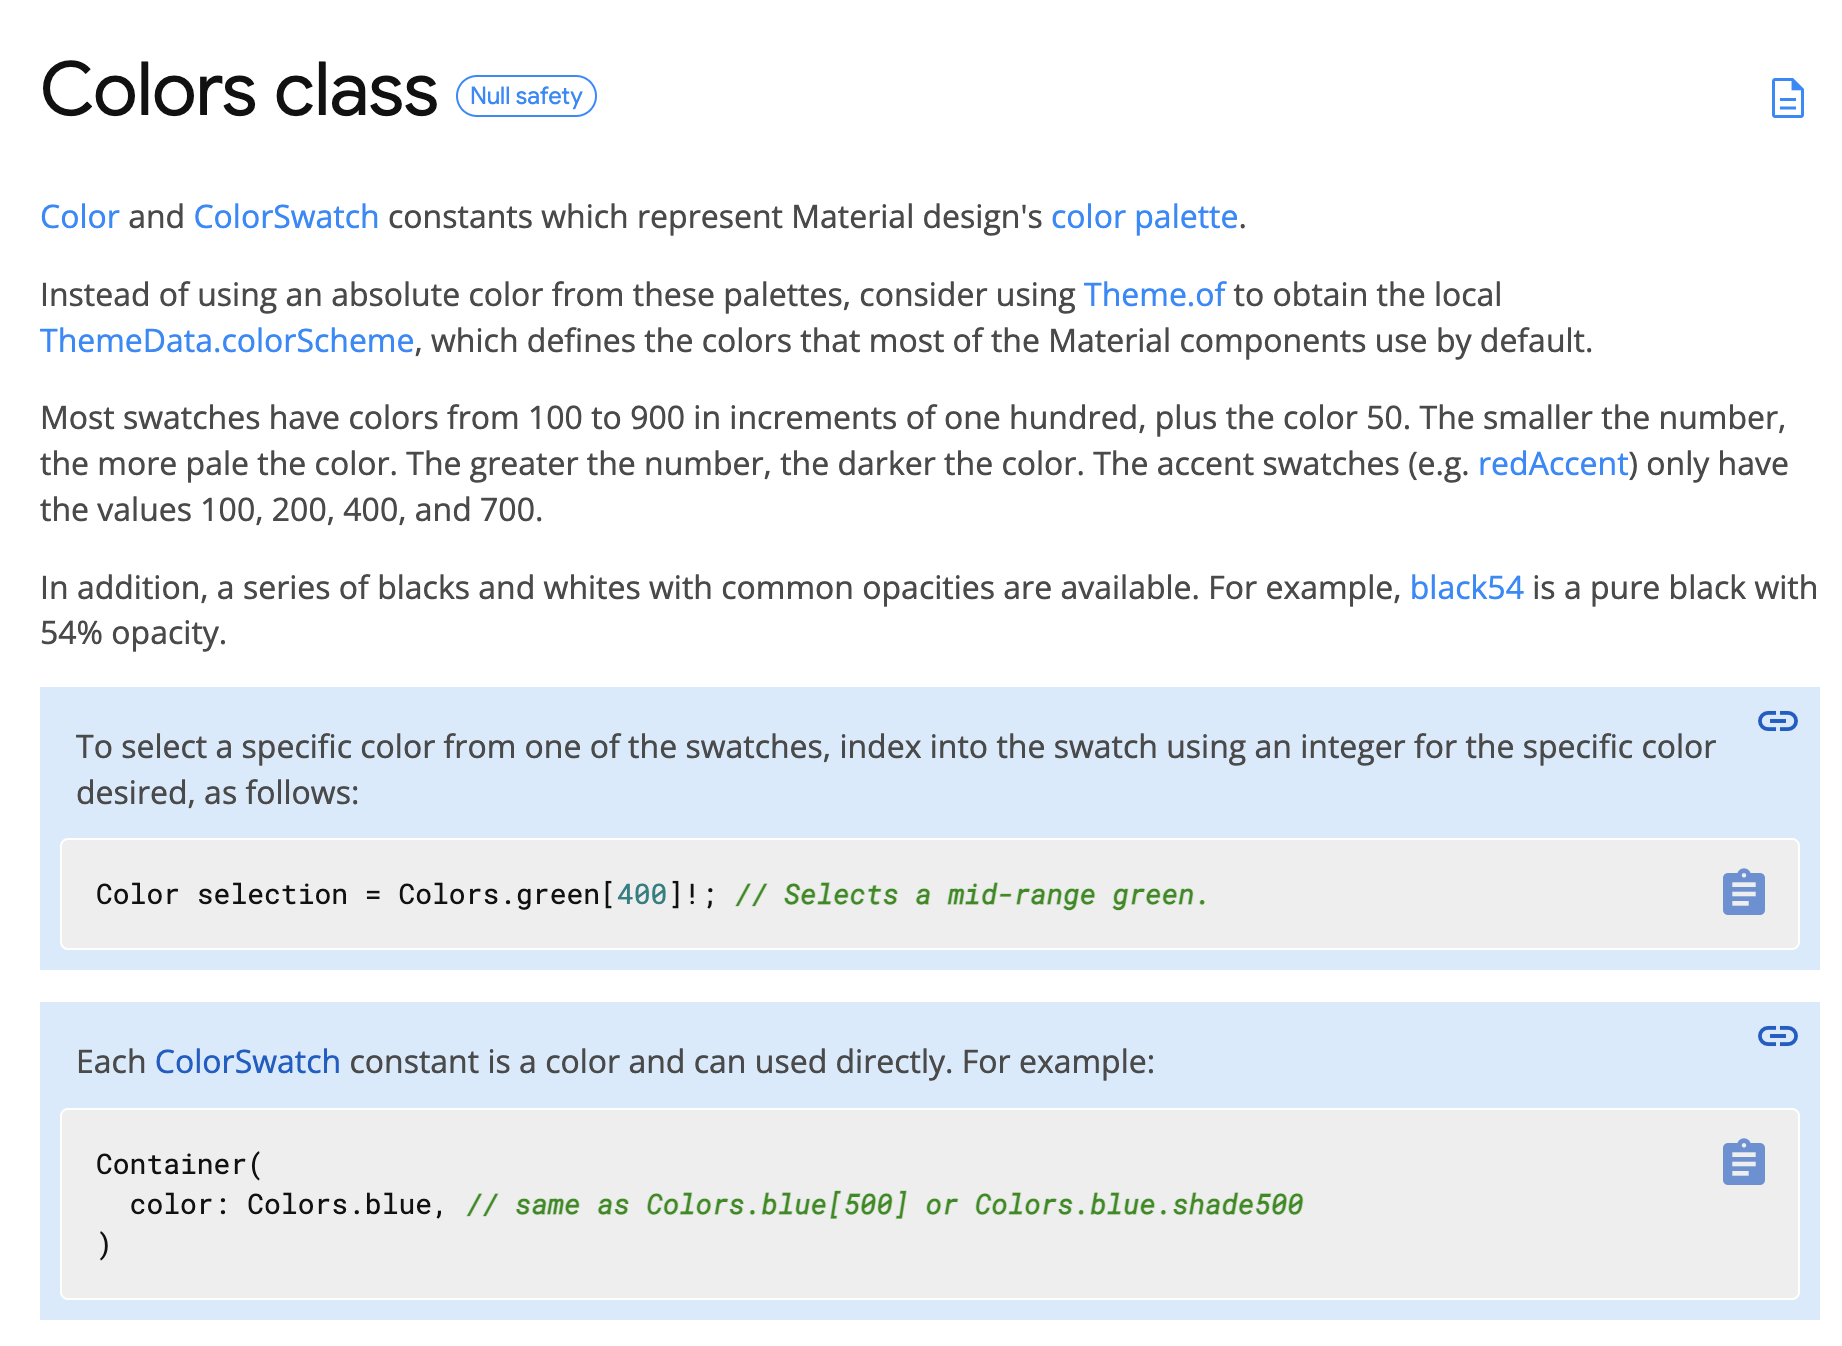
Color 클래스의 경우 내가 원하는 색상을 Hex, ARGB, RGBO 등의 값으로 지정하여 사용할 수 있다.

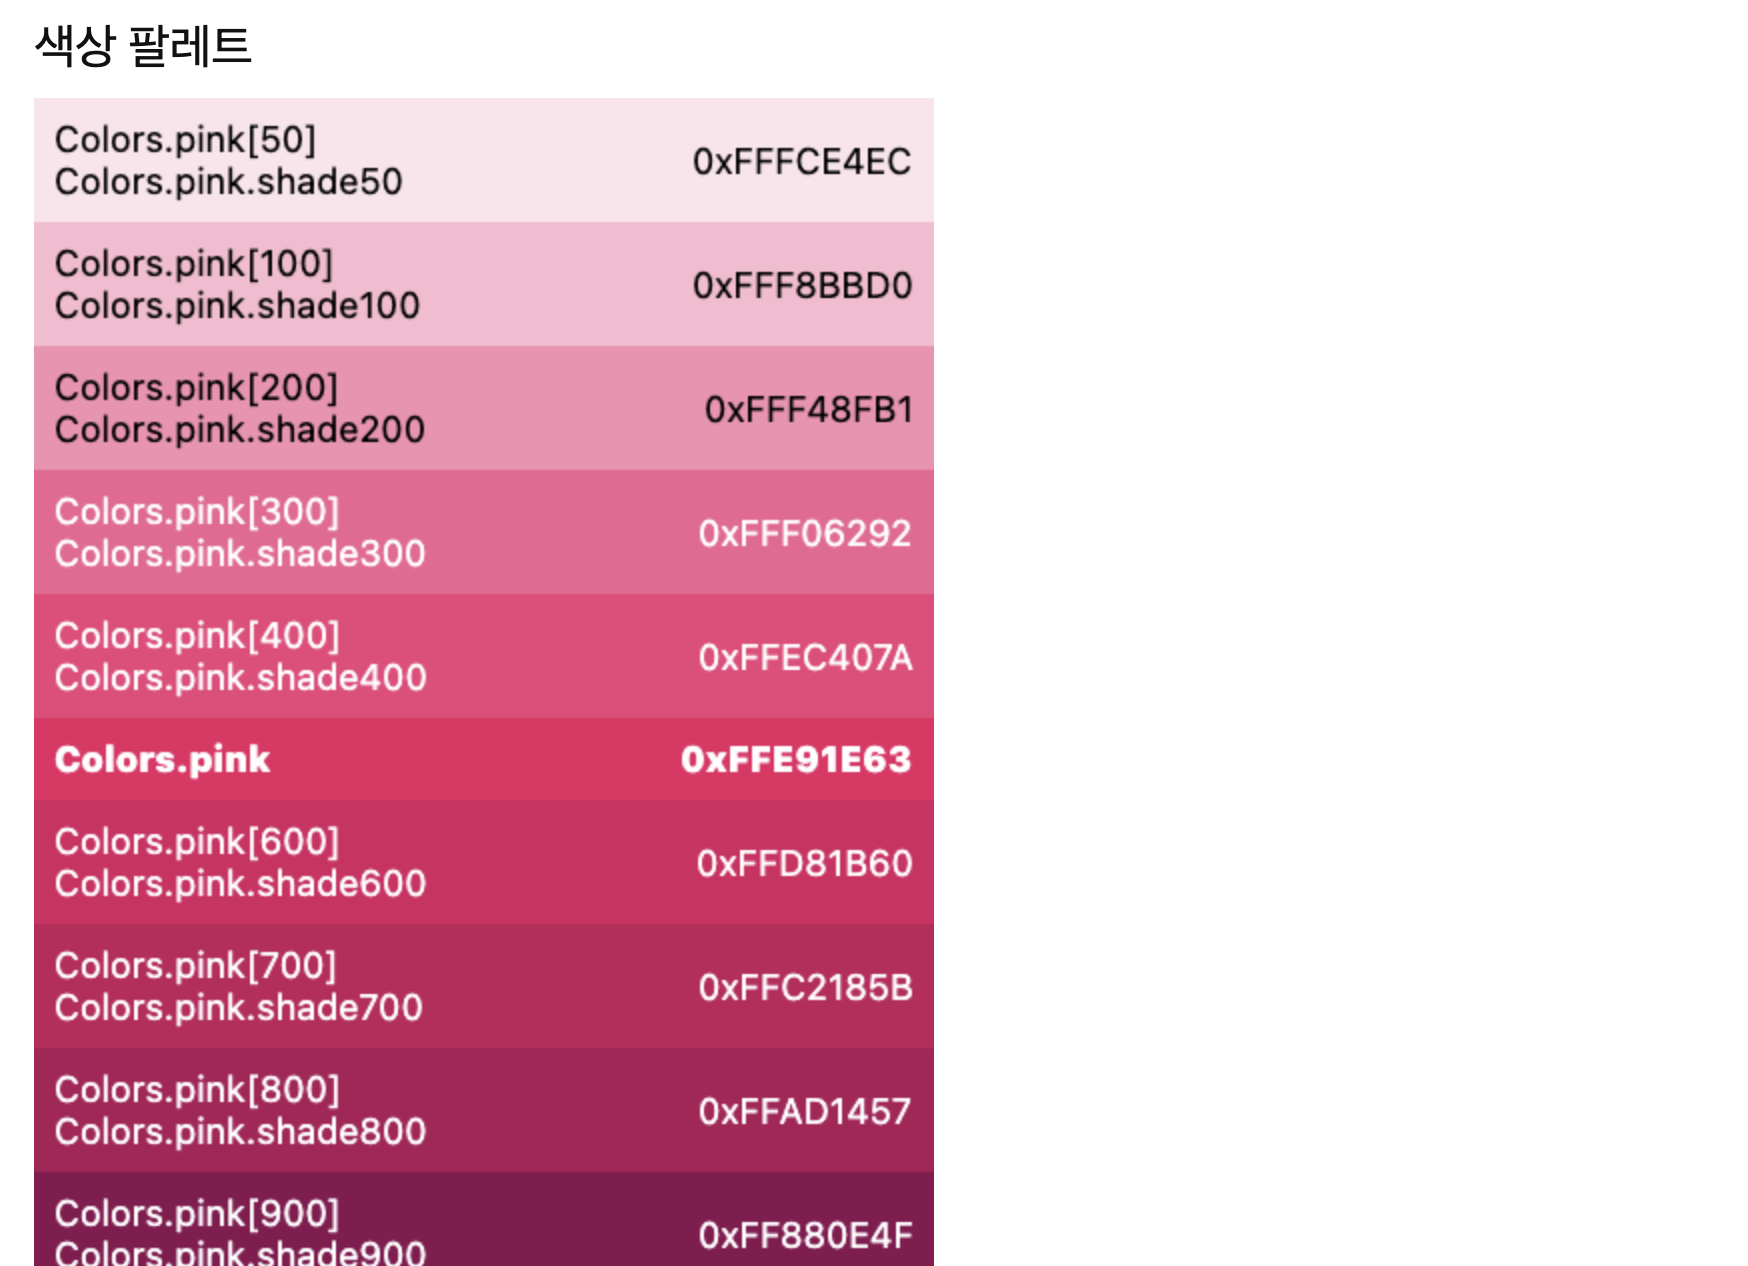
Colors 클래스의 경우 Material 디자인을 통해서 준비된 Color palette를 통해서 구현된 색상 견본을 지정하여 사용할 때 이용한다.
AppBar()
앱의 상단에 위치하는 Bar를 구성하는 위젯으로 간단히 Text() 위젯을 이용하여 타이틀을 지정해주었고 TextStyle()을 통해서 텍스트의 컬러, 텍스트의 굵기, 자간 등을 지정하여 변화를 주었다.
3. 이외에 지난 시간 학습했던 Padding(), Column(), Container(), SziedBox() 등의 위젯등을 적절히 배치하기
body: Padding(
        padding: const EdgeInsets.all(20.0),
        child: Column(
          crossAxisAlignment: CrossAxisAlignment.start,
          children: [
            Text(
              'COLOR PALETTE',
              style: TextStyle(
                color: Colors.black,
                letterSpacing: 2.0,
                fontSize: 20.0,
                fontWeight: FontWeight.bold,
              ),
            ),
            SizedBox(
              height: 10.0,
            ),
            Container(
              width: 345,
              height: 220,
              decoration: const BoxDecoration(
                image: DecorationImage(
                  image: AssetImage('images/postimage.png'),
                ), // 컨테이너 위젯에 이미지 삽입
              ),
            ),
            SizedBox(
              height: 10.0,
            ), // SizedBox() 위젯은 Row, Column에서 widget 사이에 빈 공간을 넣기 위해 사용
            Row(
              children: [
                Container(
                  height: 100,
                  width: 100,
                  color: const Color(0xffe28743),
                  margin: EdgeInsets.all(8.0),
                ),
                Container(
                  height: 100,
                  width: 100,
                  color: const Color(0xffeab676),
                  margin: EdgeInsets.all(8.0),
                ),
                Container(
                  height: 100,
                  width: 100,
                  color: const Color(0xff76b5c5),
                  margin: EdgeInsets.all(8.0),
                ),
              ],
            ),
            SizedBox(
              height: 10.0,
            ),
            Row(
              children: [
                Container(
                  height: 100,
                  width: 100,
                  color: const Color(0xff21130d),
                  margin: EdgeInsets.all(8.0),
                ),
                Container(
                  height: 100,
                  width: 100,
                  color: const Color(0xff873e23),
                  margin: EdgeInsets.all(8.0),
                ),
                Container(
                  height: 100,
                  width: 100,
                  color: const Color(0xffabdbe3),
                  margin: EdgeInsets.all(8.0),
                ),
              ],
            ),
            SizedBox(
              height: 10.0,
            ),
            Row(
              children: [
                Container(
                  height: 100,
                  width: 100,
                  color: const Color(0xff063970),
                  margin: EdgeInsets.all(8.0),
                ),
                Container(
                  height: 100,
                  width: 100,
                  color: const Color(0xff154c79),
                  margin: EdgeInsets.all(8.0),
                ),
                Container(
                  height: 100,
                  width: 100,
                  color: const Color(0xff042f66),
                  margin: EdgeInsets.all(8.0),
                ),
              ],
            ),
          ],
        ),
      ),
    );
  }
}
아직 많이 부족하지만 그래도 뭔가 만들어본 것 같은 뿌듯함이 든다.