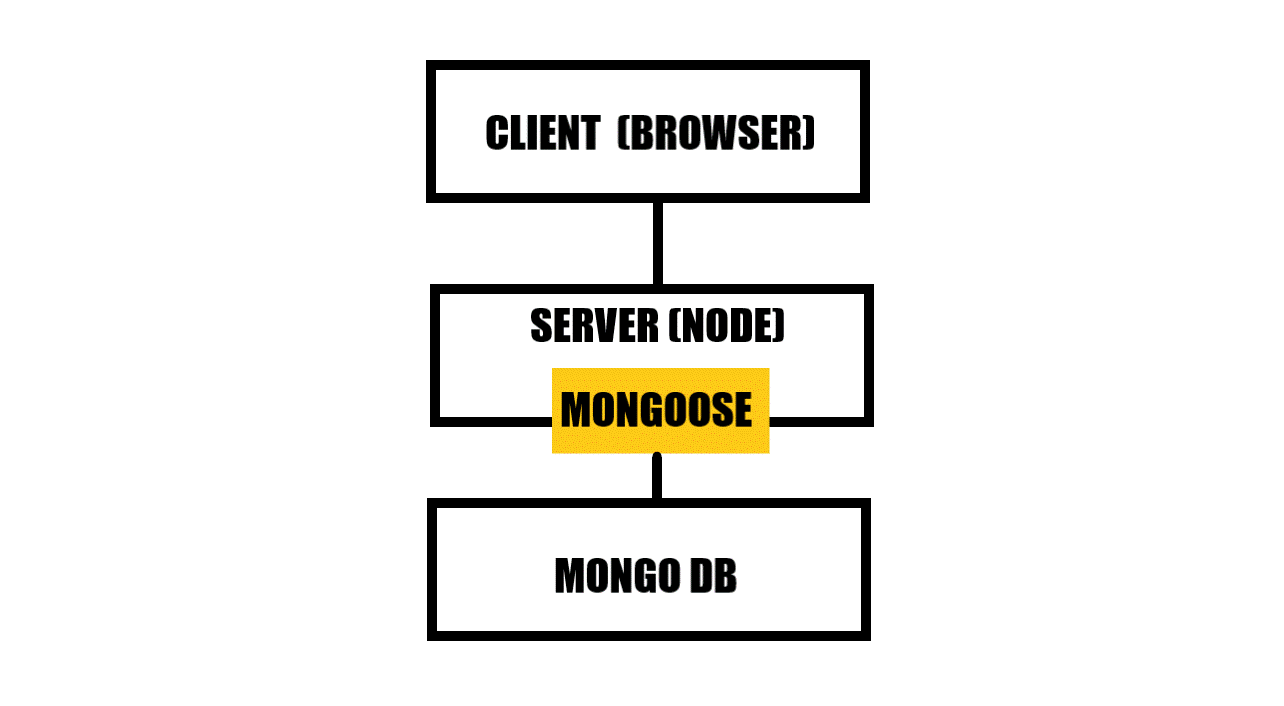
Mongoose는 Node.js와 MongoDB를 연결해 주는 역할을 한다. Node.js에서 MongoDB를 사용할 수 있게 해주는 라이브러리이다.
노드 패키지 매니저 npm 또는 yarn을 사용해서 설치할 수 있다.npm install mongoose --save yarn add mongoose // -- save로 packge.json에 저장한다.디렉토리 구조
nodeJs
├── models/
│   └── <filename>.js // schema작성
├── routes/
│   └── <filename>.js
├── app.js
└── pakage.json
mongoDB와 연결해주기
mongoose 모듈을 require 하고 connect method로 MongoDB에 연결한다. connect 인자로 두 개가 들어가는데 첫 번째 인자는 mongodb://localhost/<db-name> 가 들어가고 두 번째 인자로 {useNewUrlParser: true}를 적지 않으면 deprecatedError 가 발생한다.
app.js에서 작성한다.
const mongoose = require('mongoose');
mongoose.connect('mongodb://localhost/test', {useNewUrlParser: true});
Schema & Model
Schema
MongoDB는 NoSQL 비 관계형 데이터베이스 특성상 컬렉션에 들어갈 수 있는 데이터에 제약이 없다. 하지만 데이터를 조회할 때 조건을 명시하기 어렵기 때문에 스키마(Schema)를 만들고, 그 스키마(Schema)에 따라 문서 객체를 저장한다. 스키마(Schema)는 document의 구조가 어떤 방식으로 들어와야 하는지 알려주는 역할을 한다.
스키마(Schema)에서 사용되는 SchemaType은 String, Number, Date, Buffer, Boolean, Mixed, ObjectId, Array, Decimal128,Map 의 종류가 있다.
- 참고: SchemaType
model
model은 데이터베이스에서 데이터를 읽고, 생성하고, 수정하는프로그래밍 인터페이스를 정의한다.
mongoose.model(<collection name> , <shema>);
schema는 models/<filename>.js 에 작성한다.
아래와 같이 들어와야할 데이터의 형태를 정한다.
// <shemaname> = Strawberry
const mongoose = require('mongoose');
const Schema = mongoose.Schema;

const StrawberrySchema = new Schema({
  name: String,
  age: Number,
  weight: Number
})

/*
const StrawberrySchema = new mongoose.Schema({
  name: String,
  age: Number,
  weight: Number
});
*/

module.exports = mongoose.model('Strawberry', StrawberrySchema);
save()
const Strawberry = require('파일경로'); // 스키마에서 작성했던 모델을 가져온다.

async function create (req, res, next) {
  await new Strawberry(<저장할 데이터>).save().then(function(db){
    console.log(db) // 저장한 데이터
  })
}

/* 아래는 바닐라 코딩 과제중 작성한 코드 일부분이다.
exports.create = async function (req, res, next) {
  await new Article(req.body).save().then(function (db) {
    res.status(201)
    res.send({
      result: 'ok',
      article: db
    })
  });
};
*/
update()
여러 가지 method 중 findOneAndUpdate를 사용해서 update를 구현하였다.
findOneAndUpdate는 첫 번째 인자로 {_id: <삭제할 데이터 id>와 두 번째 인자로 <update할 데이터>를 인자로 주고 세 번째 인자로 콜백 함수를 실행한다.
const Strawberry = require('파일경로');

function update () {
   Strawberry.findOneAndUpdate({_id: <삭제할 데이터 id> , <update할 데이터>, function(err,db){
     if err throw err;
     console.log(db) // update한 데이터
   })
}

/* 아래는 바닐라 코딩 과제중 작성한 코드 일부분이다.
exports.update = async function (req, res, next) {
  Article.findOneAndUpdate({ _id: req.params.article_id }, req.body, function (err, db) {
    if (err) {
      res.status(400);
      res.send({ error: 'invalid article id' })
    } else {
      res.status(200);
      res.send({
        result: 'ok',
        article: db
      })
    }
  })
};
*/
remove()
여러 가지 method 중 findByIdAndRemove()를 사용해서 데이터 삭제를 구현하였다. findByIdAndRemove는 <삭제할 데이터 id>만 넣어주면 된다. 두 번째 인자로콜백 함수를 실행한다.
const Strawberry = require('파일경로');

function funtion delete (req, res, next) {
  Strawberry.findByIdAndRemove(<삭제할 데이터 id>, function (err) {
    if(err) throw err;
  }
}


/* 아래는 바닐라 코딩 과제중 작성한 코드 일부분이다.
exports.delete = async function (req, res, next) {
  Article.findByIdAndRemove(req.params.article_id, function (err) {
    if (err) {
      res.status(400)
      res.send({
        error: 'invalid article id'
      })
    } else {
      res.status(200)
      res.send({
        result: 'ok'
      })
    }
  })
};
*/