이번에는 네이버 로그인을 추가해 보자.
1. 네이버 API 등록하기
먼저 네이터 오픈 API로 이동하자.
https://developers.naver.com/apps/#/register?api=nvlogin
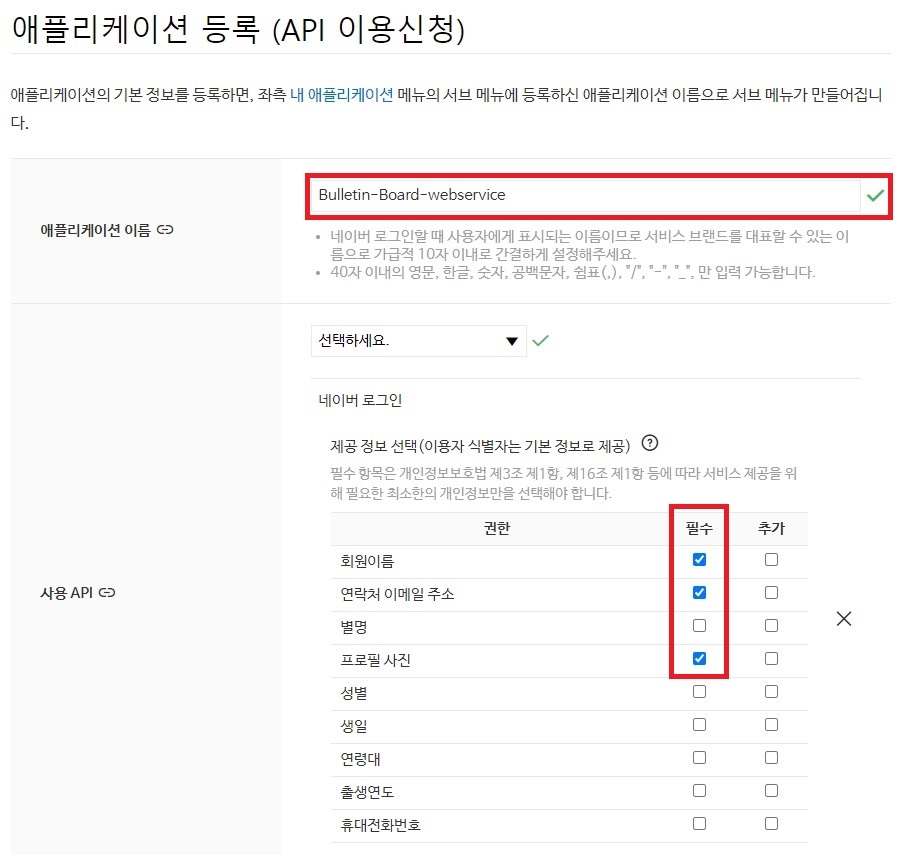
API 이용 신청을 위해서 아래의 사진과 같이 각 항목을 채워야 한다. 회원 이름, 이메일, 프로필 사진을 필수로 신청한다. 필요하다면 추가 정보를 선택하면 된다.
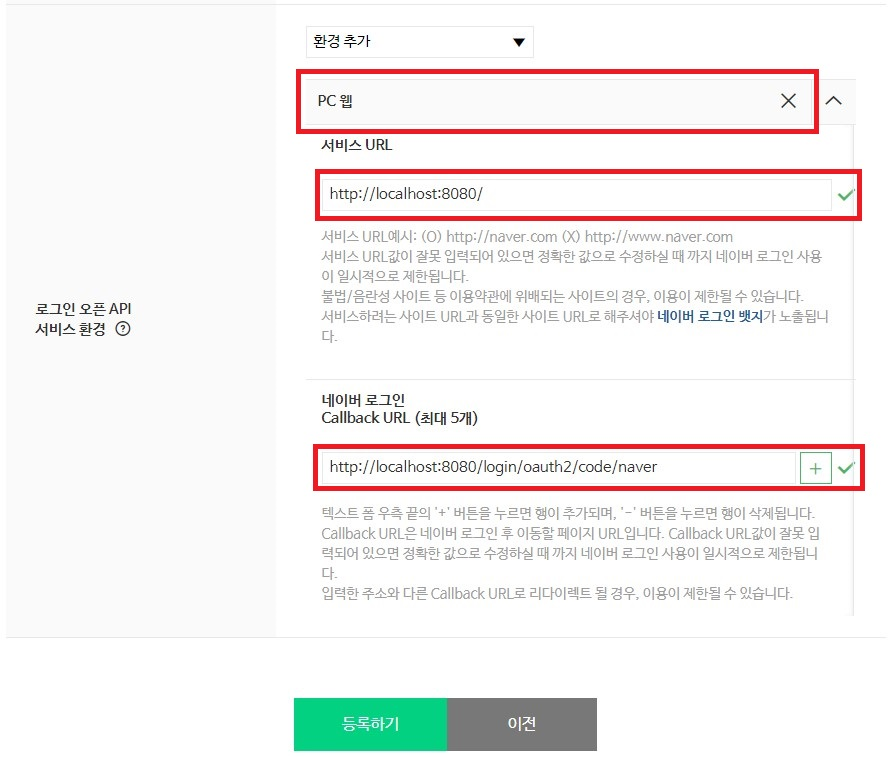
서비스 URL을 필수로 작성해야 한다. 아직 개발 단계이므로, localhost:8080으로 등록한다. 만약 AWS에 배포한 경우라면 AWS 주소를 추가해야 한다.
Callback URL은 구글에서 등록한 리디렉션 URL과 동일한 역할을 한다. 네이버는 /login/oauth2/code/naver로 등록한다.
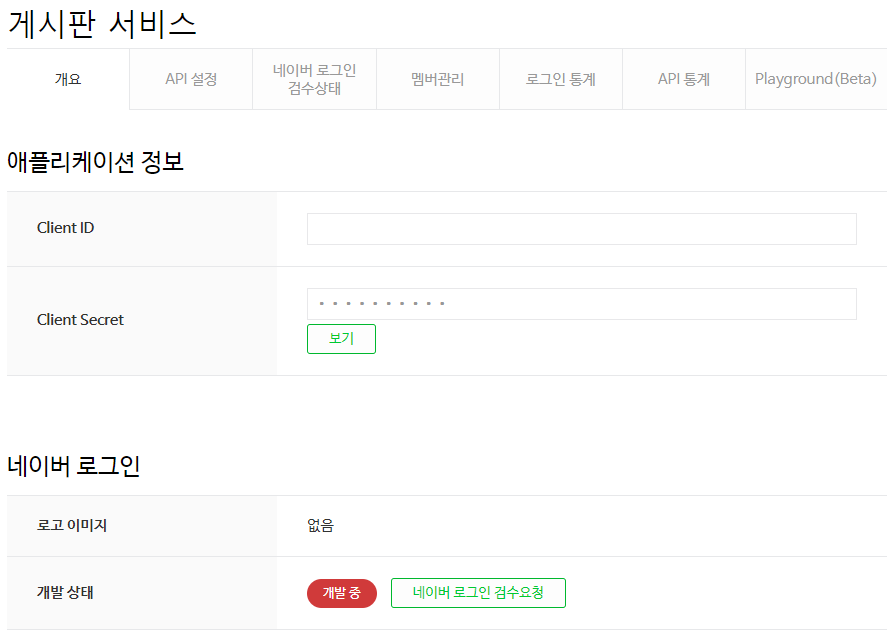
등록이 완료되면 아래와 같이 Client ID와 Client Secret이 생성된다.
2. application-oauth.yml에 등록하기
이제 Client ID와 Client Secret을 application-oauth.yml에 등록해야 한다. 네이버는 스프링 시큐리티를 공식 지원하지 않기 때문에 그동안 CommonOAuth2Provider에서 해주던 값들도 전부 수동으로 입력해야 한다.
spring:
  security:
    oauth2:
      client:
        registration:
          # 구글 로그인 추가
          google:
            client-id: [Client Id]
            client-secret: [Client Secret]
            scope:
              - email
              - profile
          # 네이버 로그인 추가
          naver:
            client-id: [Client Id]
            client-secret: [Client Secret]
            redirect-uri: "{baseUrl}/{action}/oauth2/code/{registrationId}"
            authorization-grant-type: authorization_code
            scope:
              - name
              - email
              - profile_image
            client-name: Naver

        provider:
          naver:
            authorization-uri: https://nid.naver.com/oauth2.0/authorize
            token-uri: https://nid.naver.com/oauth2.0/token
            user-info-uri: https://openapi.naver.com/v1/nid/me
user-name-attribute: responseuser-name의 이름을 네이버에서는 response로 해야 한다. 그 이유는 네이버의 로그인 회원 조회 시 반환되는 JSON 형태 때문이다.
참고: 네이버 오픈 API의 로그인 회원 결과
{
  "resultcode": "00",
  "message": "success",
  "response": {
    "email": "openapi@naver.com",
    "nickname": "OpenAPI",
    "profile_image": "https://ssl.pstatic.net/static/pwe/address/nodata_33x33.gif",
    "age": "40-49",
    "gender": "F",
    "id": "32742776",
    "name": "오픈 API",
    "birthday": "10-01"
  }
}
스프링 시큐리티에서는 하위 필드를 명시할 수 없기 때문에 최상위 필드들만
user-name으로 지정할 수 있다. 하지만 네이버의 응답 값 최상위 필드는resultcode,message,response이다. 따라서 스프링 시큐리티에서 인식 가능한 필드는 3개 중에서 골라야 한다.
우리는 response의 내부 정보가 필요하므로user_name을response로 지정해야 하고, 이후에 자바 코드로response의id를user_name으로 지정한다.
3. 스프링 시큐리티 설정 등록
구글 로그인을 등록하면서 대부분 코드가 확장성 있게 작성되었으므로, 네이버는 쉽게 등록할 수 있다. OAuthAttributes에 아래와 같이 네이버인지 판단하는 코드와 네이버 생성자만 추가하면 된다.
@Getter
public class OAuthAttributes {
public static OAuthAttributes of(String registrationId,
String userNameAttributeName,
Map<String, Object> attributes) {
// 네이버인지 판단하는 코드 추가
if ("naver".equals(registrationId)) {
return ofNaver("id", attributes); // id를 user_name으로 지정
}
return ofGoogle(userNameAttributeName, attributes);
}
...
// 네이버 생성자 추가
private static OAuthAttributes ofNaver(String usernameAttributeName,
Map<String, Object> attributes) {
Map<String, Object> response = (Map<String, Object>) attributes.get("response");
return OAuthAttributes.builder()
.name((String) response.get("name"))
.email((String) response.get("email"))
.picture((String) response.get("profile_image"))
.attributes(response)
.nameAttributeKey(usernameAttributeName)
.build();
}
...
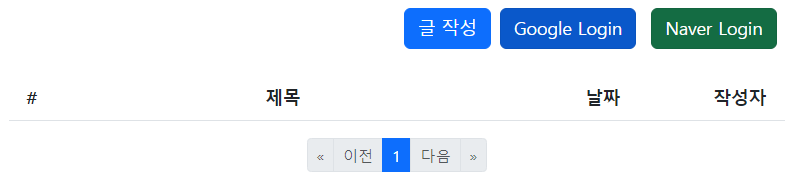
}4. 네이버 로그인 버튼 추가하기
마지막으로 메인 화면에 네이버 로그인 버튼을 추가한다. 링크는 /oauth2/authorization/naver로 설정하면 된다.
<div th:if="!${userName}">
<a th:href="@{/oauth2/authorization/google}" class="btn btn-primary me-2 active" role="button">Google Login</a>
<a th:href="@{/oauth2/authorization/naver}" class="btn btn-success me-2 active" role="button">Naver Login</a>
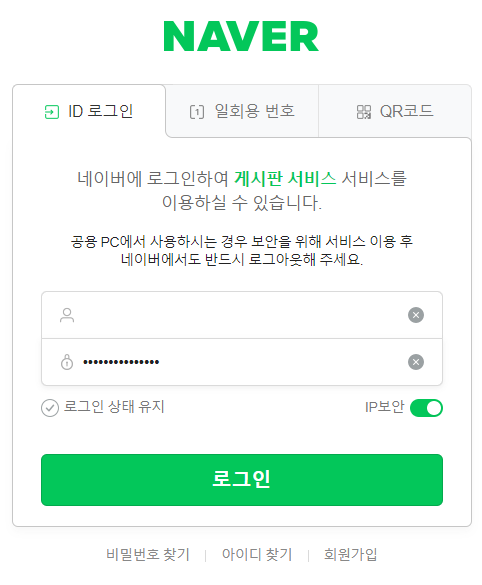
</div>5. 결과 화면
- 로그인 전
- 로그인 화면
- 로그인 후

- DB