- nodeJS 어플리케이션 컨테이너 만들기
- 우분투 기반의 웹 서버 컨테이너 만들기
- 만들어놓은 컨테이너 배포하기
nodeJS 어플리케이션 컨테이너 만들기
- 매우 간단한 nodejs 기반 웹 서버 어플리케이션 코드 작성
const http = require('http');
const os = require('os');
console.log("Test server starting...");

var handler = function(request, response) {
	console.log("Received request from " + request.connection.remoteAddress);
	response.writeHead(200);
	response.end("Container Hostname: " + os.hostname() + "\n");
};

var www = http.createServer(handler);
www.listen(8080);- dockerfile 작성
FROM node:18
COPY hello.js /
CMD ["node", "/hello.js"]- docker 명령어로 컨테이너 실행
docker build -t hellojs:latest .
우분투 기반의 웹 서버 컨테이너 만들기
- [Ubuntu] dockerfile 작성
FROM ubuntu:22.04
LABEL maintainer="Seungmin Ryu <test@gmail.com>"
# install apache
RUN apt-get update \
		&& apt-get install -y apache2
RUN echo "TEST WEB" > /var/www/html/index.html
EXPOSE 80
CMD ["/usr/sbin/apache2ctl", "-DFOREGROUND"]- 웹 서버 컨테이너 실행
docker build -t webserver:v1 .
만들어놓은 컨테이너 image 배포하기
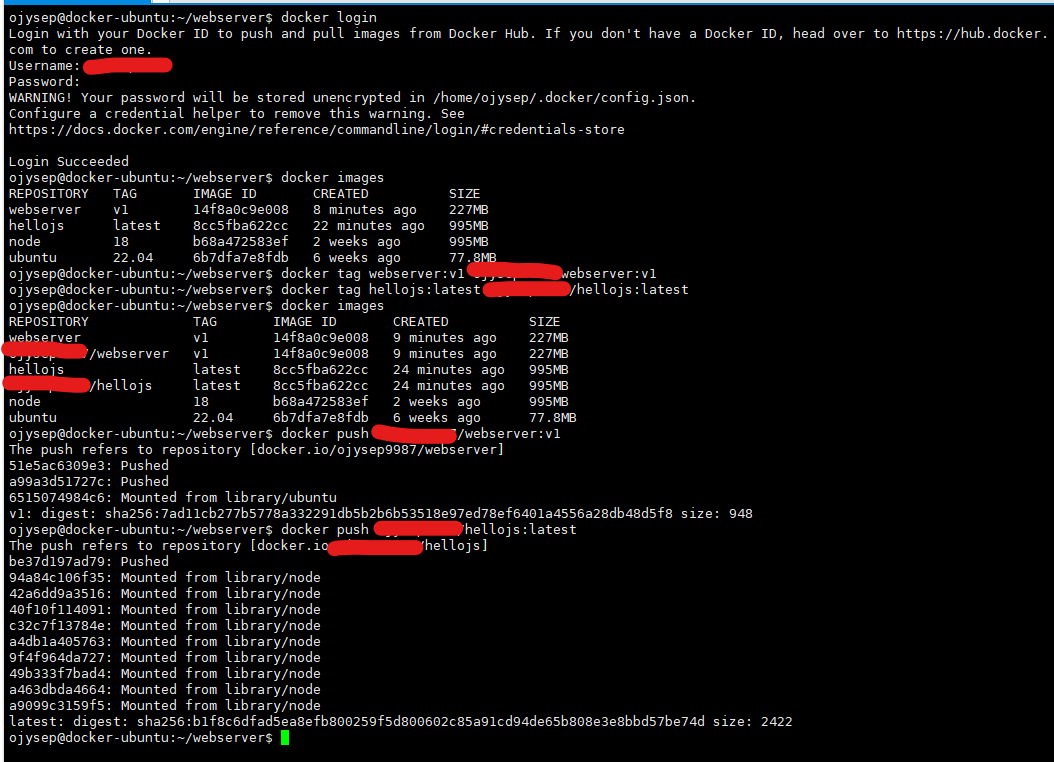
1. docker hub에 먼저 로그인(username,password는 이미 알고 있어야함)
2. docker images로 이미지들 확인하기
3. docker tag로 이미 있는 이미지 tag에 {username}/ 붙여서 복붙하기
4. docker images로 확인했을 때 계정명 붙인 것은 image ID가 같은 것을 확인할 수 있음
5. docker push <image이름:태그명> 으로 본인 docker hub로 배포하기
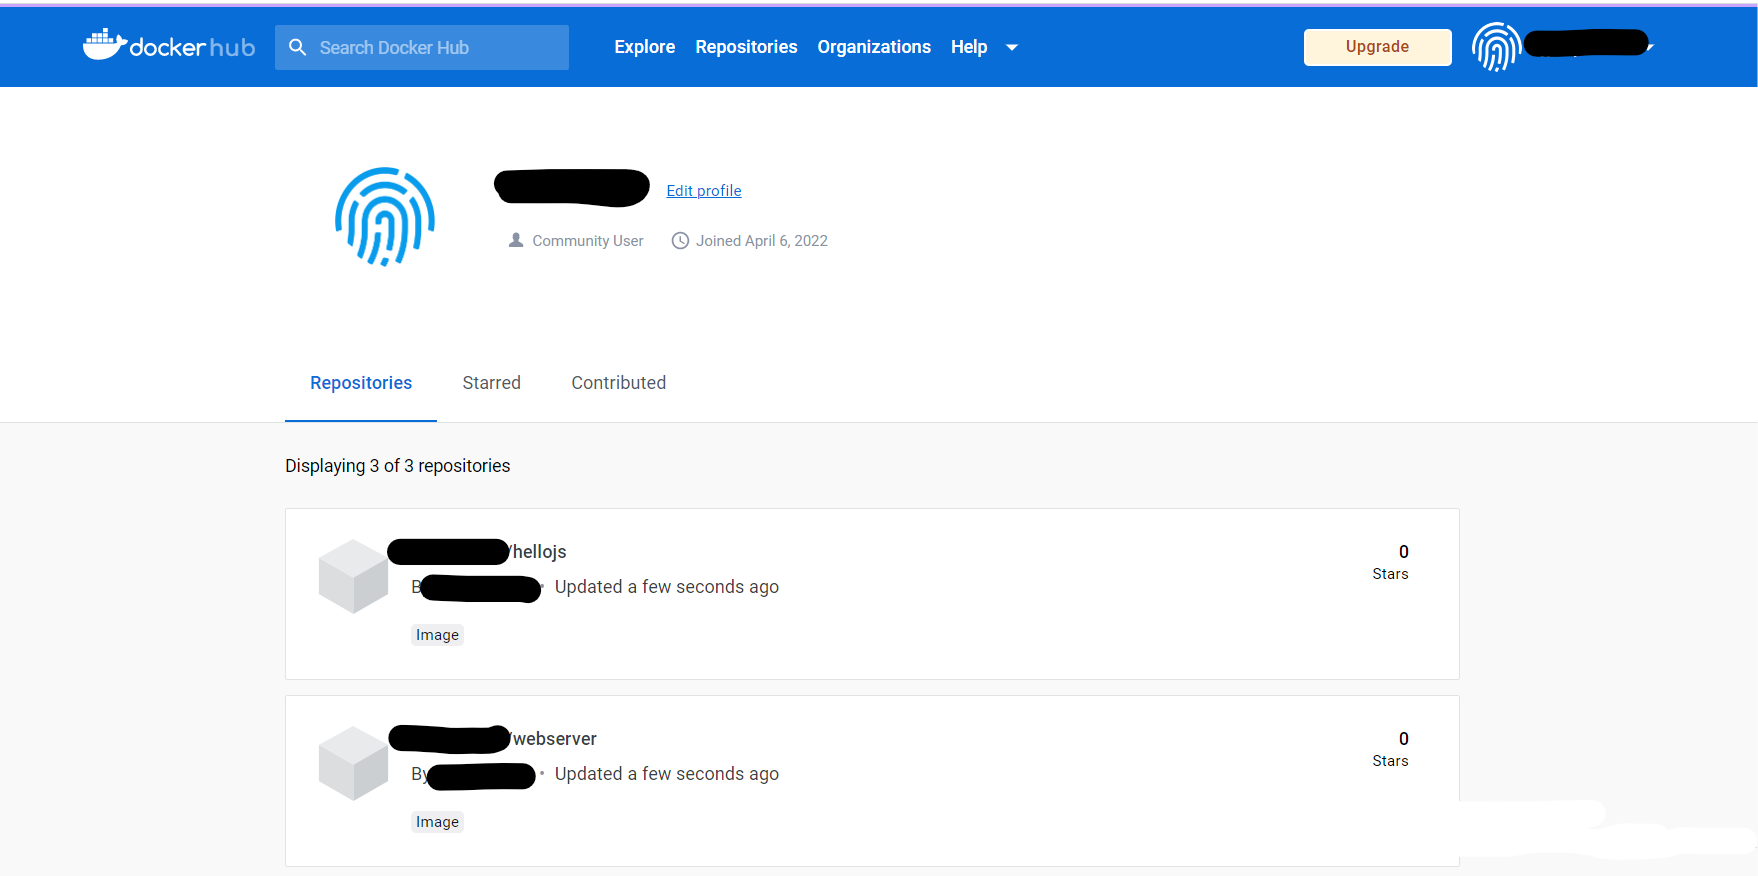
hub로 배포된 것을 확인
功在不舍