직접 게시글 작성 페이지를 구성하려다가 좋은 라이브러리를 발견해서 이를 적용한 기록을 남긴다.
요구조건
- 게시글 마크다운 스타일 작성 기능(Post)
1.1 게시글 작성시 사진 파일 즉시 업로드 및 프리뷰 기능 - 작성된 게시글 랜더링 기능(Get)
두 경우에 대해 ToastUI Editor, Viewer을 적용
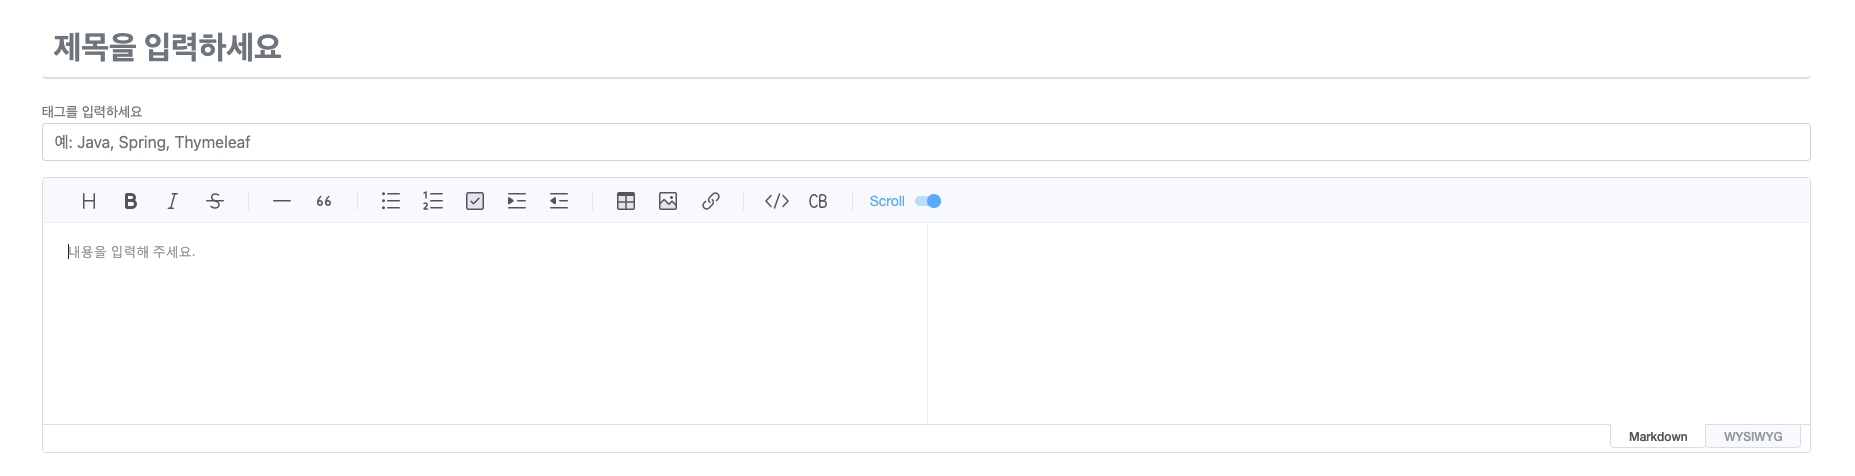
write 템플릿 시작
<head>
  <link rel="stylesheet" href="https://uicdn.toast.com/editor/latest/toastui-editor.min.css" />
</head>
<body>
<div class="write-container">
    <form th:object="${writeForm}" th:action="@{/write}" method="post" enctype="multipart/form-data">
        <!-- 제목 입력 -->
        <input type="text" th:field="*{title}" class="form-control title-input" placeholder="제목을 입력하세요">

        <!-- 태그 입력 -->
        <small class="text-muted">태그를 입력하세요</small>
        <input type="text" th:field="*{tags}" class="form-control mb-3" placeholder="예: Java, Spring, Thymeleaf">

        <!-- 에디터를 적용할 요소 (컨테이너) -->
        <div id="editor">
        </div>
        <input type="textarea" name="content" id="editor-content-provider" hidden style="display: block;">
    </form>
</div>
<script src="https://uicdn.toast.com/editor/latest/toastui-editor-all.min.js"></script>
<script>
    const editor = new toastui.Editor({
        el: document.querySelector('#editor'), // 에디터를 적용할 요소 (컨테이너)
        height: 'auto',                        // 에디터 영역의 높이 값 (OOOpx || auto)
        initialEditType: 'markdown',            // 최초로 보여줄 에디터 타입 (markdown || wysiwyg)
        initialValue: '',                       // 내용의 초기 값으로, 반드시 마크다운 문자열 형태여야 함
        previewStyle: 'vertical',               // 마크다운 프리뷰 스타일 (tab || vertical)
        placeholder: '내용을 입력해 주세요.',
  });
  </script>
</body> - 주의 : 제목입력란과 태그입력란은 직접 만든 것으로 그 아래의 작성폼만
ToastUI라이브러리 기능에 해당한다.(바디 태그들에서id="editor"div부분만 해당한다.)
바디 태그에 <script src="https://uicdn.toast.com/editor/latest/toastui-editor-all.min.js"></script>를 넣어주고 헤드 태그에 <link rel="stylesheet" href="https://uicdn.toast.com/editor/latest/toastui-editor.min.css" />를 넣어준다.
그리고 editor객체를 생성한다. el속성으로 하여금 태그와 매핑이 가능하고 나머지 속성의 효과는 주석의 설명을 읽기 바란다.
사진 업로드, 미리보기 기능 구현
https://congsong.tistory.com/68 <- 참고 링크
구현해야할 기능으로, 에디터의 사진 불러오기기능을 사용하여 작성란에 사진을 불러올 경우 곧바로 서버에 사진 파일을 저장하고, 사진 파일을 오른쪽 preview부분에 보일 수 있도록 해야한다.
@RestController
@RequestMapping("/editor")
public class FileApiController {

    // 파일 업로드 경로
    @Value("${file.dir}")
    private String uploadDir;

    /**
     * 에디터 이미지 업로드
     * @param image 파일 객체;
     * @return 업로드된 파일 명
     */
    @PostMapping("/image-upload")
    public String uploadEditorImage(@RequestParam final MultipartFile image) {
        if (image.isEmpty()) {
            return "";
        }

        String orgFilename = image.getOriginalFilename();                                         // 원본 파일명
        String uuid = UUID.randomUUID().toString().replaceAll("-", "");           // 32자리 랜덤 문자열
        String extension = orgFilename.substring(orgFilename.lastIndexOf(".") + 1);  // 확장자
        String saveFilename = uuid + "." + extension;                                             // 디스크에 저장할 파일명
        String fileFullPath = Paths.get(uploadDir, saveFilename).toString();

        File dir = new File(uploadDir);
        if (!dir.exists()) {
            dir.mkdirs();
        }

        try {
            File uploadFile = new File(fileFullPath);
            image.transferTo(uploadFile);
            return saveFilename;
        } catch (IOException e) {
            throw new RuntimeException(e);
        }
    }
    /**
     * 디스크에 업로드된 파일을 byte[]로 반환
     * @param filename 디스크에 업로드된 파일명
     * @return image byte array
     */
    @GetMapping(value = "/image-print", produces = {MediaType.IMAGE_GIF_VALUE, MediaType.IMAGE_JPEG_VALUE, MediaType.IMAGE_PNG_VALUE})
    public byte[] printEditorImage(@RequestParam final String filename) {
        // 업로드 파일 전체 경로
        String fileFullPath = Paths.get(uploadDir, filename).toString();

        // 파일이 없는 경우 예외
        File uploadedFile = new File(fileFullPath);
        if (!uploadedFile.exists()) {
            throw new RuntimeException();
        }

        try {
            //이미지 파일을 바이트로 변환 후 반환
            return Files.readAllBytes(uploadedFile.toPath());
        } catch (IOException e) {
            throw new RuntimeException(e);
        }
    }
}
참고링크와 거의 비슷하게 컨트롤러를 구성해준다.(저장 경로 로직만 약간 다르다.)
그리고 write템플릿의 스크립트 부분을 다음과 같이 수정해준다.
<script>
    const editor = new toastui.Editor({
        el: document.querySelector('#editor'), // 에디터를 적용할 요소 (컨테이너)
        height: 'auto',                        // 에디터 영역의 높이 값 (OOOpx || auto)
        initialEditType: 'markdown',            // 최초로 보여줄 에디터 타입 (markdown || wysiwyg)
        initialValue: '',                       // 내용의 초기 값으로, 반드시 마크다운 문자열 형태여야 함
        previewStyle: 'vertical',               // 마크다운 프리뷰 스타일 (tab || vertical)
        placeholder: '내용을 입력해 주세요.',
        hooks: {
            async addImageBlobHook(blob, callback) { // 이미지 업로드 로직 커스텀
                try {
                    /*
                     * 1. 에디터에 업로드한 이미지를 FormData 객체에 저장
                     *    (이때, 컨트롤러 uploadEditorImage 메서드의 파라미터인 'image'와 formData에 append 하는 key('image')값은 동일해야 함)
                     */
                    const formData = new FormData();
                    formData.append('image', blob);

                    // 2. FileApiController - uploadEditorImage 메서드 호출
                    const response = await fetch('/editor/image-upload', {
                        method : 'POST',
                        body : formData,
                    });

                    // 3. 컨트롤러에서 전달받은 디스크에 저장된 파일명
                    const filename = await response.text();
                    console.log('서버에 저장된 파일명 : ', filename);

                    // 4. addImageBlobHook의 callback 함수를 통해, 디스크에 저장된 이미지를 에디터에 렌더링
                    const imageUrl = `/editor/image-print?filename=${filename}`;
                    callback(imageUrl, 'image alt attribute');

                } catch (error) {
                    console.error('업로드 실패 : ', error);
                }
            }
        }

    });
</script>
이렇게 구현하면, 사진 업로드시에
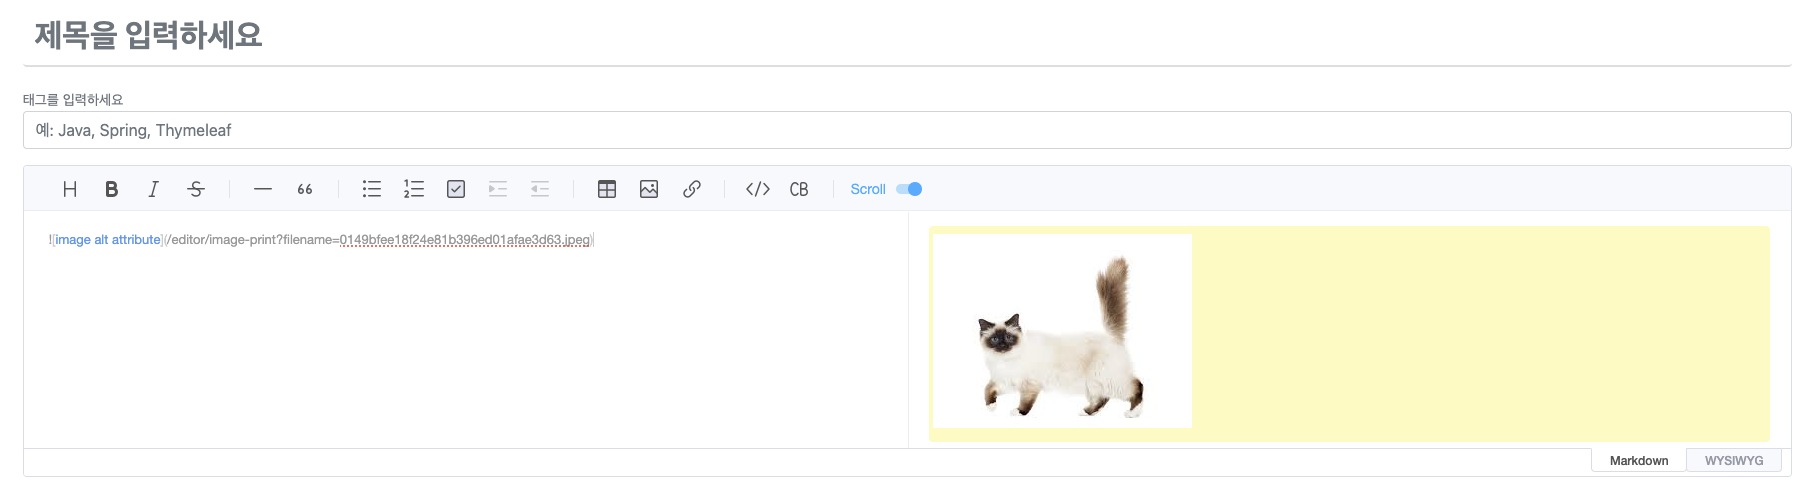 곧바로 서버와 통신하여 사진을 저장하고 저장한 경로를 통해 미리보기가 가능해진다.
form 데이터 서버로 전송
<!-- 에디터를 적용할 요소 (컨테이너) -->
        <div id="editor">
        </div>
        <input type="textarea" name="content" id="editor-content-provider" hidden style="display: block;">
위의 에디터 적용 div태그 아래 hidden 인풋 태그를 넣었다. form submit시에 이벤트리스너를 통해 form의 content를 이 input에 담아 넘기기로 한다. 서버 컨트롤러에서는 content필드로 받으면 된다.
이벤트 리스너를 구현하기 위해 다시 스크립트를 다음과 같이 수정한다.
    const editor = new toastui.Editor({
        el: document.querySelector('#editor'), // 에디터를 적용할 요소 (컨테이너)
        height: 'auto',                        // 에디터 영역의 높이 값 (OOOpx || auto)
        initialEditType: 'markdown',            // 최초로 보여줄 에디터 타입 (markdown || wysiwyg)
        initialValue: '',                       // 내용의 초기 값으로, 반드시 마크다운 문자열 형태여야 함
        previewStyle: 'vertical',               // 마크다운 프리뷰 스타일 (tab || vertical)
        placeholder: '내용을 입력해 주세요.',
        hooks: {
            async addImageBlobHook(blob, callback) { // 이미지 업로드 로직 커스텀
                try {
                    /*
                     * 1. 에디터에 업로드한 이미지를 FormData 객체에 저장
                     *    (이때, 컨트롤러 uploadEditorImage 메서드의 파라미터인 'image'와 formData에 append 하는 key('image')값은 동일해야 함)
                     */
                    const formData = new FormData();
                    formData.append('image', blob);

                    // 2. FileApiController - uploadEditorImage 메서드 호출
                    const response = await fetch('/editor/image-upload', {
                        method : 'POST',
                        body : formData,
                    });

                    // 3. 컨트롤러에서 전달받은 디스크에 저장된 파일명
                    const filename = await response.text();
                    console.log('서버에 저장된 파일명 : ', filename);

                    // 4. addImageBlobHook의 callback 함수를 통해, 디스크에 저장된 이미지를 에디터에 렌더링
                    const imageUrl = `/editor/image-print?filename=${filename}`;
                    callback(imageUrl, 'image alt attribute');

                } catch (error) {
                    console.error('업로드 실패 : ', error);
                }
            }
        }

    });
    document.querySelector('form').addEventListener('submit', function (event) {
    // 에디터에서 작성된 내용을 가져옵니다.
    const content = editor.getMarkdown();

    const encodedContent = encodeURIComponent(content);

    // 숨겨진 input 태그에 값을 넣습니다.
    document.querySelector('#editor-content-provider').value = encodedContent;
});encodeURIComponent메서드를 통해 마크다운 데이터를 인코딩 시킨다.(서버에서 디코딩해서 저장해야 한다.) -> 인코딩 안하고 해보니 줄바꿈등의 태그들이 누락되는 현상을 경험했다. 서버에서는 아래의 코드로 디코딩해서 DB에 저장했다.
String encodedContent = URLDecoder.decode(form.getContent(), StandardCharsets.UTF_8);write submit -> 서버 폼 데이터 Post 요청 받기
	@PostMapping("/write")
    public String write(@ModelAttribute WriteForm form, HttpSession session) throws IOException {
        User sessionUser = (User) session.getAttribute("loginUser");
        writeService.saveWrite(form, sessionUser);
        return "redirect:/";
    }

@Data
public class WriteForm {
    private String title;
    private String tags;
    private String content;
}
엔티티로 곧장 받지 말고 WriteForm 데이터용 객체를 통해 데이터를 받아준다. 세션 로그인 관련 로직은 로그인된 유저가 작성해야 옳기에 존재한다. 중요한 것은 toastUi Editor를 통해 작성된 글은 WriteForm의 content에 담긴다.
이후에는 Repository, Service계층을 잘 활용하여 본인의 서버 DB에 잘 저장해주면 된다.(spring MVC 기능에 집중한 포스트는 아니기에 이는 생략한다.)
 DB를 확인해보니 적절하게 Content가 적재된 모습을 볼 수 있다.(3번째 행 데이터만 집중)
Viewer
게시글을 작성 및 등록하는 과정을 완성했다면 게시글을 볼 수 있어야 한다. 우선 Get요청용 컨트롤러는 다음과 같다.
@Controller
@RequiredArgsConstructor
public class PostController {

    private final PostService postService;

    @GetMapping("/@{username}/post/{postUrl}")
    public String getPost(
        @PathVariable("username") String username,
        @PathVariable("postUrl") String postUrl,
        Model model
    ) {
        PostViewDto postViewDto = postService.getPost(username, postUrl);

        model.addAttribute("postViewDto", postViewDto);
        model.addAttribute("username", username);
        return "postView";
    }
}

@Data
public class PostViewDto {

    private String title;
    private String username;
    private LocalDateTime createByDt;
    private List<String> tags = new ArrayList<>();
    private String content;
    private int likeCount;
}
서비스-리포지토리 계층으로부터 적절히 Dto객체를 채워준다. 핵심은 content 필드이다. Dto를 구성해서 컨트롤러 계층에서 모델에 담아 템플릿으로 보내준다.
헤더 : <link rel="stylesheet" href="https://uicdn.toast.com/editor/latest/toastui-editor-viewer.min.css" />
바디 : <script src="https://uicdn.toast.com/editor/latest/toastui-editor-viewer.js"></script>

<div id="viewer">
</div>

<script th:inline="javascript">
    // Thymeleaf를 통해 서버에서 전달된 content 데이터를 가져옵니다.
    const postContent = /*<![CDATA[*/ [[${postViewDto.content}]] /*]]*/;

    // ToastUI Editor 초기화
    const viewer = new toastui.Editor({
        el: document.querySelector('#viewer'),
        height: 'auto',
        initialValue: '', // 초기값 없이 시작
        toolbarItems: [],
    });


    // 서버에서 받은 content 데이터를 에디터에 설정
    viewer.setMarkdown(postContent);
</script>
에디터 템플릿에서 사용한 것과 다른 css와 js파일을 로드한다.(viewer용)
viewer객체를 생성해준다. 로드한 js,css가 viewer용이기때문에 viewer객체가 적절히 생성된다.
th:inline="javascript"를 활용하여 스프링과 스크립트를 바인딩해줄 수 있다. 이를 통해 스크립트에서 postViewDto를 사용가능하다. postViewDto.content를 setMarkdown을 통해 viewer객체에 content를 주입해준다.
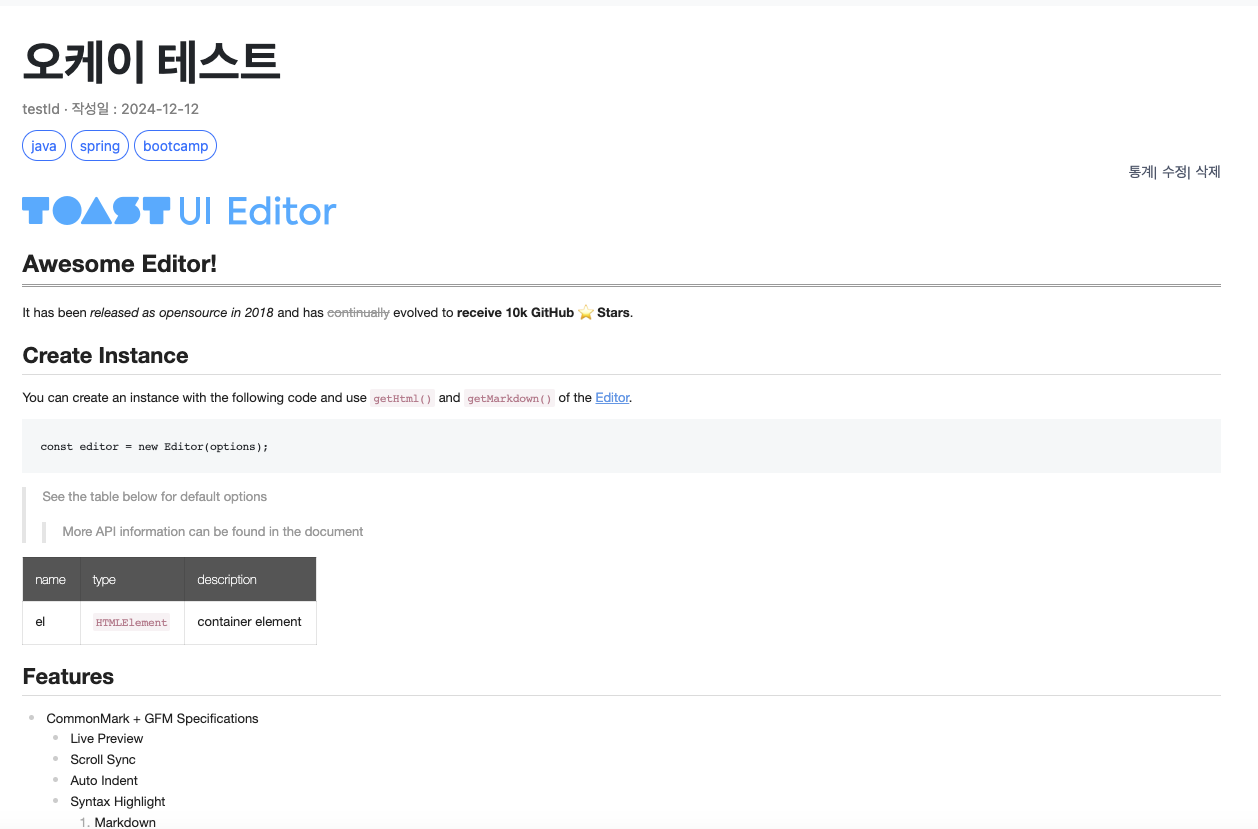
이렇게 해당 템플릿을 컨트롤러를 통해 띄우게 된다면 다음과 같이 작성했던 글을 편집기가 아닌 형태로 볼 수 있다.