📌BottomNavigationView
BottomNavigationView란 화면 밑에 있는 네이게이션 역할을 하는 버튼 모음이다.
각각의 버튼을 눌렀을 때 레이아웃에 fragment를 붙일 수 있다.
fragment란?
액티비티와 다르게 App의 UI중에 재사용 가능한 것을 잘라서 독립적인 수명주기를 가진 레이아웃이다. 그래서 자체 입력 이벤트를 처리할 수 있지만 독립적으로 혼자 존재할 수 없다. 항상 액티비티 위에서 존재해야한다. 그래서 비슷한 역할을 하는 액티비티나 뷰 모음을 fragment를 만들어 놓으면 UI의 모듈성이 올라가 쉽게 재사용을 할 수 있다.
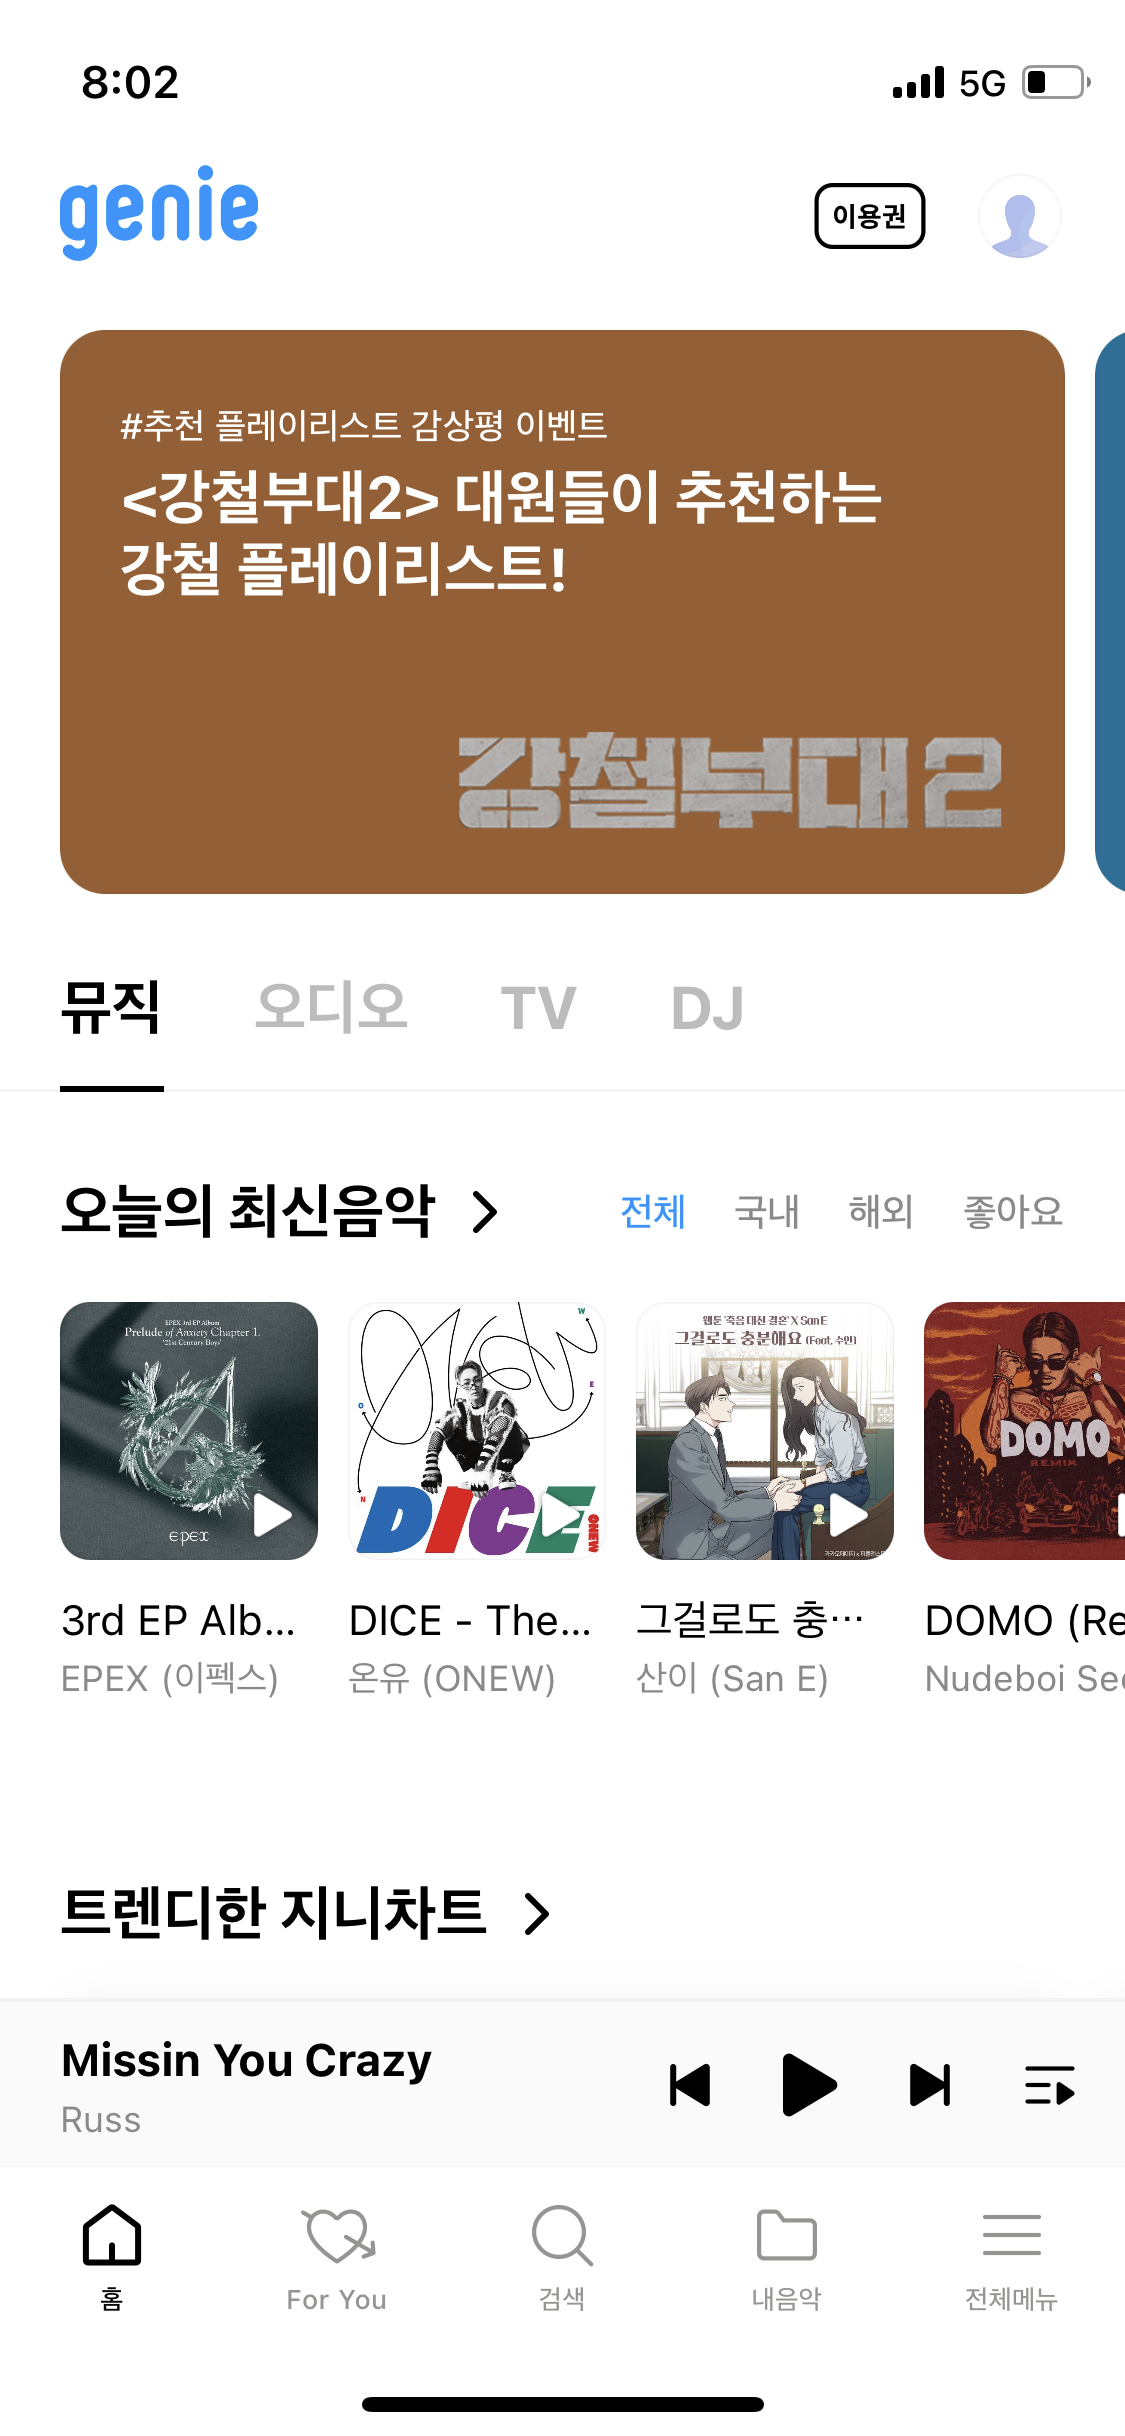
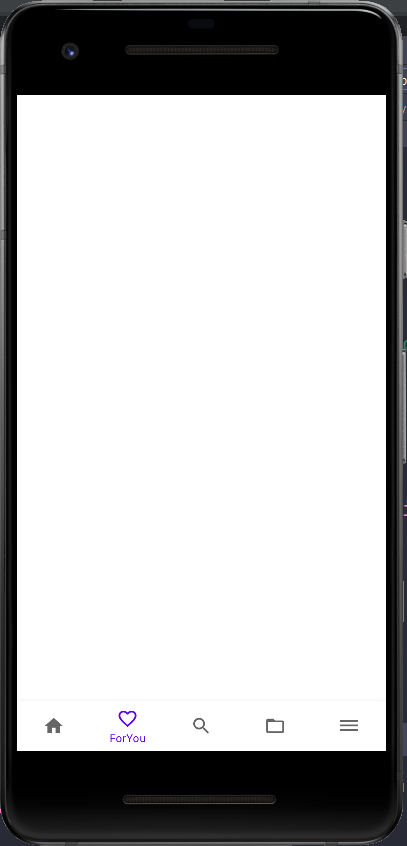
지니 App 화면
📌사용법
1.FrameLayout에 들어갈 Layout를 만들어 줍니다. app:layout_constraintBottom_toTopOf="@id/bottomNavigationView" 부분은 bottomNavigationView위에 위치시키기 위해서 미리 적어놓았습니다.
<FrameLayout
    android:layout_width="0dp"
    android:layout_height="0dp"
    app:layout_constraintBottom_toTopOf="@id/bottomNavigationView"
    app:layout_constraintEnd_toEndOf="parent"
    app:layout_constraintStart_toStartOf="parent"
    app:layout_constraintTop_toTopOf="parent" />
2.BottomNavigationView를 만들고 id를 위에 만든 bottomNavigationView를 적어줍니다.
<com.google.android.material.bottomnavigation.BottomNavigationView
android:id="@+id/bottomNavigationView"
android:layout_width="0dp"
android:layout_height="wrap_content"
app:layout_constraintBottom_toBottomOf="parent"
app:layout_constraintEnd_toEndOf="parent"
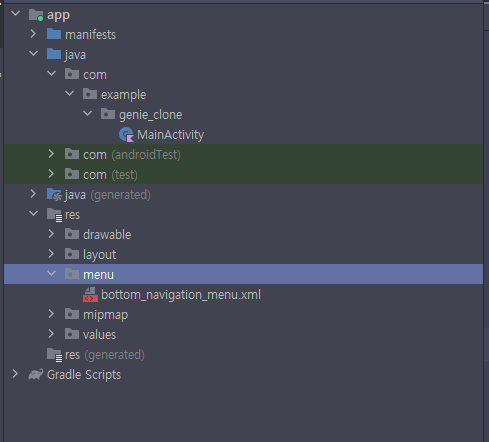
app:layout_constraintStart_toStartOf="parent" />3.bottomNavigationView에 보일 아이콘이나 이름등을 관리하는 버튼들의 리스트를 menu를 이용해 관리가 가능합니다.
3.1 menu를 사용하시려면 리소스파일을 만들어 주어야 합니다.
먼저 res에서 menu 폴더를 만들어 줍니다.
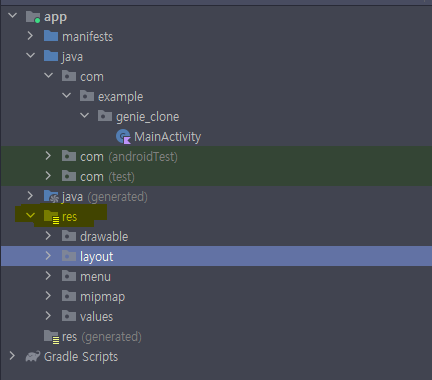
형광펜친 res파일 오른쪽 버튼을 눌러 New -> Android Resource Directory를 눌러주면

다음과 같이 나옵니다. 그러면 맨 위에 name을 values에서 menu로 바꾸어 주시고 ok를 눌러주시면 디렉토리가 생성이 됩니다.
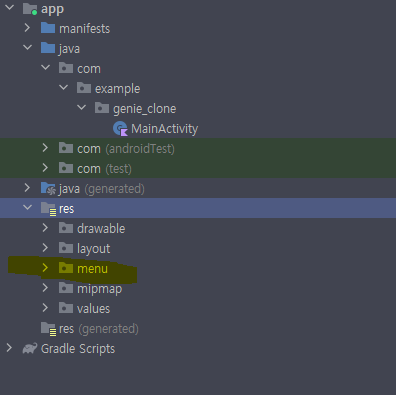
3.2 만든 폴더에 리소스 파일을 만들어 주시면 됩니다. 생성한 폴더 오른쪽 버튼 -> New -> Menu Resource File를 눌러 File name을 원하시는 이름을 적어주시면 됩니다.
전 bottom_navigation_menu로 만들었습니다.
3.3 만든 리소스 파일(bottom_navigation_menu)에 bottomNavigationView에 들어갈 아이콘이나 이름을 넣어주시면 됩니다.
저는 지니app bottomNavigationView에 들어갈 아이콘과 이름을 넣어줬습니다.
icon은 drawable폴더에서 new -> Vector Asset에 있는 아이콘을 사용했어요
title은 values폴더 -> String.xml에서 관리하고 있습니다.
<menu xmlns:android="http://schemas.android.com/apk/res/android">


    <item android:id="@+id/home"
        android:icon="@drawable/ic_baseline_home_24"
        android:title="@string/bottom_navigation_home" />

    <item android:id="@+id/forYou"
        android:icon="@drawable/ic_baseline_favorite_border_24"
        android:title="@string/bottom_navigation_forYou" />

    <item android:id="@+id/search"
        android:icon="@drawable/ic_baseline_search_24"
        android:title="@string/bottom_navigation_search" />

    <item android:id="@+id/myMusic"
        android:icon="@drawable/ic_baseline_folder_open_24"
        android:title="@string/bottom_navigation_myMusic" />

    <item android:id="@+id/menu"
        android:icon="@drawable/ic_baseline_dehaze_24"
        android:title="@string/bottom_navigation_Menu" />

</menu>
3.4 인제 activity_main.xml 파일과 연결을 시켜줍니다.
app:menu="@menu/자신이 만든 리소스파일 이름(전 bottom_navigation_menu로 만들었어요)"
    <com.google.android.material.bottomnavigation.BottomNavigationView
        android:id="@+id/bottomNavigationView"
        android:layout_width="0dp"
        android:layout_height="wrap_content"
        app:layout_constraintBottom_toBottomOf="parent"
        app:layout_constraintEnd_toEndOf="parent"
        app:layout_constraintStart_toStartOf="parent"
        app:menu="@menu/bottom_navigation_menu" />
4. 글씨색과 애니메이션끄기
bottomNavigationView이 완성이 되었지만 저는 지니app bottomNavigationView 처럼 만들고 싶습니다.
그러기 위해서 2가지를 바꿀려고 합니다.
- 글씨색 바꾸기 버튼 눌렀을 때 검은색, 안눌렀을 때 회색
- 선택이 안될 시 이름이 안보이다가 버튼을 눌렀을 때 이름이 올라오는 애니메이션을 끄도록 하겠습니다.
4.1 글씨색 바꾸기
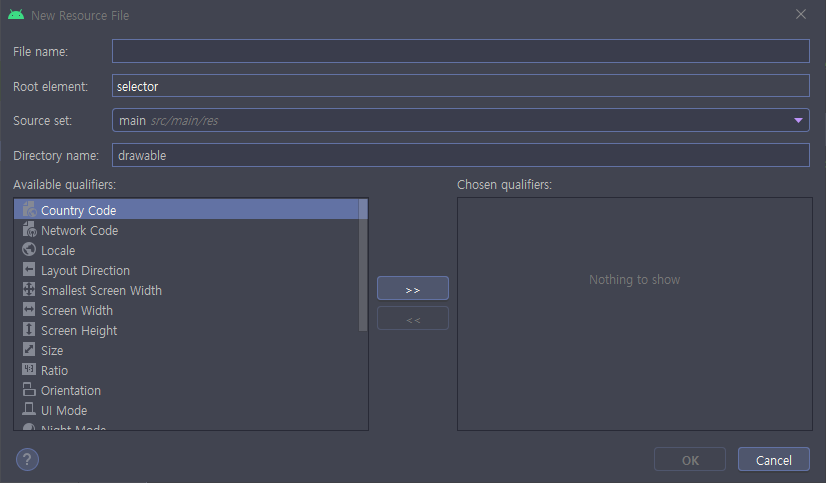
먼저 selector을 만들어주어야 합니다. selector는 drawable폴더 오른쪽 클릭 후 -> new -> Drawable Resource File을 눌러 원하시는 File name을 적어주시고 ok를 눌러주시면 됩니다.
그리고 그 안에서 아래 코드를 적어줍니다.
<selector xmlns:android="http://schemas.android.com/apk/res/android">
    <!--    체크시 검은색으로 -->
    <item android:color="@color/black" android:state_checked="true"/>

    <!-- 선택되지 않았을 때    -->
    <item android:color="@color/gray_cc" android:state_checked="false"/>

</selector>
인제 selector파일은 완성이 되었으니 연결을 해줍니다.
app:itemIconTint="@drawable/자신이 만든 selector파일이름(전 selector_menu_color로 만들었습니다.)"
그리고 app:itemTextColor="@color/black" 로 제목 색상도 바꿔줍니다.
그럼 아이콘과 텍스트이 검은색으로 바뀝니다.
    <com.google.android.material.bottomnavigation.BottomNavigationView
        android:id="@+id/bottomNavigationView"
        android:layout_width="0dp"
        android:layout_height="wrap_content"
        app:itemTextColor="@color/black"
        app:itemIconTint="@drawable/selector_menu_color"
        app:layout_constraintBottom_toBottomOf="parent"
        app:layout_constraintEnd_toEndOf="parent"
        app:layout_constraintStart_toStartOf="parent"
        app:menu="@menu/bottom_navigation_menu" />
4.2 bottomNavigationView 애니메이션 끄기
그럼 아이콘과 텍스트가 검은색으로 바뀌었으니 애니메이션만 꺼주면 되는데요 애니메이션은 아래 코드를 추가해 주시면 됩니다.😊
app:labelVisibilityMode="labeled"
    <com.google.android.material.bottomnavigation.BottomNavigationView
        android:id="@+id/bottomNavigationView"
        android:layout_width="0dp"
        android:layout_height="wrap_content"
        app:itemIconTint="@drawable/selector_menu_color"
        app:itemTextColor="@color/black"
        app:labelVisibilityMode="labeled"
        app:layout_constraintBottom_toBottomOf="parent"
        app:layout_constraintEnd_toEndOf="parent"
        app:layout_constraintStart_toStartOf="parent"
        app:menu="@menu/bottom_navigation_menu" />
그럼 다음과 같이 완성이 됩니다.
완성