1. discord.py 라이브러리 설치 & 업데이트
cmd창에 입력해주세요.
# Linux/macOS 설치
python3 pip install discord.py

# Windows 설치
py -3 pip install discord.py

---

# Linux/macOS 업데이트
python3 pip install -U discord.py

# Windows 업데이트
py -3 pip install -U discord.py

*설치 오류시 => py -3 -m pip install discord.pydiscord.py*
2. 챗봇 코드
import discord

class MyClient(discord.Client):
    async def on_ready(self):
        print('Logged on as', self.user)

    async def on_message(self, message):
        if message.author.bot:
            return None

        if message.content == "챗봇 바보":
            channel = message.channel
            msg = "...뭐이?"
            await channel.send(msg)
            return None

intents = discord.Intents.default()
intents.message_content = True
client = MyClient(intents=intents)
client.run('token') #토큰 입력
2.1 챗봇 코드 설명
class MyClient(discord.Client):
    async def on_ready(self):
        print('Logged on as', self.user)
-> 챗봇이 정상작동되었음을 알리는 단계!
async def on_message(self, message):-> (self, message) => (유저이름, 유저가 보낸 메시지)
if message.author.bot:
    return None
-> 만약 메시지를 챗봇이 보낸 경우에는 답변 안 함
if message.content == "챗봇 바보":
            channel = message.channel
            msg = "...뭐이?"
            await channel.send(msg)
            return None
-> 만약 유저가 "챗봇 바보"를 보낼경우:
-> 유저가 메시지를 보낸 채널을 챗봇이 메시지를 보낼 채널 로 지정
-> 전송할 메시지
-> 메시지 전송
3. 챗봇 설정
https://discord.com/developers/applications
디스코드 개발자 웹에서 어서 아래 사진과 같이 설정해 주세요
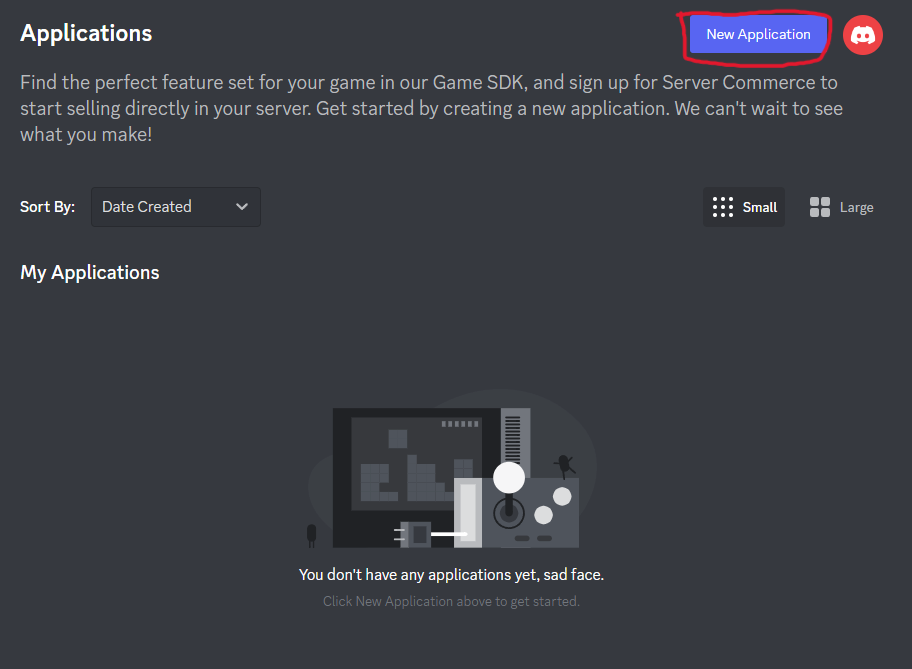 해당 버튼을 눌러 봇을 만들어 주세요.
 봇 이름 지정, 박스 체크 후 다음 단계로 이동
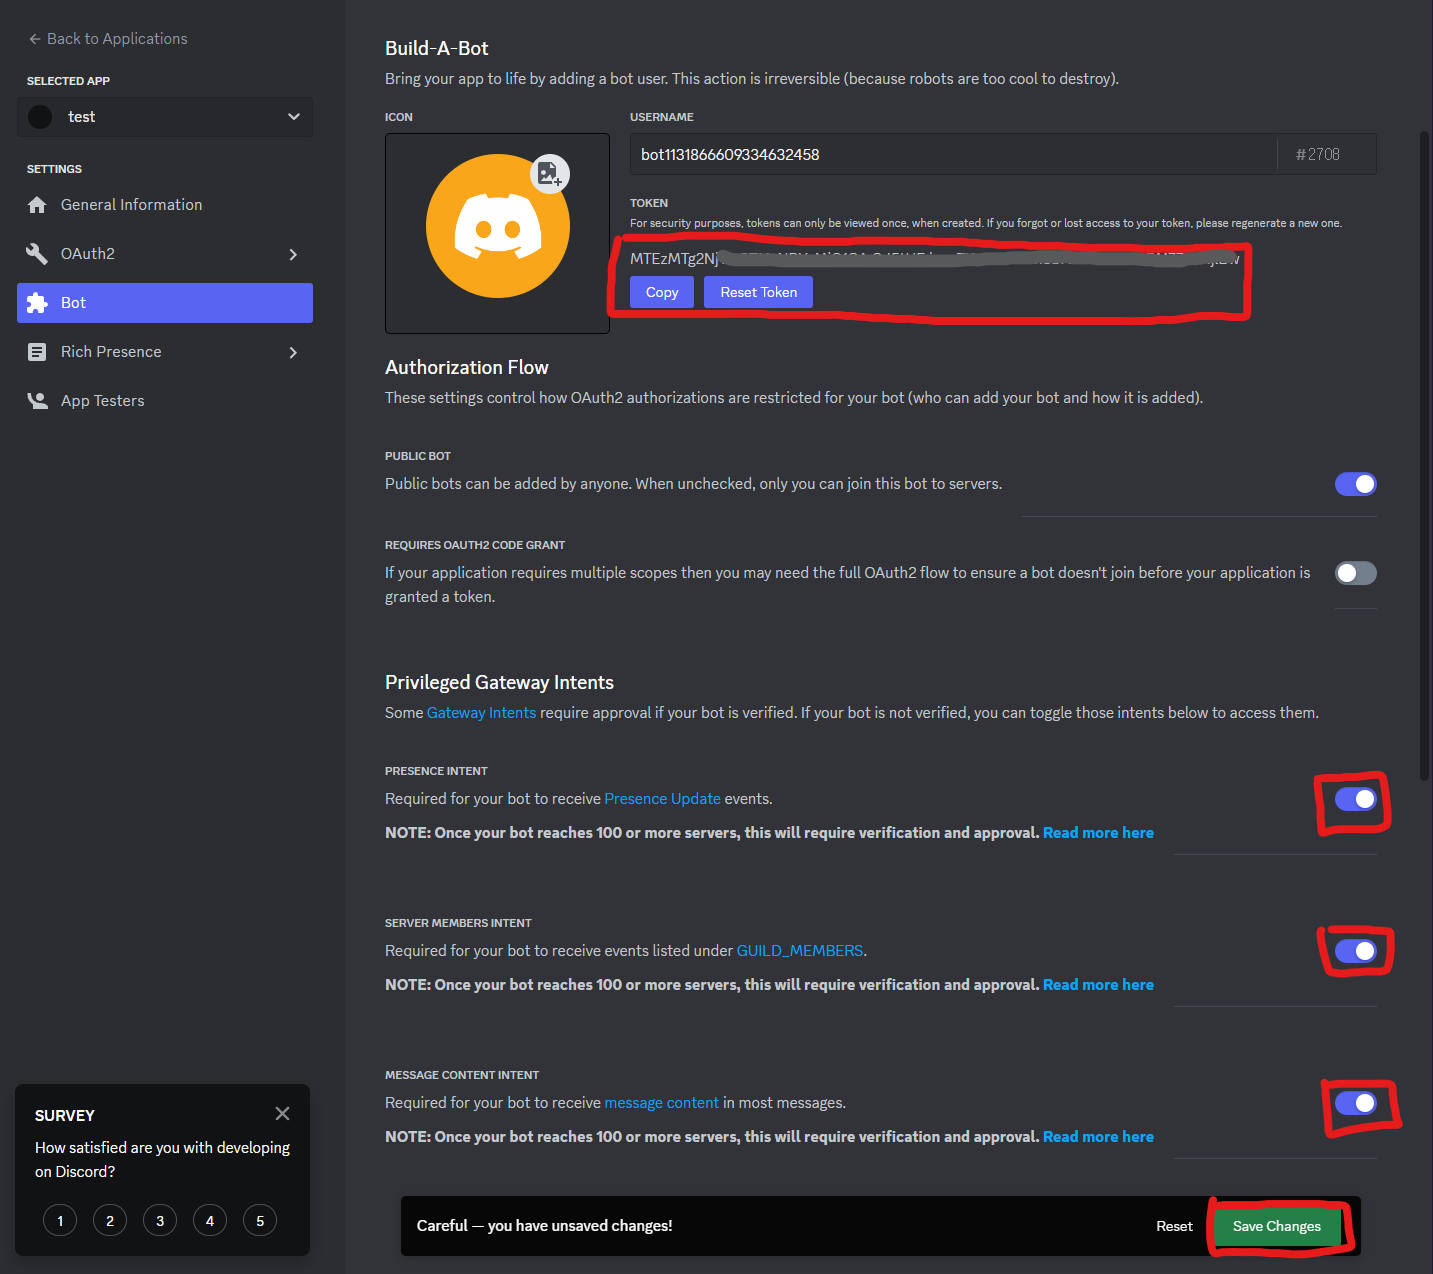 디스코드 보안 업데이트로 인하여 사진에 나온 버튼을 활성화하지 않으면 봇이 정상적으로 작동하지 않습니다.
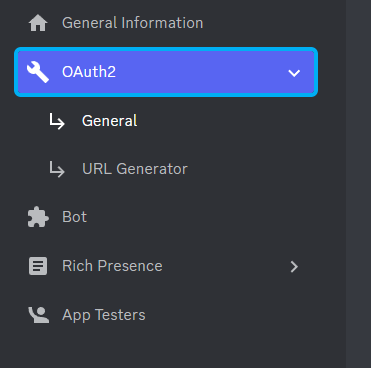
OAuth2 -> General 이동 후 bot, Admin 체크 후 아래에 나오는 URL이 챗봇을 초대할 수 있는 주소입니다.
여기까지 디스코드 챗봇 설정부터 개발까지 알아보았습니다.
조금 더 심화적인 코드는 다음 시간에 알아보도록 하겠습니다.
GitHub: https://github.com/FURY312/PDBs

Pandora's box [ πίθος ]