[flutter] provider 패턴으로 firebase email login 붙이기
I think that you have a basic understanding of flutter will proceed
If you have any code or questions you don't understand, please leave a comment at any time🤗flutter에 대한 기본 이해가 있는 분들이라고 생각하고 진행하겠습니다
이해가 안되는 코드가 있거나 질문사항이 있다면 언제든 댓글로 남겨주세요🤗
"예를 들어 provider라던지 생성자 뒤 :(콜론)이라던지 Widget관련된거라던지"
0. import
https://pub.dev/packages/firebase_auth#-installing-tab-
https://pub.dev/packages/provider
dependencies:
  firebase_auth: ^0.15.4
  provider: ^4.1.2
1. Create View
We plan to concentrate only on the functions, so please make it Suit yourself.
기능에만 집중할 예정이니 편하실대로 제작해주세요.
import 'package:flutter/material.dart';
class LoginPage extends StatelessWidget {
LoginPage({Key key}) : super(key: key);
final _emailController = TextEditingController();
final _passwordController = TextEditingController();
Widget build(BuildContext context) {
return Scaffold(
body: Column(
children: <Widget>[
Text('Login'),
_buildEmailInput(),
_buildPasswordInput(),
_buildSubmitButton(),
],
));
}
Widget _buildEmailInput() {
return TextFormField(
maxLines: 1,
keyboardType: TextInputType.emailAddress,
autocorrect: false,
decoration: InputDecoration(
hintText: 'email',
),
controller: _emailController,
onSaved: (value) => _emailController.text = value.trim(),
);
}
Widget _buildPasswordInput() {
return TextFormField(
style: TextStyle(fontFamily: ''),
maxLines: 1,
keyboardType: TextInputType.visiblePassword,
autocorrect: false,
obscureText: true,
decoration: InputDecoration(
hintText: 'password',
),
controller: _passwordController,
onSaved: (value) => _passwordController.text = value.trim(),
);
}
Widget _buildSubmitButton() {
return RaisedButton(
onPressed: () => print('click :)'),
child: Text('submit'),
);
}
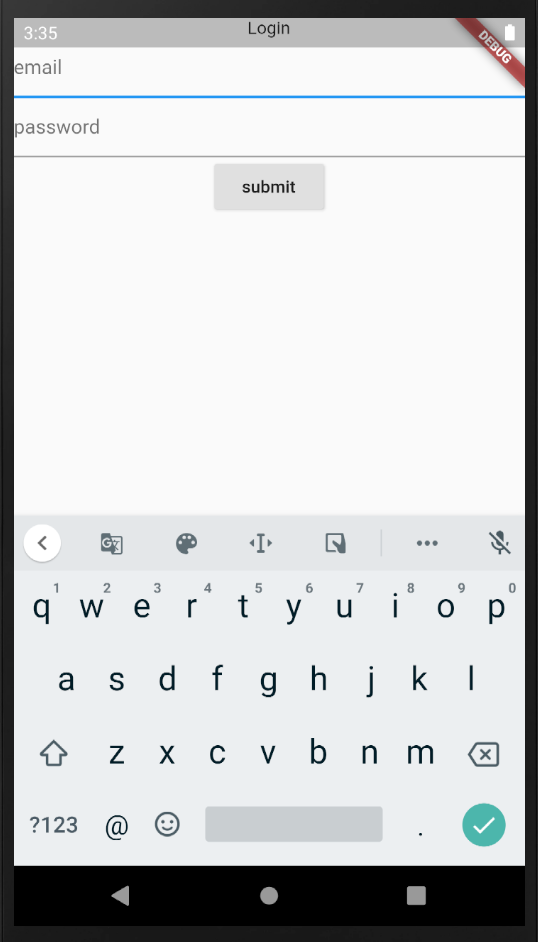
}If you make a screen according to the code, it's such a mess ... ^^ a function-focused screen is created.
위 코드대로 View를 짠다면 이런 엉망진창...^^
기능에 충실하게 생긴 화면이 제작됩니다.
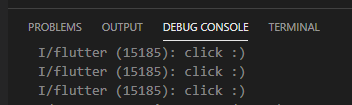
Result of clicking the button
위 코드대로 짰다면 버튼 클릭하면 다음과 같이 나오겠쥬?
2. Provider Service (Firebase Sign-in(Login) Code)
import 'package:firebase_auth/firebase_auth.dart';
import 'package:flutter/material.dart';
class FirebaseAuthService with ChangeNotifier {
FirebaseAuthService({auth}) : _auth = auth ?? FirebaseAuth.instance;
FirebaseAuth _auth;
Future<FirebaseUser> signInWithEmailAndPassword(
{ String email, String password}) async {
final credential = EmailAuthProvider.getCredential(
email: email,
password: password,
);
final authResult = await _auth.signInWithCredential(credential);
return authResult.user;
}
}
3. Provider and View Connection
기존 child: LoginPage(),를 보여주고 있던 위젯에다가
MultiProvider > ChangeNotifierProvider로 감싸줍니다.
Before
child: LoginPage(),After
MultiProvider(
    providers: [
        ChangeNotifierProvider<FirebaseAuthService>(
            create: (_) => FirebaseAuthService(),
        ),
    ],
    child: LoginPage(),
);
4. Provider and View Connection
기존 1번에 했던 LoginPage Code에 Provider Service를 읽어올 수 있게 코드 한줄을 넣어줍니다. (글로벌변수로 _auth가지고있어서 사용해도되고, 매개변수로 넘겨도 됩니다.)
final auth = Provider.of<FirebaseAuthService>(context, listen: false);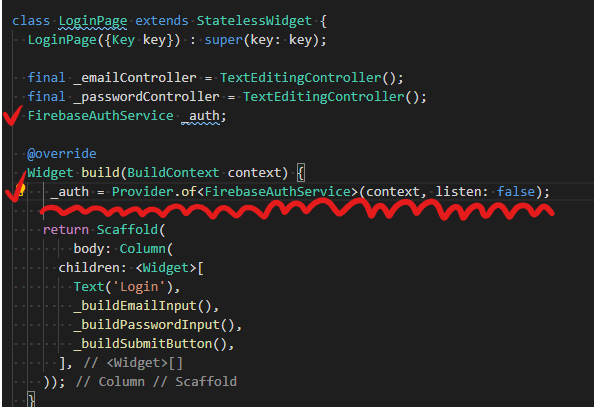
5. Call Provider Method
테스트로 해뒀던 onPressed: () => print('click :)'), 코드를 이젠 주석하고
onPressed: () async => _submit(),로 바꿔줍니다.
그리고 _auth Provider Service 안에 있는 signInWithEmailAndPassword()를 호출해 줍니다.
  Widget _buildSubmitButton() {
    return RaisedButton(
      onPressed: () async => _submit(),
      child: Text('submit'),
    );
  }

  Future<void> _submit() async {
    final user = await _auth.signInWithEmailAndPassword(
        email: _emailController.text,
        password: _passwordController.text);

    (user == null)
        ? print('로그인 맞지않습니다.')
        : print('Signed in: ${user?.uid}');
  }
이제 로그인 시도하는건 완료 :)
구글 로그인은 뭐 한번만 구현하면 가입이랑 로그인까지 구현 한방에 되는데...
이메일 로그인은 회원가입까지 만들어줘야하나... 일단 로그인 시도는 여기서 마무리!다음 시간엔 "로그인 상태에 따른 화면 분리"로 찾아뵙겠습니다... 안넝👋👋