스크롤 가능한 column 안에 고정되지 않은 크기의 LazyColumn, LazyVerticalGrid를 배치하면 에러가 발생한다. 상위 요소에 LazyColumn과 LazyVerticalGrid 하나만 배치하고 item과 items를 활용하면 되지만, 하위 요소로 부득이하게 고정된 크기의 LazyColumn 혹은 LazyVerticalGrid를 배치해야 할 수도 있다.
실제로 개발하다가 이러한 상황이 발생했었고, 감사하게 '우아한 테크'의 Compose 이전 관련 영상을 참고해 SubcomposeLayout으로 문제를 해결할 수 있었다.
https://www.youtube.com/watch?v=ryIXyhEZRYY&list=LL&index=2&t=1427s
SubcomposeLayout을 사용하다가, 이와 비슷한 Layout과 SubcomposeLayout가 무엇이고, 어떻게 사용할지 알아보면 좋을 것 같아 알아보게 되었다.
이를 위해 안드로이드 공식 문서 맞춤형 레이아웃 문서를 참고했다.
https://developer.android.com/develop/ui/compose/layouts/custom?hl=ko
Compose의 주요 세 단계
1단계 : Composition (컴포지션)
Composition 단계에 호출된 Composable 함수를 바탕으로 UI 트리를 구성한다.
2단계 : Layout (레이아웃)
Layout 단계에는 Composition 단계에 구성된 UI 트리를 기반으로 각 레이아웃 노드를 측정하고 배치한다.
레이아웃 단계에서 트리는 다음 세 단계 알고리즘을 사용하여 트리 경로를 탐색한다.
- 하위 요소 측정: 노드가 하위 요소(있는 경우)를 측정한다.
- 자체 크기 결정: 이러한 측정치를 기반으로 노드가 자체 크기를 결정한다.
- 하위 요소 배치: 각 하위 노드는 노드의 자체 위치를 기준으로 배치한다.
이 단계의 알고리즘이 끝나면 할당된 너비와 높이, 그리고 x, y 좌표가 계산된다.
3단계 : Drawing (그리기)
트리가 위에서 아래로 다시 탐색되고 각 노드가 차례로 화면에 그려진다.
Layout 함수란?
Layout Composable 함수를 사용하면 하위 요소를 수동으로 측정하고 배치할 수 있다. Column 및 Row와 같은 모든 상위 수준 레이아웃은 Layout 컴포저블을 사용하여 빌드된다고 한다.
Layout(
        content = {
            Column {
                Text("1")
                Text("2")
                Text("3")
                Text("4")
            }
        }
    ) { measurables, constraints ->
        val placeables = measurables.map { measurable ->
            measurable.measure(constraints)
        }
        layout(constraints.maxWidth, constraints.maxHeight ) {
            var yPosition = 0

            for (placeable in placeables) {
                placeable.placeRelative(x = 0, y = yPosition)
                yPosition += placeable.height
            }
        }
    }
measurables, constraints를 바탕으로 content의 하위 요소들을 측정하고, 하위 요소들을 커스텀하게 배치하면서 layout 함수로 전체 레이아웃을 구성할 수 있다.
SubcomposeLayout 함수란?
@Composable
public fun SubcomposeLayout(
    modifier: Modifier = Modifier,
    measurePolicy: SubcomposeMeasureScope.(Constraints) -> MeasureResult
): Unit
Analogue of Layout which allows to subcompose the actual content during the measuring stage for example to use the values calculated during the measurement as params for the composition of the children.
Possible use cases:
You need to know the constraints passed by the parent during the composition and can't solve your use case with just custom Layout or LayoutModifier. See androidx. compose. foundation. layout. BoxWithConstraints.
- You want to use the size of one child during the composition of the second child.
- You want to compose your items lazily based on the available size. For example you have a list of 100 items and instead of composing all of them you only compose the ones which are currently visible(say 5 of them) and compose next items when the component is scrolled.
SubComposeLayout함수의 document에 적혀있는 내용이다. 마지막에 적혀있는 케이스가 내가 앞서 말했던 케이스이다. 아이템의 크기를 기반으로 LazyColumn, LazyRow의 높이 혹은 너비를 고정시킬 수 있다.
Layout의 layout과 유사하게 SubcomposeLayout의 layout을 이용하여 배치하고자 하는 레이아웃을 커스텀하게 배치할 수 있다. 또한 subcompose 함수를 이용해 LazyColumn의 아이템과 같은 요소를 측정할 수 있다. (Measurable의 List를 리턴)
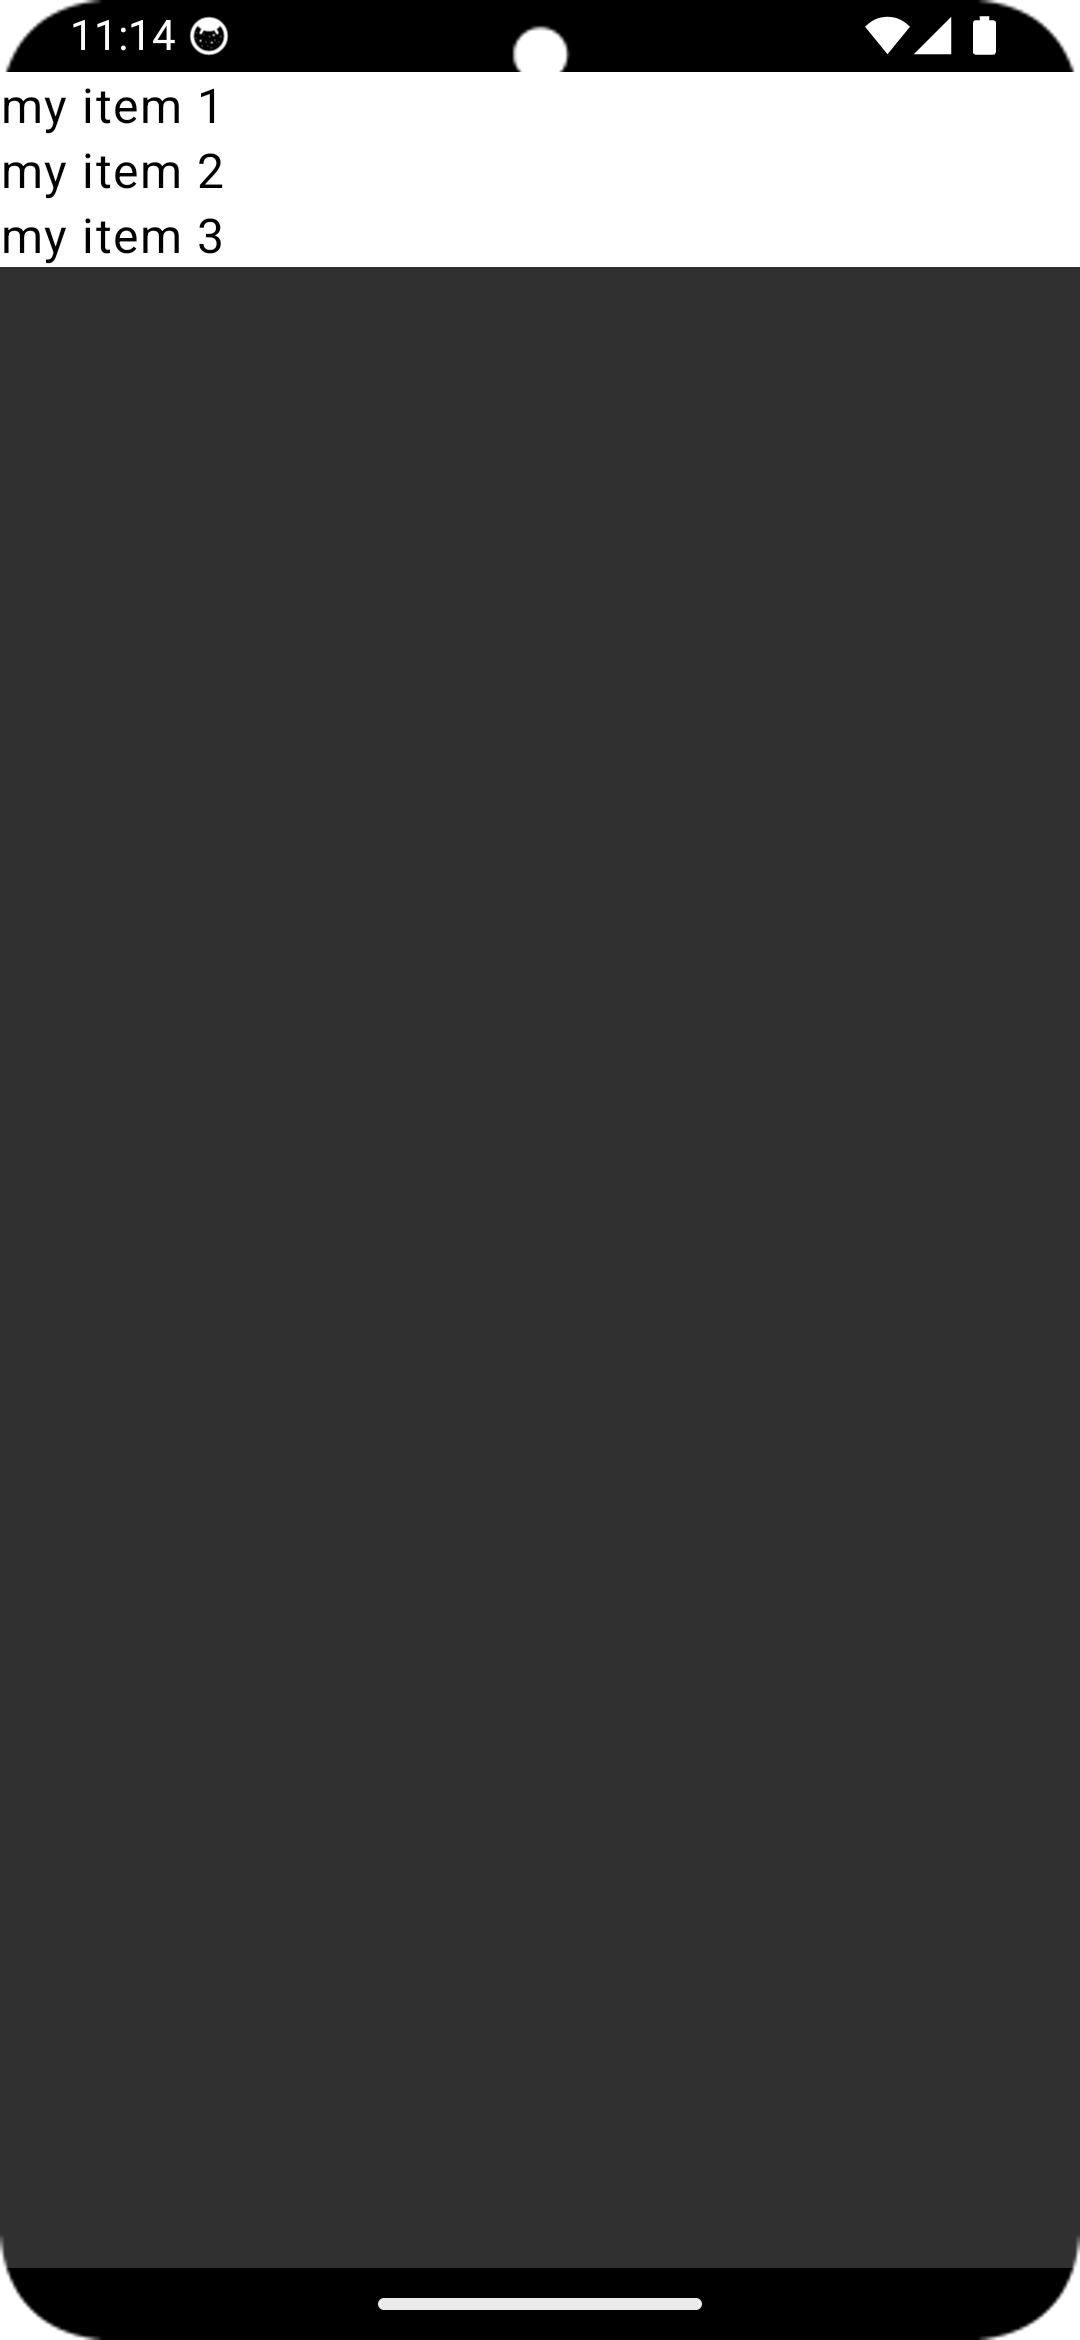
만약 LazyColumn에서 아이템을 3개만 보여지는 높이로 설정하고 싶으면 SubcomposeLayout에서 먼저 item의 높이를 구하고, LazyColumn을 item 높이 * 3에 해당하는 값을 높이로 설정하고 layout 함수로 배치하면 된다.
@Composable
fun MyLayout() {
    SubcomposeLayout { constraint ->
        val placableItem = subcompose(
            slotId = "item",
            content = { MyItem(0) }
        ).first().measure(constraint)

        val itemHeight = placableItem.height

        val placeableMyLazyColumn = subcompose(
            slotId = "lazyColumn",
            content = { MyLazyColumn() }
        ).first().measure(
            constraint.copy(
                maxHeight = itemHeight * 3
            )
        )

        layout(
            width = constraint.maxWidth,
            height = placeableMyLazyColumn.measuredHeight
        ) {
            placeableMyLazyColumn.placeRelative(0, 0)
        }
    }
}

@Composable
fun MyLazyColumn() {
    LazyColumn {
        items((1..10).toList()) {
            MyItem(it)
        }
    }
}

@Composable
fun MyItem(number: Int) {
    Text("my item $number")
}
