Supabase set up
- terminal에 입력
yarn add @supabase/ssr @supabase/supabase-js- .env.local sup abase 연결 URL, KEY 설정
NEXT_PUBLIC_SUPABASE_URL=example
NEXT_PUBLIC_SUPABASE_ANON_KEY=example-
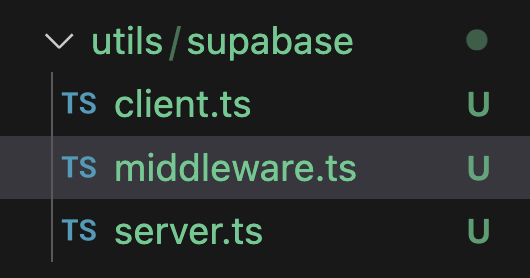
src>utils>supabase>
client.ts
middleware.ts
server.ts 생성
-
사용하는 곳과 연결
const HomePage = async () => {
  const { data } = await getNewProducts();
  const serverClient = createClient();
  const { data: supabaseData } = await serverClient.from("products").select();
-
supbase table에서 Add RLS policy
-
create policy 클릭
-
src>app>auth/callback>route.ts
import { NextResponse } from "next/server";
// The client you created from the Server-Side Auth instructions
import { createClient } from "@/utils/supabase/server";

export async function GET(request: Request) {
  const { searchParams, origin } = new URL(request.url);
  const code = searchParams.get("code");
  // if "next" is in param, use it as the redirect URL
  const next = searchParams.get("next") ?? "/";

  if (code) {
    const supabase = createClient();
    const { error } = await supabase.auth.exchangeCodeForSession(code);
    if (!error) {
      const forwardedHost = request.headers.get("x-forwarded-host"); // original origin before load balancer
      const isLocalEnv = process.env.NODE_ENV === "development";
      if (isLocalEnv) {
        // we can be sure that there is no load balancer in between, so no need to watch for X-Forwarded-Host
        return NextResponse.redirect(`${origin}${next}`);
      } else if (forwardedHost) {
        return NextResponse.redirect(`https://${forwardedHost}${next}`);
      } else {
        return NextResponse.redirect(`${origin}${next}`);
      }
    }
  }

  // return the user to an error page with instructions
  return NextResponse.redirect(`${origin}/auth/auth-code-error`);
}
🌟 Supabase로 데이터를 추가하는 방법
- supabase Authentication에서 Create policy insert 클릭 후 저장
- 로직작성
"use client";
import browserClient from "@/utils/supabase/client";
import { Button } from "../ui/button";

export const AddProductbutton = () => {
  const onAddClick = async () => {
    const data = await browserClient.from("products").insert({
      is_new: true,
      price_amout: 10.0,
      title: "title",
      seo_title: "title",
      description: "description",
      seo_description: "description",
      rating: 1,
    });
  };
  return <Button onClick={onAddClick}>추가</Button>;
};
supabase데이터 수정
- supabase Table Editor 에서 Auth policies
- Authentication에서 Create policy
create policy "policy_name"


on "public"."products"


as PERMISSIVE


for SELECT


to public


using (

// 이부분수정
(select auth.uid()) = user_id
with check{
  (select auth.uid())=user_id
}

);
id부분은 uuid로 저장되어야함
supabase 데이터 삭제
- supabase Authentication Policy추가 (delete)
- 로직추가
"use client";
import browserClient from "@/utils/supabase/client";
import { Button } from "../ui/button";

export const AddProductbutton = () => {
  const onAddClick = async () => {
    // const data = await browserClient.from("products").insert({
    //   is_new: true,
    //   price_amout: 10.0,
    //   title: "title",
    //   seo_title: "title",
    //   description: "description",
    //   seo_description: "description",
    //   rating: 1,
    // });

    // await browserClient
    //   .from("products")
    //   .update({
    //     title: "updated Title",
    //   })
    //   .eq("id", 11);

    await browserClient.from("products").delete().eq("id", 12);
    return <Button onClick={onAddClick}>삭제</Button>;
  };
};
supabase 에 storage image 업로드 하는 방법
- supabase에서 Storage생성
- 이름설정
- 로직작성
const serverClient = createClient();
  const url = serverClient.storage
    .from("지정한 버킷이름")
    .getPublicUrl("logo.png");
Next.js배포
1.Github main에 수정사항 다 합쳐주기
2. Vercel 에서 .env.local key value 넣어주고 배포
3. 소셜로그인 등 사이트 주소 변경시켜주기
4.Authentication > URL configuration Site URL 에 Vercel 배포주소 넣어주기
5. Redirect URL에 localhost 주소 넣어주기
성능 최적화
- Next.js Analyzer설치
yarn add @next/bundle-analyzer- next.config.mjs export 변경
/** @type {import('next').NextConfig} */
const nextConfig = {
  reactStrictMode: false,
  images: {
    remotePatterns: [
      {
        protocol: "https",
        hostname: "fakestoreapi.com",
        pathname: "/**",
      },
    ],
    formats: ["image/avif", "image/webp"],
  },
};

export default process.env.ANALYZE === "true"
  ? withBundleAnalyzer()(nextConfig)
  : nextConfig;
- build하고 나면 얼마나 많은 용량을 차지하고 있는 지확인가능
- 너무 큰 모듈을 확인하고 지연 모듈로 변경시켜줌
- lazy loading, dynamic()사용
const Banner = dynamic(() => import("@/components/Banner"));

const HomePage = async () => {
  const { getNewProducts } = await import("@/services/server-action");
  const { data } = await getNewProducts();
- Vercel Settings의 Function에 국가를 한국으로 변경
Next-auth
// 아직 베타버전
1. 설치
yarn add next-auth@beta- 환경 변수세팅
npx auth secret- app> auth.ts
provider세팅
import NextAuth, { User } from "next-auth";
import Credentials from "next-auth/providers/credentials";

export const { handlers, signIn, signOut, auth } = NextAuth({
  providers: [
    Credentials({
      name: "Credentials",
      credentials: {
        username: { label: "Username", type: "text", placeholder: "username" },
        password: { label: "Password", type: "password" },
      },
      async authorize(credentials): Promise<User | null> {
        const users = [
          {
            id: "test-user-1",
            userName: "test1",
            name: "Test 1",
            password: "pass",
            email: "test1@donotreply.com",
          },
          {
            id: "test-user-2",
            userName: "test2",
            name: "Test 2",
            password: "pass",
            email: "test2@donotreply.com",
          },
        ];
        const user = users.find(
          (user) =>
            user.userName === credentials.username &&
            user.password === credentials.password
        );
        return user
          ? { id: user.id, name: user.name, email: user.email }
          : null;
      },
    }),
  ],
  basePath: "/api/auth",
  secret: process.env.AUTH_SECRET,
});
- src>app>api>auth>[...nextauth]
route.ts
import { handlers } from "@/auth";
export const {GET, POST} = handlers;
기술을 넘어 제품의 가치를 만드는 프론트엔드 엔지니어를 지향합니다.