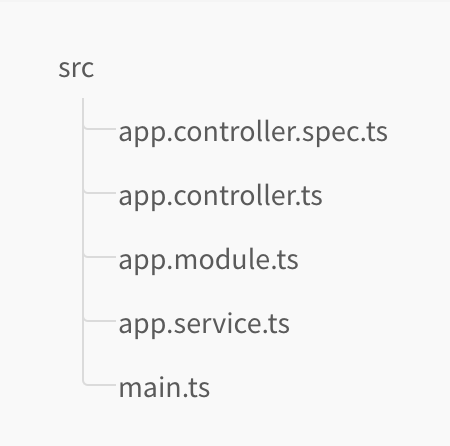
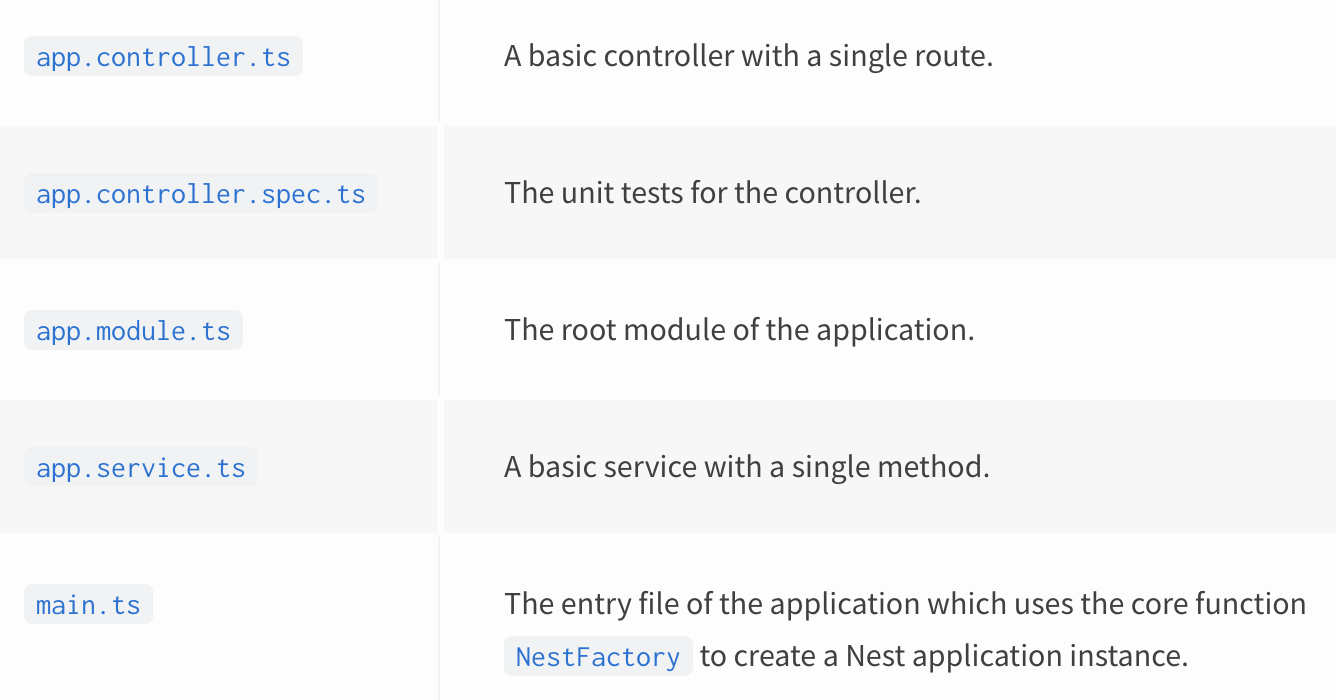
Nest install
$ yarn add -D @nestjs/cliscript에서 실행 변경
package.json에 기술된 스크립트를 보면 "start:dev": "nest start --watch" 라고 되어 있습니다.
—watch 옵션으로 소스코드 변경을 감지하여 코드를 저장할 때 마다 서버를 다시 구동시켜 줍니다.
yarn을 사용해서 그런지 nest new project-name가 안되서 아래를 사용했더니 잘 실행 됩니다.
npx @nestjs/cli new project-name

controller
컨트롤러는 들어오는 요청(request)를 받고 처리된 결과를 응답(response)으로 돌려주는 인터페이스 역할을 합니다.
컨트롤러는 엔드포인트 라우팅(routing) 메커니즘을 통해 각 컨트롤러가 받을 수 있는 요청을 분류합니다. 컨트롤러를 사용 목적에 따라 구분하면 구조적이고 모듈화된 소프트웨어를 작성할 수 있습니다.
컨트롤러의 '데코레이터'
데코레이터는 클래스에 함수의 기능을 더한것입니다.
app.controller.ts
@Controller()
export class AppController {
  constructor(private readonly appService: AppService) {}

  @Get()
  getHello(): string {
    return this.appService.getHello();
  }
여기서 데코레이터 @Get을 @Post로 바꾸면 자동으로 post로 바뀝니다.
(type script를 사용하면 자동으로 post가 import되야하는데 어찌된 영문인지 자동으로 import가 되지 않았음)
데코레이터 밑에 함수는 항상 붙여써야한다는 점을 기억해야합니다.
controller의 역할은 url을 가져오고 함수를 리턴합니다.
service는 이런 함수들을 가져와서 실질적인 서비스 수행, 데이터베이스에 접근하거나 등등의 서비스를 수행합니다.
app.module.ts
모든 것을 import하는 곳. 반드시 하나만 존재합니다.
@Get("/:id")
  getOne(@Param("id") id : string) {
    return `this will return one movie with the id: ${id}`;
  }
parameter를 추가해보면 위와 같습니다.
url속 파라미터의 변수명과 @Param()에 들어가는 이름이 동일 해야하고 뒤에 파라미터를 받아오는 변수의 이름은 동일하지 않아도 됩니다.
get(/:id)가 존재하면 get(/search)와 같은 쿼리가 동작할때 id가 들어가게됨. 따라서 :id보다 위에 get('/search')를 두어야함.
movie=>movie.id === parseInt(id)
string 데이터를 int로 타입 변환할때 위에를 movie=>movie.id === +id 이렇게 바꿔도 됨. 이러면 자동으로 id값을 int처리 시켜줌
만약에 에러 코드를 보내야하는 순간이 오면 어떻게 처리 해야할까요?
예를 들어 사용자가 없는 url을 입력한다면 404 에러 코드를 전송 해야합니다.
이때, 사용하는 것이 "NotFoundException"입니다.
getOne(id: string): Movie {

    const movie = this.movies.find((movie) => movie.id === +id);
    if(!movie) {
      throw new NotFoundException(`Movie with ID ${id} not found.`);
    }
    return movie;
  }
위와 같이 예외 처리를 해준 다음 throw new NotFoundException()을 해주면 됩니다.
괄호 안에 들어가는 문구는 자유롭게 작성 하면 됩니다.
에러 코드 및 메시지는 아래와 같이 나옵니다.
여기서 "message"는 자유롭게 작성한 문구이고 나머지는 NotFoundException 에서 자동으로 보내줍니다.
{
  "statusCode": 404,
  "message": "Cannot GET /movies/1",
  "error": "Not Found"
}
deleteOne 안에 this.getOne(id)를 입력하면 throw new NotFoundException 처리를 하지 않아도 되며, getOne에서 에러를 throw 해줍니다.
  getOne(id: string): Movie {
    const movie = this.movies.find((movie) => movie.id === +id);
    if (!movie) {
      throw new NotFoundException(`Movie with ID ${id} not found.`);
    }
    return movie;
  }

  deleteOne(id: string) {
    this.getOne(id);
    this.movies = this.movies.filter((movie) => movie.id !== +id);
  }
위의 코드 예시에서 만약에 movies/123123123 로 delete요청을 보내면 자동으로 아래가 리턴됩니다.
{
  "statusCode": 404,
  "message": "Cannot GET /movies/1",
  "error": "Not Found"
}
Post 수정 검사
DTO(Data Transfer Object)
: 타입에 대한 유효성 검사, DTO를 사용해서 유효성을 검사하는 미들웨어를 작성할 수 있습니다.
Nest는 pipe를 사용하여 미들웨어 사용할 수 있습니다.
<main.ts>
async function bootstrap() {
  const app = await NestFactory.create(AppModule);
  app.useGlobalPipes(new ValidationPipe  );
  await app.listen(3000);
}
bootstrap();
npm i class-validator class transformer
<create-movie.dto.ts>
export class CreateMoiveDto {
  @IsString()
  readonly title: string;
  @IsNumber()
  readonly year: number;
  @IsString({each : true})
  readonly genres: string[];
}
dto를 사용할 수 있는 다른 좋은 부분은 url로 받아오는 prametere들은 기본이 string이기 때문에 'id'와 같은
int로 받아와야하는 값들이 int로 타입을 설정할 수 있습니다.
