출처:https://hyeo-noo.tistory.com/383
질문의 의도가 무엇일까?
ssh를 알고 있는가?
ssh를 사용해 보았는가?
사용하는 OS가 무엇인지?
평소에 Ubuntu 같은 리눅스 기반 OS를 사용하는지?
ssh의 원리를 알고 있는지?
password가 아닌 key pair 방식을 사용해 보았는지?
사용하는 도구를 알고 있는지?
실제로 ssh 에 접속하는 방법은 알고 있지만
원리가 어떻게 되고,
어떻게 사용자를 추가하게 되고,
Public Key, Private Key 가 사용되는 원리까지 알아야 좋다.
더 나아가서는 접근제어를 어떻게 관리하는지에 대한 질문도 받을 수 있다.
Ubuntu 20.04.4 CLI 버전을 백그라운드에서 실행시키고 있는 모습이다.
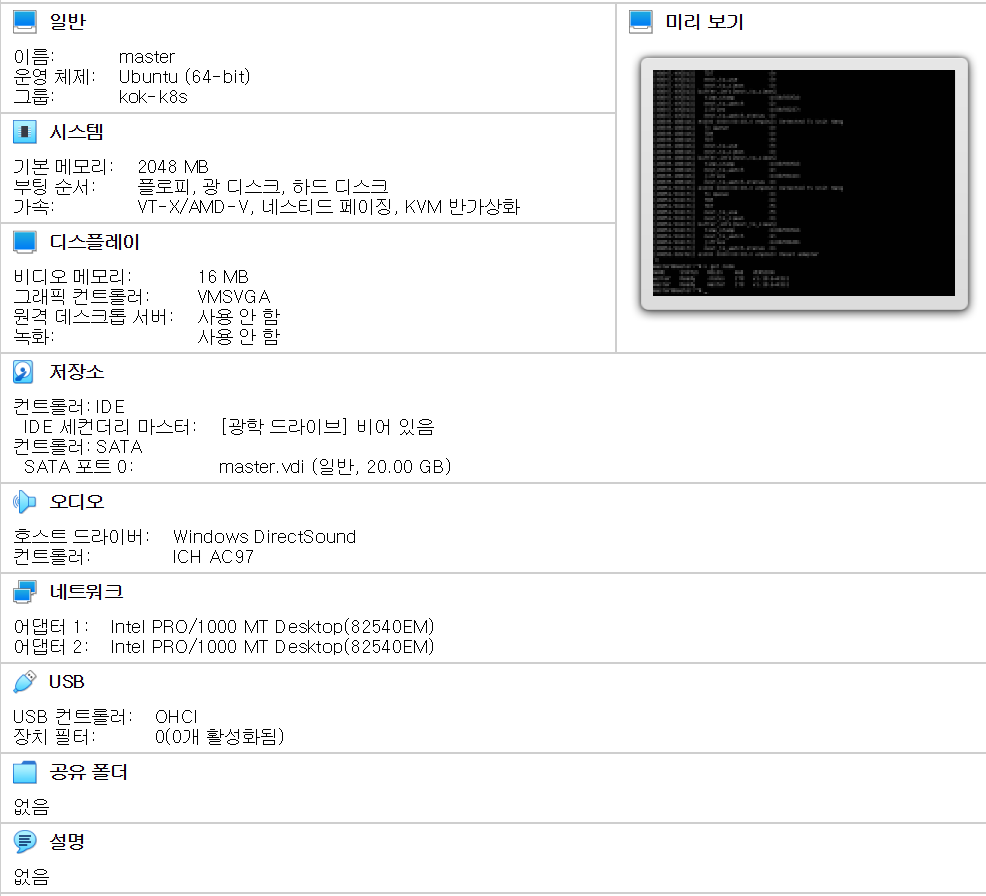
평소에 쿠버네티스를 공부하면서 Virtual Box나 ec2 인스턴스 같은 리눅스 OS는 매일 사용한다.
그래서 항상 ssh로 터미널을 연결해서 썼지만,
이제서야 ssh의 정확한 원리에 대해서 알아보려고 한다.
ssh 연결
내 VM의 사설 IP는 192.168.56.102 이다.
ssh master@192.168.56.102
master@192.168.56.102's password:
ssh를 연결을 시도하면 password를 묻고 password를 입력하면 아래처럼 접속이 완료된다.

ssh master@192.168.56.102
ssh 명령어를 보면 아무런 옵션도 없고, 그냥 username과 IP만 존재한다.
사실 반드시 있어야 하는건 포트 옵션 (-p)이다.
위 명령어는 ssh master@192.168.56.102 -p 22 와 동일한 뜻이다.
일반적으로 22번 포트는 ssh 연결에 쓰이기 때문에 -p 22가 default 값으로 지정되어있다.
22번처럼 일반적으로 많이 쓰이는 포트는 well-known 포트라고 해서 다른 용도 사용을 암묵적으로 금지한다.
ssh 포트 변경
물론 22번 포트말고 다른 포트로 ssh연결을 하고 싶을수도 있다.
sudo -i
현재 계정을 root 계정으로 바꾼다.
password가 필요하다.
vi /etc/ssh/sshd_config
sshd_config 파일에 접속한다.
파일에서 Port 22라고 적힌 부분을 수정해주고,
(1024 이상의 포트 번호를 선택하자)
sshd_config 파일
더보기
#       $OpenBSD: sshd_config,v 1.103 2018/04/09 20:41:22 tj Exp $

# This is the sshd server system-wide configuration file.  See
# sshd_config(5) for more information.

# This sshd was compiled with PATH=/usr/bin:/bin:/usr/sbin:/sbin

# The strategy used for options in the default sshd_config shipped with
# OpenSSH is to specify options with their default value where
# possible, but leave them commented.  Uncommented options override the
# default value.

Include /etc/ssh/sshd_config.d/*.conf

#Port 22
#AddressFamily any
#ListenAddress 0.0.0.0
#ListenAddress ::

#HostKey /etc/ssh/ssh_host_rsa_key
#HostKey /etc/ssh/ssh_host_ecdsa_key
#HostKey /etc/ssh/ssh_host_ed25519_key

# Ciphers and keying
#RekeyLimit default none

# Logging
#SyslogFacility AUTH
#LogLevel INFO

# Authentication:

#LoginGraceTime 2m
#PermitRootLogin prohibit-password
#StrictModes yes
#MaxAuthTries 6
#MaxSessions 10

#PubkeyAuthentication yes

# Expect .ssh/authorized_keys2 to be disregarded by default in future.
#AuthorizedKeysFile     .ssh/authorized_keys .ssh/authorized_keys2

#AuthorizedPrincipalsFile none

#AuthorizedKeysCommand none
#AuthorizedKeysCommandUser nobody

# For this to work you will also need host keys in /etc/ssh/ssh_known_hosts
#HostbasedAuthentication no
# Change to yes if you don't trust ~/.ssh/known_hosts for
# some PAM modules and threads)
ChallengeResponseAuthentication no

# Kerberos options
#KerberosAuthentication no
#KerberosOrLocalPasswd yes
#KerberosTicketCleanup yes
#KerberosGetAFSToken no

# GSSAPI options
#GSSAPIAuthentication no
#GSSAPICleanupCredentials yes
#GSSAPIStrictAcceptorCheck yes
#GSSAPIKeyExchange no

# Set this to 'yes' to enable PAM authentication, account processing,
# and session processing. If this is enabled, PAM authentication will
# be allowed through the ChallengeResponseAuthentication and
# PasswordAuthentication.  Depending on your PAM configuration,
# PAM authentication via ChallengeResponseAuthentication may bypass
# the setting of "PermitRootLogin without-password".
# If you just want the PAM account and session checks to run without
# PAM authentication, then enable this but set PasswordAuthentication
# and ChallengeResponseAuthentication to 'no'.
UsePAM yes

#AllowAgentForwarding yes
#AllowTcpForwarding yes
#GatewayPorts no
X11Forwarding yes
#X11DisplayOffset 10
#X11UseLocalhost yes
#PermitTTY yes
PrintMotd no
#PrintLastLog yes
#TCPKeepAlive yes
#PermitUserEnvironment no
#Compression delayed
#ClientAliveInterval 0
#ClientAliveCountMax 3
#UseDNS no
#PidFile /var/run/sshd.pid
#MaxStartups 10:30:100
#PermitTunnel no
#ChrootDirectory none
#VersionAddendum none

# no default banner path
#Banner none

# Allow client to pass locale environment variables
AcceptEnv LANG LC_*

# override default of no subsystems
Subsystem sftp  /usr/lib/openssh/sftp-server

# Example of overriding settings on a per-user basis
#Match User anoncvs
#       X11Forwarding no
#       AllowTcpForwarding no
#       PermitTTY no
#       ForceCommand cvs server
PasswordAuthentication yes
vi /etc/services
services 파일에 접속해서 포트 번호만 변경해준다. (tcp 변경 금지)
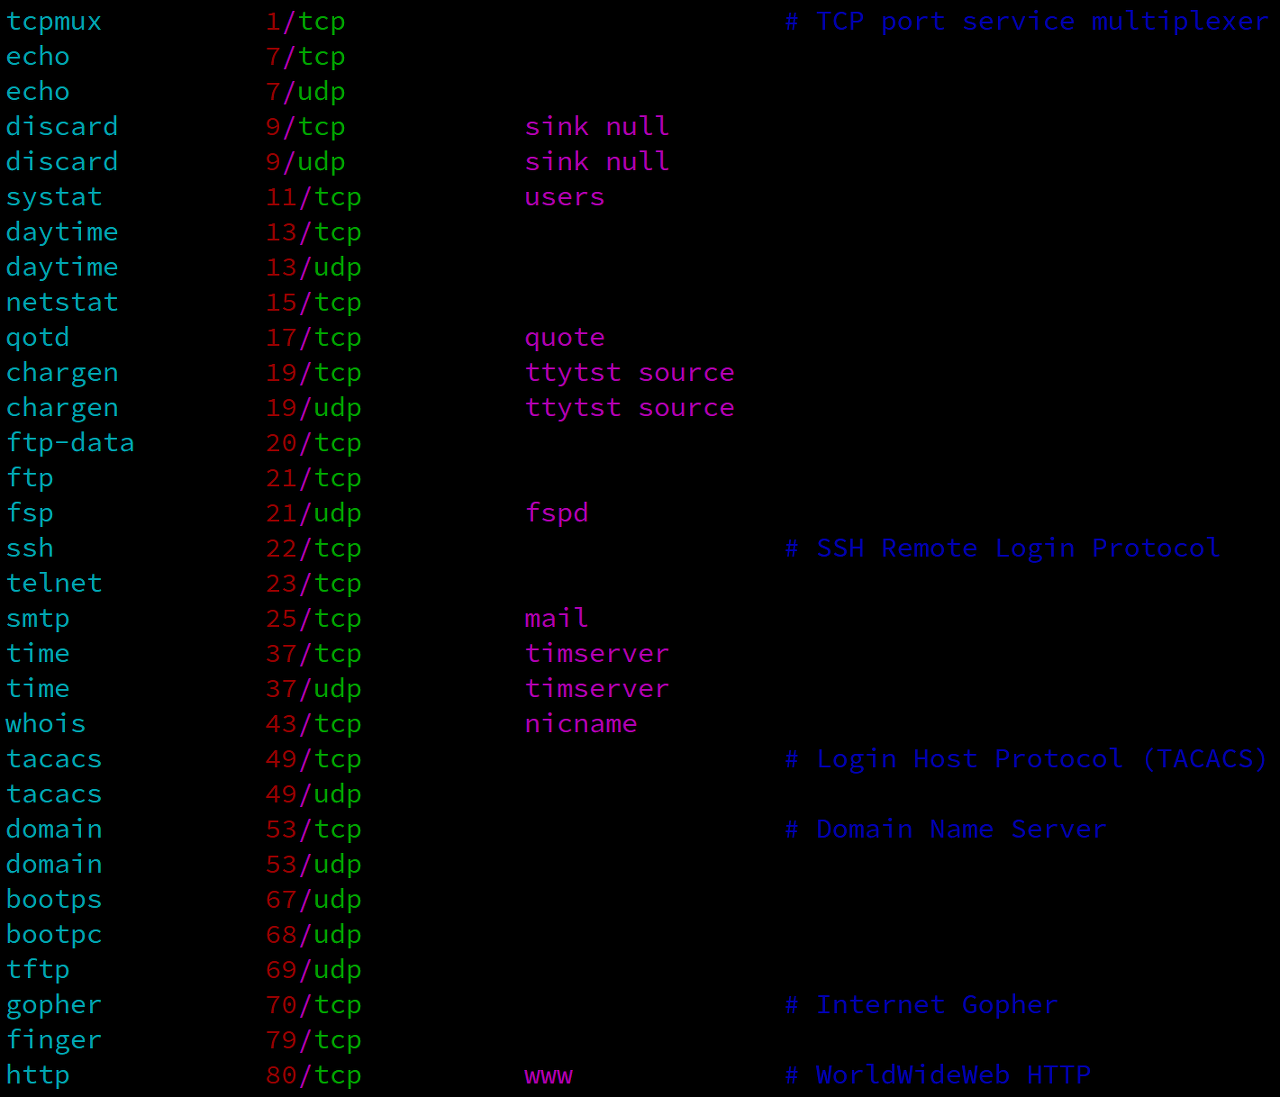
/etc/services 파일
ssh 연결 원리
출처 : https://securitytutorials.co.uk/secure-shell-ssh-101/
서버가 공개키를 가지고, 클라이언트가 비밀키를 가진다.
RSA 방식.
- 서버 인증 및 세션 키 생성
접속하려는 서버가 올바른 서버인지 검증하고, 이후의 데이터 통신을 안전하게 진행하기 위한 세션 키를 생성하는 과정이다.
접속 요청을 받은 서버는 클라이언트에게 자신의 공개키를 전송한다.
최초 접속이라면, 서버로부터 전달받은 공개키를 로컬에 저장할 건지 물어볼 것이다.
동의한다면 해당 공개키가 클라이언트 홈 디렉토리의 .ssh/known_hosts 파일 안에 추가된다. (윈도우라면 C:/Users/{이름}/.ssh 폴더)
이후부터는 해당 서버에 접속 요청을 할 때마다 서버의 공개키가 로컬에 저장되어 있는 공개키와 같은 것인지 검증하게 되며, 같다면 올바른 서버로 판단하게 된다. (클라이언트 인증 과정)
이 과정에서, 통신 시 암호화 및 복호화를 위해 사용될 대칭키 (= 세션키) 가 생성된다.
- 클라이언트 인증
클라이언트가 해당 서버에 대한 올바른 접근 권한을 가지고 있는지 검증하는 과정이다.
클라이언트 인증에는 아래의 두 가지 방식이 있다.
Password 인증
⇒ 보안 상 취약하여 권장되지 않는 방식이다.
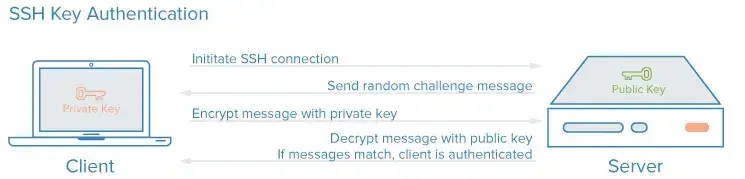
SSH 공개키 인증
⇒ 권장되는 인증 방식이다. 인증 절차는 다음과 같다.
클라이언트 측에서 Key Pair를 생성하고 서버에 공개키를 전송하는 작업은 이미 완료한 상태라고 가정한다.
클라이언트는 해당 서버에 접속하기 위해 사용할 Key Pair의 ID를 서버에 전송한다.
서버는 해당 ID에 매칭되는 공개키가 홈 디렉토리의 .ssh/authorized_keys 파일 안에 작성되어 있는지 찾는다.
존재한다면, 랜덤 스트링(Random Challenge Message)을 생성하고 이를 해당 공개키로 암호화하여 클라이언트에 전송한다.
클라이언트는 전달받은 암호화된 스트링을 비밀키로 복호화한다.
이후 복호화한 스트링을 이용하여 해시 값을 계산하고, 이를 다시 서버에 전송한다.
서버도 생성했던 스트링을 이용하여 해시 값을 계산하고, 클라이언트로부터 받은 값과 같은지 검사한다.
같다면, 올바른 클라이언트임이 인증되어 데이터 통신이 가능해진다.
SSH 연결 과정 요약
접속 시 생성한 대칭키 (= 세션키) 를 이용하여 서로 데이터를 주고 받으며 통신한다.
클라이언트가 보낼 때는 대칭키로 암호화하고, 받을 때는 대칭키로 복호화하는 방식이다.
통신이 종료되면 (= SSH 세션이 종료되면) 해당 대칭키는 폐기되며,
다시 접속할 때마다 새로운 대칭키가 생성되어 통신에 사용된다.
당연히 대칭키, 공개키, 비밀키 간의 차이점을 알아야 합니다.