
6일차
Optional-Chaining
표현
data?.fetchProfile       // data가 true이면 fetchProfile을 실행한다

data||data.fetchProfile // data의 false
false인 표현

nullish-coalescing
표현
data ?? data.fetchProfile //data가 null,undefind일때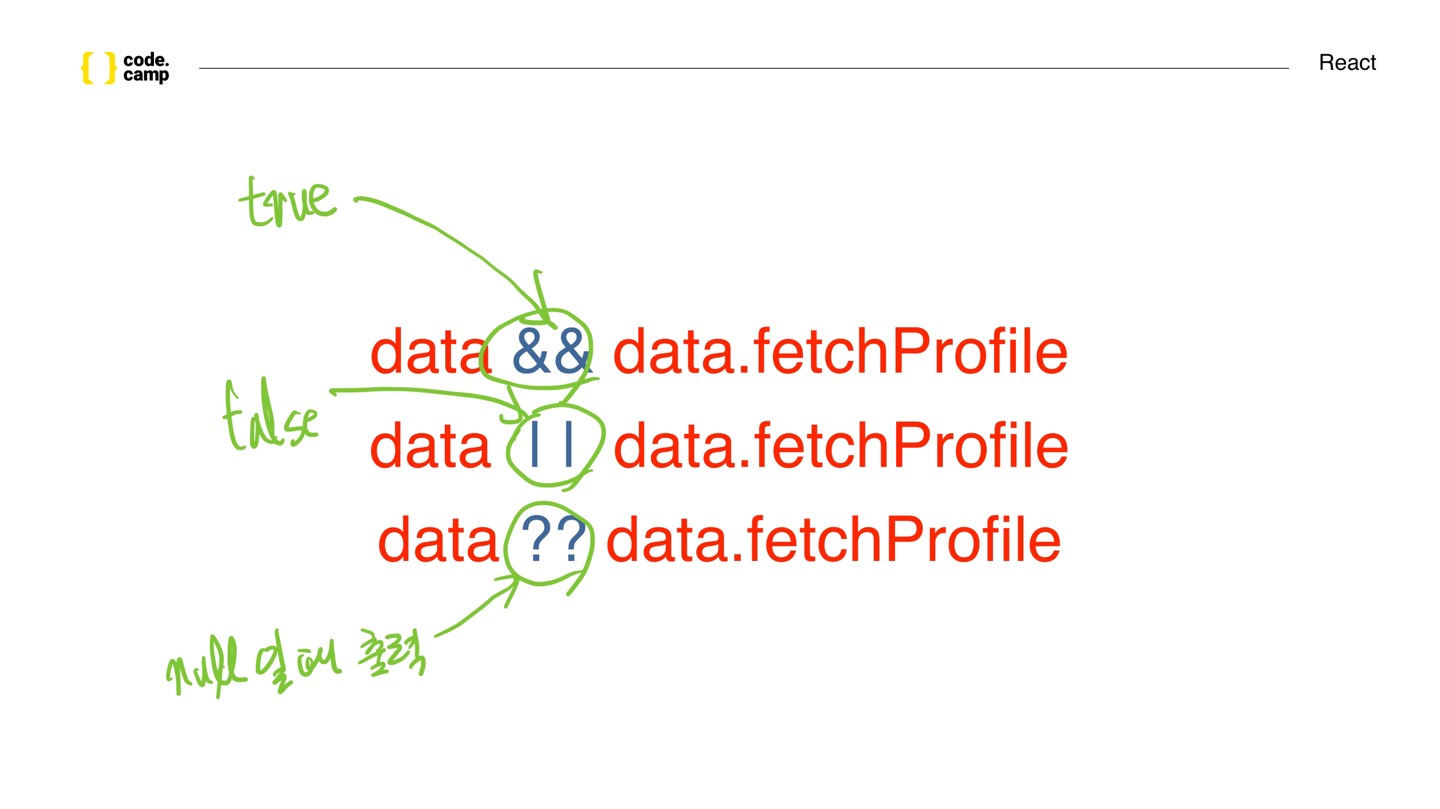
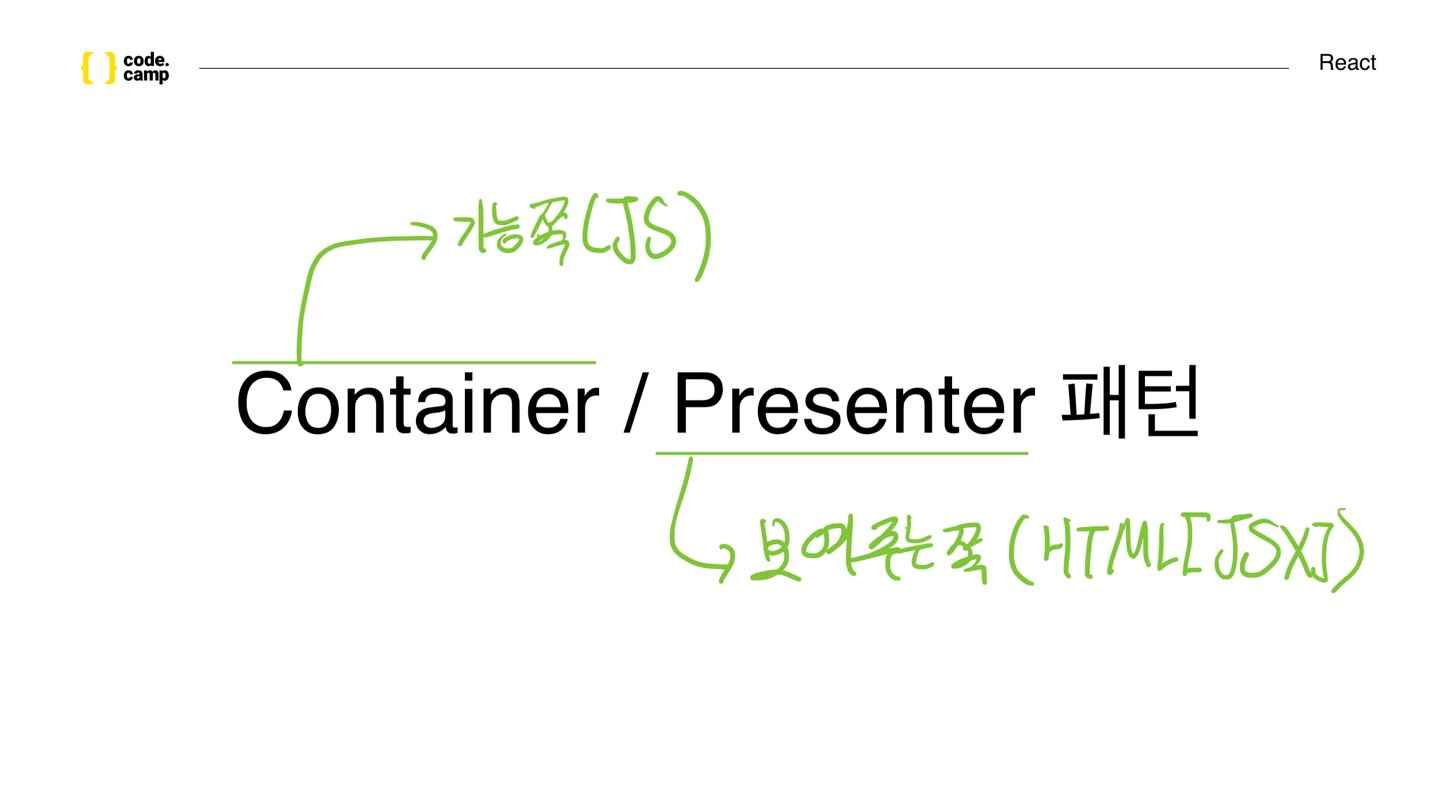
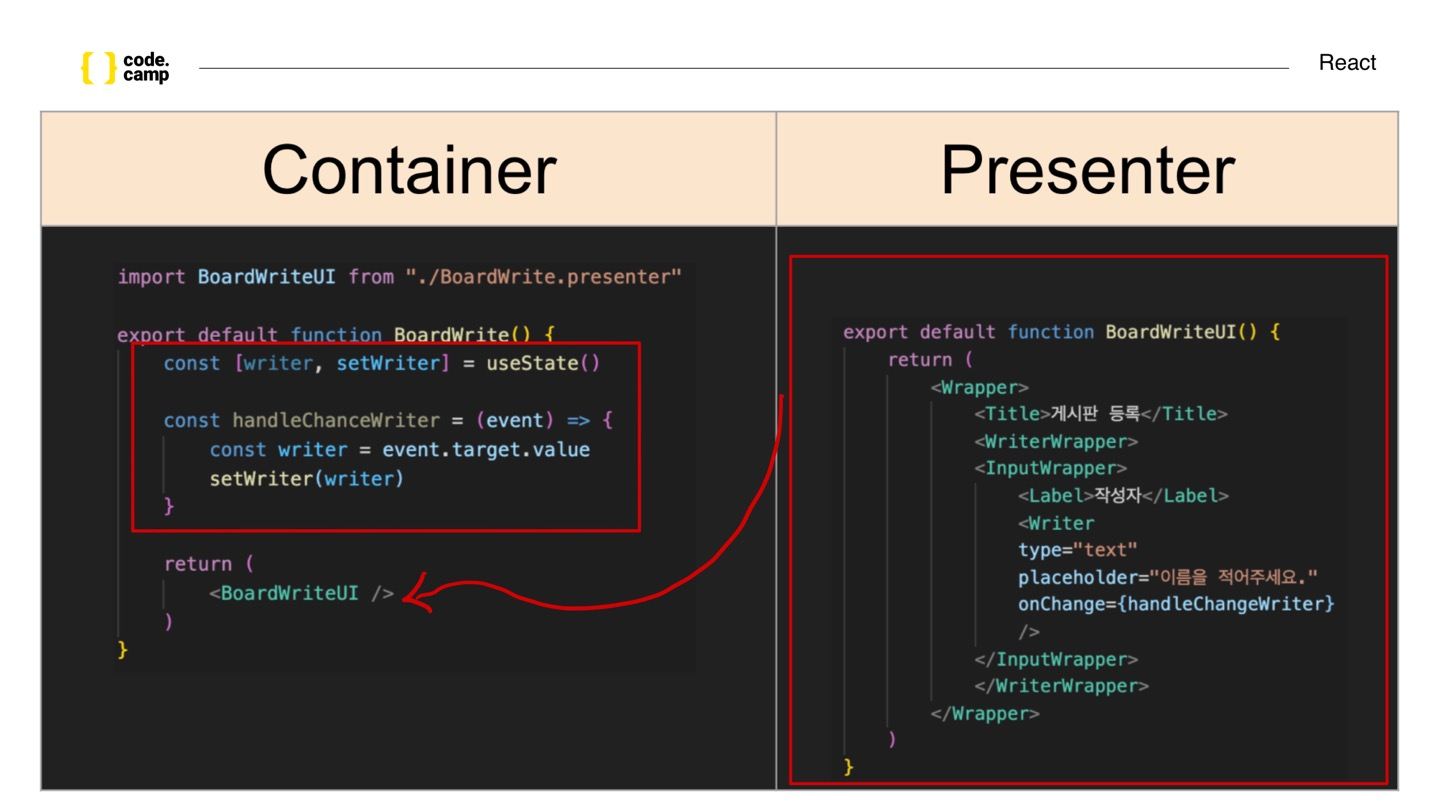
Container과 Presenter의 차이
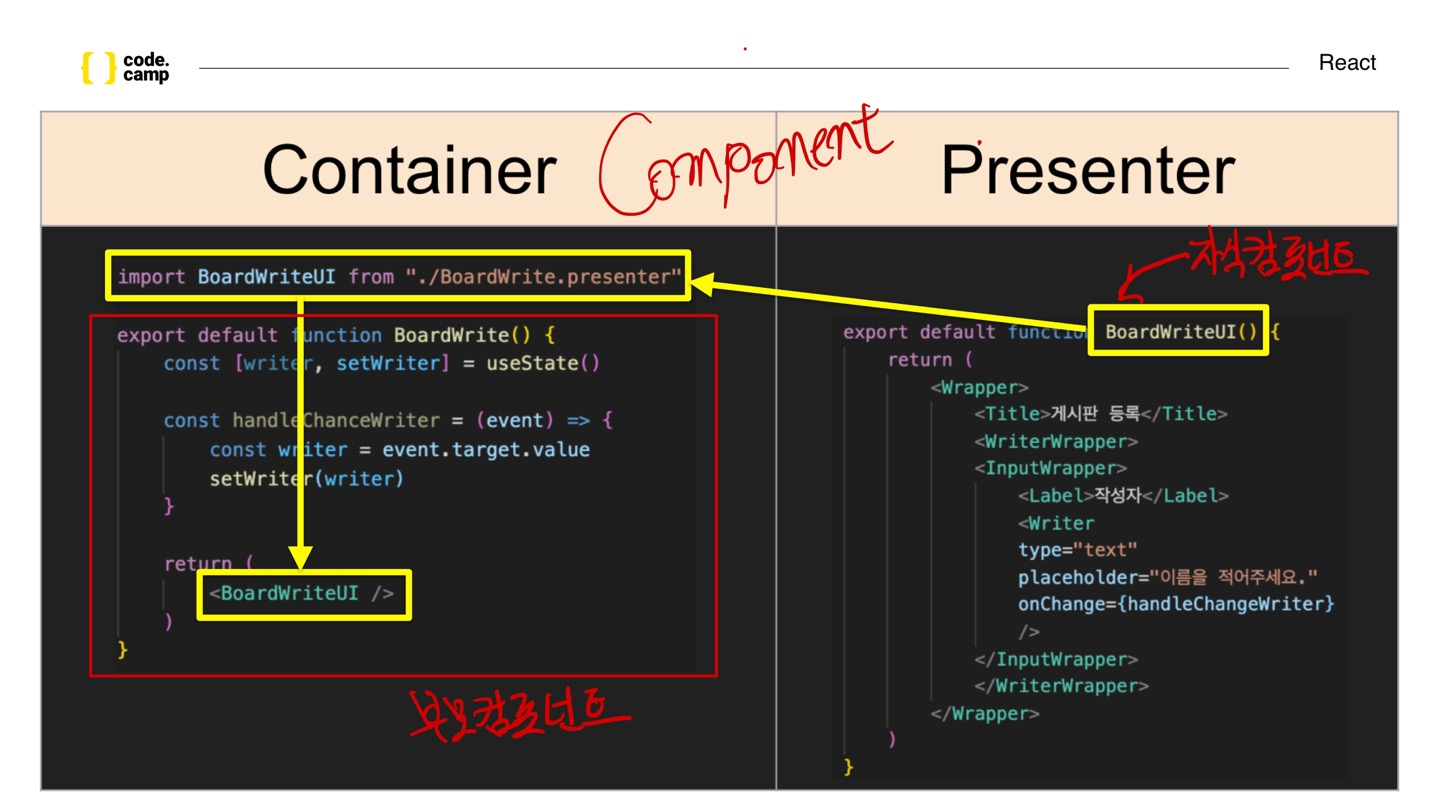
Quiz
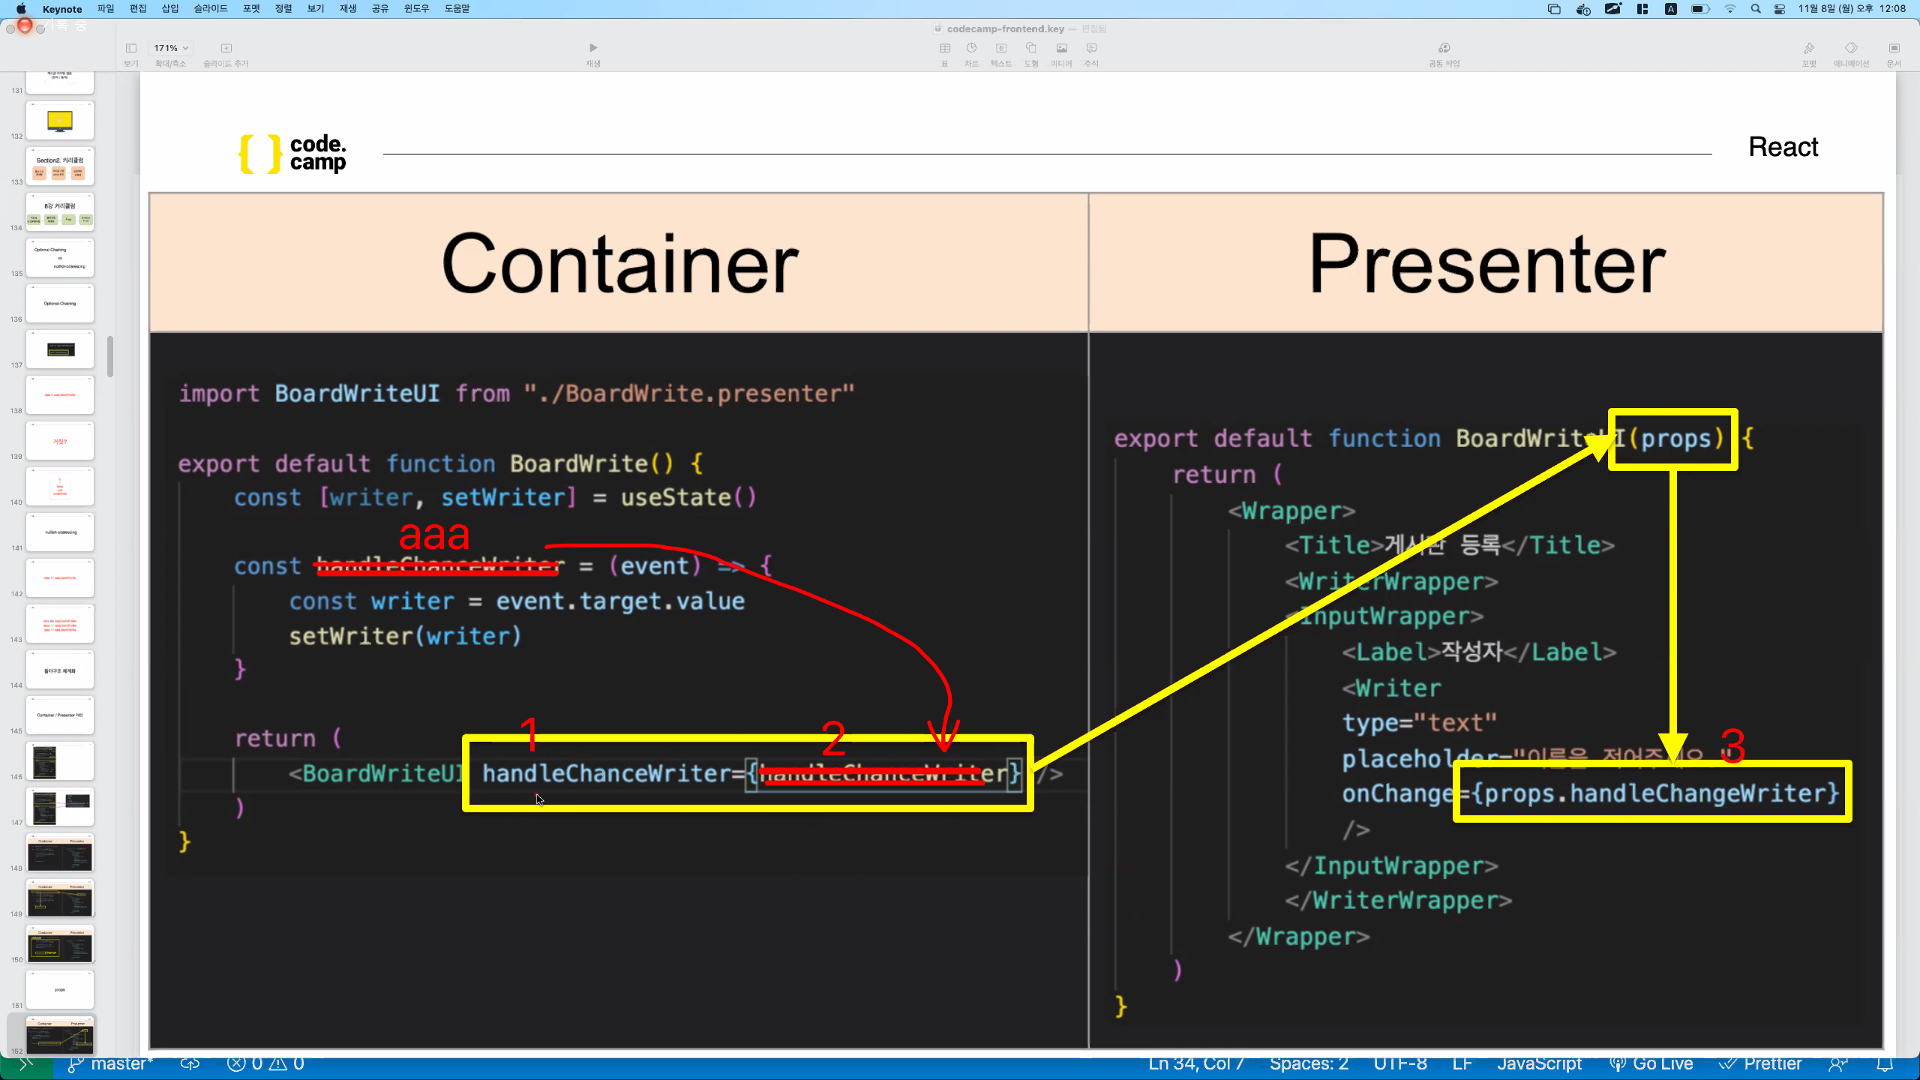
aaa가 바뀐다면 2번이 바뀌어야한다
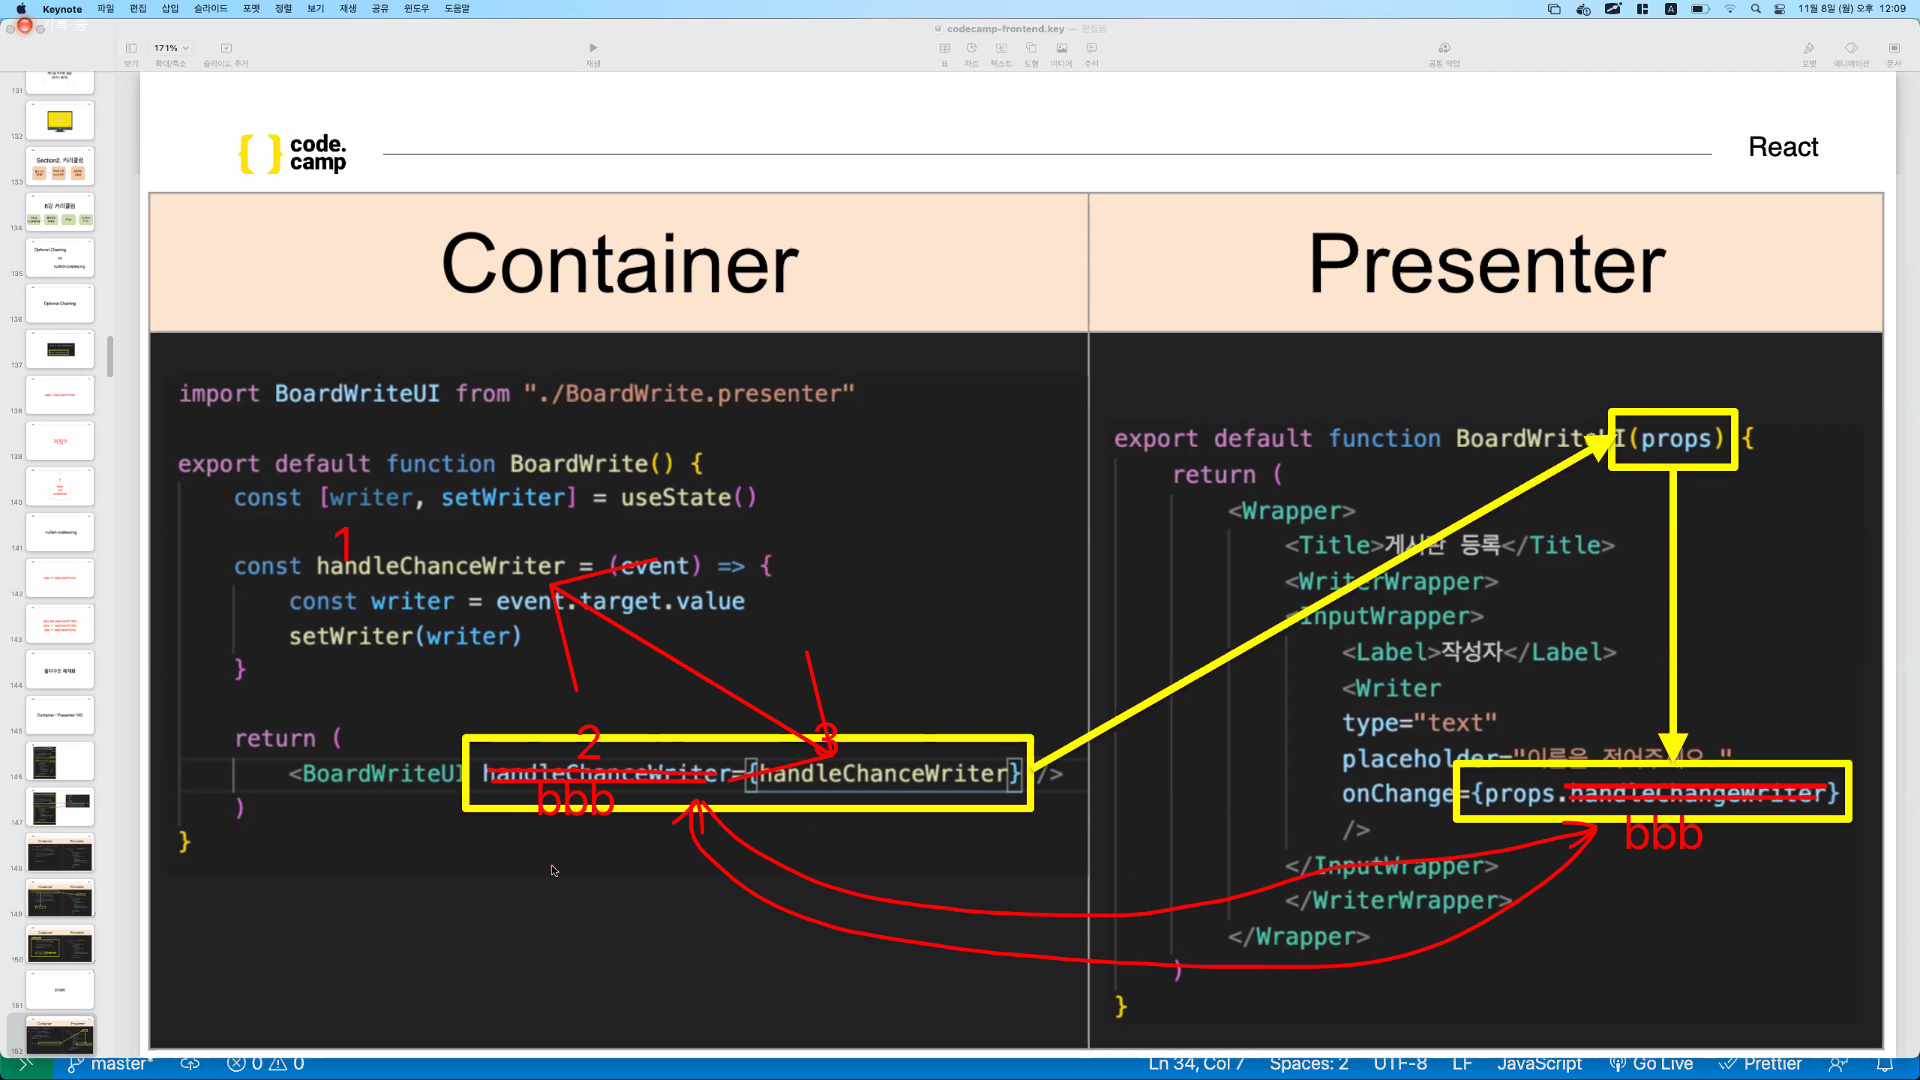
bbb가 바뀐다면2번이 바뀌어야한다
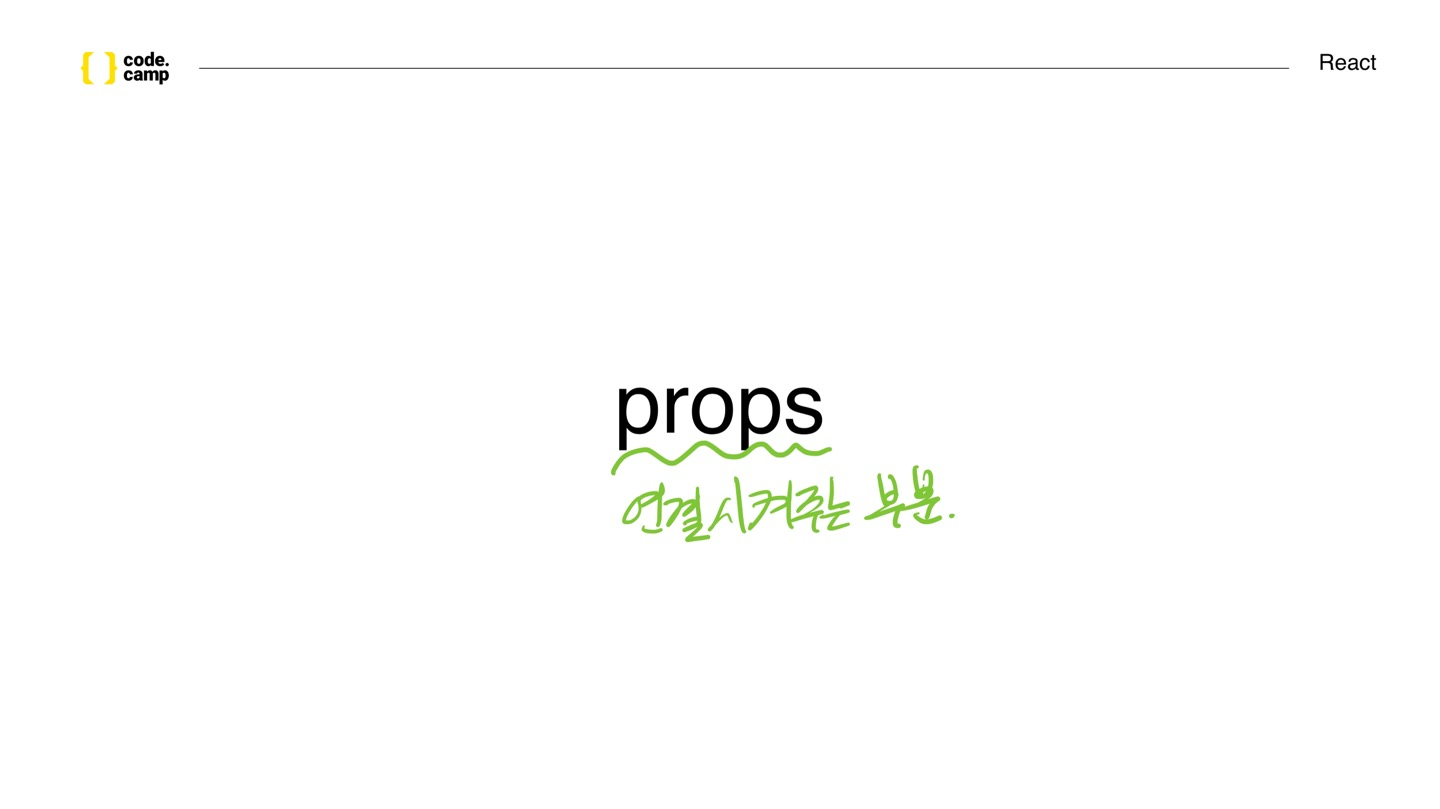
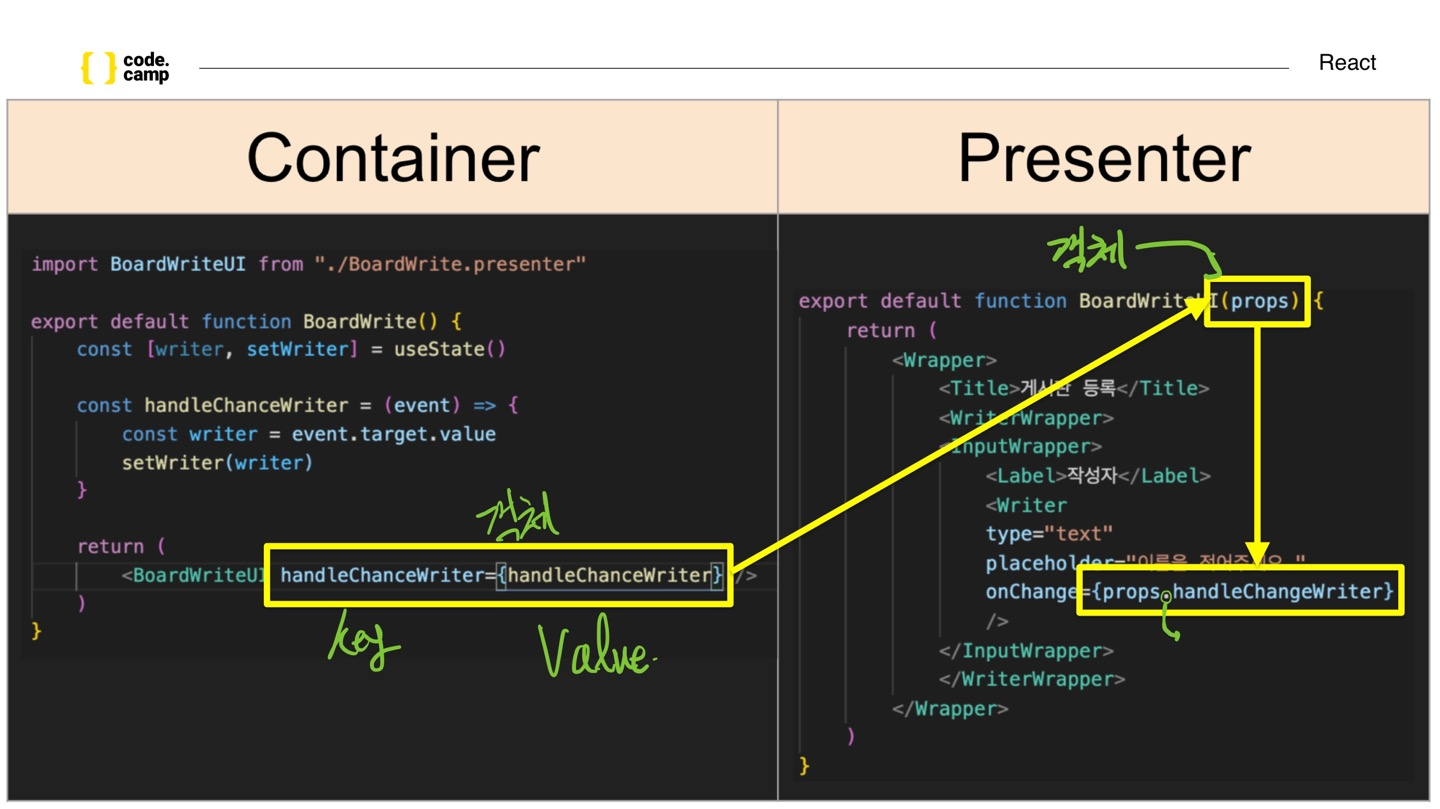
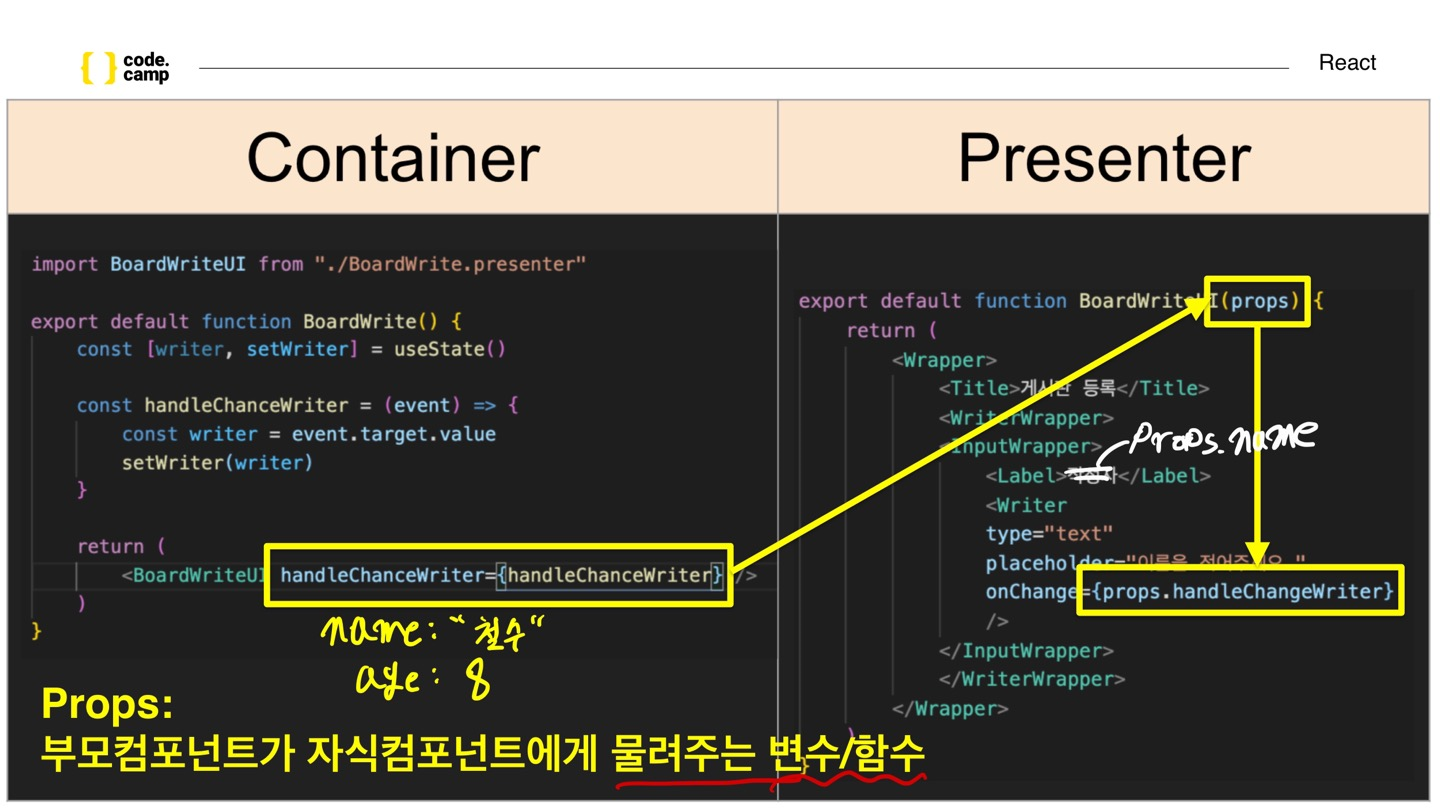
props란?

7일차
map
- 배열 각 요소에 대하여 주어진 함수를 수행한 결과를 모아 새로운 배열을 반환하나는 매서드
const classmates = [
    { name: '철수', age: "13" },
    { name: '영희', age: "10" },
    { name: '훈이', age: "11" },
  ]
  const aaa = classmates.map((el) => ({ name: el.name, age: el.age, school: '토끼초등학교' }))

  console.log(aaa)
filter
배열 각 요소에 대하여 주어진 함수의 결과값이 true인 요소를 모아 새로운 배열을 반환하는 메서드
  const classmates = [
    { name: '철수', age: "13", school: "토끼초등학교" },
    { name: '영희', age: "10", school: "다람쥐초등학교" },
    { name: '훈이', age: "11", school: "토끼초등학교" },
  ]

    const school = classmates.filter((el) => el.school === "토끼초등학교")
  const age = classmates.filter((el) => el.age == 11)
  const named = classmates.filter((el) => el.name === "영희")
map&filter
  const abc = classmates
    .filter((el) => (el.age >= 11))
    .map((el) => ({ name: el.name, age: el.age, school: "다람쥐초등학교" }))

  console.log(abc)
8일차
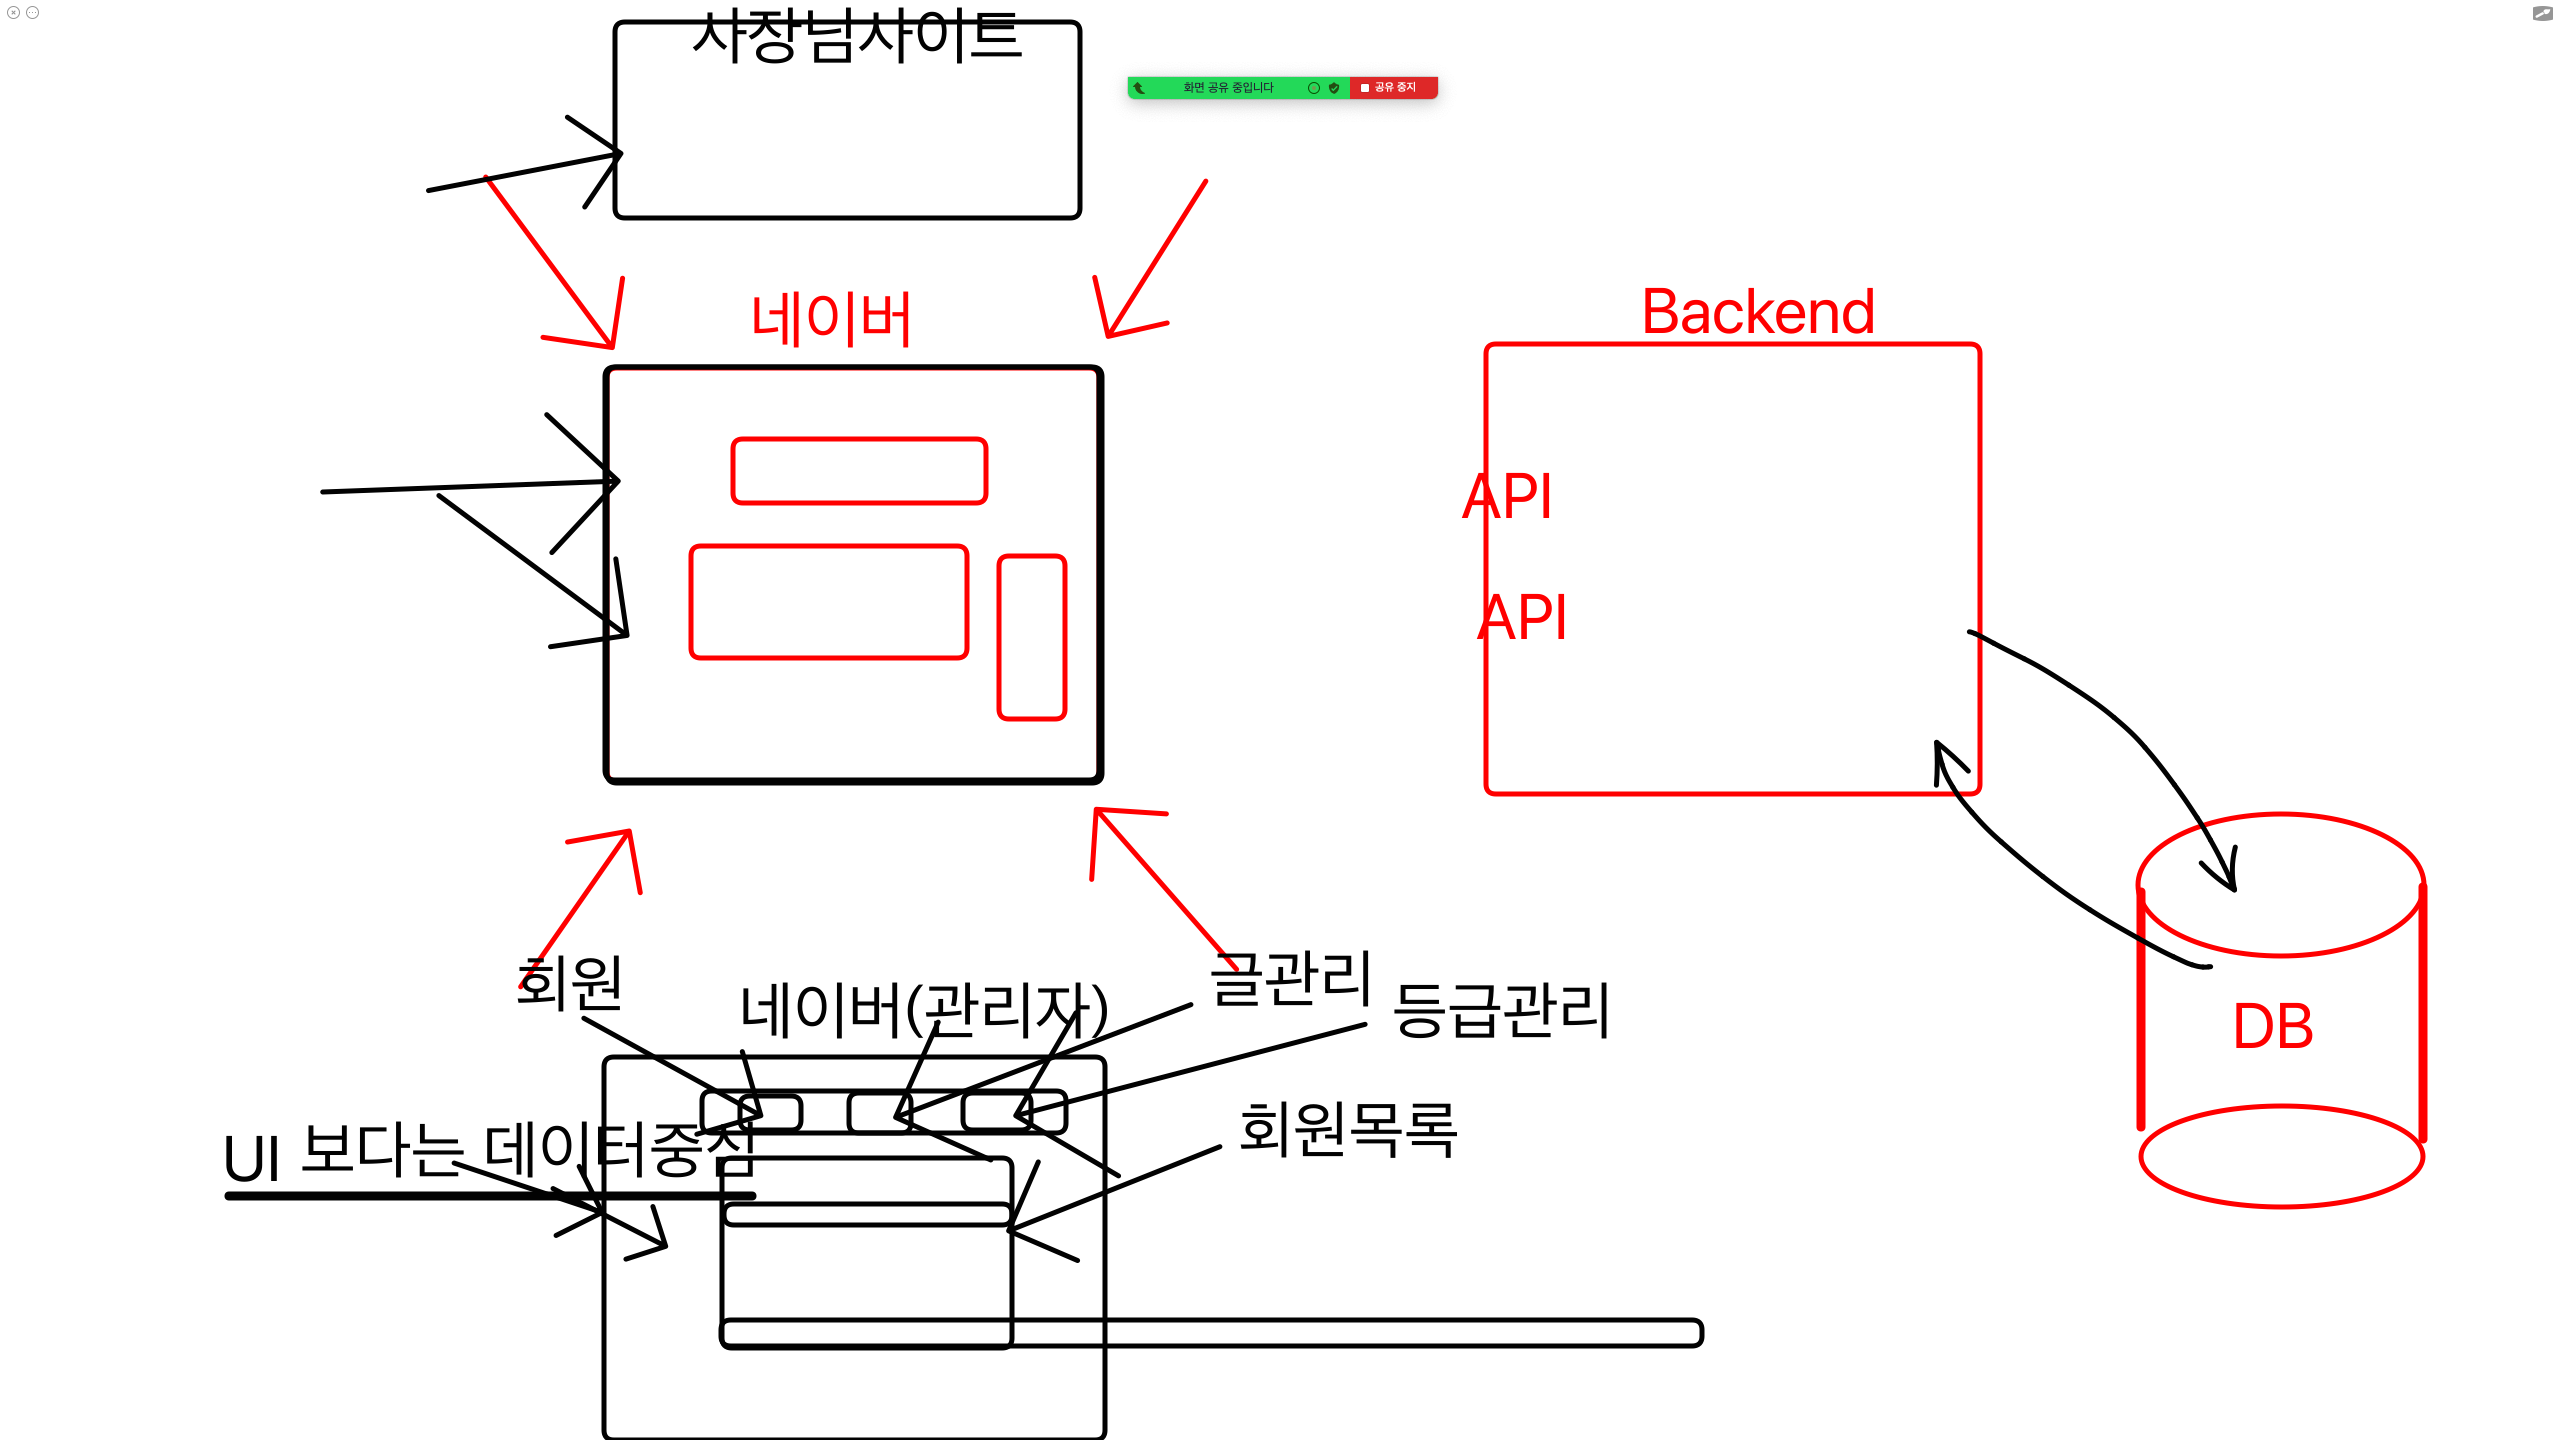
전체 구조
컴포넌트 재사용

기존에 컴포넌트를 두개써서 렌더링했다면 앞으로는 밑에 형식처럼 사용했으면 좋겠다.

하나의 컴포넌트에 props를 생성해서 수정과 등록페이지를 구동하게 만들었다.
{!props.ggg && <MyButton onClick={props.zzz} qqq={props.qqq}>게시물 등록하기</MyButton>}
{props.ggg && <MyButton onClick={props.xxx} qqq={props.qqq}>게시물 수정하기</MyButton>}
// 하나의 컴포넌트에 수정과 등록을 할수있도록 기능을 집어넣었다.
9일차
typescript
- 자바스크립트의 타입을 강제로 시키는 언어
- 기존의 자바스크립트에서의
""는 String(문자열)
사용법
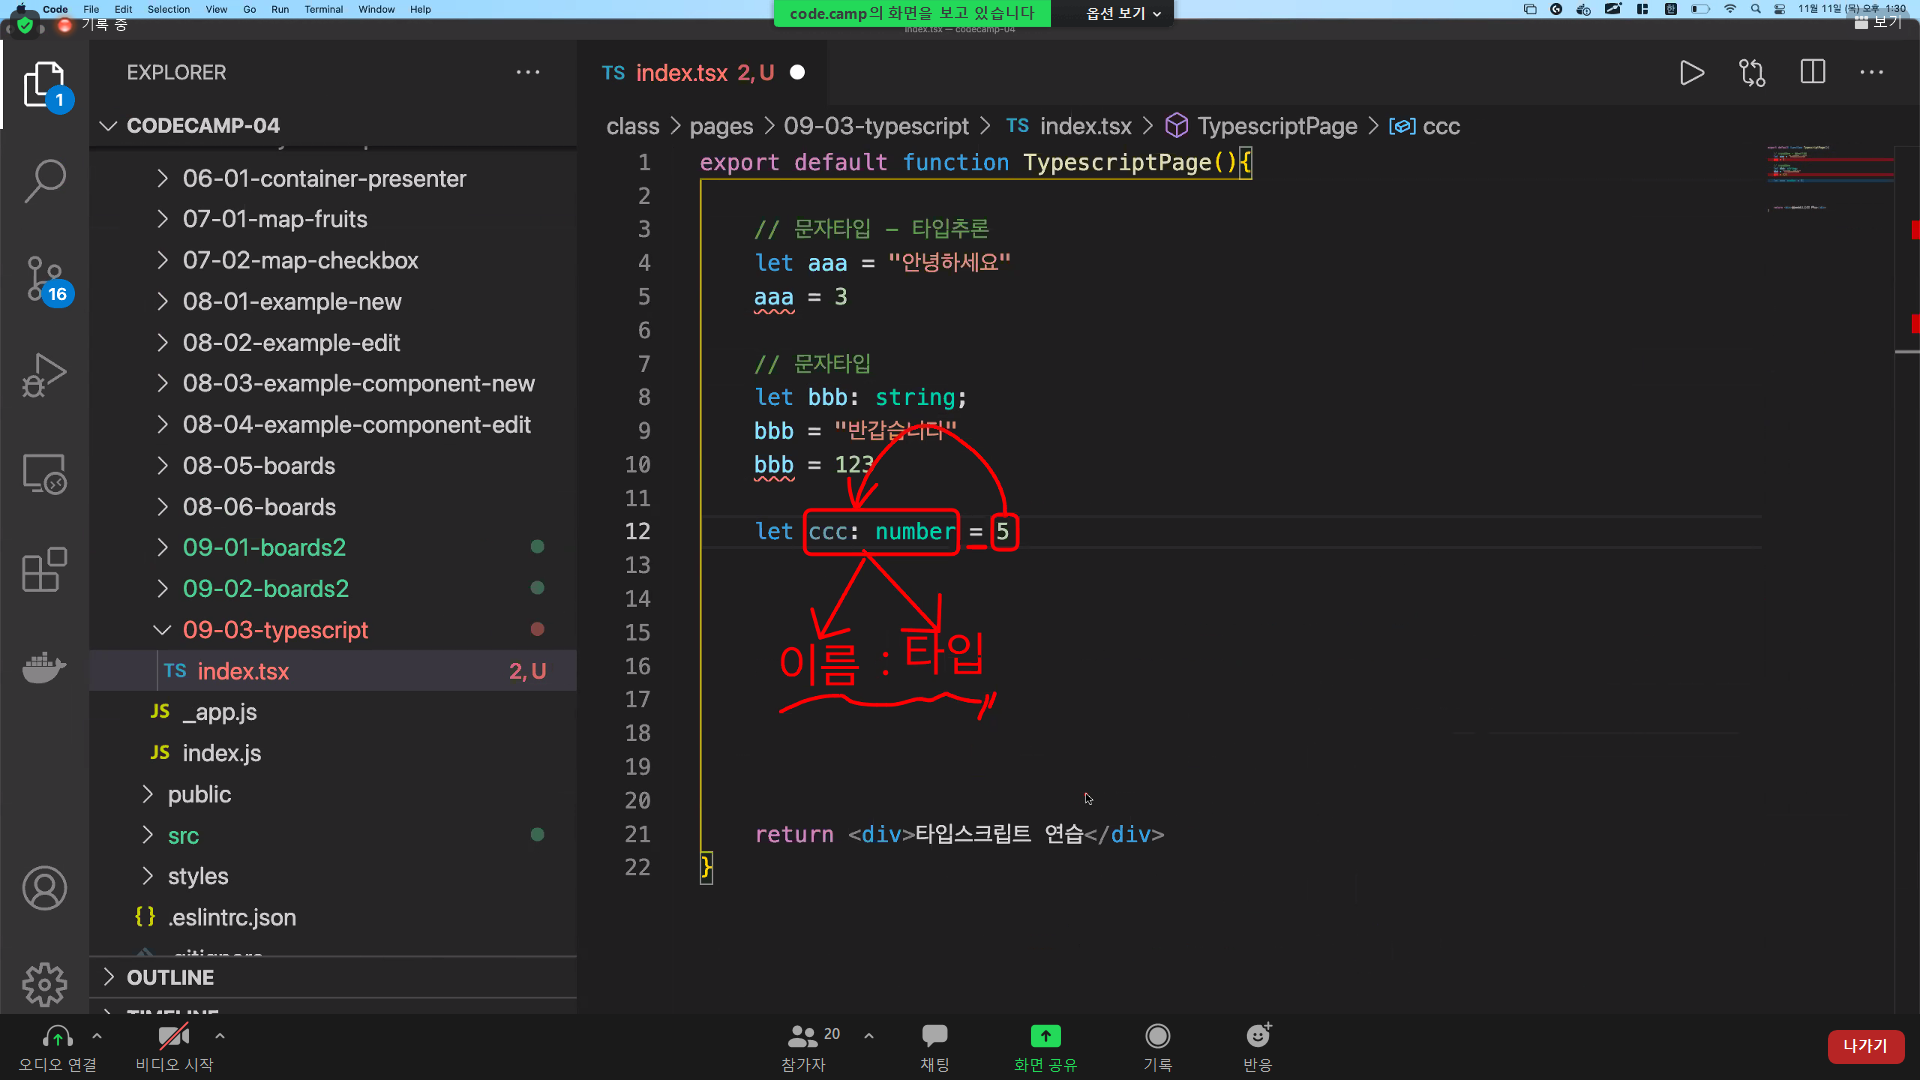
export default function TypescriptPage() {
  // 문자타입 - 타입추로
  let aaa = "안녕하세요";
  // aaa = 3; X numer이아닌String

  // 문자타입
  let bbb: string;
  bbb = "반갑습니다";
  // bbb = 123 X string값

  let ccc: number = 5;
  // ccc = 'asdf' //X =? ccc는 숫자

  // let ddd = [1, 2, 3, 4, 5, 6]; //숫자배열
  // ddd = ["asdasd","asdasd","ASD"]; //X 문자배열

  // 배열타입
  let ddd: number[] = [1, 2, 3, 4, 5, 6]; //숫자배열
  let eee: string[] = ["a", "b", "c", "d", "e"];
  let fff: number[] | string[] = [1, 2, 3, 4, 5]; // |(union_type) => 왼쪽과 오른쪽도 된다는 의미
  fff = ["a", "b", "c"];
  let ggg: (number | string)[] = [1, "b", 2, "c"];

  // 객체타입
  //관례..?
  interface IProfile {
    name: string;
    age: number | string;
    shcool: string;
  }

  let profile: IProfile = {
    name: "철수",
    age: 8,
    shcool: "다람쥐초등학교",
  };
  profile.age = "8살";
  // profile.shcool = 3; // interface에서 타입을 정해줬기때문에 숫자보단 문자열로 정해줘야한다.

  return <div>{profile}</div>;
}
10일차
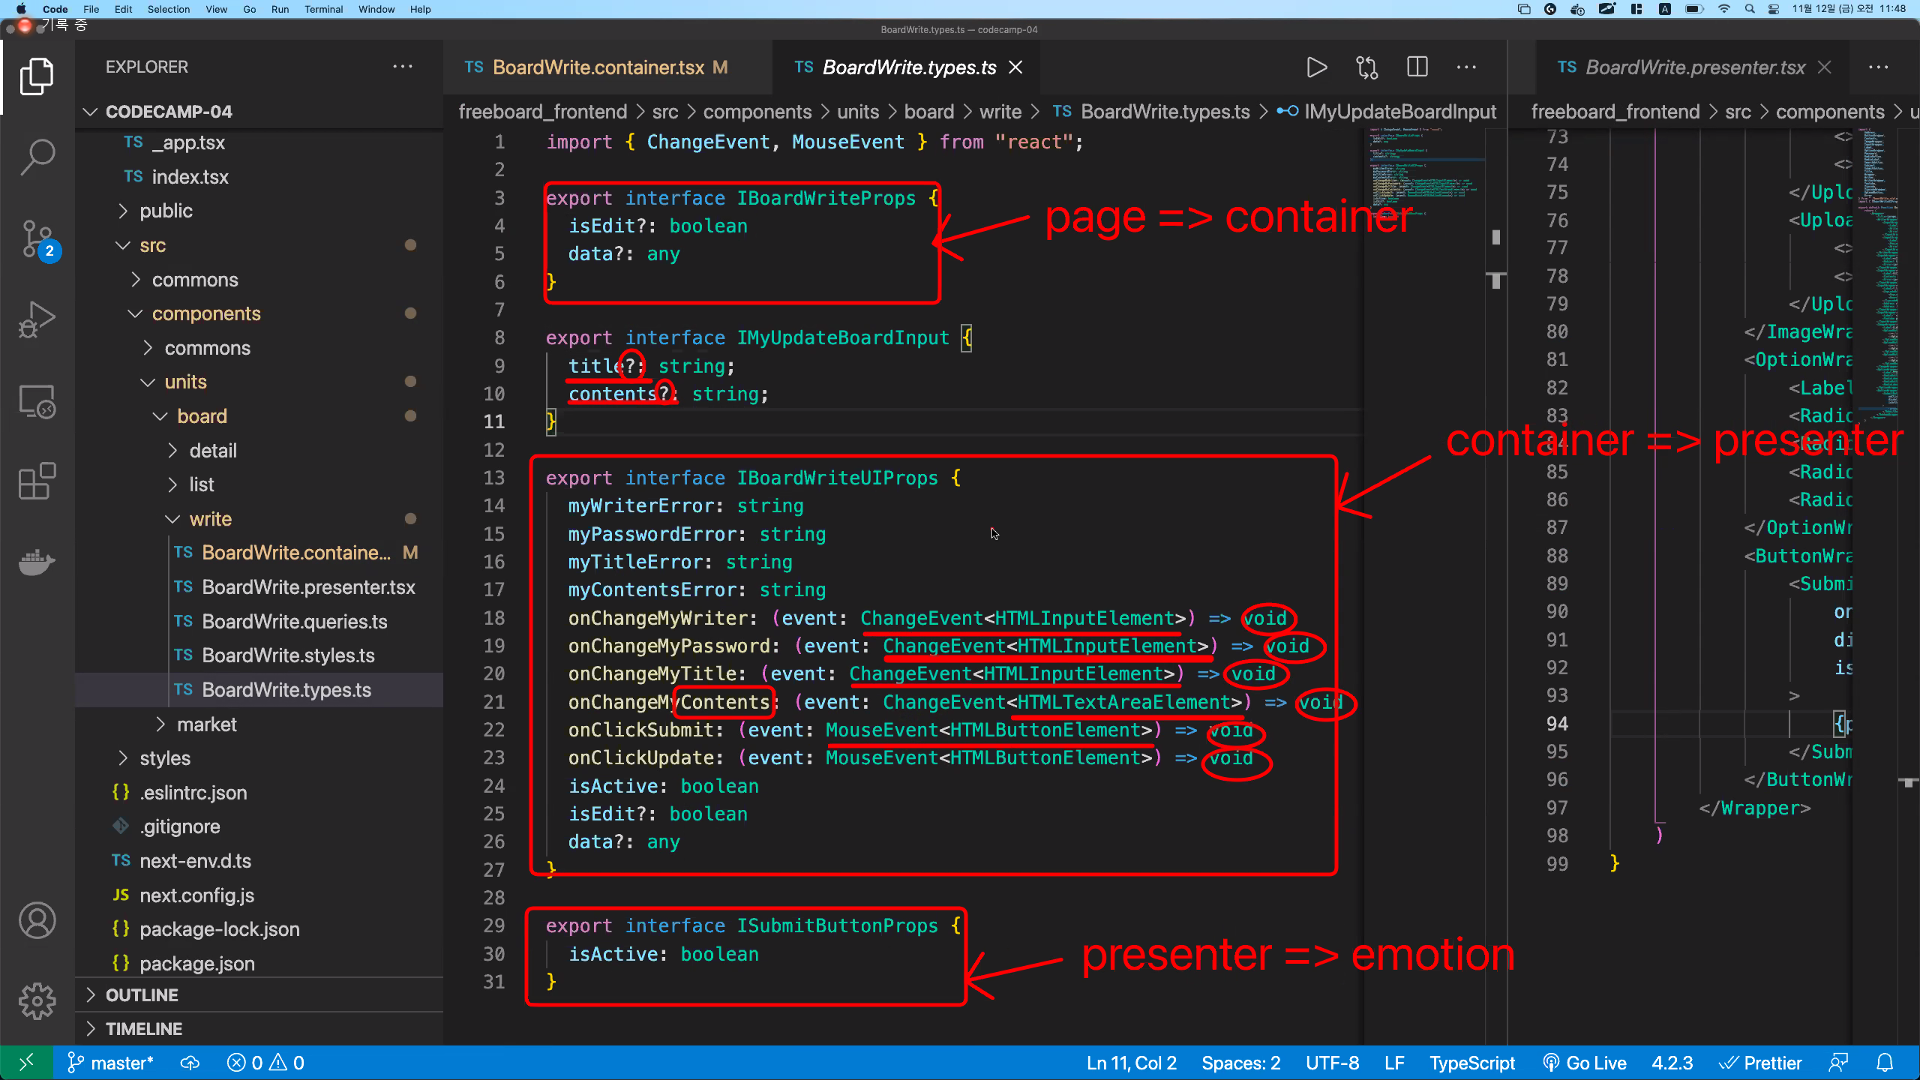
리턴이 없는 void
click을 했을 때 event가 발생했을 떄의 함수는 MouseEvent
API타입스크립트
API응답데이터
- GraphQl-Codegen
코드문법 규칙
코드 포멧규칙
안전한 GIT
단축키.zip
rm -rf 폴더명 // 폴더 지우기
npm install -g npm // nodepackage-manager 업데이트

npm install husky --save-dev // 협업때 fomat과 lint를 맞춰준다(이버전은 7버전 하지마...)_
yarn add husky@4 (4버전 이걸로!!)
eslint 적용하기
yarn add eslint --dev // eslint 설치
yarn run eslint --init //설치후 옵션적용
prettier 적용하기
yarn add --dev --exact prettier // prettier 설치
echo {}> .prettierrc.json // .prettierrc.json

.eslintrc파일에서
{
  "extends": [
    "prettier"
  ]
}
적용하기
.eslintrc.js
module.exports = {
    env: {
        browser: true,
        es2021: true
    },
    extends: [
        'plugin:react/recommended',
        'standard',
        'prettier' // prettier을 상속(prettier로 포멧터해주겠다)
    ],
    parser: '@typescript-eslint/parser',
    parserOptions: {
        ecmaFeatures: {
            jsx: true
        },
        ecmaVersion: 13,
        sourceType: 'module'
    },
    plugins: [
        'react',
        '@typescript-eslint'
    ],
    rules: {
        'react/react-in-jsx-scope': 'off',
    }

}
수업 이해모음집.zip
- src/commons = 라이브러리,스타일(Api...)
- src/components = 요소들을 컴포넌트로 나누고 조립하는 방식(Header,Nav...)
- src/components/commons = 공통컴포넌트
- src/components/units = 단일컴포넌트


하나의 함수는 하나만 기능하도록 만드는게 좋다.
함수의 이름은 동사
boolean형태는 앞에 함수명이 is___로시작한다

yarn dev -p portnum // portnum바꾸기

XML => Extensibel Markup Language
devDependencies <-실행전에 필요

early-exit pattern - 없으면 빨리 종료시킨다


return과 break는 같은가?
return은 함수 값이있으면 중단
break는 반복에서 값이있으면 중단
::: 결이다르다
타입스크립트 모음집
typescript
yarn add lib // 필요라이브러리를 다운받고
yarn add @types/lib // 타입스트크립트에 적용이안될떄 @types/라이브러리명 설치한다.

codegen.yml === codegen.yaml


schema: http://graphql주소
generates:
  ./src/commons/types/generated/types.d.ts:
    plugins:
      - typescript
    config:
      typesPrefix: I