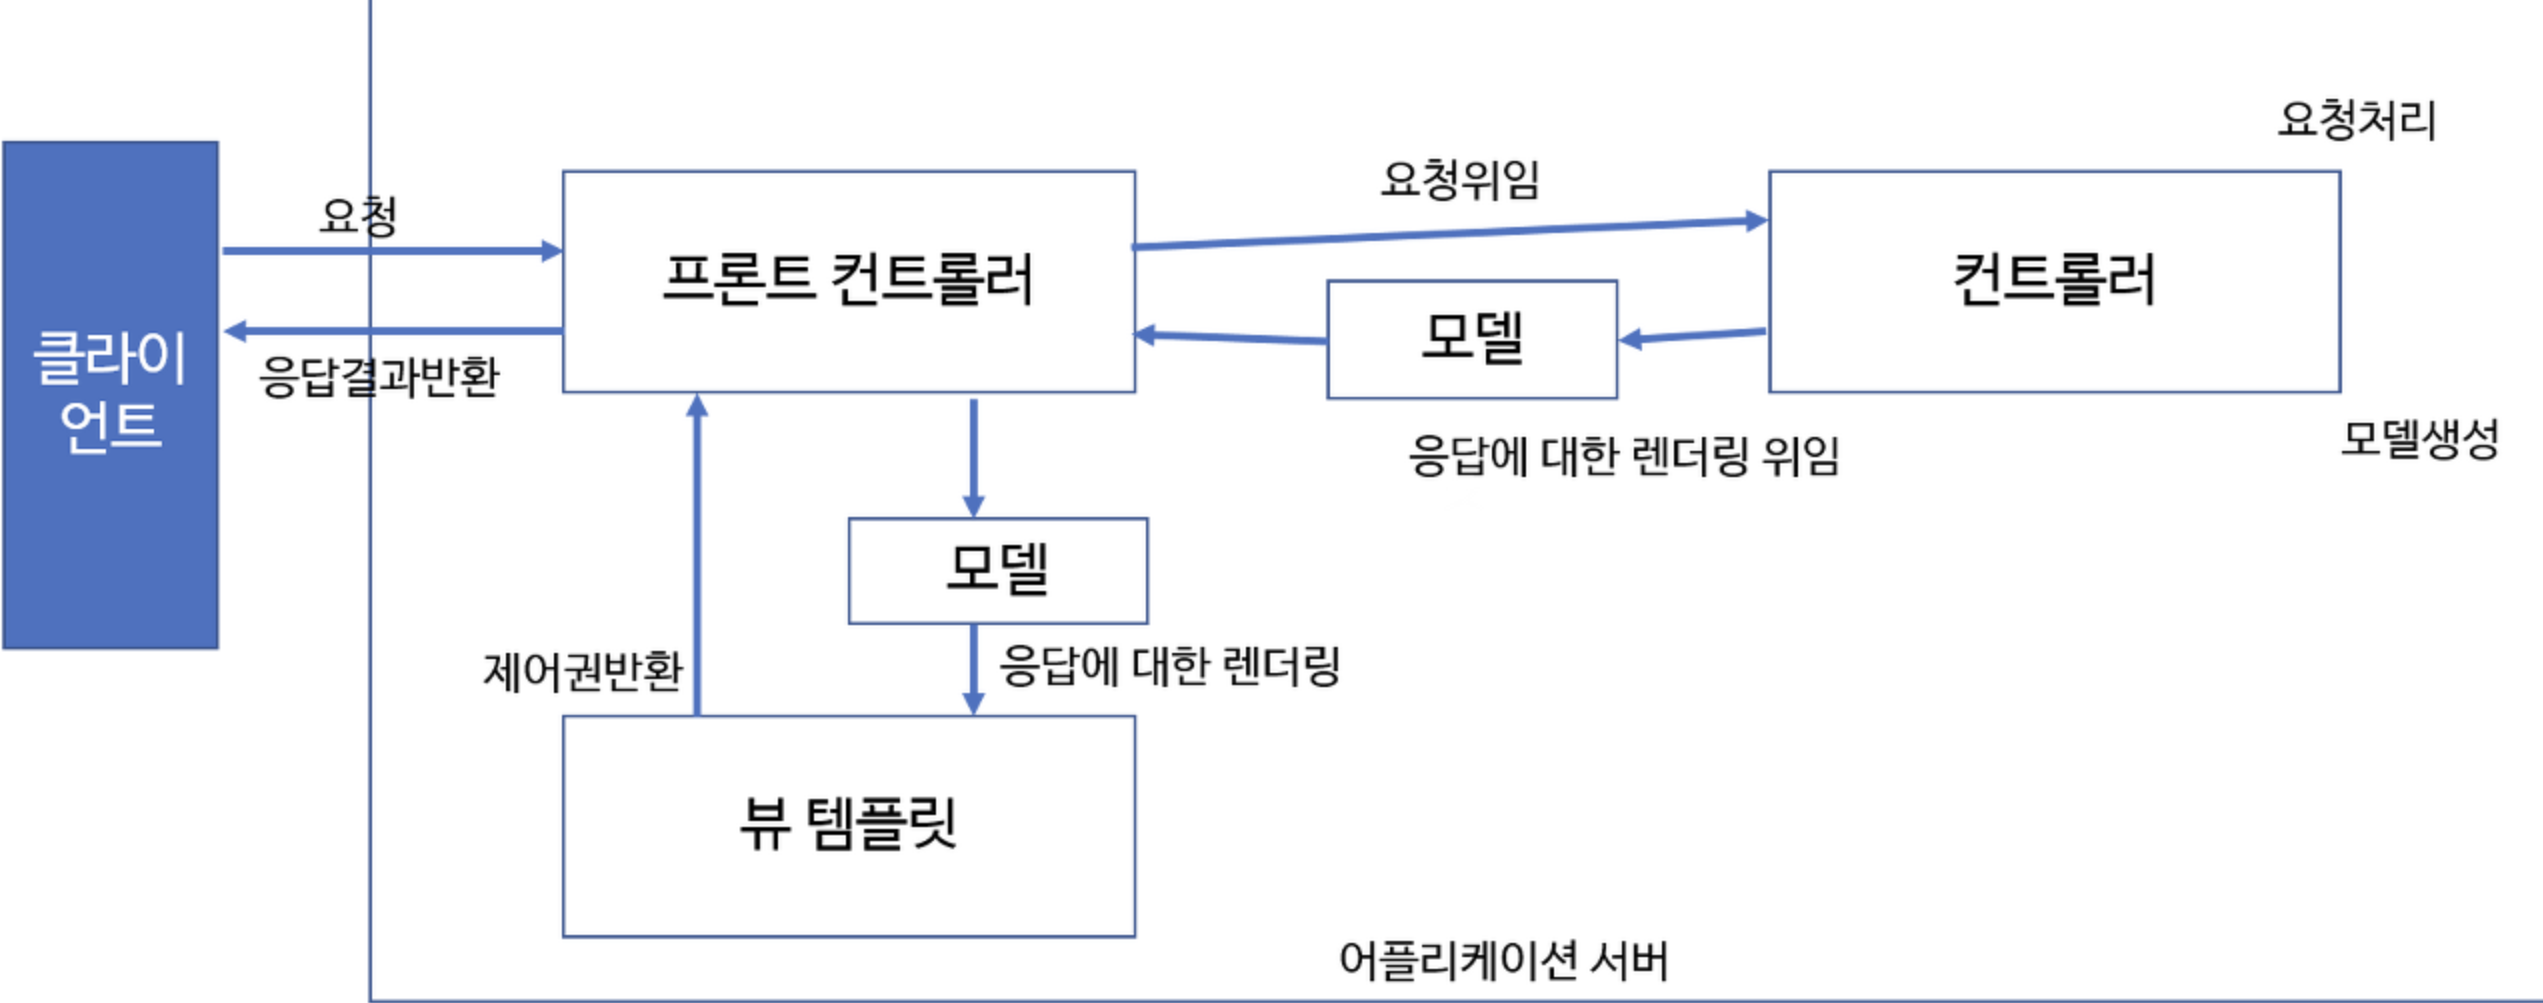
일단 시작하기에 앞서 MVC를 이해를 해야한다.
이 구조를 바탕으로 아래 그림을 참고해서 생각을 해보자.
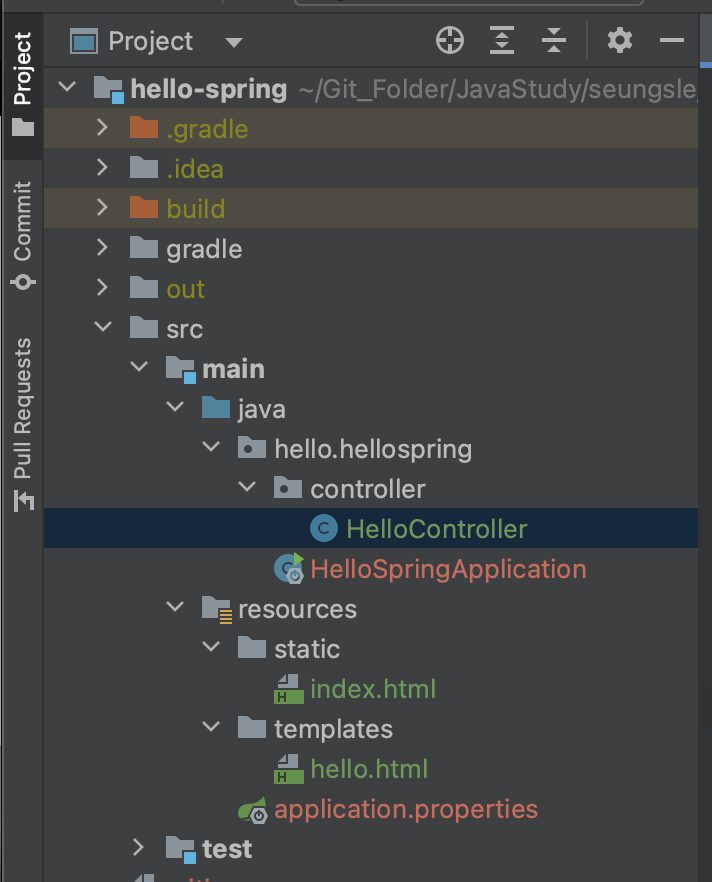
먼저 hello.hellospring.HelloSpringApplication의 메인문을 실행하면, 8080포트로 서버가 실행이 된다.
그러면 http://localhost:8080 로 접속하게 되면 resources.static.index.html이 표시가 될것이다.
여기서 http://localhost:8080/hello로 get요청을 해보면 java Spring에서는 controller가 있는 HelloController로 들어가서 get 메소드를 실행하게 된다.
이 get 메소드는 addAttribute로 model에 데이터를 저장하고, return으로 view 템플릿을 어떤거로 할지 결정하게 된다. (view resolver이 알아서 return값에 해당하는 페이지를 찾아줌)
이렇게 되면 우리 눈에 보여지는 페이지는 get 메소드의 return 값을 통해 resources.templates.returnValue.html 로 보여지게된다.
template엔진인 Thymeleaf로 모델 데이터들을 가져와서 보여진다.
-
controller.HelloController
package hello.hellospring.controller; import org.springframework.stereotype.Controller; import org.springframework.ui.Model; import org.springframework.web.bind.annotation.GetMapping; @Controller public class HelloController { @GetMapping("hello") public String hello(Model model) { model.addAttribute("data", "hello!!"); return "hello"; } @GetMapping("hello-mvc") public String helloMvc(@RequestParam("name") String name, Model model) { model.addAttribute("name", name); return "hello-template"; } }@Controller?- 사용자의 요청이 진입하는 entry point이며,
- 요청에 따라 어떤 처리를 해줄지 결정해주며, (단, Controller에서는 단지 결정만 해주고 실질적인 처리는 서비스(layered architecture)에서 담당한다.
- 사용자에게 View(또는 서버에서 처리된 데이터를 포함하는 view)를 응답으로 보내준다.
@GetMapping("hello")- http get요청을 처리하는 annotation이다.
http://localhost:8080/hello라고 입력하면 아래 메소드로 들어오게된다.
public String hello(Model model)- hello라는 get요청이 들어오면, 실행이 되는 함수이다.
- string을 리턴으로 한 이유는 MVC 때문인데, View를 어떤 html로 실행할지를 정해주기 위해서 이다.
- 그리고 Model또한 MVC 때문인데, spring의 model에 저장하기 위해서 파라미터로 가져온다.
public String hello(Model model) { model.addAttribute("data", "hello!!"); return "hello"; }addAttribute모델에다가 key / value 를 입력해준다.- return 값에다가 보여질 template html파일을 선택한다. 이 코드는 templates.hello.html을 보여주게 된다.(view resolver가 알아서 처리한다)
@GetMapping("hello-mvc") public String helloMvc(@RequestParam("name") String name, Model model) { model.addAttribute("name", name); return "hello-template"; }@GetMapping("hello-mvc")- http get요청을 처리하는 annotation이다.
http://localhost:8080/hello-mvc라고 입력하면 아래 메소드로 들어오게된다.
public String helloMvc(@RequestParam("name") String name, Model model)- get 메소드의 파라미터를 전달받는 annotation이다.
http://localhost:8080/hello-mvc?name=parametervalue라고 입력하면 parametervalue가 name으로 입력이되어 함수의 파라미터로도 전달이 된다.- 그리고 뒤에 Model또한 MVC 때문인데, spring의 model에 저장하기 위해서 파라미터로 가져온다.
model.addAttribute("name", name);- addAttribute모델에다가 key / value 를 입력해준다. 여기선 파라미터로 전달받은 name이 value값으로 들어간다.
return "hello-template";- return 값에다가 보여질 template html파일을 선택한다. 이 코드는 templates.hello-template.html을 보여주게 된다.(view resolver가 알아서 처리한다)
-
resources.templates.hello.html<!DOCTYPE HTML> <html xmlns:th="http://www.thymeleaf.org"> <head> <title>Hello</title> <meta http-equiv="Content-Type" content="text/html"; charset="UTF-8" /> </head> <body> <p th:text="'안녕하세요. ' + ${data}" > 안녕하세요. 손님</p> </body> </html><p th:text="'안녕하세요. ' + ${data}" > 안녕하세요. 손님</p>- 여기의 ${data}가 model에서 data의 value값으로 치환이 된다.
-
resources.templates.hello-template.html<html xmlns:th="http://www.thymeleaf.org"> <body> <p th:text="'hello ' + ${name}">hello empty</p> </body> </html>- 마찬가지로
${name}의 value값이 치환된다.
- 마찬가지로
