
Swagger를 NestJs에 적용해본다.
Swagger

Swagger는 REST API를 설계 및 문서화하여 협업, 유지보수 시 도움이 되는 라이브러리이다.
이를 이제 NestJS에 적용한다.
Setting
먼저 Swagger 폴더를 만들고 그 안에 Swagger 설정 파일을 만든다.
//constants.ts
export const SWAGGER_API_ROOT = 'api';
export const SWAGGER_API_TITLE = 'always API';
export const SWAGGER_API_DESCRIPTION = 'The always API description';
export const SWAGGER_API_CURRENT_VERSION = '1.0';
export const SWAGGER_API_TAG = 'always';
//index.ts
import { INestApplication } from '@nestjs/common';
import { DocumentBuilder, SwaggerModule } from '@nestjs/swagger';
import {
SWAGGER_API_CURRENT_VERSION,
SWAGGER_API_DESCRIPTION,
SWAGGER_API_ROOT,
SWAGGER_API_TAG,
SWAGGER_API_TITLE,
} from './constants';
export const setSwagger= (app: INestApplication)=> {
const config= new DocumentBuilder();
.setTitle(SWAGGER_API_TITLE)
.setDescription(SWAGGER_API_DESCRIPTION)
.setVersion(SWAGGER_API_CURRENT_VERSION)
.addTag(SWAGGER_API_TAG)
.build();
const document= SwaggerModule.createDocument(app, config);
SwaggerModule.setup(SWAGGER_API_ROOT, app, document);
}이제 이를 main.ts에서 Nest에 등록해준다.
//main.ts
...
import {setupSwagger} from './swagger'
...

setupSwagger(app)
...
Apply
이제 각 모듈, 컨트롤러에 이를 적용해주어 API를 문서화시킨다.
우선, 각 모듈에 파일을 하나 만들어 해당 모듈의 API에 대한 명세화를 진행한다.
아래는 User의 예이다.
//users.docs.ts
import { applyDecorators } from '@nestjs/common';
import { UserController } from './users.controller';
import { ApiOperation, ApiParam } from '@nestjs/swagger';
//인덱스 시그니처 속성을 이용해 컨트롤러의 핸들러들을 매핑시켜 타입으로 정의한다.
type SwaggerMethod<T>= {
[K in keyof T]: (summary: string)=> MethodDecorator;
};
export const ApiDocs: SwaggerMethod<UserController>= {
findUsers(summary: string){
return applyDecorators(
ApiOperation({
summay,
description; '모든 유저의 정보를 조회한다.'
}),
);
},
findUserById(sumary: string){
return applyDecorators(
ApiOperation({
summary,
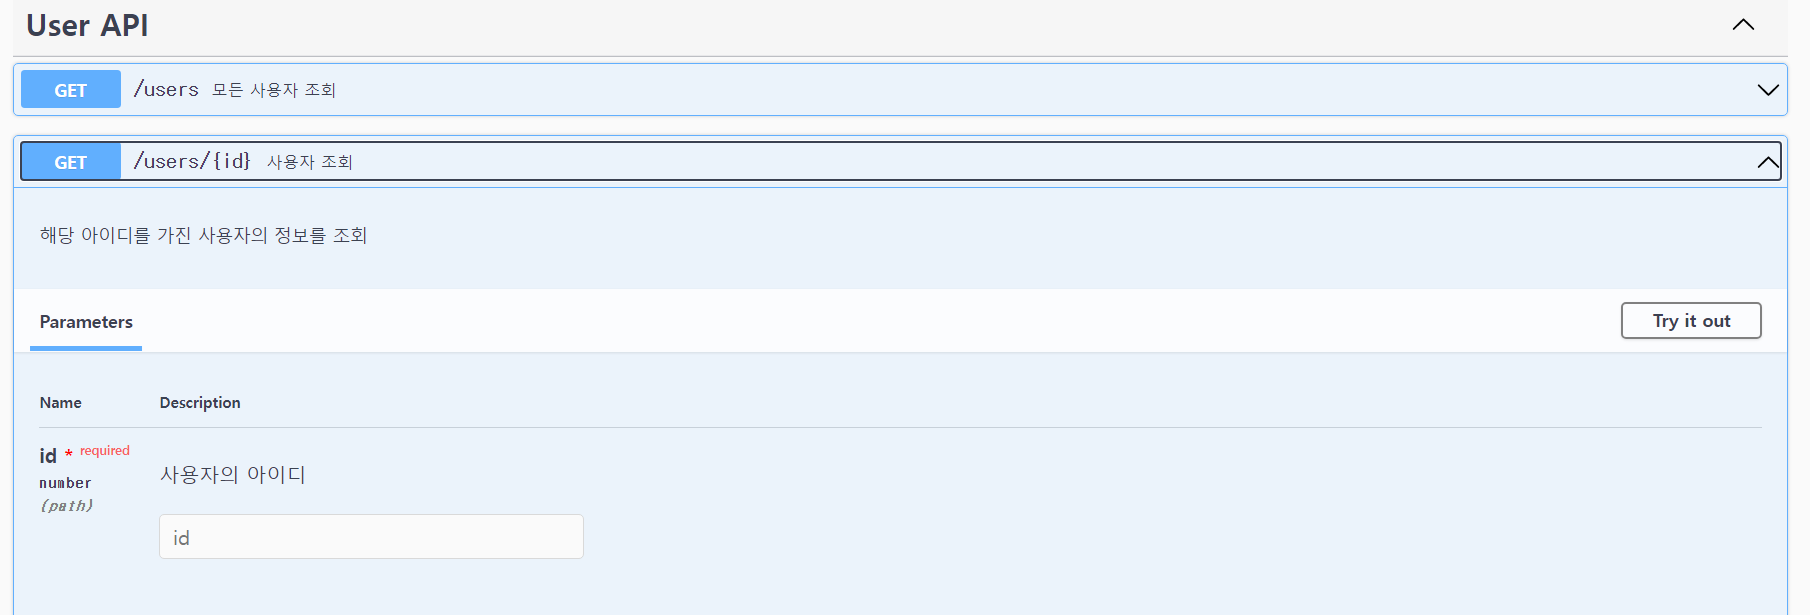
description: '해당 아이디를 가진 사용자의 정보를 조회'
}),
ApiParam({
name: 'id',
required: true,
description: '사용자의 아이디'
});
);
},
}User 컨드롤러의 각 API에 대한 명세를 했으니 이를 이제 User 컨트롤러의 각 핸들러에 적용시킨다.
....
@Controller('users')
@ApiTags('User API')
export class UserController{
    ....

    @Get()
    @ApiDocs.findUsers('모든 사용자 조회'){
		...
    }

    @Get(':id')
    @ApiDocs.findUserById('사용자 조회'){
        ...
    }
    ....
}
확인
지정한 Swagger API Root로 접속해 API 문서화가 잘 되었는지 확인한다.
++
Swagger에 Bearer Auth 추가하기(For 토큰 인증)
//SwaggerSetting
const config = new DocumentBuilder()
    .setTitle(SWAGGER_API_TITLE)
    .setDescription(SWAGGER_API_DESCRIPTION)
    .setVersion(SWAGGER_API_CURRENT_VERSION)
    .addTag(SWAGGER_API_TAG)
    .addBearerAuth(
      {
        description: 'Enter token',
        name: 'Authorization',
        type: 'http',
        scheme: 'bearer',
        bearerFormat: 'bearer',
      },
      'Authorization',				//이 부분과
    )
    .build();
...

//SwaggerMethodDoc
kakaoLogin(summary: string) {
    return applyDecorators(
      ApiOperation({
        summary,
        description: '카카오 로그인 API',
      }),
      ApiResponse({
        status: 201,
        description:
          'access token + refresh token + user 정보 + userOnboarding 정보',
      }),
      ApiBearerAuth('Authorization'), 		//이 부분이 같아야 함
    );
  },
...
확인
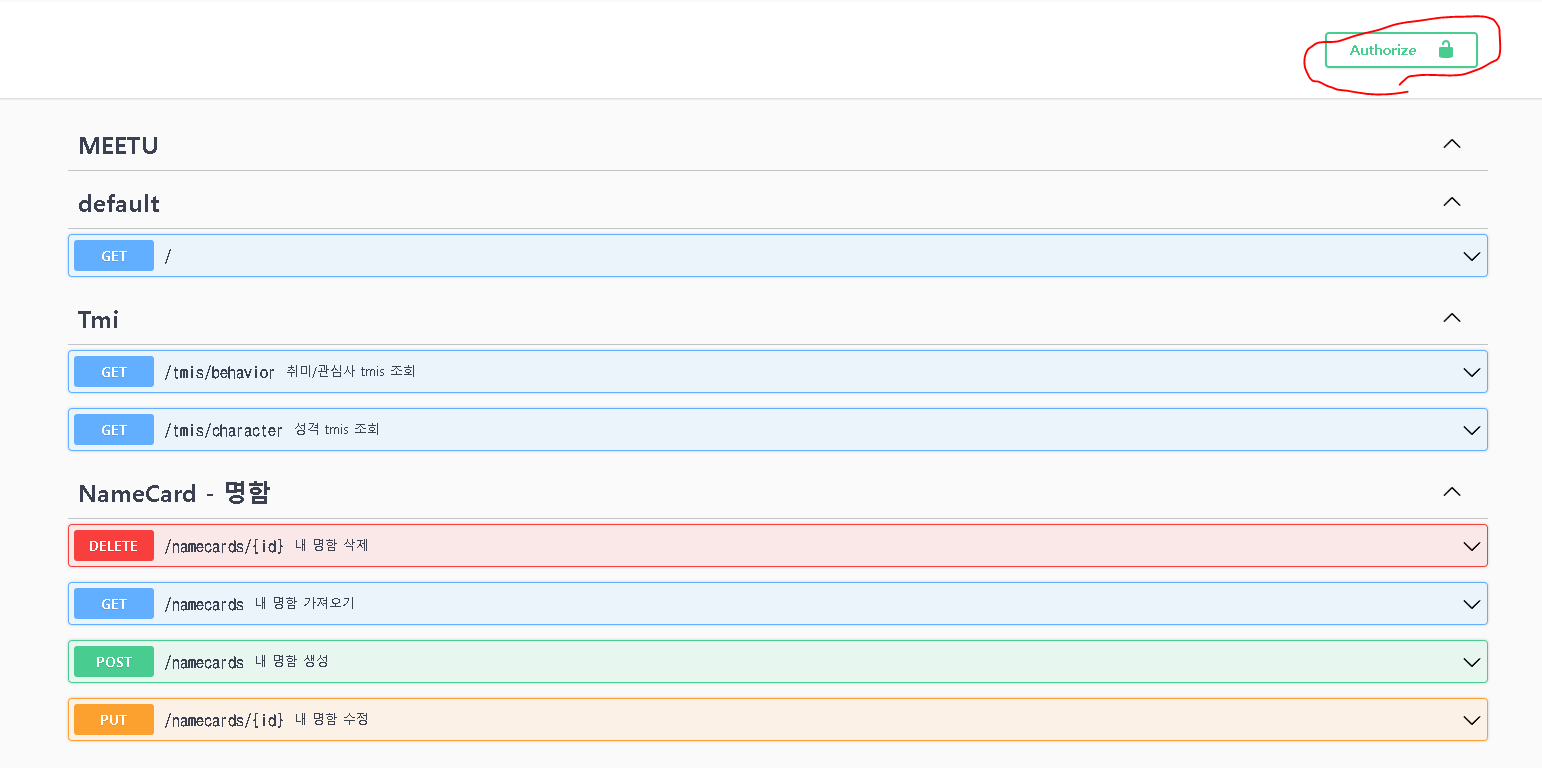
Authorize 버튼을 클릭하고
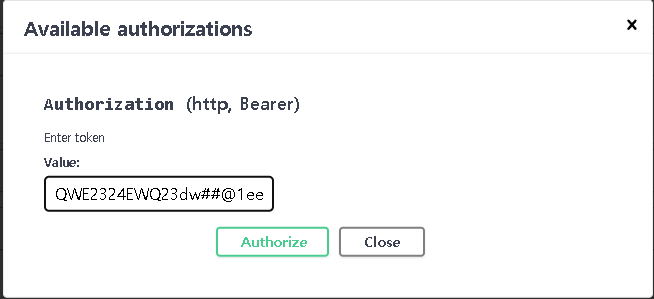
위와 같이 토큰 값을 입력하고, Authorize 버튼을 누른다.
이제 토큰이 유효하다면, 토큰의 인증이 필요했던 API들에 접근할 수 있다.
++
Response Example
클라이언트 입장에서 인증을 해야 API를 실행해볼 수 있는 경우 테스트 과정에서 매번 인증을 거치는게 작업의 소요가 클 수 있다.
그들의 편의를 위해 Response의 Example을 보여준다면, 효율적으로 작업이 진행될 것이다.
예시를 보여주는 방법은 간단하다.
Response Dto를 하나 만들고, swagger 코드에 ApiResponse({type: //Response Dto})를 넣어주기만 하면 된다.
구현
//response.dto.ts
export class AddNamecardToCollectionsDto {
  @IsNumber({}, { each: true })
  @IsNotEmpty()
  @ApiProperty({ type: number, description: '도감 ID들', example: '[1,2,3]' })
  collectionIds: number[];
}

//swaggerDoc.ts
addNamecardsToCollection(summary: string){
  return applyDecorator(
    ApiResponse({
      status:201,
      description: '~~~~'
      type: AddNamecardToCollectionsDto   //여기에 정의한 dto 넣기
    })
   )
}
확인
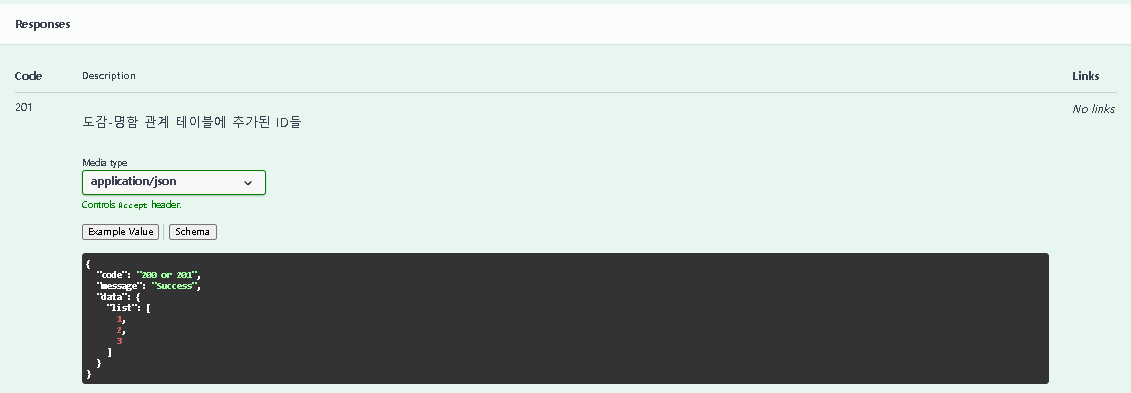
API를 날려보지 않아도 해당 API의 Response가 어떤식인지를 위와 같이 알 수 있다.
위와 같이 Example Value 형식으로 볼 수도 있고, Schema 형식으로 보다 더 자세히 각 프로퍼티들의 타입, 각 프로퍼티들에 대한 설명과 함께 볼 수도 있다.
Request Body Example도 위와 동일한 방식으로 구현해 보여줄 수 있다.
ApiResponse({type:~})대신ApiBody({type: ~})를 사용하면 된다.