팀으로 진행중인 일기 어플 프로젝트에서 처음으로 복잡한 로직을 구현하는 일이 생겼다.
지금까지는 JPA를 써서 단순한 CRUD만 구현하면 되는 문제였으나 이제는 서비스단에서 로직을 구현해야 할 일이 생겼다.
목적
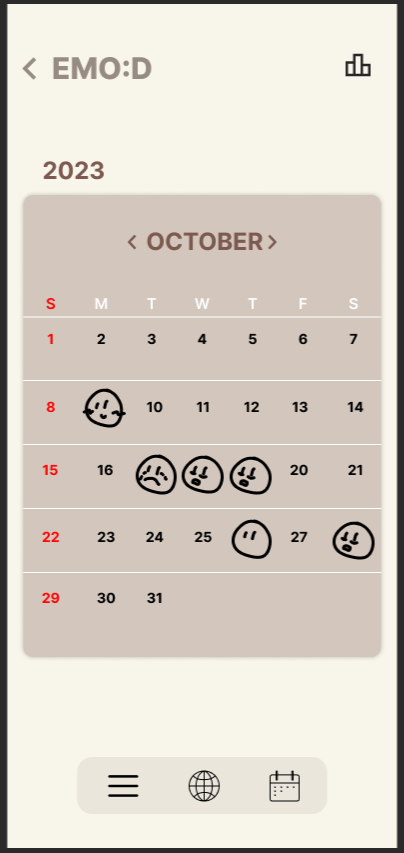
이런식으로 일기를 쓴 날에 그날의 감정이 이모티콘으로 나오고 이모티콘을 클릭하면 작성했던 일기로 이동한다.
우선 일기 엔티티의 변수(칼럼)들은 다음과 같다
Diary.java (Entity)의 일부
    @Id
    @GeneratedValue(strategy = GenerationType.IDENTITY)
    private Long id;

    private String content;
    private Integer empathy;
    private String emotion;
    private Boolean is_comm;
    private Boolean is_share;

    @Column(name = "user_id")
    private Long userId;
    private String author;

    @CreatedDate
    @Column(name = "created_at")
    public LocalDateTime CreatedAt;

    @LastModifiedDate
    @Column(name = "updated_at")
    public LocalDateTime updatedAt;
id는 일기의 고유값, content는 일기의 내용, empathy는 공감 횟수, emotion은 감정, is_comm, is_share은 댓글과 보이기 설정, user_id는 작성한 유저의 고유 값, author은 스프링시큐리티의 인증을 위한 칼럼이다. CreatedAt과 updatedAt은 작성 일시, 수정 일시이다.
이 중 캘린더에서 프론트에 전달해야 할 것은 id(클릭 시 이동을 위해), emotion(감정 이모티콘 표현을 위해) 그리고 CreatedAt의 day 부분이다.
CalenderResponse.java (DTO)
@Setter
@Getter
public class CalendarResponse {
	Long id;
	Integer day;
	String emotion;

	public CalendarResponse(Long id, Integer day, String emotion)
	{
		this.id = id;
		this.day = day;
		this.emotion = emotion;
		System.out.println(emotion);
	}

	public CalendarResponse(CalendarResponse res)
	{
		this.id = res.getId();
		this.day = res.getDay();
		this.emotion = res.getEmotion();
	}
}
id, day, emotion을 설정하고 내부 로직을 위한 생성자, 그리고 response 시 변환을 위한 생성자를 만들었다.
CalendarInfo.java (DTO)
@Getter
@Setter
public class CalendarInfo {
	private List<Diary> ids;
	private LocalDateTime date;

	public CalendarInfo(LocalDateTime date)
	{
		this.date = date;
	}
}
CalendarResponse로 보내주기 전 가공을 위한 DTO를 하나 더 생성했다.
이제 서비스단에서 다음 함수들을 구현했다.
    public List<Diary> findByMonth(LocalDateTime date, String author)
    {
    	List<Diary> data = diaryRepository.findByUserId(Long.parseLong(author));
    	List<Diary> result = new ArrayList<Diary>();

    	int i;
    	for(i=0; i<data.size(); i++)
    	{
    		if(data.get(i).getCreatedAt().getMonth() == date.getMonth())
    		{
    			if(data.get(i).getCreatedAt().getYear() == date.getYear())
    			{
    				result.add(data.get(i));
    			}
    		}
    	}
    	return result;
    }
스프링 시큐리티에서 .getName()을 호출할 시 user_id를 string으로 전달하게 해놨다. author 파라미터로 이 값을 받고 PathVariable로 전달된 Date값을 date 파라미터로 전달받는다.
해당 함수는 유저가 전달 받은 Date 값과 같은 연도와 달에 쓴 Diary를 전부 반환해주는 함수이다.
    public CalendarInfo setCalendar(LocalDateTime date, String author)
    {
    	CalendarInfo cal = new CalendarInfo(date);
    	List<Diary> calCon = findByMonth(date, author);

    	cal.setIds(calCon);
    	return cal;
    }
그렇게 반환받은 Diary의 List에서 필요한 정보만 추출하여 CalenderInfo로 반환해주는 함수이다.
   public List<CalendarResponse> getCalendar(CalendarInfo info)
    {
    	List<CalendarResponse> res = new ArrayList<CalendarResponse>();
    	Integer day;
    	String emotion;
    	Long id;

    	int i;
    	for(i=0; i<info.getIds().size(); i++)
    	{
    		day = info.getIds().get(i).getCreatedAt().getDayOfMonth();
    		emotion = info.getIds().get(i).getEmotion();
    		id = info.getIds().get(i).getId();

    		res.add(new CalendarResponse(id, day, emotion));
    	}
    	return res;
    }
마지막으로 CalendarRepsonse의 배열을 통해 찾아낸 달의 필요한 정보를 저장하여 반환하는 함수이다.
CalendarController.java (Controller)
@RestController
@RequiredArgsConstructor
@RequestMapping("/api/calendars")
public class CalendarController {
private final DiaryService diaryService;
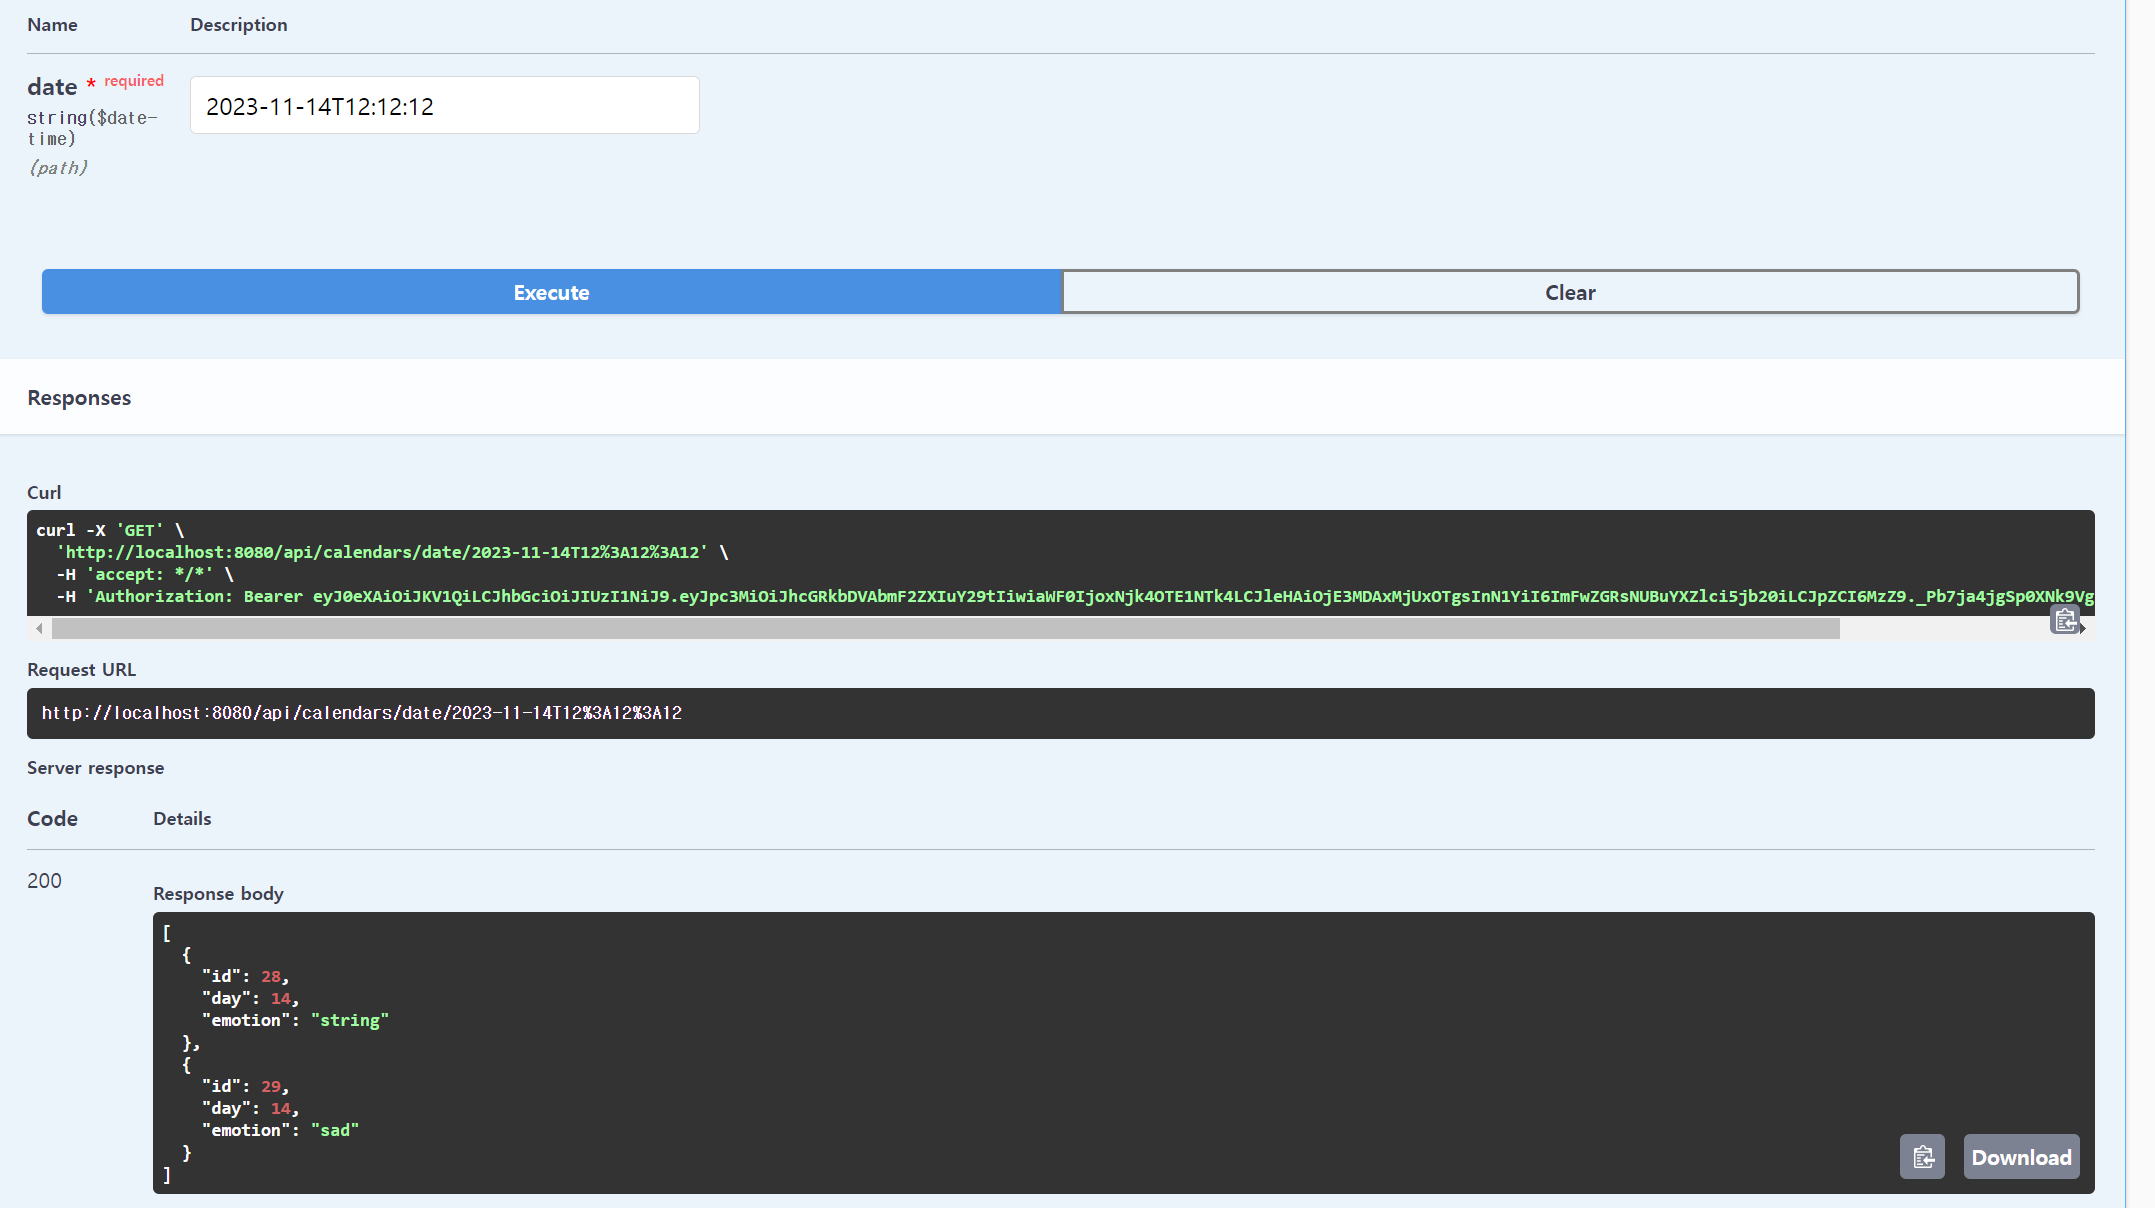
@Operation (summary = "캘린더 정보를 받아오는 기능")
@GetMapping("/date/{date}")
public ResponseEntity<List<CalendarResponse>> getCalender(
@PathVariable(value="date") @DateTimeFormat(pattern="yyyy-MM-dd'T'HH:mm:ss") LocalDateTime date, Principal principal) {
CalendarInfo info = diaryService.setCalendar(date, principal.getName());
List<CalendarResponse> res = diaryService.getCalendar(info)
.stream()
.map(CalendarResponse::new)
.toList();
return ResponseEntity.ok()
.body(res);
}
}이제 컨트롤러를 통해 연결해주면 기능 구현이 완료된다. Date 파라미터를 그냥 받으면 오류가 나는데 @DateTimeFormat 어노테이션을 통해 패턴을 미리 지정해두면 받은 값을 정상적으로 불러올 수 있다.
완료.
사실 로직보다는 의문의 오류로 인해 고통을 받았는데 post를 테스트 할 때 createdAt 칼럼이 null로 되어있는 값을 많이 넣어놔서 그 부분에서 오류가 난 것이었다. 개발 시 데이터베이스에 쓰레기 값이 있는지 잘 확인해봐야겠다.
