[React Native] 인스타그램 UI 만들기 #4

안녕하세요. 안피곤입니다.
리액트 네이티브(React Native)로 인스타그램 UI를 구현하는 네 번째 강의입니다. 이번에는 프로필 화면을 구현합니다. 이 포스팅은 아래 무료 동영상 강의를 참고하여 작성하였습니다.

상단바 수정하기
탭 화면마다 상단바가 다르기 때문에 수정해야합니다. 현재는 모든 탭 화면에서 같은 상단바가 보입니다.
먼저 ./Components/MainScreen.js 파일을 수정합니다. navigationOptions의 header에 null 을 입력합니다.
export default class MainScreen extends Component {

  static navigationOptions = {
    header: null
  }

// (...)
그다음 ./Components/AppTabNavigator/HomeTab.js 파일을 수정합니다. Header, Left, Right, Body를 추가로 import 합니다.
import { Container, Content, Icon, Thumbnail, Header, Left, Right, Body } from 'native-base';
그리고 render() 함수를 수정합니다. <Container> 아래에 <Header>를 추가합니다.
export default class HomeTab extends Component {
    render() {
        return (
            <Container style={style.container}>
                <Header>
                    <Left><Icon name='ios-camera' style={{ paddingLeft:10 }}/></Left>
                    <Body><Text>Instagram</Text></Body>
                    <Right><Icon name='ios-send' style={{ paddingRight:10 }}/></Right>
                </Header>

    // (...)
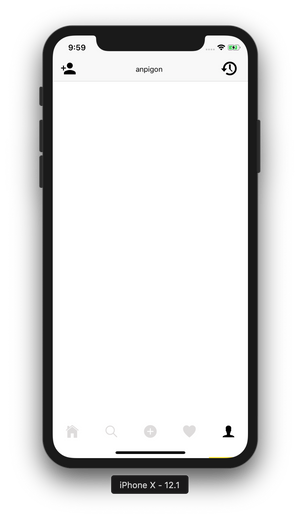
여기까지 작업하고 확인해봅니다. 확인해보면 나머지 탭 화면에는 헤더가 사라졌습니다. 그리고 HomeTab 화면에는 헤더가 생겼습니다.

프로필 페이지 헤더 만들기
./Components/AppTabNavigator/ProfileTab.js를 수정합니다. Image와 Container, Content, Header, Left, Body, Right, Button를 추가로 import 합니다.
import { View, Text, StyleSheet, Image } from 'react-native';
import { Icon, Container, Content, Header, Left, Body, Right, Button, Image } from 'native-base';
그다음 render() 함수를 수정합니다. 프로필 화면에도 <Header>를 추가합니다.
export default class ProfileTab extends Component{

    render() {
        return (
            <Container style={{ flex:1, backgroundColor: 'white'}}>
                <Header>
                    <Left><Icon name="md-person-add" style={{ paddingLeft:10 }} /></Left>
                    <Body><Text>anpigon</Text></Body>
                    <Right><EntypoIcon name="back-in-time" style={{ paddingRight:10, fontSize: 32 }} /></Right>
                </Header>
            </Container>
        );
    }

    // (...)
다음은 여기까지 작업한 화면입니다. 헤더 좌우에 아이콘이 생겼습니다.
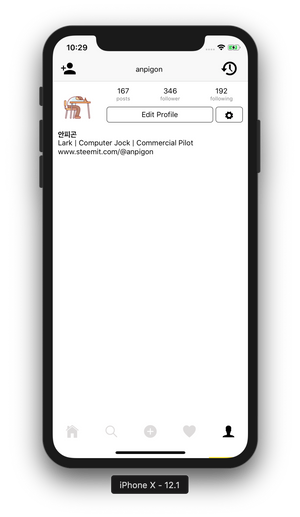
<Header> 바로 아래에 다음 코드를 입력합니다. 프로필 이미지, 포스팅 수, 팔로워 수, 팔로잉 수를 출력합니다. 바로 아래에 프로필 수정 버튼과 설정 버튼이 위치하고 있습니다. 그리고 그 아래에 이름과 프로필 정보가 출력됩니다.
<Content>
  <View style={{flexDirection:'row', paddingTop:10}}>
    <View style={{flex:1, alignItems:'center'}}>
      <Image source={{ url: 'https://steemitimages.com/u/anpigon/avatar' }}
             style={{width:75, height:75, borderRadius:37.5}}/>
    </View>
    <View style={{flex:3}}>
      <View style={{flexDirection:'row', justifyContent:'space-around'}}>
        <View style={{alignItems:'center'}}>
          <Text>167</Text>
          <Text style={{fontSize:10, color:'gray'}}>posts</Text>
        </View>
        <View style={{alignItems:'center'}}>
          <Text>346</Text>
          <Text style={{fontSize:10, color:'gray'}}>follower</Text>
        </View>
        <View style={{alignItems:'center'}}>
          <Text>192</Text>
          <Text style={{fontSize:10, color:'gray'}}>following</Text>
        </View>
      </View>
      <View style={{flexDirection:'row'}}>
        <Button bordered dark
                style={{flex:4, marginLeft:10, justifyContent:'center', height:30, marginTop:10}}>
          <Text>Edit Profile</Text>
        </Button>
        <Button bordered dark small icon
                style={{flex:1, marginRight:10, marginLeft:5, justifyContent:'center', height:30, marginTop:10}}>
          <Icon name="settings" />
        </Button>
      </View>
    </View>
  </View>
  <View style={{paddingHorizontal:10, paddingVertical:10}}>
    <Text style={{fontWeight:'bold'}}>안피곤</Text>
    <Text>Lark | Computer Jock | Commercial Pilot</Text>
    <Text>www.steemit.com/@anpigon</Text>
  </View>
</Content>
아래는 여기까지 작업한 화면입니다.
스팀잇 프로필 정보 출력하기
스팀잇 API 서버에서 계정 정보를 가져오는 함수를 구현합니다. 계정 정보를 가져오기 위해서 database_api.get_accounts API를 사용하였습니다.
fetchAccount(username) {
  const data = {
    id: 3,
    jsonrpc: "2.0",
    method: "call",
    params: [
      "database_api",
      "get_accounts",
      [[username]]
    ]
  };
  return fetch('https://api.steemit.com', {
    method: 'POST',
    body: JSON.stringify(data)
  })
  .then(res => res.json())
  .then(res => res.result[0])
}
그리고 스팀잇 팔로우 수와 팔로잉 수를 가져오는 함수를 입력합니다. follow_api.get_follow_count API를 사용합니다.
fetchFollowCount(username) {
  const data = {
    id: 4,
    jsonrpc: "2.0",
    method: "call",
    params: [
      "follow_api",
      "get_follow_count",
      [username]
    ]
  };
  return fetch('https://api.steemit.com', {
    method: 'POST',
    body: JSON.stringify(data)
  })
  .then(res => res.json())
  .then(res => res.result)
}
그다음 componentWillMount() 를 구현합니다. 그리고 방금 구현한 fetchFollowCount() 함수를 호출합니다. 가져온 계정 정보와 팔로우 수를 state에 저장합니다. 명성(reputation)도 계산하여 저장합니다.
componentWillMount() {
  const username = 'anpigon'; // 내 계정명

  this.fetchAccount(username).then(({name, post_count, reputation, json_metadata}) => {
    const { profile } = JSON.parse(json_metadata); // JSON 파싱
    const log = Math.log(parseInt(reputation.substring(0, 4))) / Math.log(10);
    this.setState({
      name, // 이름
      reputation: Math.max(reputation.length - 1 + log - parseInt(log) - 9, 0) * 9 + 25, // 명성도 계산
      postCount: post_count, // 포스팅 수
      profile // 프로필 정보
    })
  });

  this.fetchFollowCount(username).then(({following_count, follower_count}) => {
    this.setState({
      followingCount: following_count, // 팔로잉 수
      followerCount: follower_count // 팔로워 수
    })
  });
}
마지막으로 render() 함수를 수정합니다. 앞에서 가져온 정보들을 출력하기 위해 데이터를 맵핑합니다.
render() {
  const {
    name,
    reputation,
    profile,
    postCount,
    followingCount,
    followerCount
  } = this.state;

  return (
  <Container style={{ flex:1, backgroundColor: 'white'}}>
    <Header>
      <Left><Icon name="md-person-add" style={{ paddingLeft:10 }} /></Left>
      <Body><Text>{name}</Text></Body>
      <Right><EntypoIcon name="back-in-time" style={{ paddingRight:10, fontSize: 32 }} /></Right>
    </Header>
    <Content>
      <View style={{flexDirection:'row', paddingTop:10}}>
        <View style={{flex:1, alignItems:'center'}}>
          <Image source={{ url: profile.profile_image }}
                 style={{width:75, height:75, borderRadius:37.5}}/>
        </View>
        <View style={{flex:3}}>
          <View style={{flexDirection:'row', justifyContent:'space-around'}}>
            <View style={{alignItems:'center'}}>
              <Text>{postCount}</Text>
              <Text style={{fontSize:10, color:'gray'}}>posts</Text>
            </View>
            <View style={{alignItems:'center'}}>
              <Text>{followingCount}</Text>
              <Text style={{fontSize:10, color:'gray'}}>follower</Text>
            </View>
            <View style={{alignItems:'center'}}>
              <Text>{followerCount}</Text>
              <Text style={{fontSize:10, color:'gray'}}>following</Text>
            </View>
          </View>
          <View style={{flexDirection:'row'}}>
            <Button bordered dark
                    style={{flex:4, marginLeft:10, justifyContent:'center', height:30, marginTop:10}}>
              <Text>Edit Profile</Text>
            </Button>
            <Button bordered dark small icon
                    style={{flex:1, marginRight:10, marginLeft:5, justifyContent:'center', height:30, marginTop:10}}>
              <Icon name="settings" />
            </Button>
          </View>
        </View>
      </View>
      <View style={{paddingHorizontal:10, paddingVertical:10}}>
        <Text style={{fontWeight:'bold'}}>{profile.name} ({reputation.toFixed(2)})</Text>
        <Text>{profile.about}</Text>
        <Text>{profile.website}</Text>
      </View>
    </Content>
  </Container>
);
}
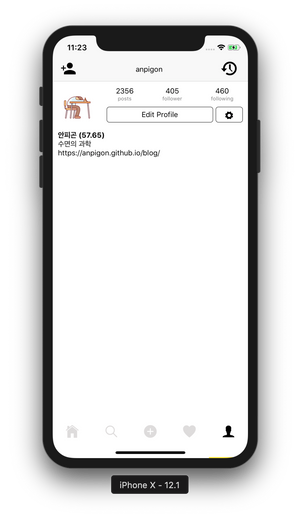
아래는 여기까지 작업한 화면입니다.
그리고 작업한 코드는 모두 깃허브에 업로드되어 있습니다.
https://github.com/anpigon/rn_instagram_clone
여기까지 읽어주셔서 감사합니다.

저는 스팀잇에도 같은 글을 포스팅하고 있습니다.
https://busy.org/@anpigon

3개의 댓글

리액트 처음이라서 막막했는데 덕분에 어느정도 감이잡히네용 이렇게 정리해주시기 쉽지않으실텐데 감사합니다! 위 댓글분 말씀처럼 누락된 부분 수정해주시면 더 좋은 포스팅이 될것같아요 감사해요!
좋은 글 감사합니다.
따라서 하다보니 작동이 안되는 부분이 많아서 소스코드를 참조해봤습니다.
소스코드는 에러가 없지만 글에 적어주신 import 코드는 참조 에러가 발생합니다.
아래의 코드로 작성해야 참조 에러가 발생하지 않습니다.
import { View, Text, StyleSheet, Image } from 'react-native';
import { Icon, Container, Content, Header, Left, Body, Right, Button } from 'native-base';
import EntypoIcon from 'react-native-vector-icons/Entypo'
그 밖에도 소스코드를 가져와서 테스트를 해보니 스크린샷과 다른 모습이 많이 있는데,
안드로이드에서 추가로 넣어줘야 하는 스타일 옵션들이 빠진 것 같습니다.
인스타그램 만들기 글을 처음부터 끝까지 다보면서 따라해봤는데 수정이 필요한 부분이 조금 있습니다.
map 함수의 key 에러나, 컨테이너와 뷰가 섞여 사용되서 헷갈리는 부분도 있고, 스타일 옵션을 만들고 쓰지 않는 경우도 있습니다. 코드를 조금 수정해주시면 따라하시는 분들이 시행착오를 겪지 않을 것 같습니다.